
Celoxis 14.5 — the complete Knowledge Base
Every article in this version on one page: 201 articles across 12 sections, in reading order. Search it with your browser, save it as a PDF, or keep it for offline reference.
Getting Started
2 articlesHow-To
Getting StartedHow-To
Getting Started — for users
This quick start guide will help you understand:
- How information is organized
- How to log in
- How to work with your dashboard
- How to navigate the U.I.
- How to change your preferences
- How to create your first project
- How to work with the gantt chart
- How to report progress on tasks
- How to log time
- How to track projects
- How to run reports
- How to get help
A. How information is organized
You can create projects, tasks, risks, issues, change requests, etc. You can also log time and expenses, upload files, and enter comments. Let’s see how they are all organized.
Organization
│
├── Workspace 1 (e.g. Engineering)
│   │
│   ├── Project 1.1
│   │   │
│   │   ├── Tasks
│   │   │   │
│   │   │   ├── Subtasks
│   │   │   ├── Time Logs
│   │   │   ├── Expenses
│   │   │   ├── Updates
│   │   │   └── Files
│   │   │
│   │   ├── Discussions
│   │   │
│   │   ├── Risks (Custom App)
│   │   │   │
│   │   │   ├── Time Logs
│   │   │   ├── Updates
│   │   │   └── Files
│   │   │
│   │   ├── Issues (Custom App)
│   │   │   │
│   │   │   ├── Time Logs
│   │   │   ├── Updates
│   │   │   └── Files
│   │   │
│   │   └── Files
│   │
│   ├── Project 1.2
│   │   ...
│   └── Project 1.N
│
├── Workspace 2 (e.g. Marketing)
│   │
│   ├── Project 2.1
│   │   ...
│   └── Project 2.N
│
└── Workspace M (e.g. Sales)
    │
    ├── Project M.1
    │   ...
    └── Project M.N
are like departments. They enable you to easily segregate and control access to data. If you don't plan on using this functionality, then it is automatically hidden from your user interface.
contain tasks, risks, issues and other custom apps. You can also conduct discussions in a project and also upload files. A project belongs to one workspace.
can contain sub tasks. You can log time and expenses against tasks. You can also upload files or enter comments.
Custom apps like
and
are contained in projects. You can log time against them. You can also upload files or enter comments.
B. How to log in
When user accounts are created, they are notified via email of their username, password and the link to log in. Consult that email to obtain your username and password. After logging in, you should change your password.
SaaS
URL: https://celoxis.com

On-Premise
Contact your system administrator or refer the email in your inbox as mentioned earlier.
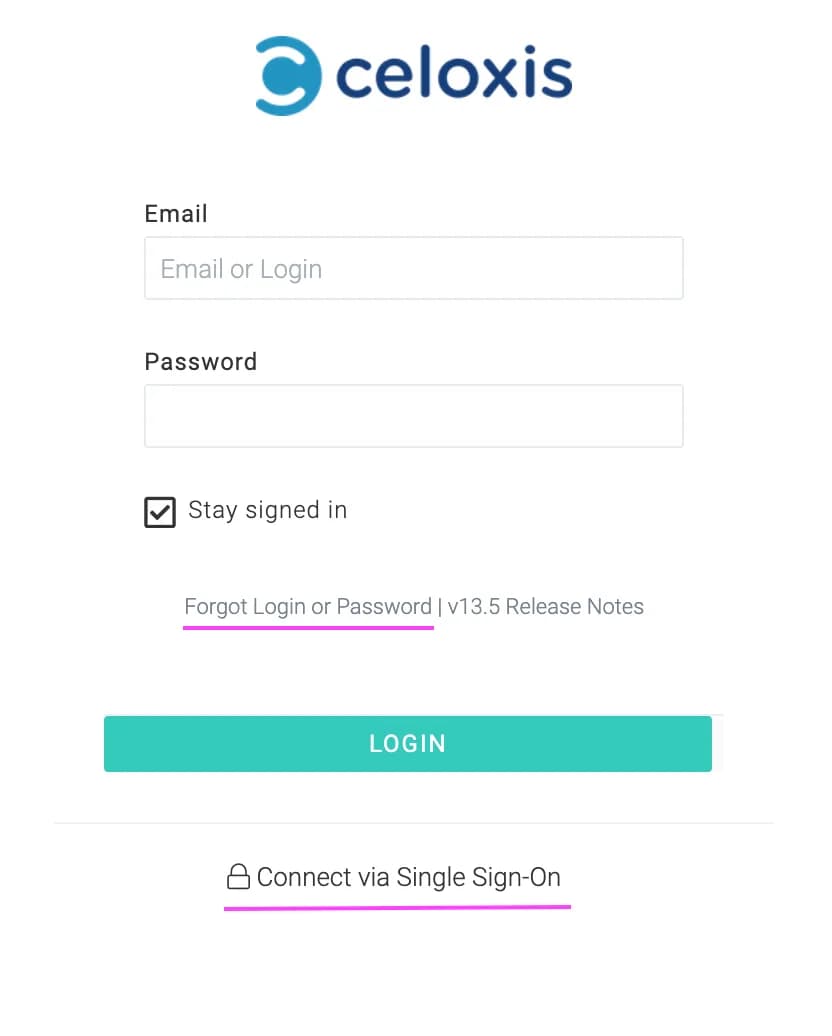
As you can see the login screen is straightforward. If your organization uses single sign-on, then click on the SSO link highlighted in the image.
C. Dashboard
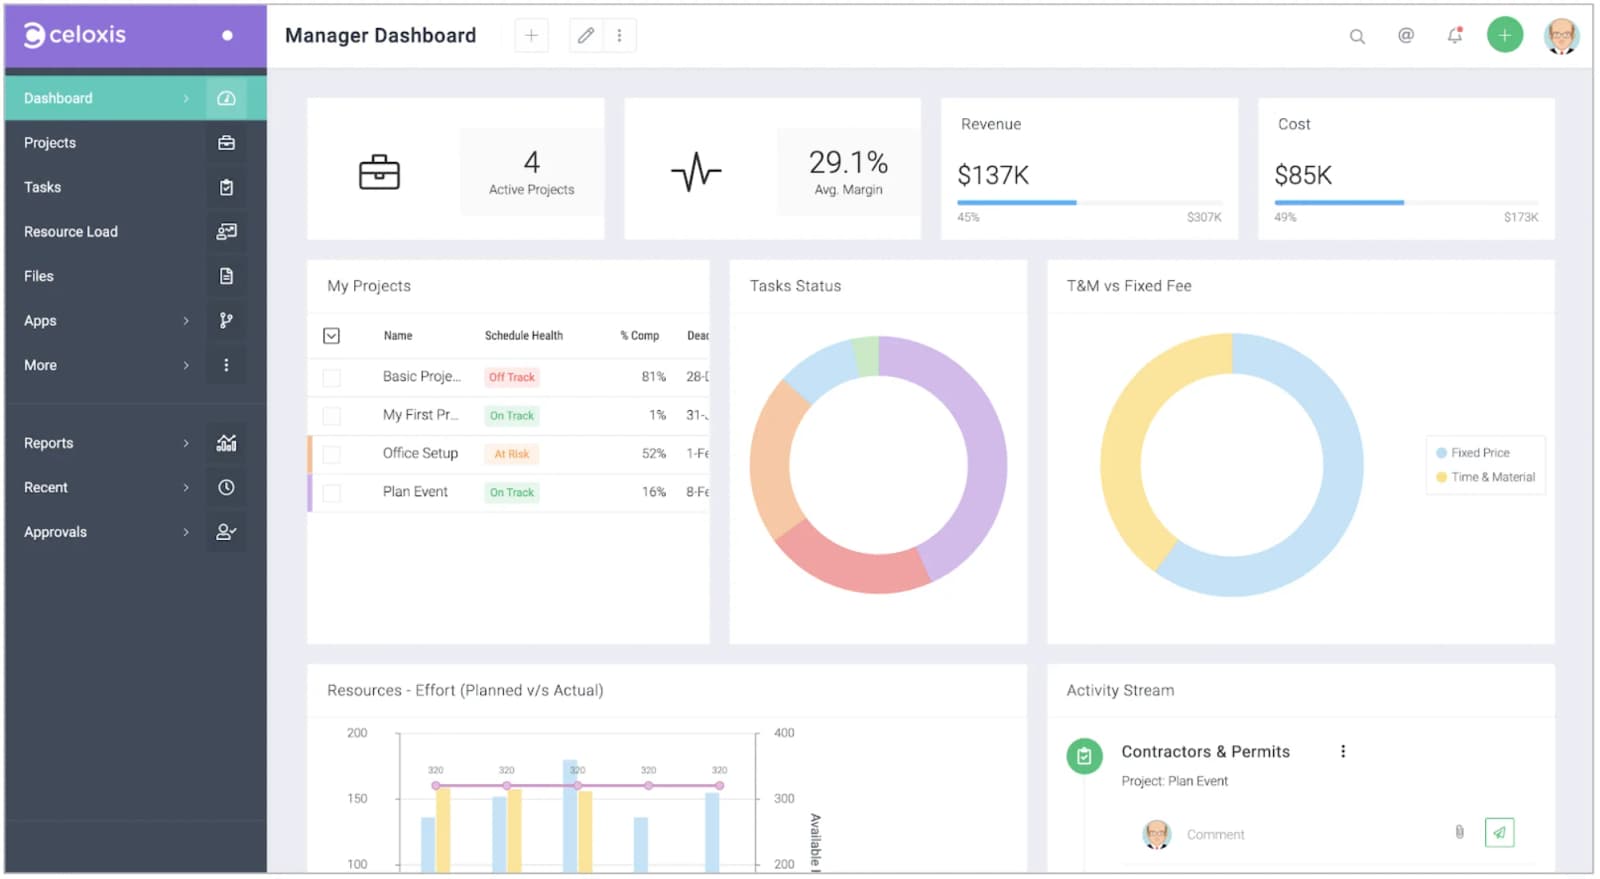
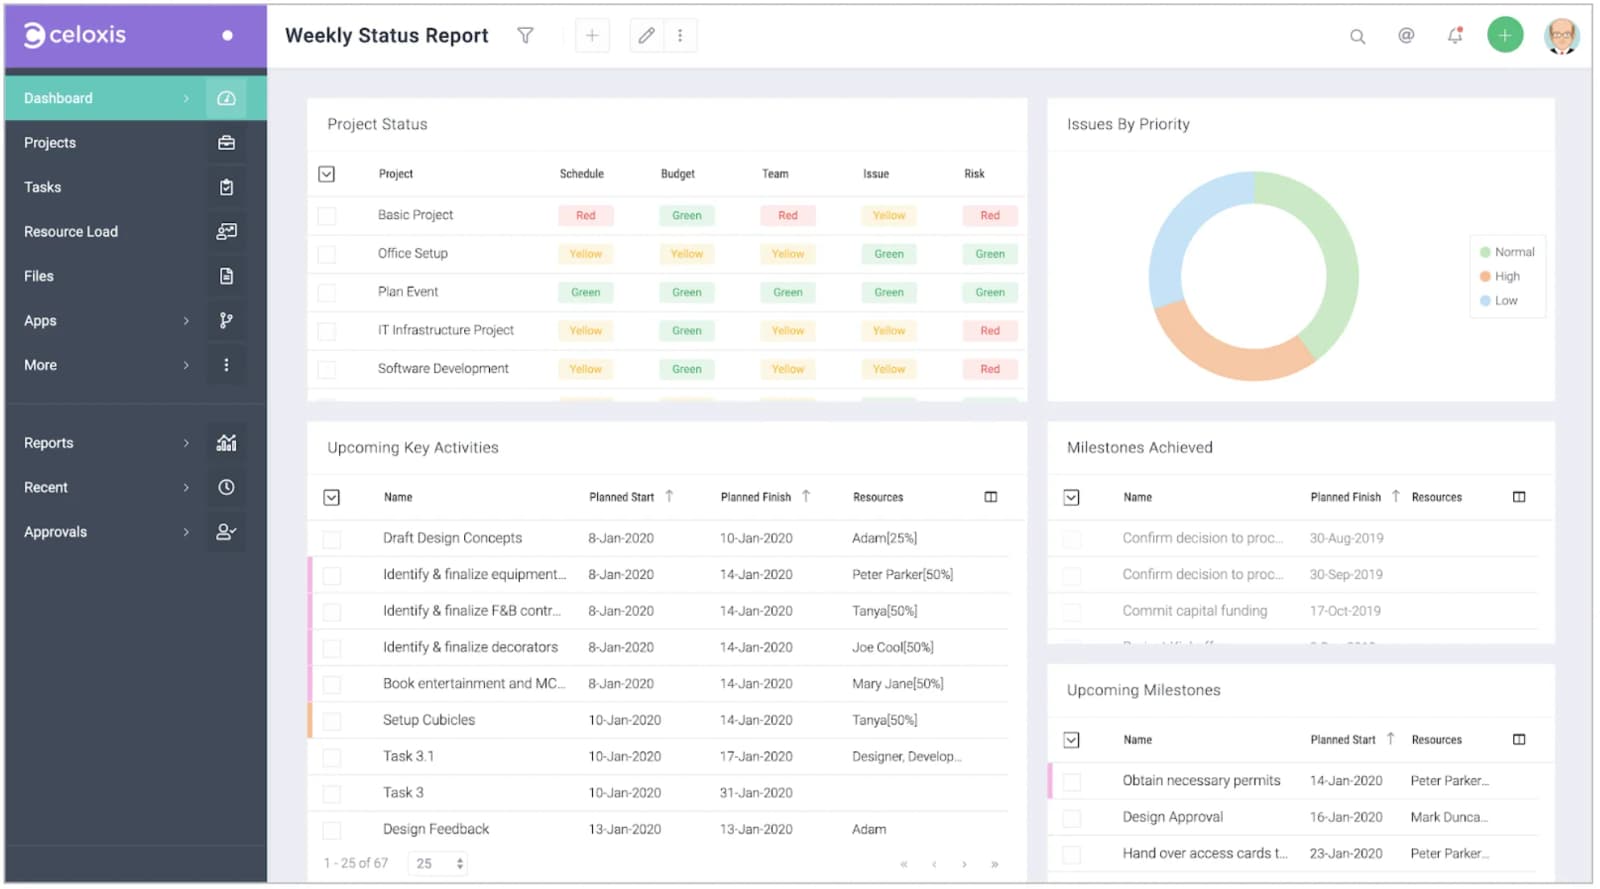
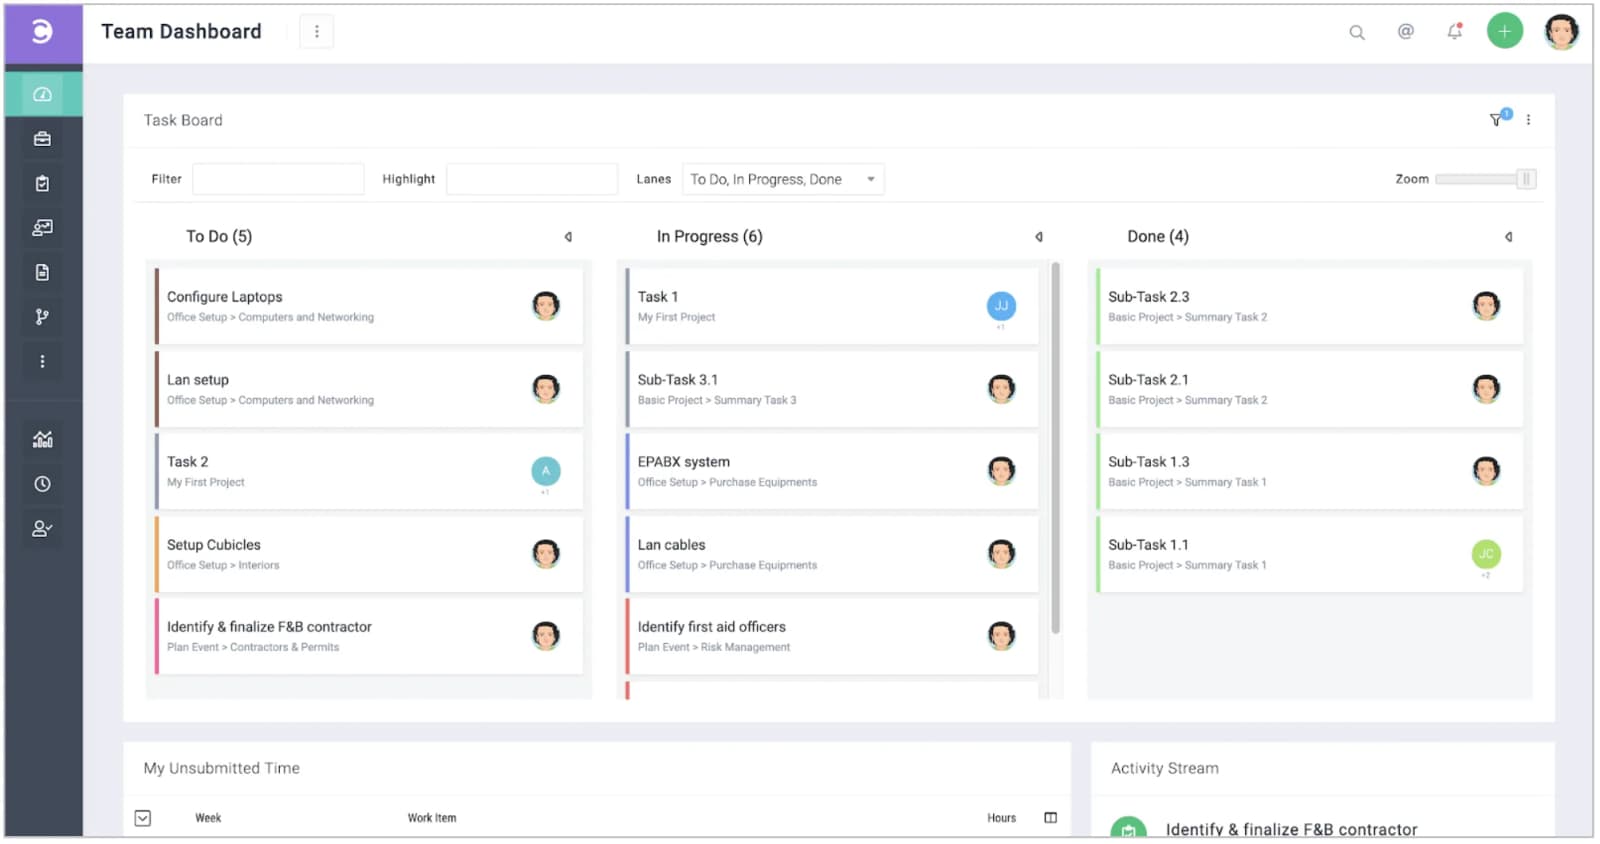
Your account will be pre-populated with multiple dashboards that we think are useful. Use them as is or as a starting point for your customizations.
There are 5 things that you should know:
1Multiple Dashboards
You can create multiple dashboards to suit your working style. You can create different dashboards based on role – for example a dashboard each for project manager, team member, resource manager, PMO director, etc. You can even create different dashboards based on function – for example a dashboard each for planning, tracking, QA, resource utilization, etc.
Multiple dashboards can be assigned to one user.
2Customizing Dashboards
You can customize the widgets, layouts, columns, filters, grouping and much more.
In the following example, a widget is deleted and a new widget is added and resized.
3Performing Actions on Dashboards
You should be able to do most of your work from your dashboards.
In the following example, a manager drills down a pie chart to list all overdue tasks and requests an update from the assignees.
4Sharing Dashboards
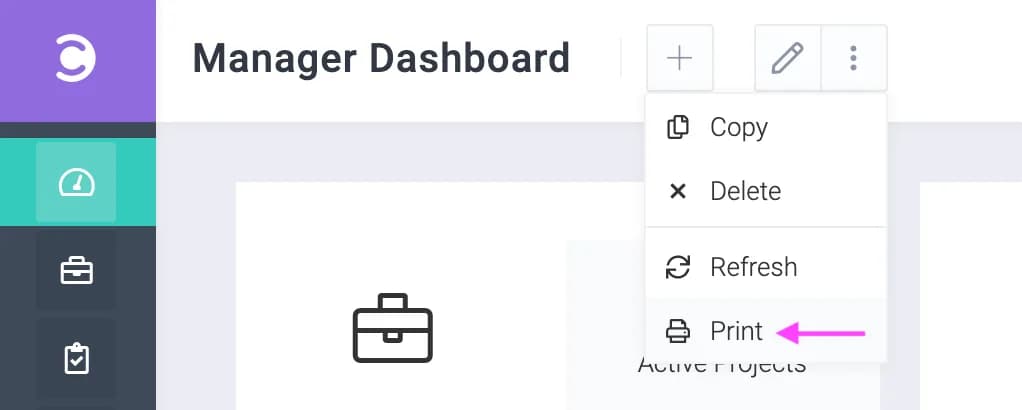
Dashboards can be exported to PDF that you can send via email.
5Scheduling Dashboards
You can schedule dashboards to be sent via email at scheduled times.
Click on next to the dashboard name and then click on Schedule tab to enter your schedule details and recipients.
D. Navigating the User Interface
The Celoxis User Interface (UI) is consistent and predictable. This means that if you understand how one page works, you will understand how 90% of other pages work.
We shall now look at the basic elements of the user interface:
- The Top Menu
- The Side Menu
- The Recent Items Menu
- Starred Reports
- A Typical Page
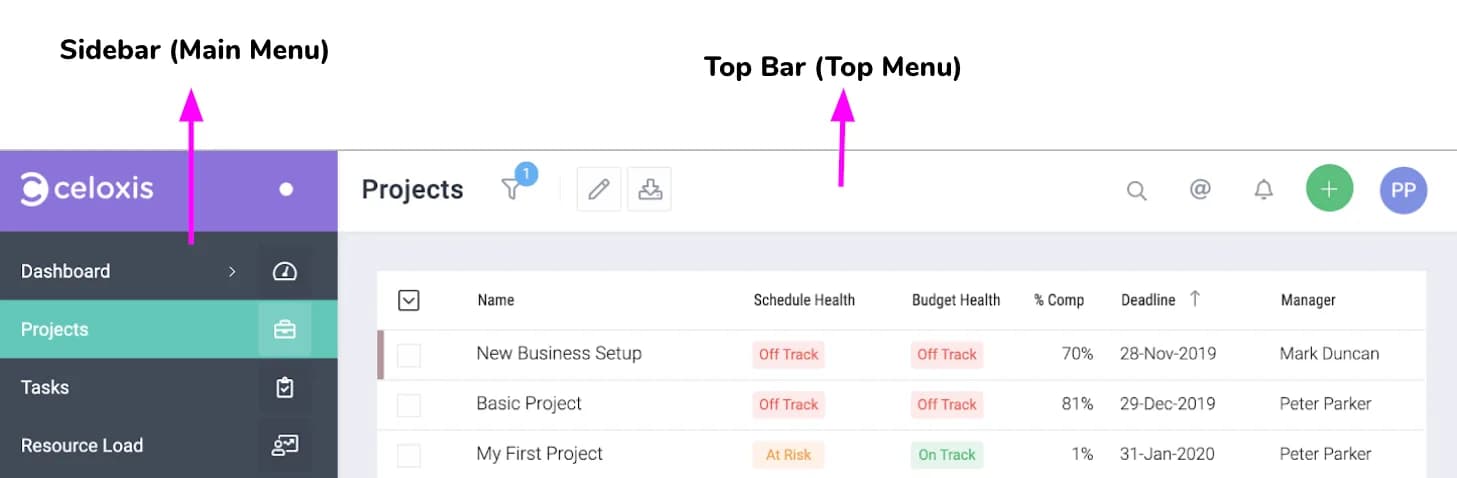
1The Top Menu (or Top Bar)
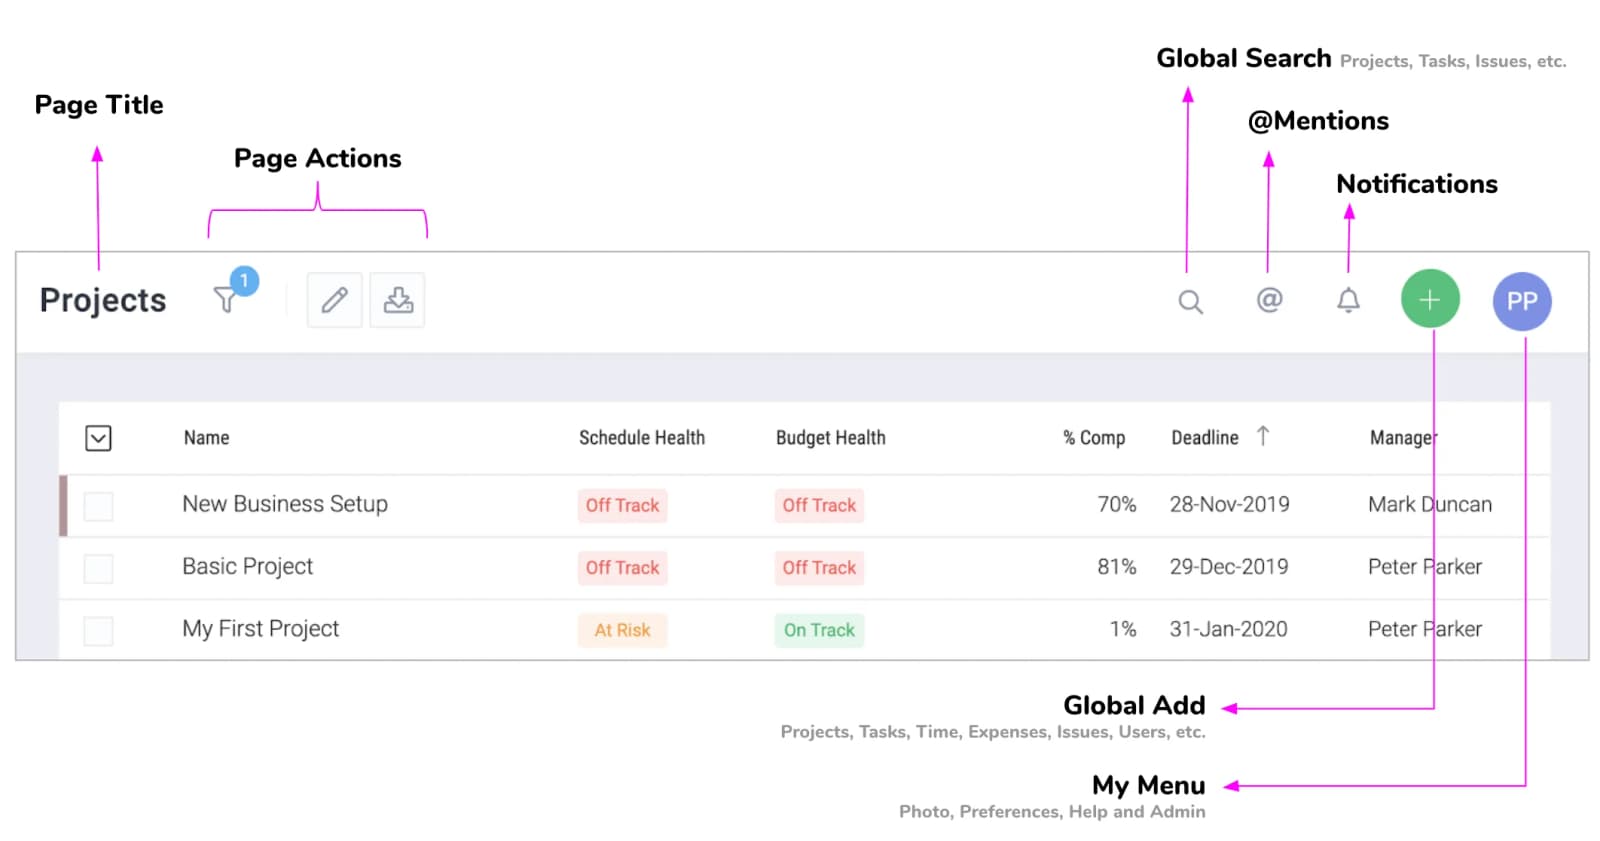
The left hand side elements of the top menu i.e. the page title and actions change with every page while the right hand side elements starting with the search icon do not. The following image describes the elements in the top menu.
The Add Menu
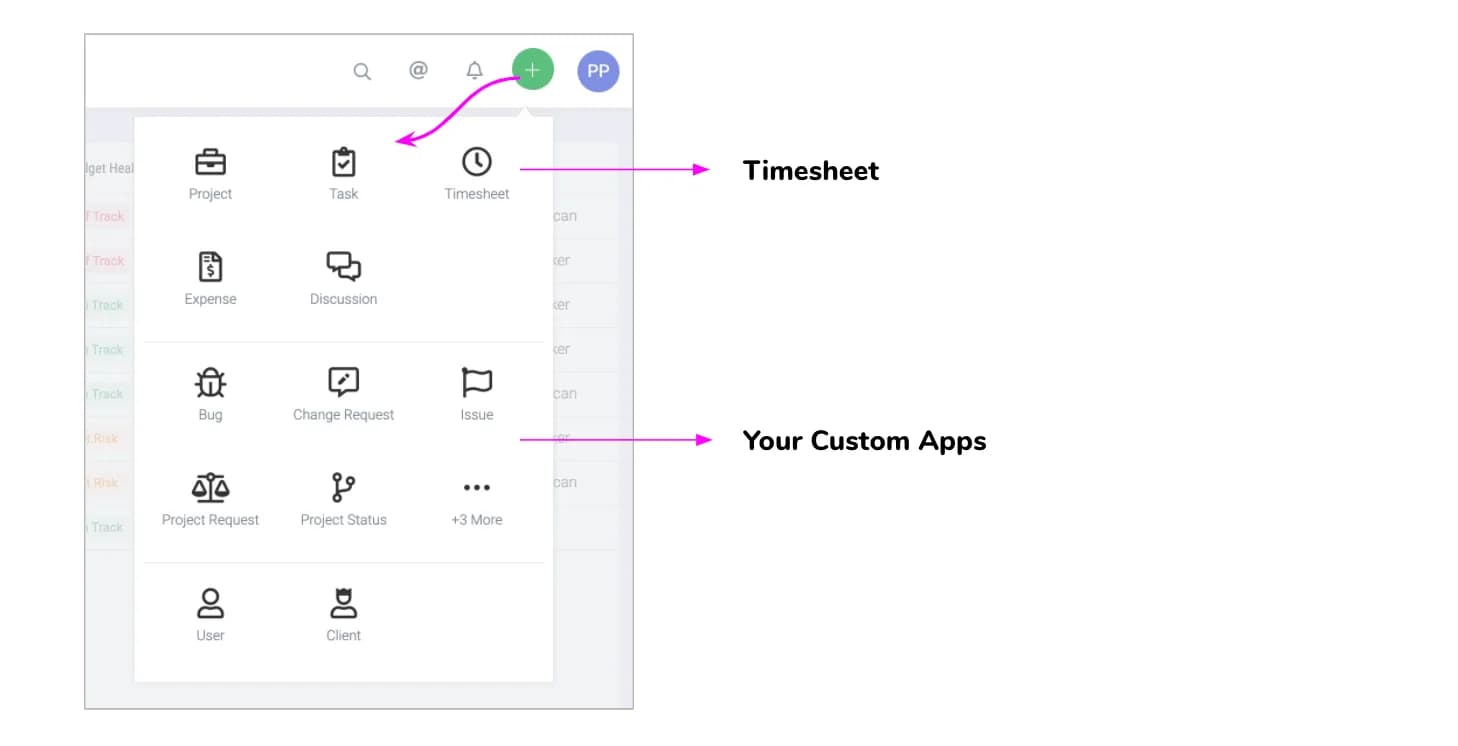
The add button is always available on all pages and can be used to add projects, tasks, issues, risks, users and more as show below. You can quickly jump to the timesheet by clicking on the timesheet icon.
2The Sidebar (or Main Menu)
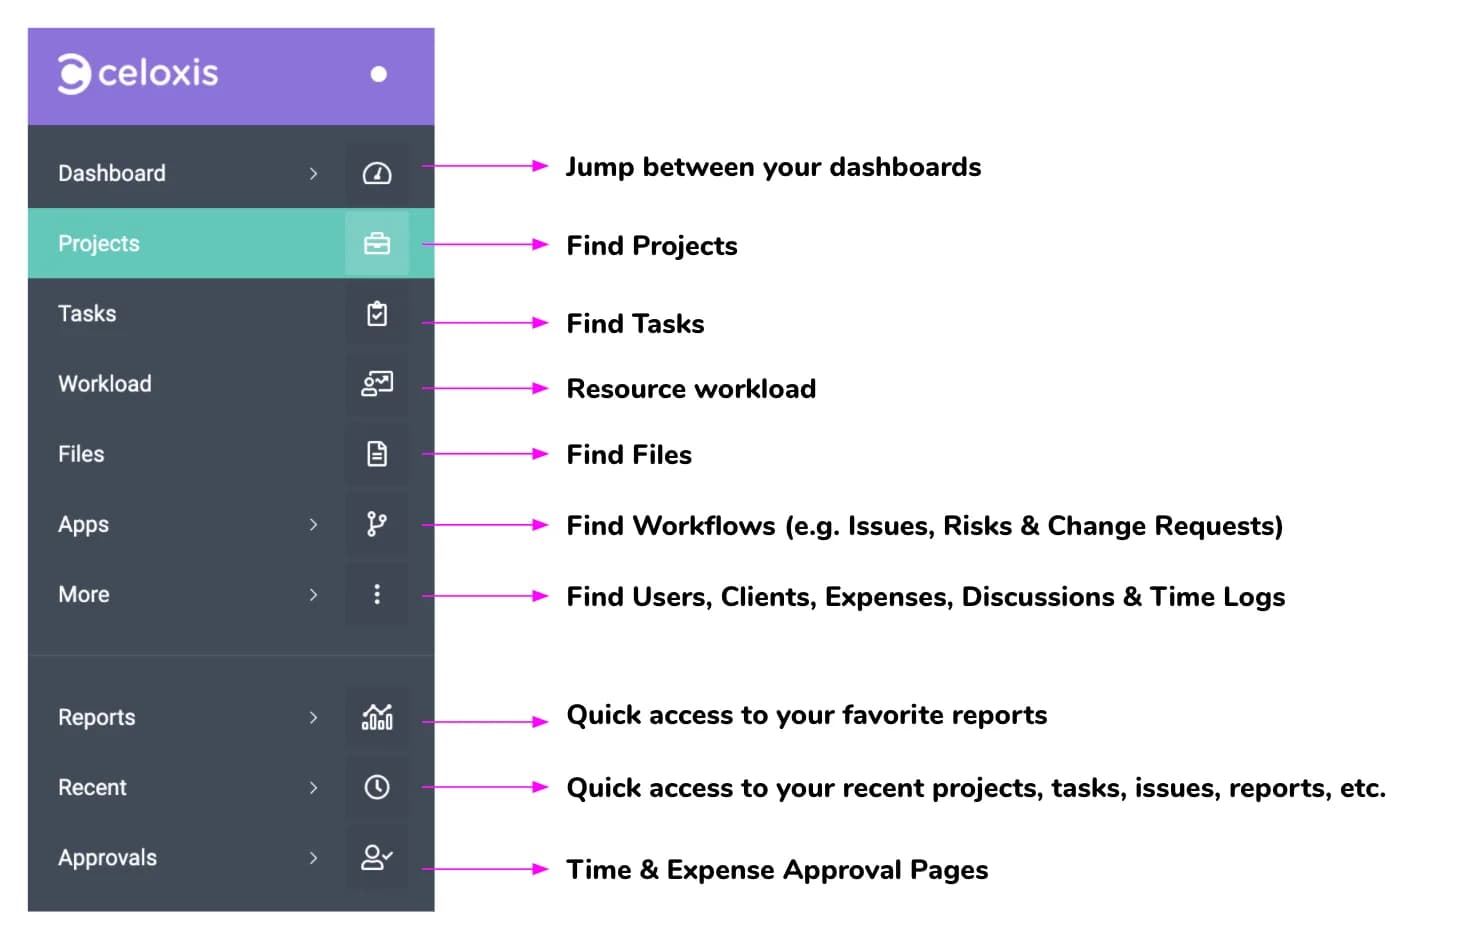
The sidebar is used to navigate to different pages as shown below.
Sidebar > Apps Menu
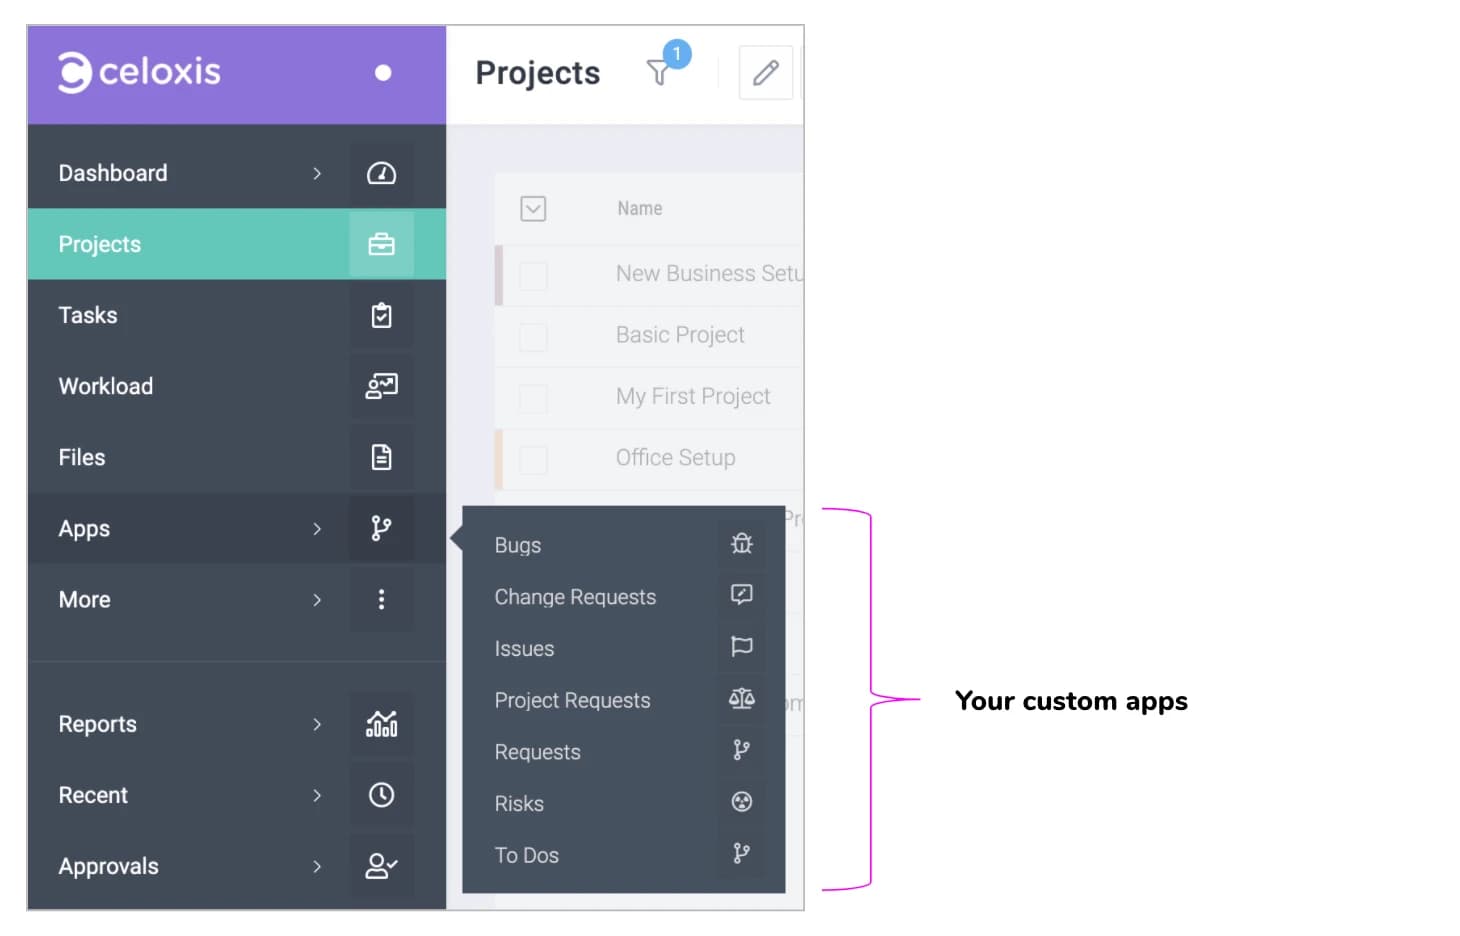
The Apps menu is the way to go to lists of your custom apps. In the following example, clicking on Issues will take you to the list of issues.
3The Recent Items Menu
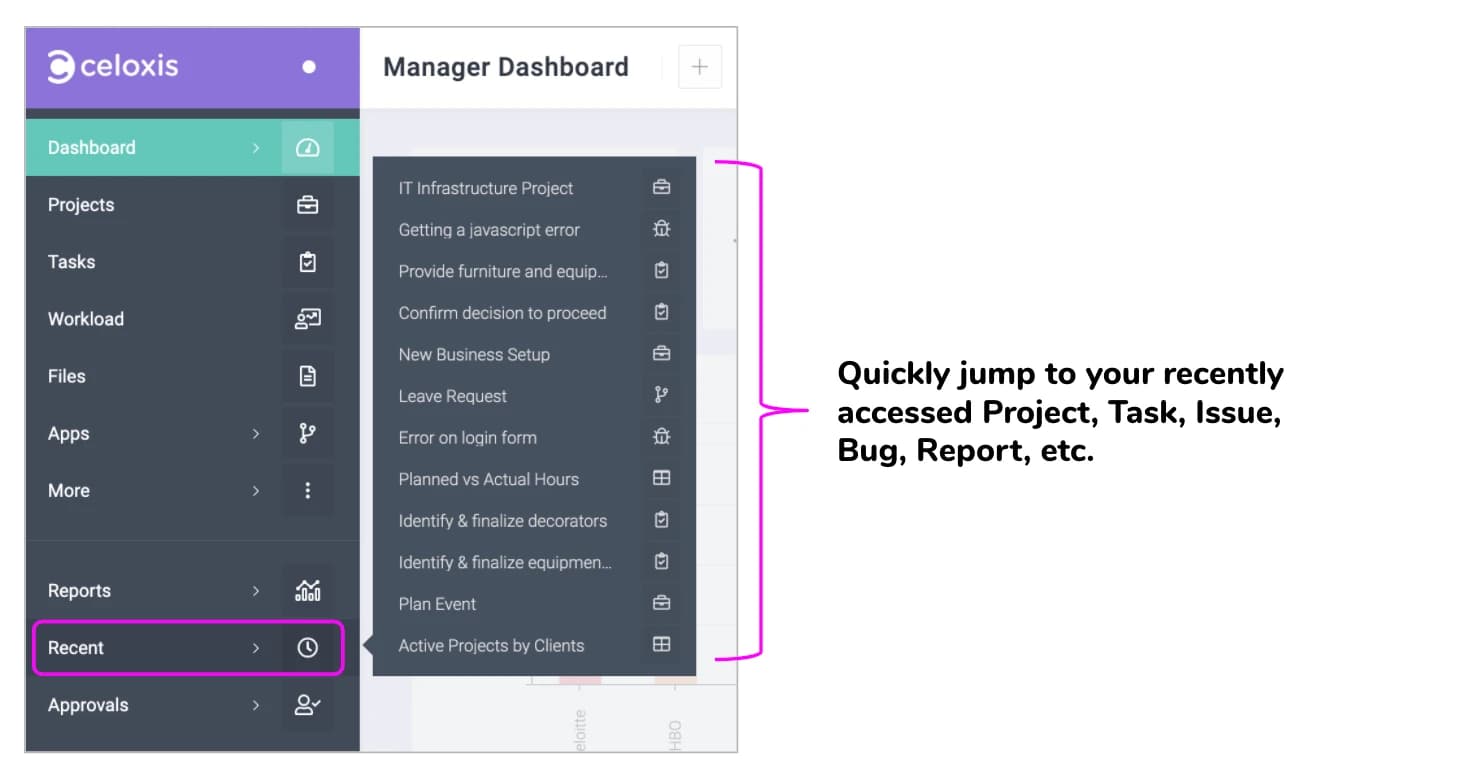
This menu is a great time saver. It lets you quickly jump to your recently accessed Project, Task, Issue, Bug, Report, etc.
4Starred Reports
If you use a report frequently then mark it as favorite by clicking on the star icon in the report. Once done, this report will start appearing in your Reports menu.
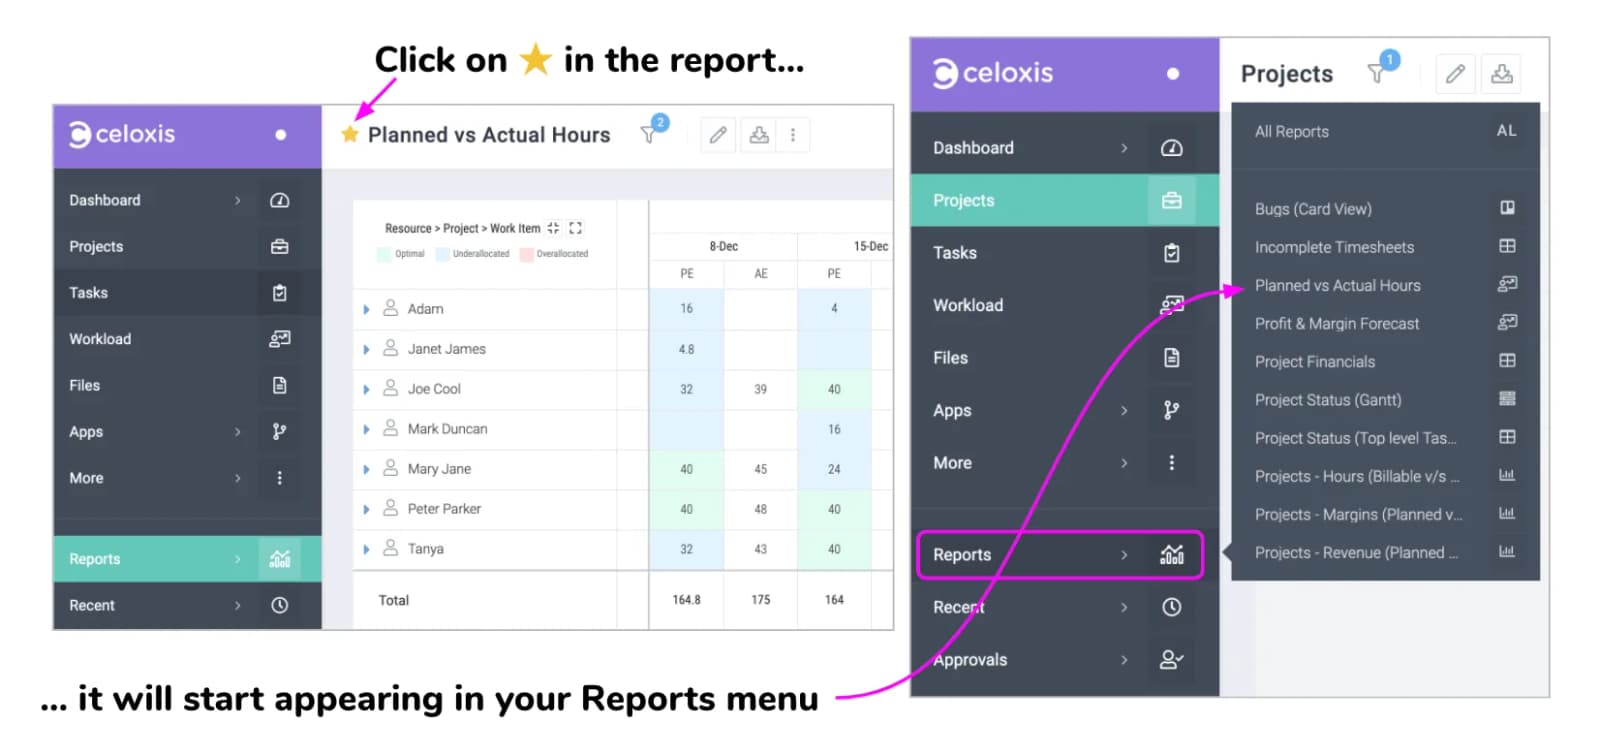
In the above example, clicking on the star for the report X makes it available in the Reports menu.
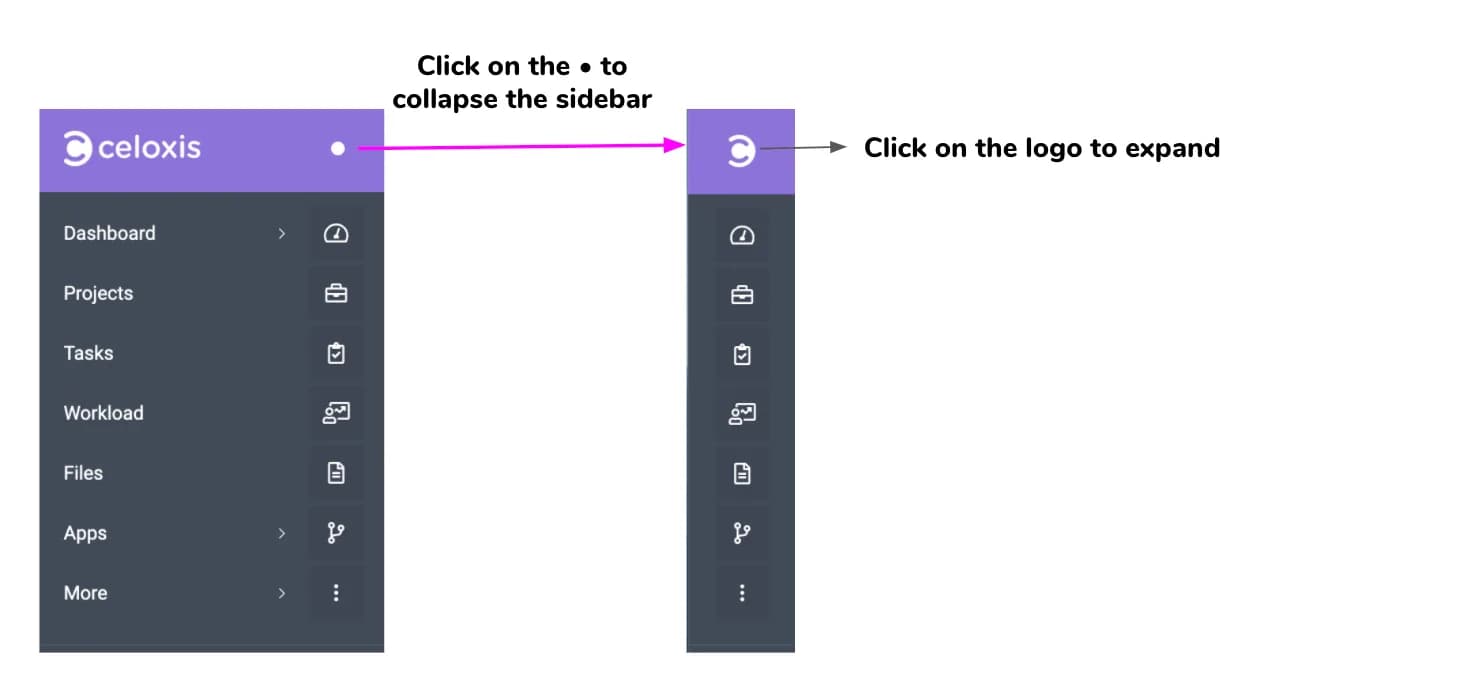
Tip: Get more screen real-estate by clicking on the
5A Typical Page
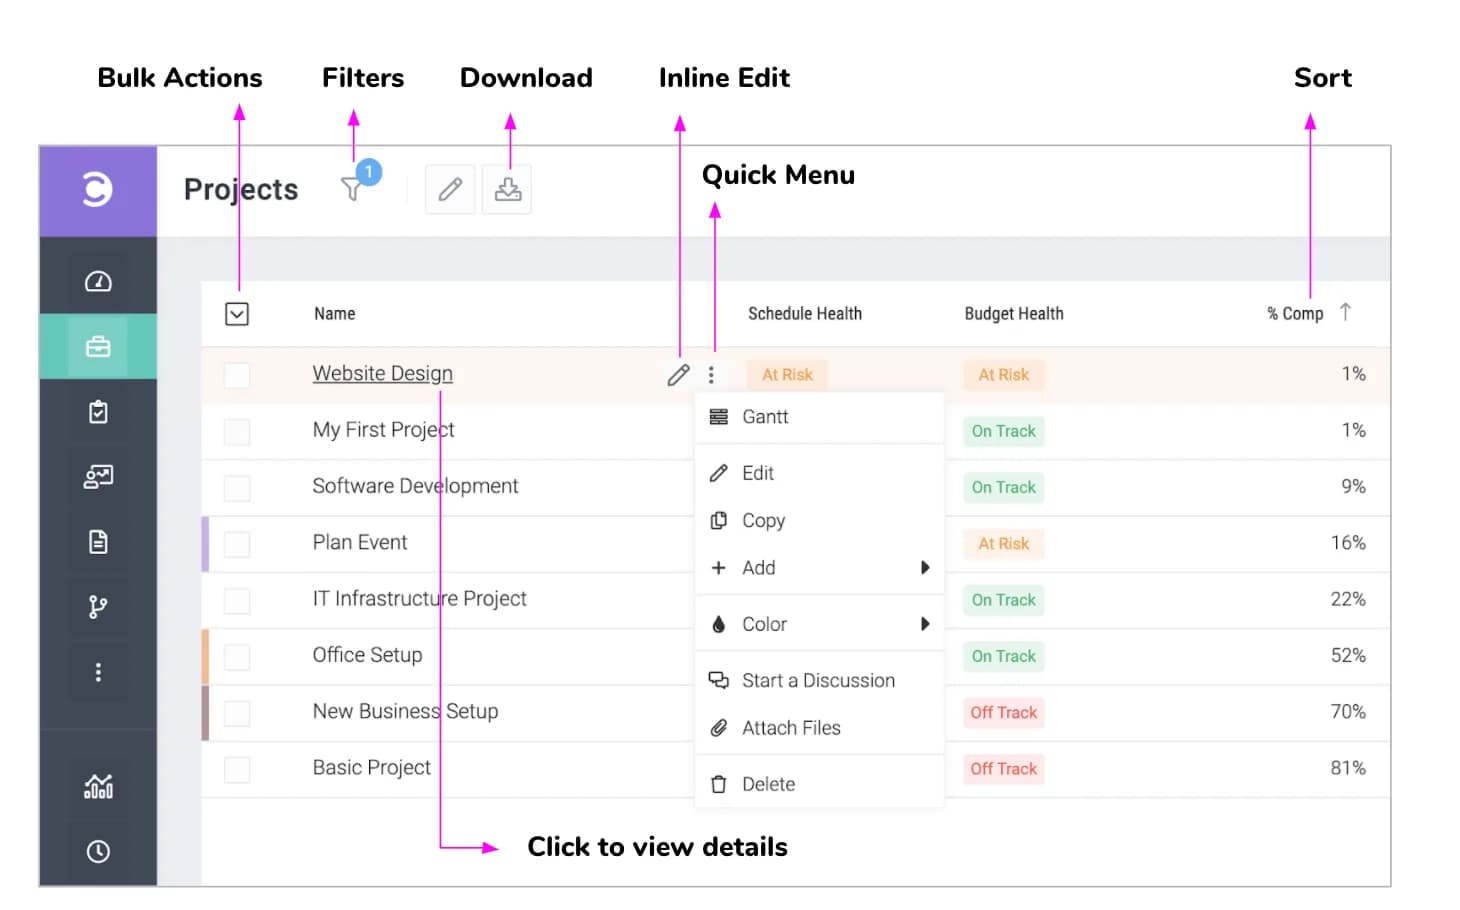
Most pages will have the same structure as the example below.
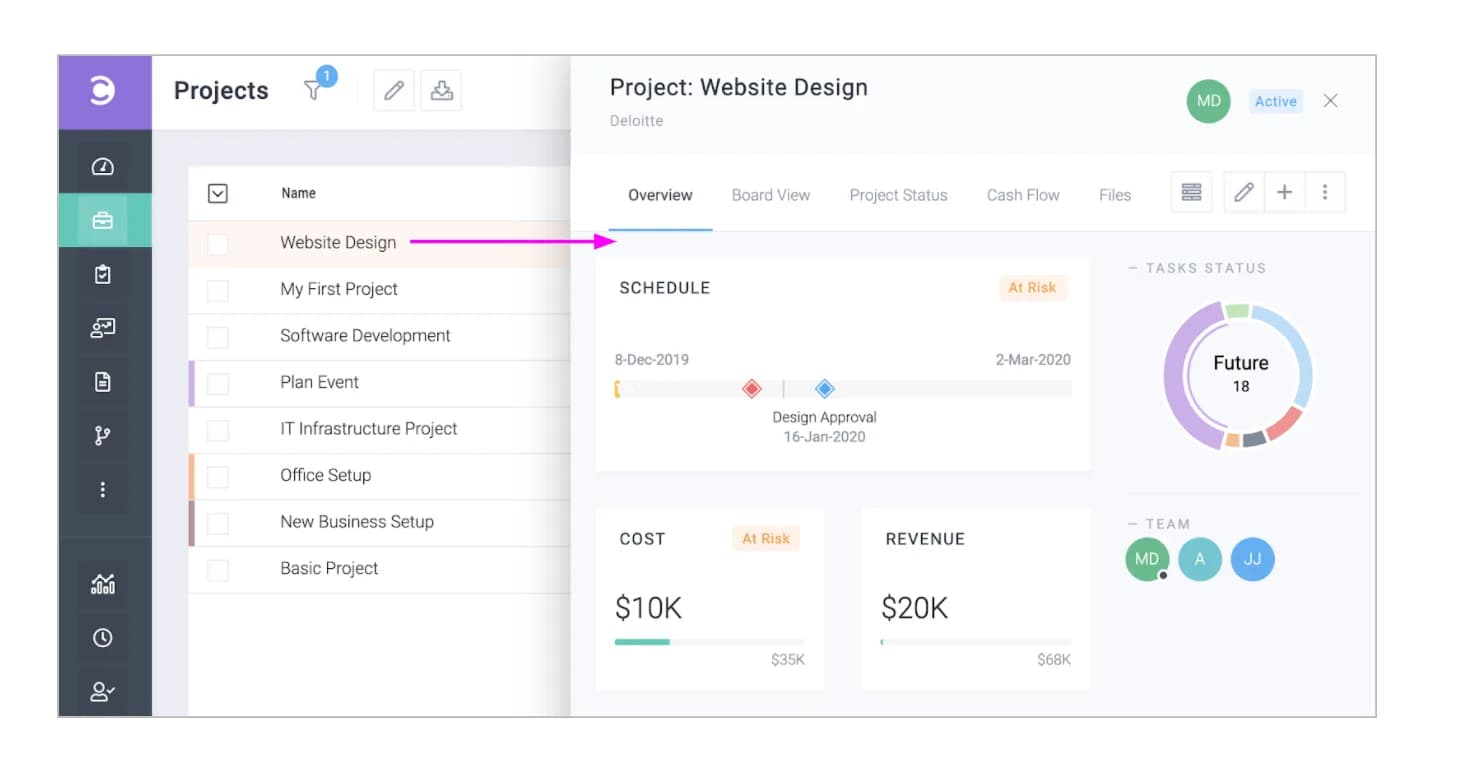
Viewing an item like project, task, issue or a custom app item.
Clicking on an item's name will open its panel. In the following example, we click on a project to view it.
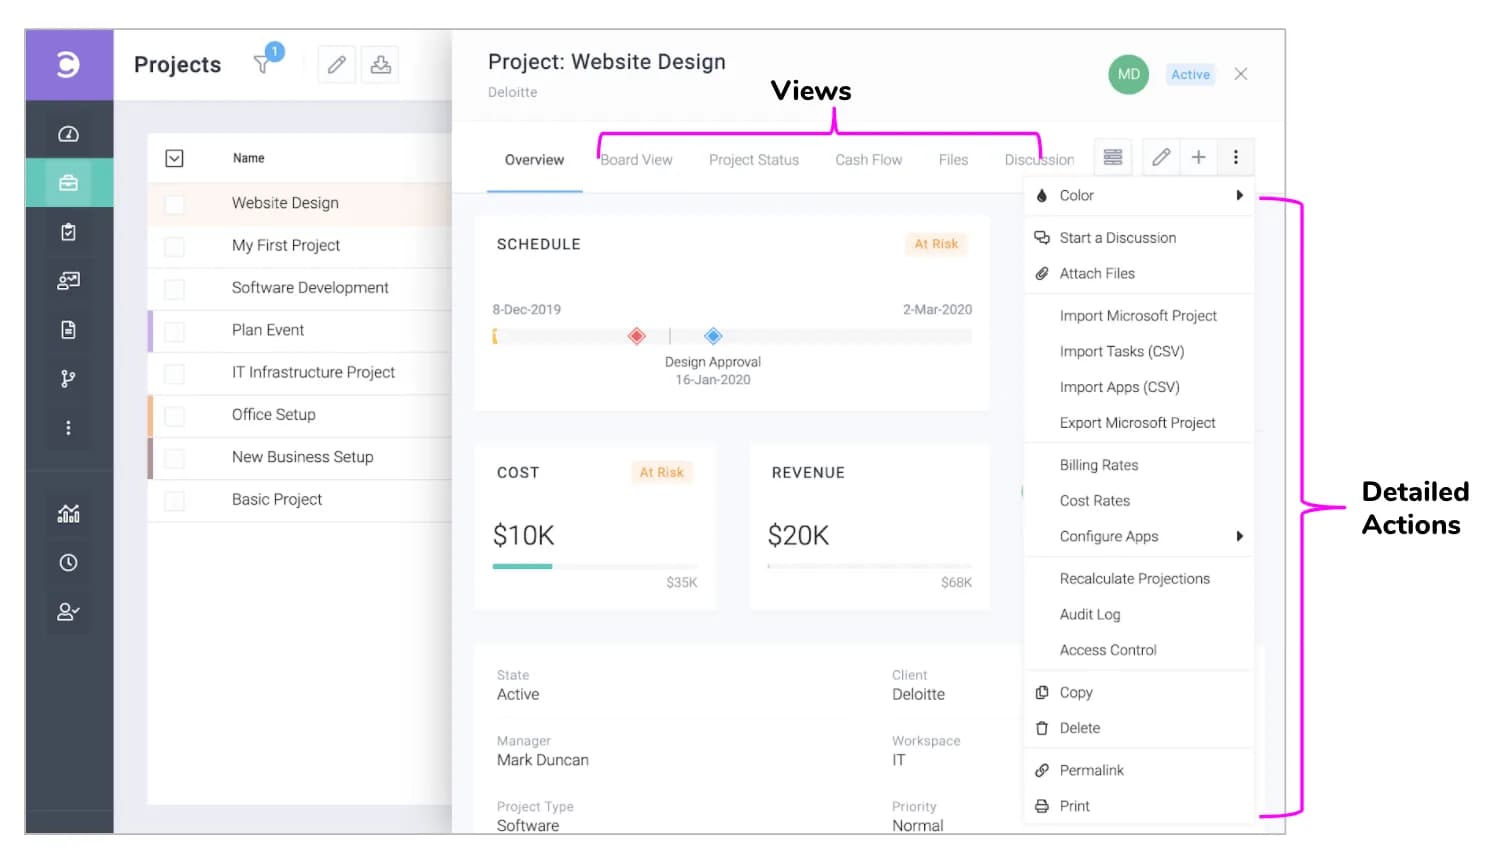
The Project Panel
The panels have tabs so you can quickly view associated items like tasks, files, risks and even reports. Clicking on the icon will reveal a comprehensive action menu like shown below. Panels for tasks, issues etc are organized similarly.
E. Changing your preferences
Click Main MenuProfile
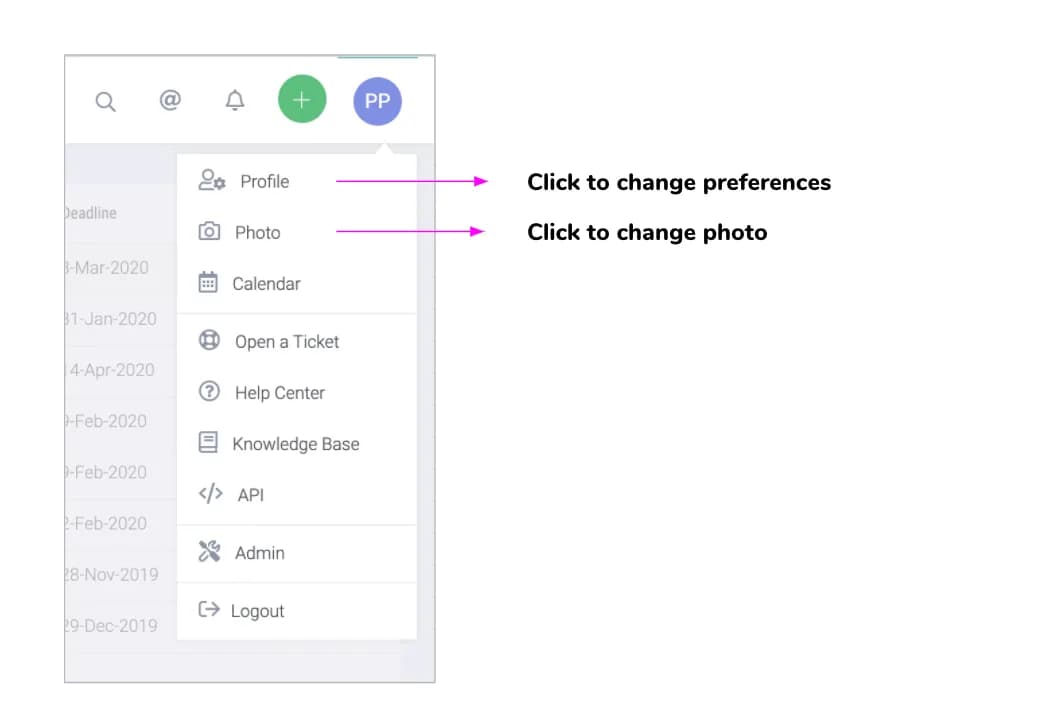
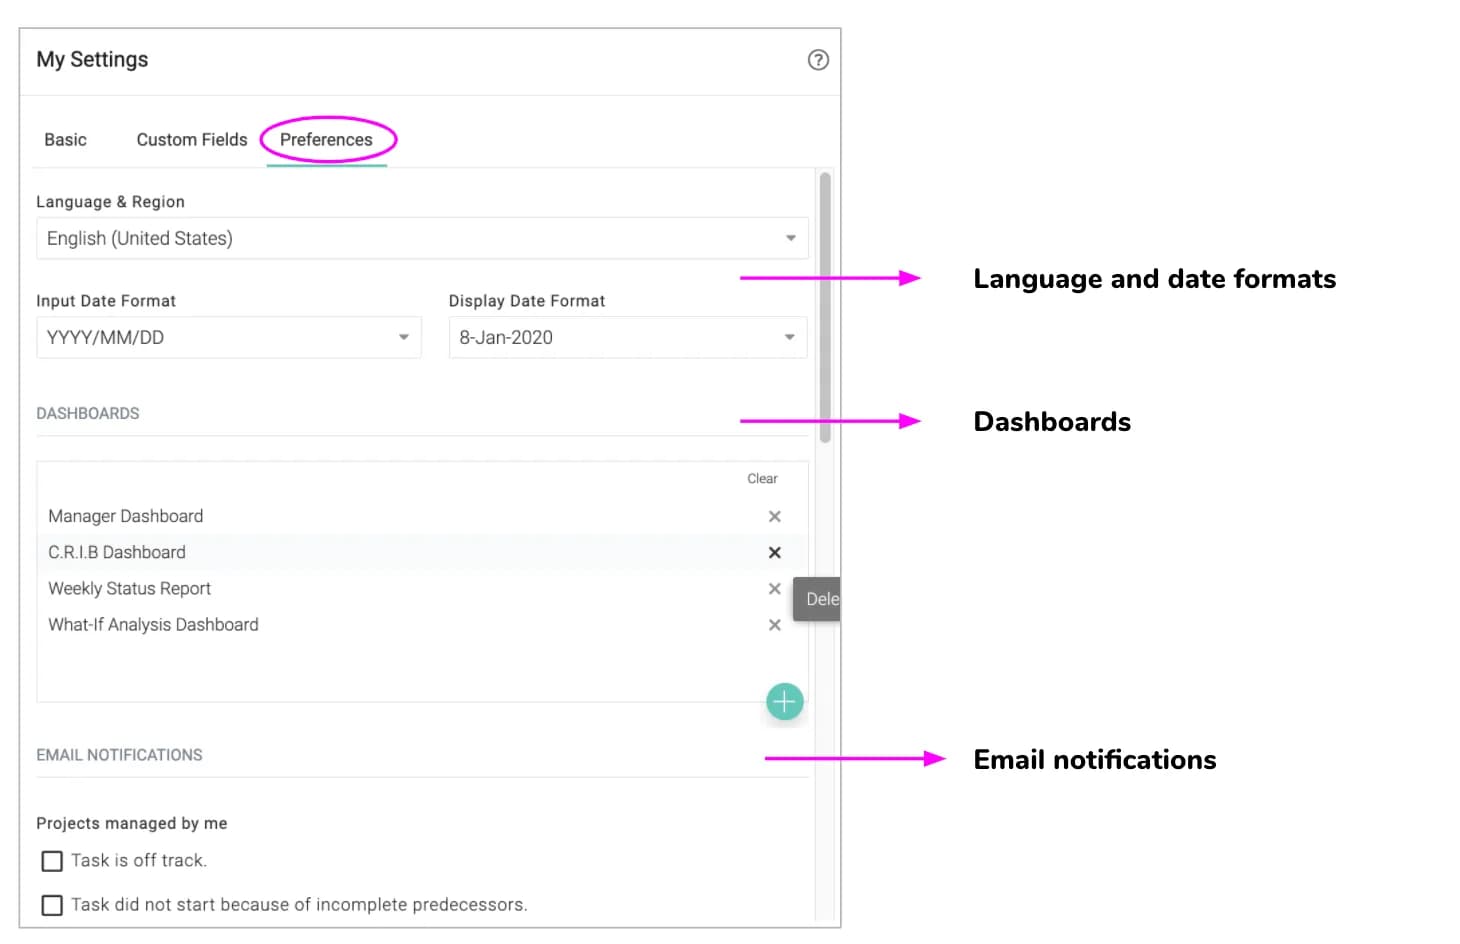
Click on the Preferences tab to change your language, date formats, email notification options and other preferences.
F. Creating your first project
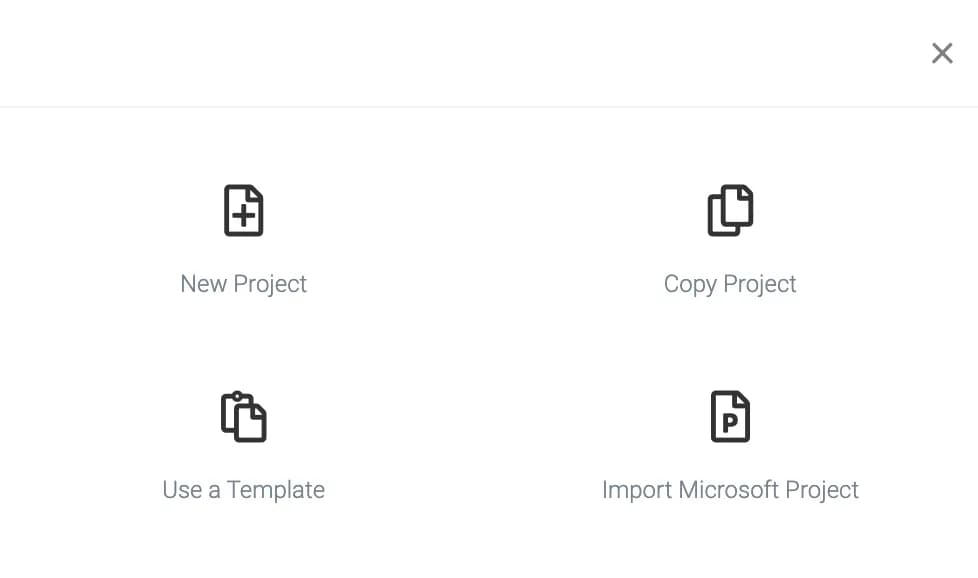
Click on Main MenuProject to add a project. You will be presented with a few options as shown below. If you have Microsoft Project files, you can import those or you can start with a blank project.
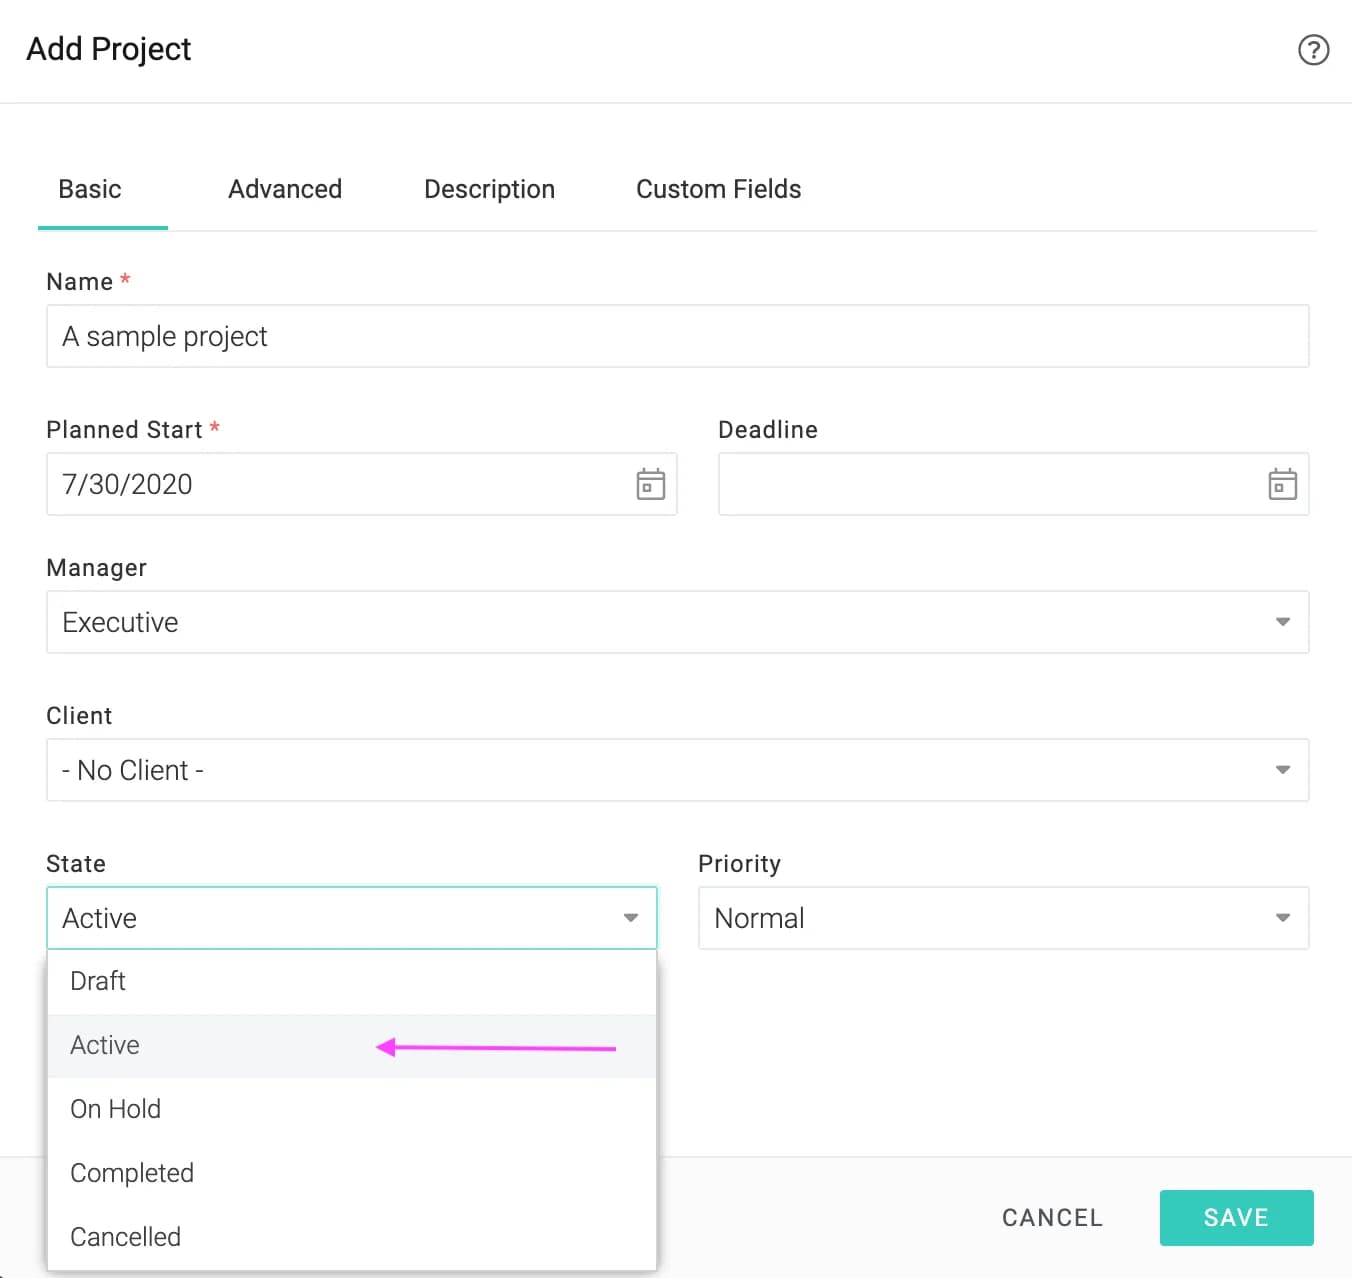
Activate your project
Mark this project as active which will indicate to the system that this progress is underway. This will enable email notifications and color indicators for this project and you shall get a better experience of the software's capabilities.
G. Gantt Chart
Click on on the project's panel to open the Gantt chart.
The following video highlights some of the important capabilities of the gantt chart like:
- Inline editing
- Drag-n-drop for changing task schedule, moving tasks and adding dependencies
- Adding multiple tasks quickly
- Assigning resources to tasks
- Identifying tasks with overloaded resources with the icon
- Selecting multiple tasks and right-clicking to perform actions on them
- Viewing critical path
H. Reporting progress on tasks
Team members can report progress on tasks from their dashboard.
Reporting progress on multiple tasks at once
Select the tasks to report on, click on the icon and choose the appropriate action. The On Track option can be used to indicate that things are progressing as per the plan.
Reporting detailed progress on a single task
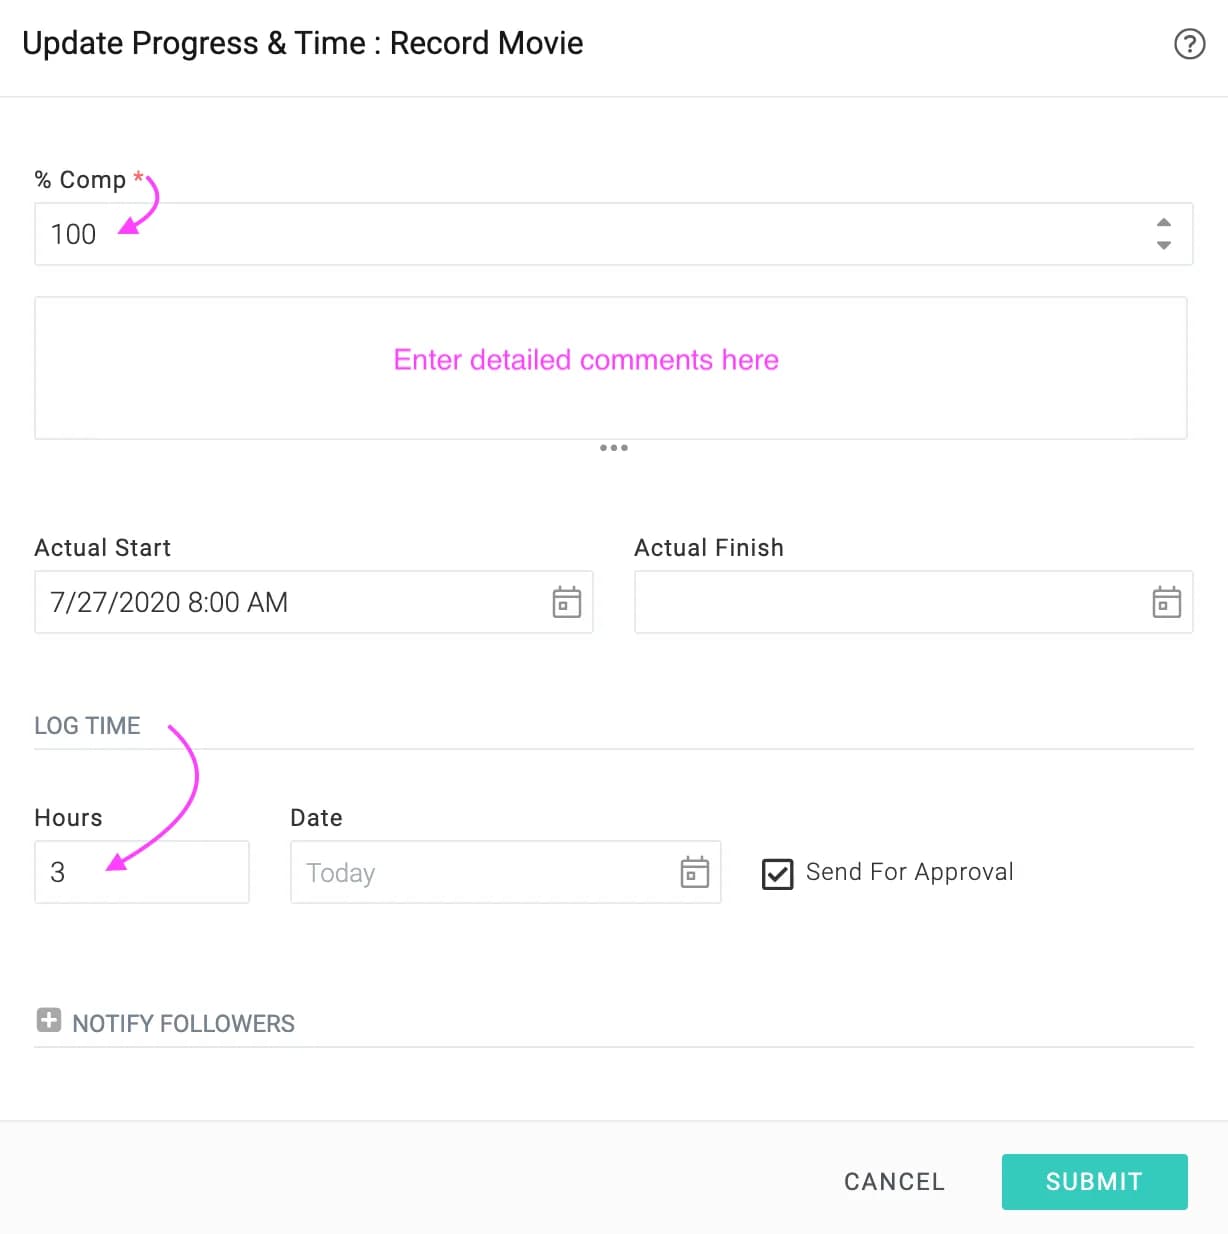
You can enter a detailed update and even log time at the same time using the Log Progress action as shown below.
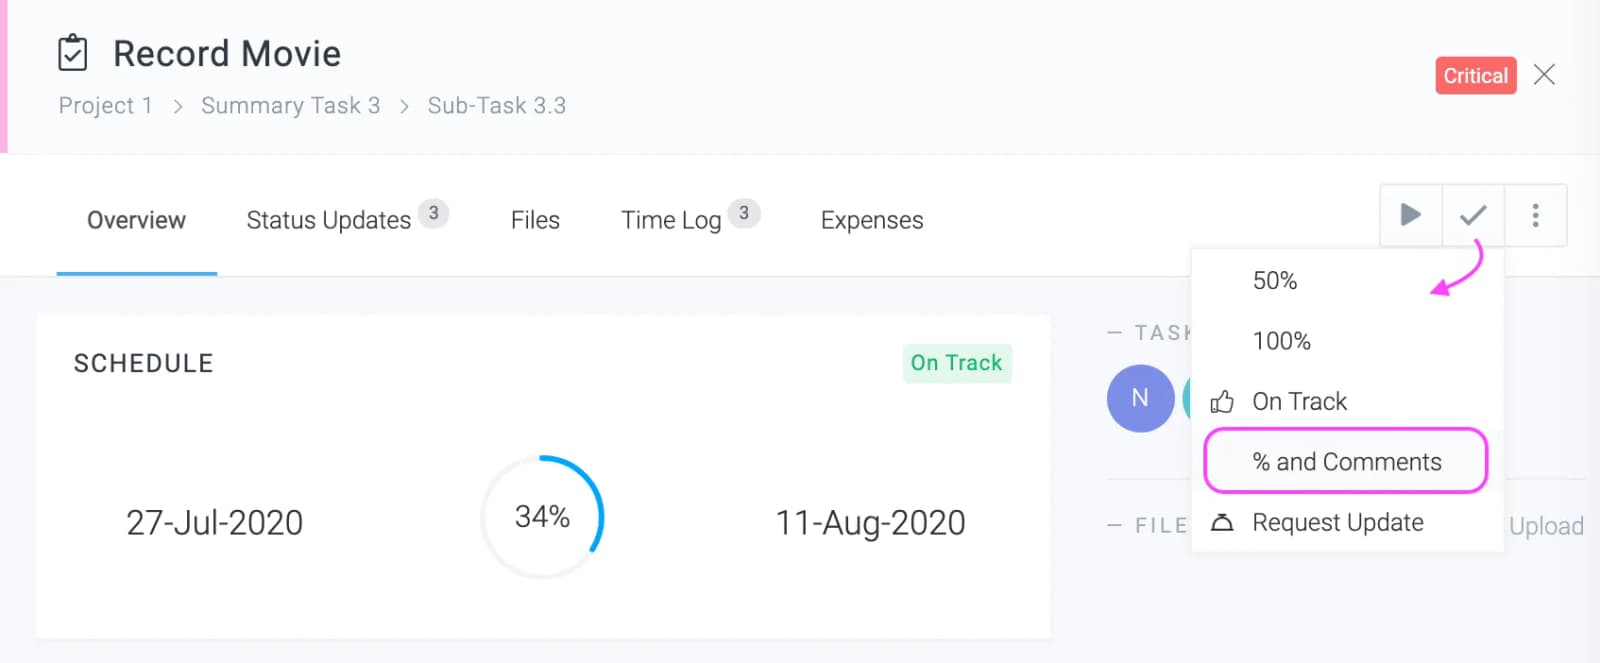
This will open a form like this:
I. Filling Timesheets
In the last section, we have seen how to log time on a specific task while updating its progress. We shall now look at logging time via the weekly screen.
To open your weekly timesheet click Main MenuTimesheet.
You can log time on tasks as well as non project time on the weekly timesheet. While logging time, you can also update task progress.
J. Tracking Projects
As team members report progress on their tasks, the system automatically calculates the estimated completion dates and costs of tasks and projects. This is indicated using RAG indicators.
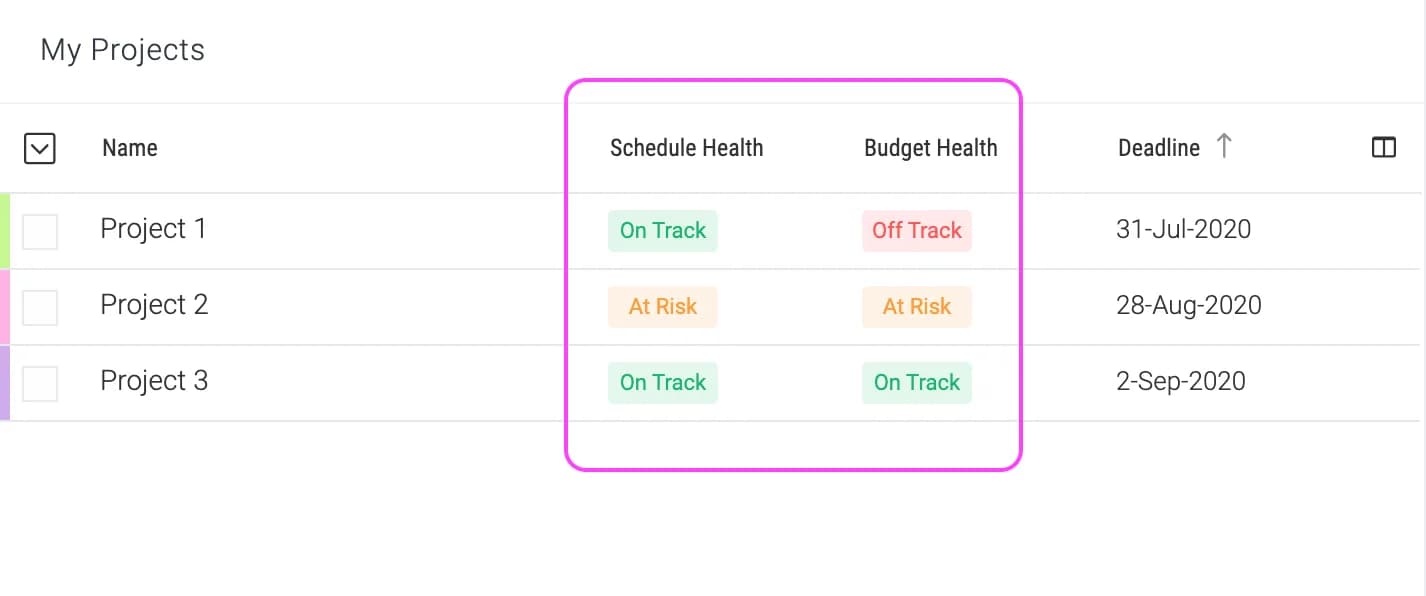
The Project Manager dashboard is a great place to track projects. You can customize the columns in list widgets, add chart widgets and drill-down into problem areas quickly. See the dashboards section of this document for more information.
Tracking a single project
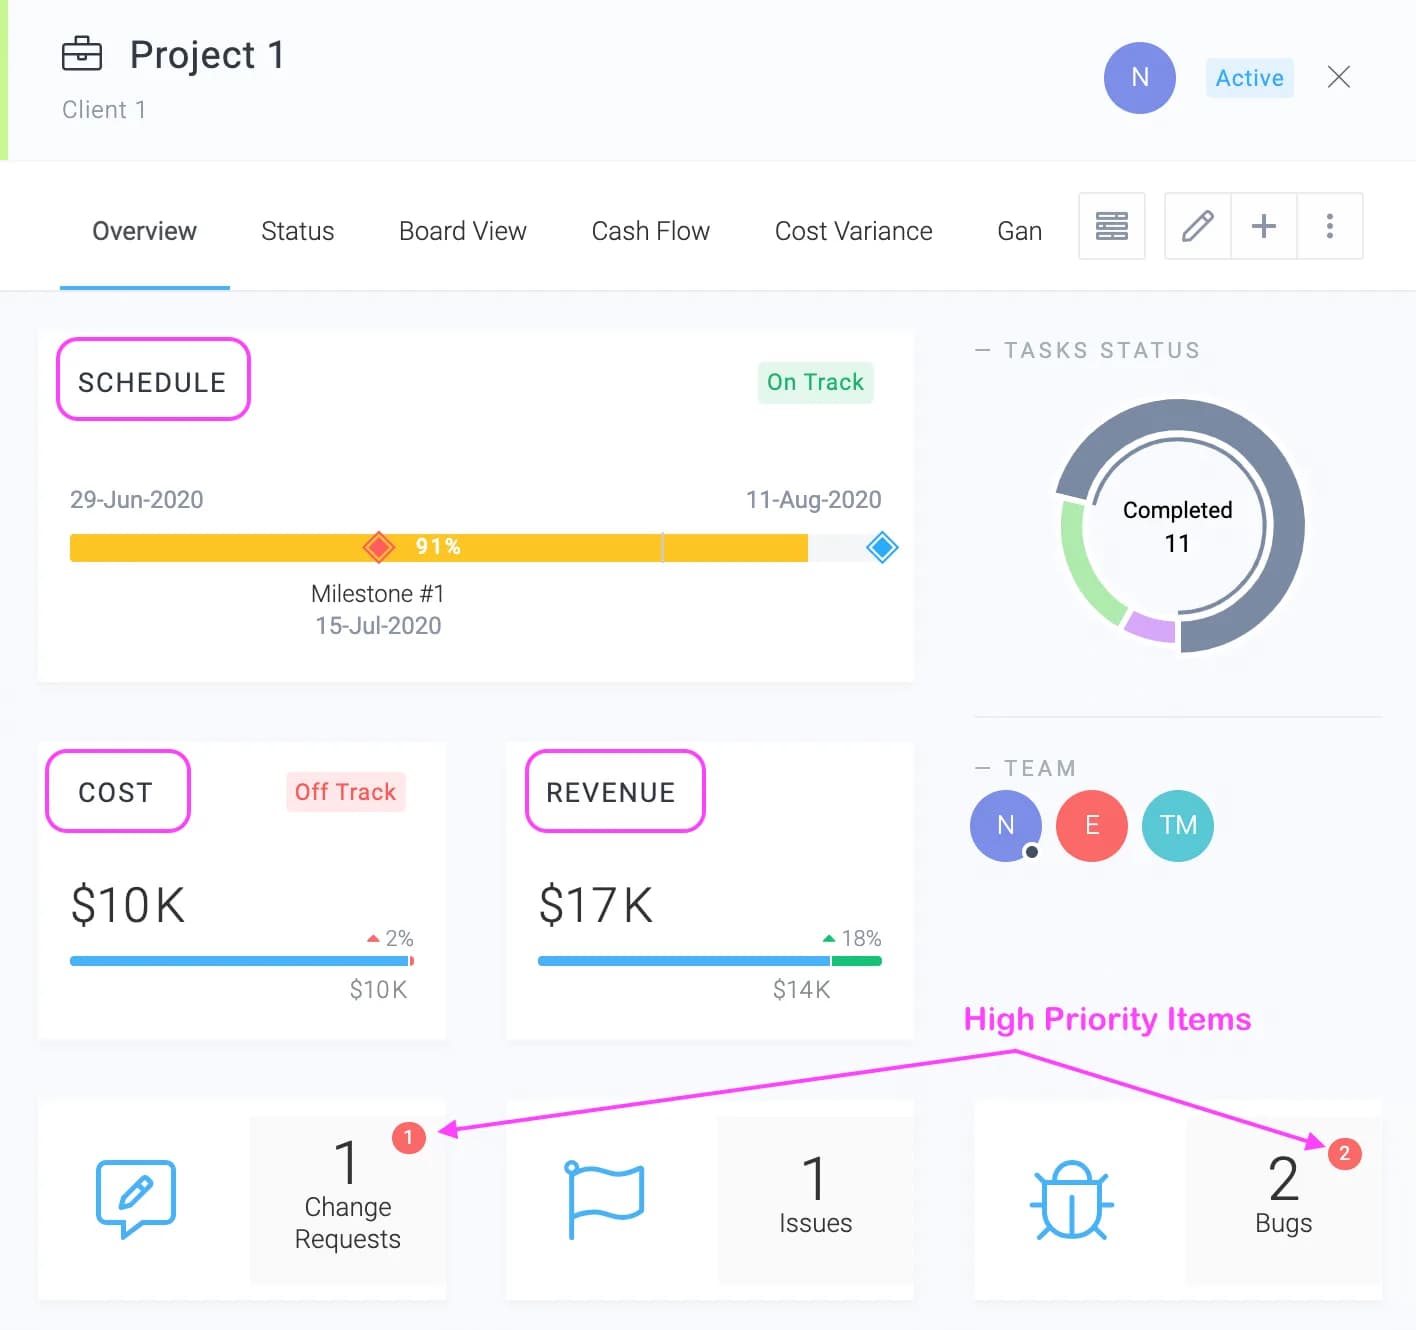
When you click on a project, a panel will open. This panel will have a lot of interesting tracking information about the schedule, cost, revenue and even identify high priority items in issues, change requests etc.
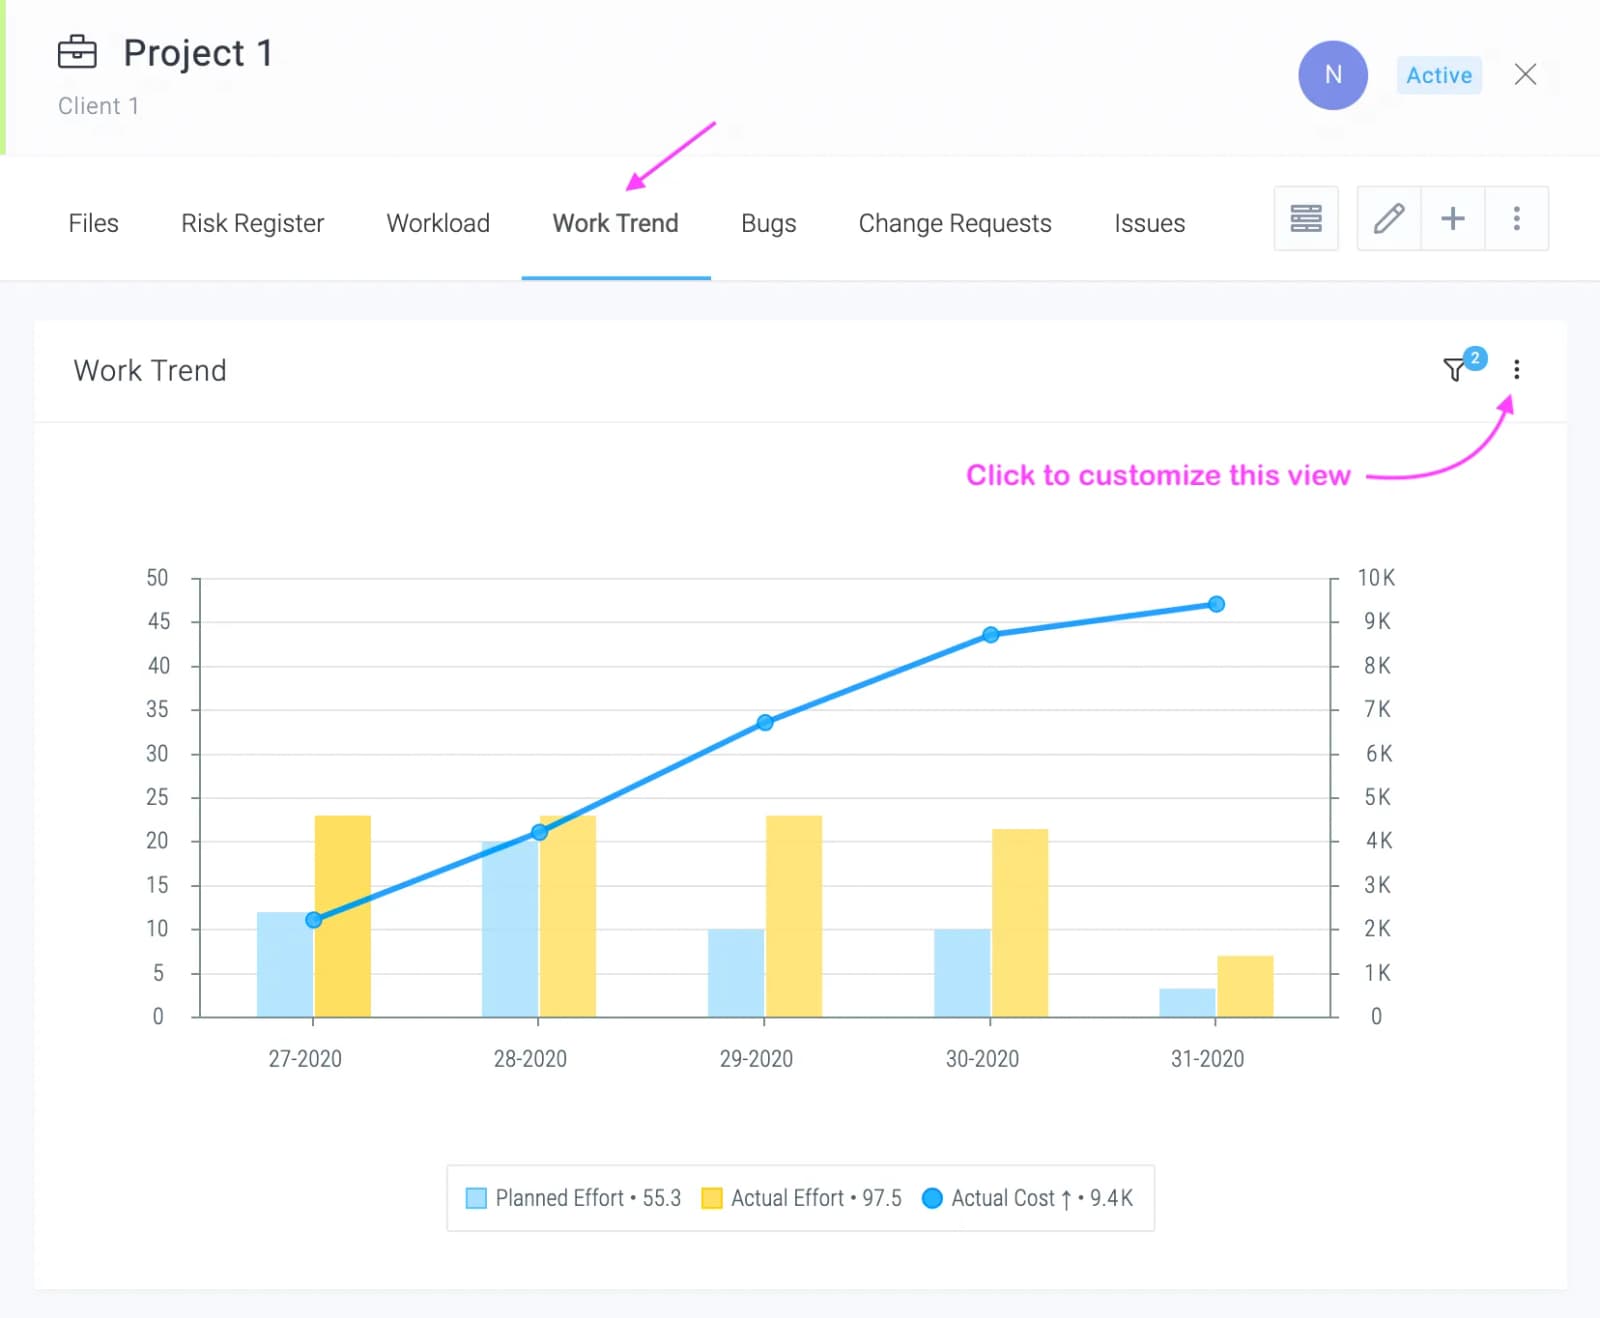
You can also click on the various tabs to get various reports for a project. A sample is shown below. All tabs are fully customizable and you can add, customize or delete tabs as per your requirements.
K. Reporting
Celoxis has one of the most sophisticated reporting engines in the industry. We provide a number of pre-built reports that you can use as-is or as a starting point for building your report. To go to reports, click Main MenuReportsAll Reports.
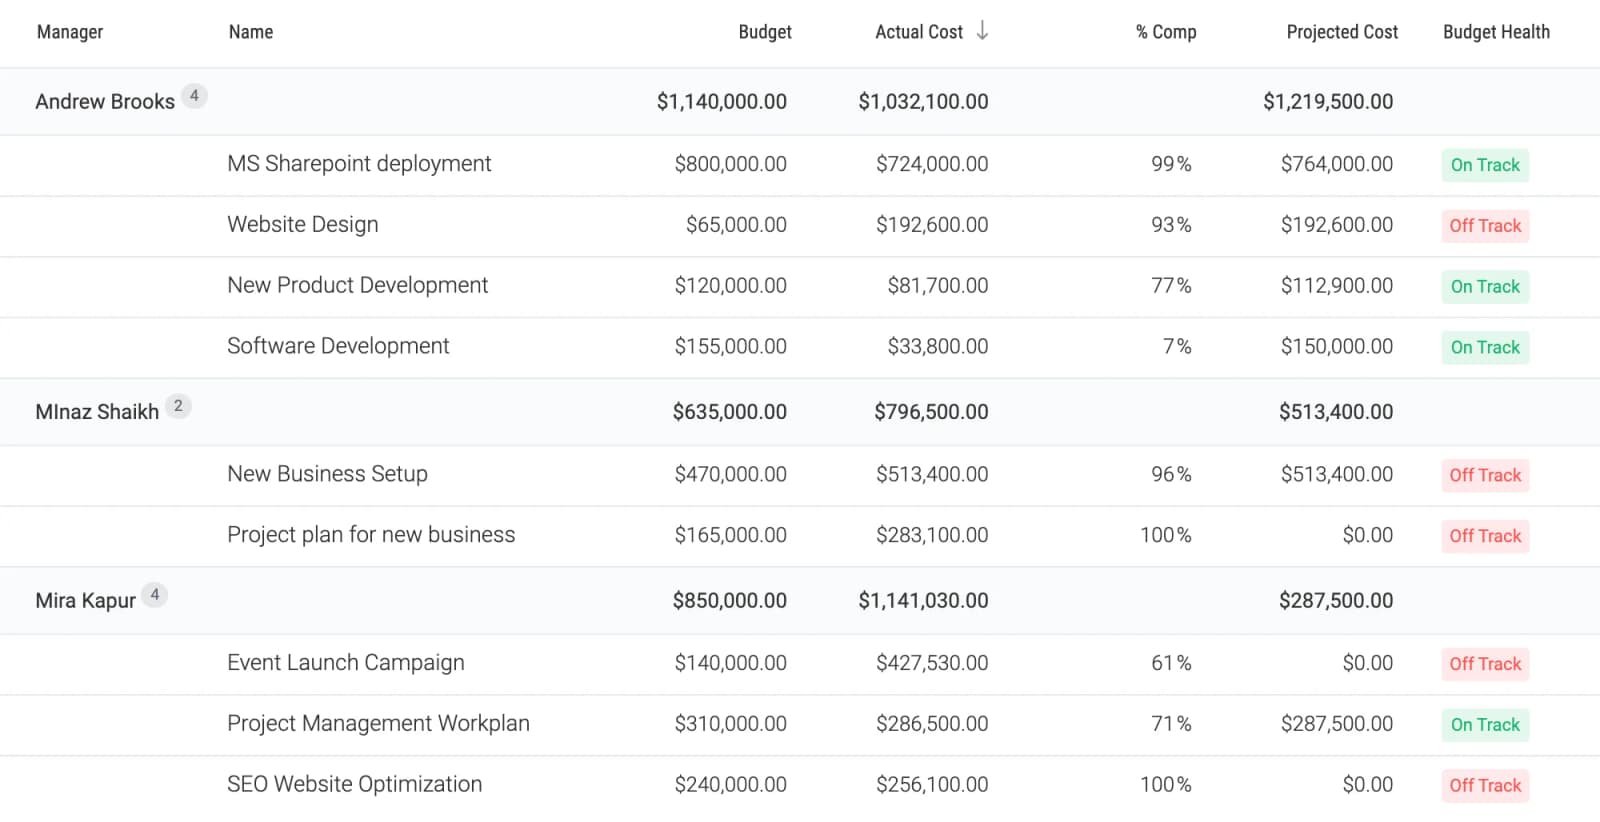
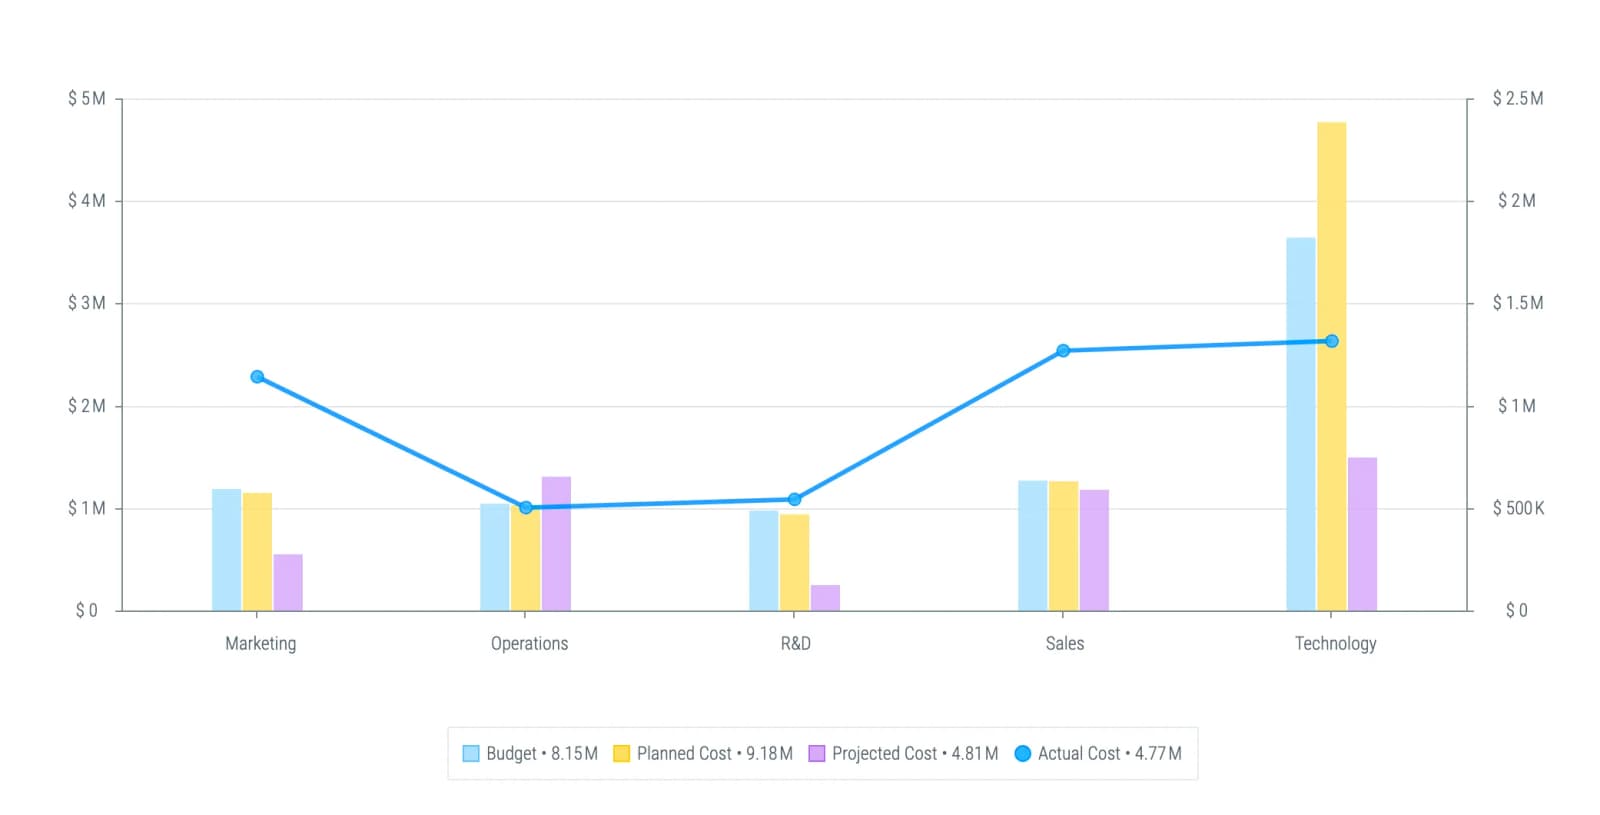
The sample reports shown below demonstrate the power of our reporting.
Budget Tracking
Cost Performance by Division
Cost S-Curve
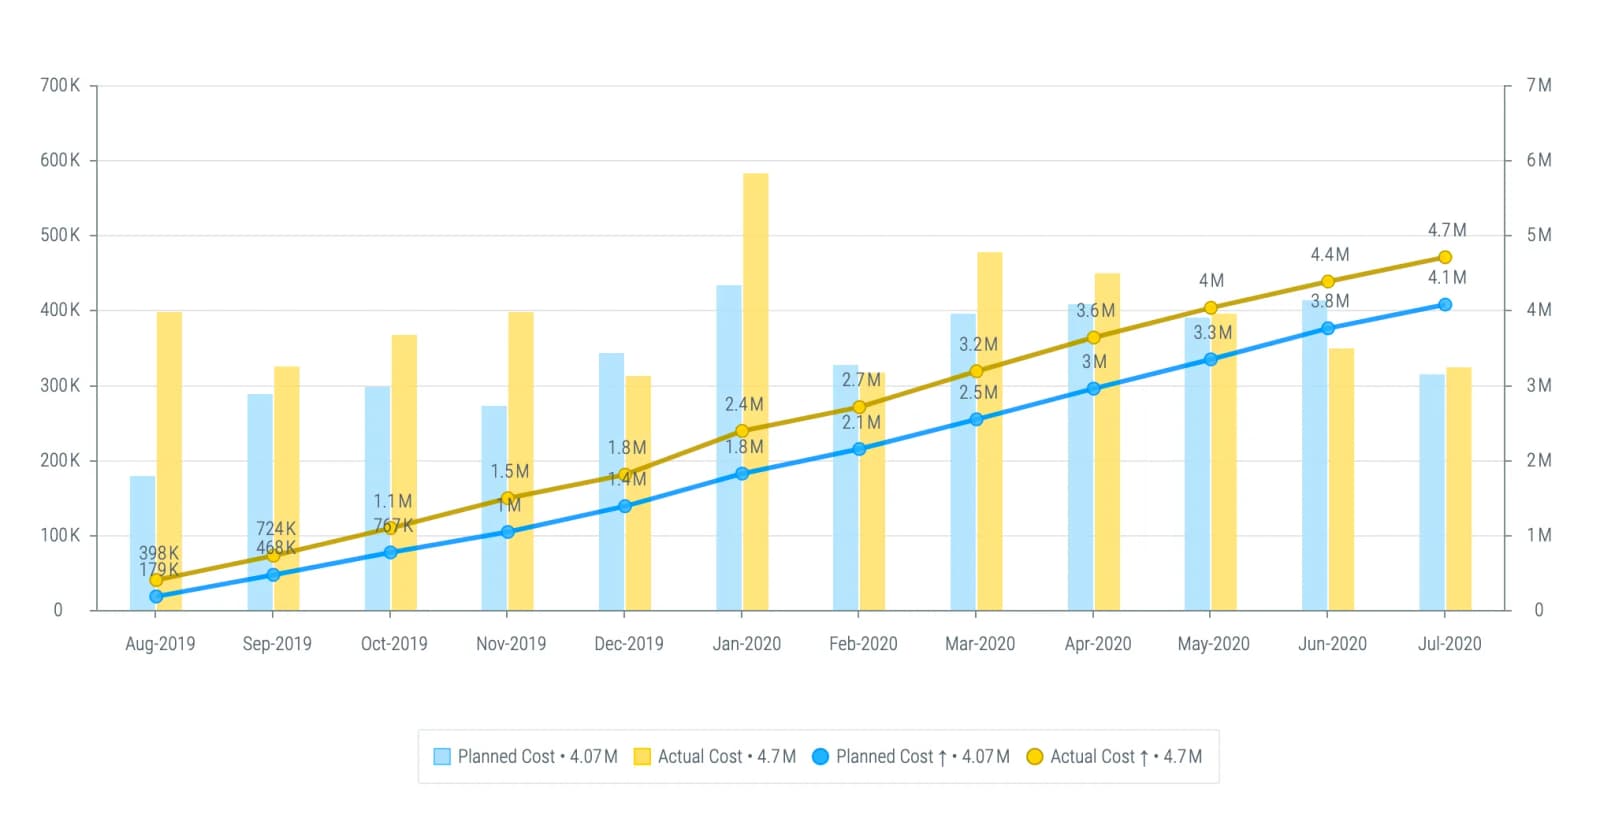
Monthly Cost Breakdown
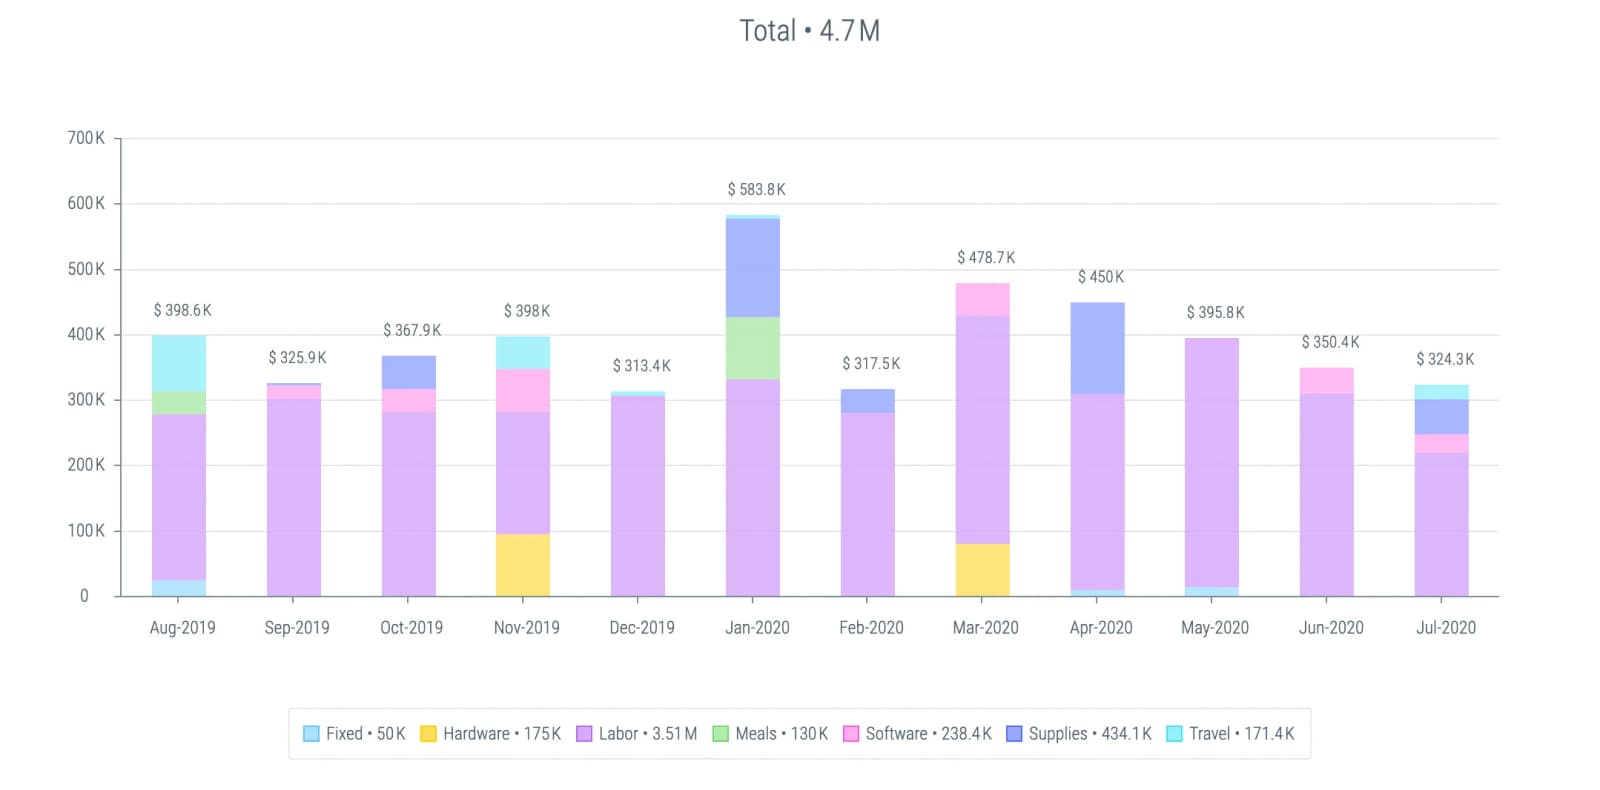
Revenue Performance by BU & Manager
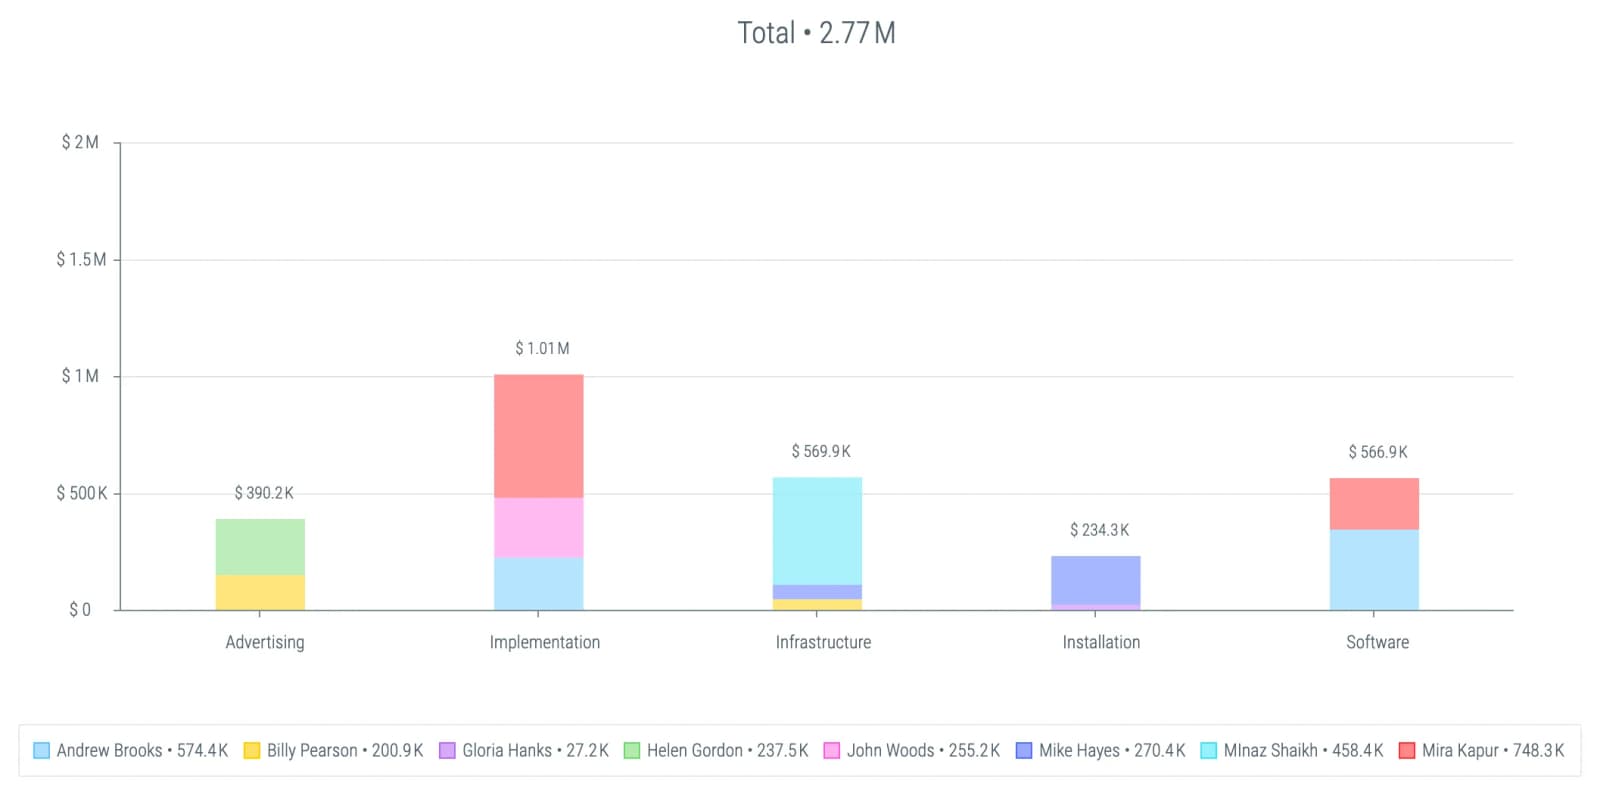
Product Roadmap
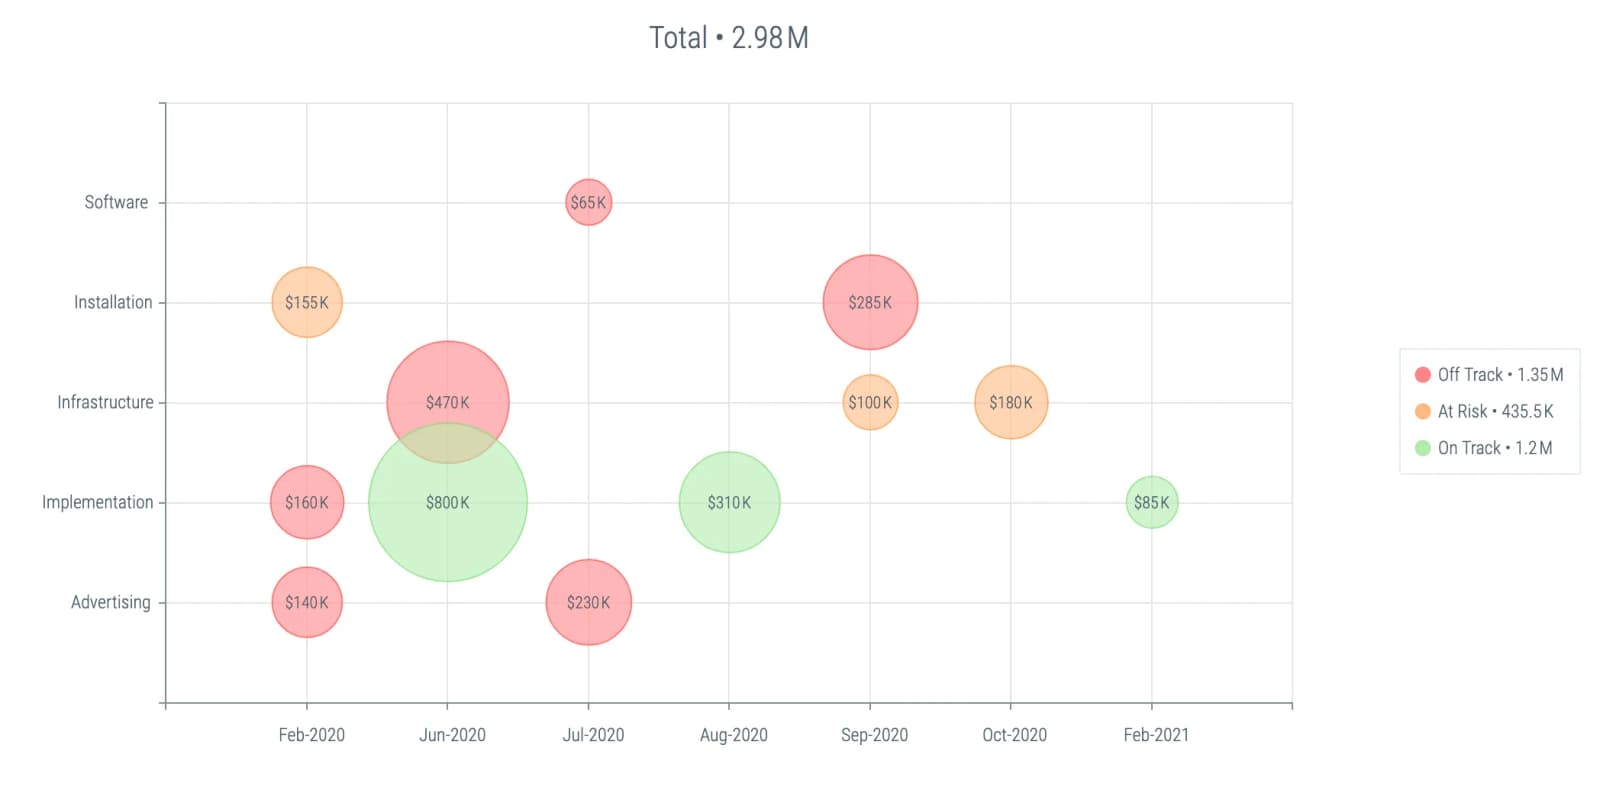
L. Getting Help
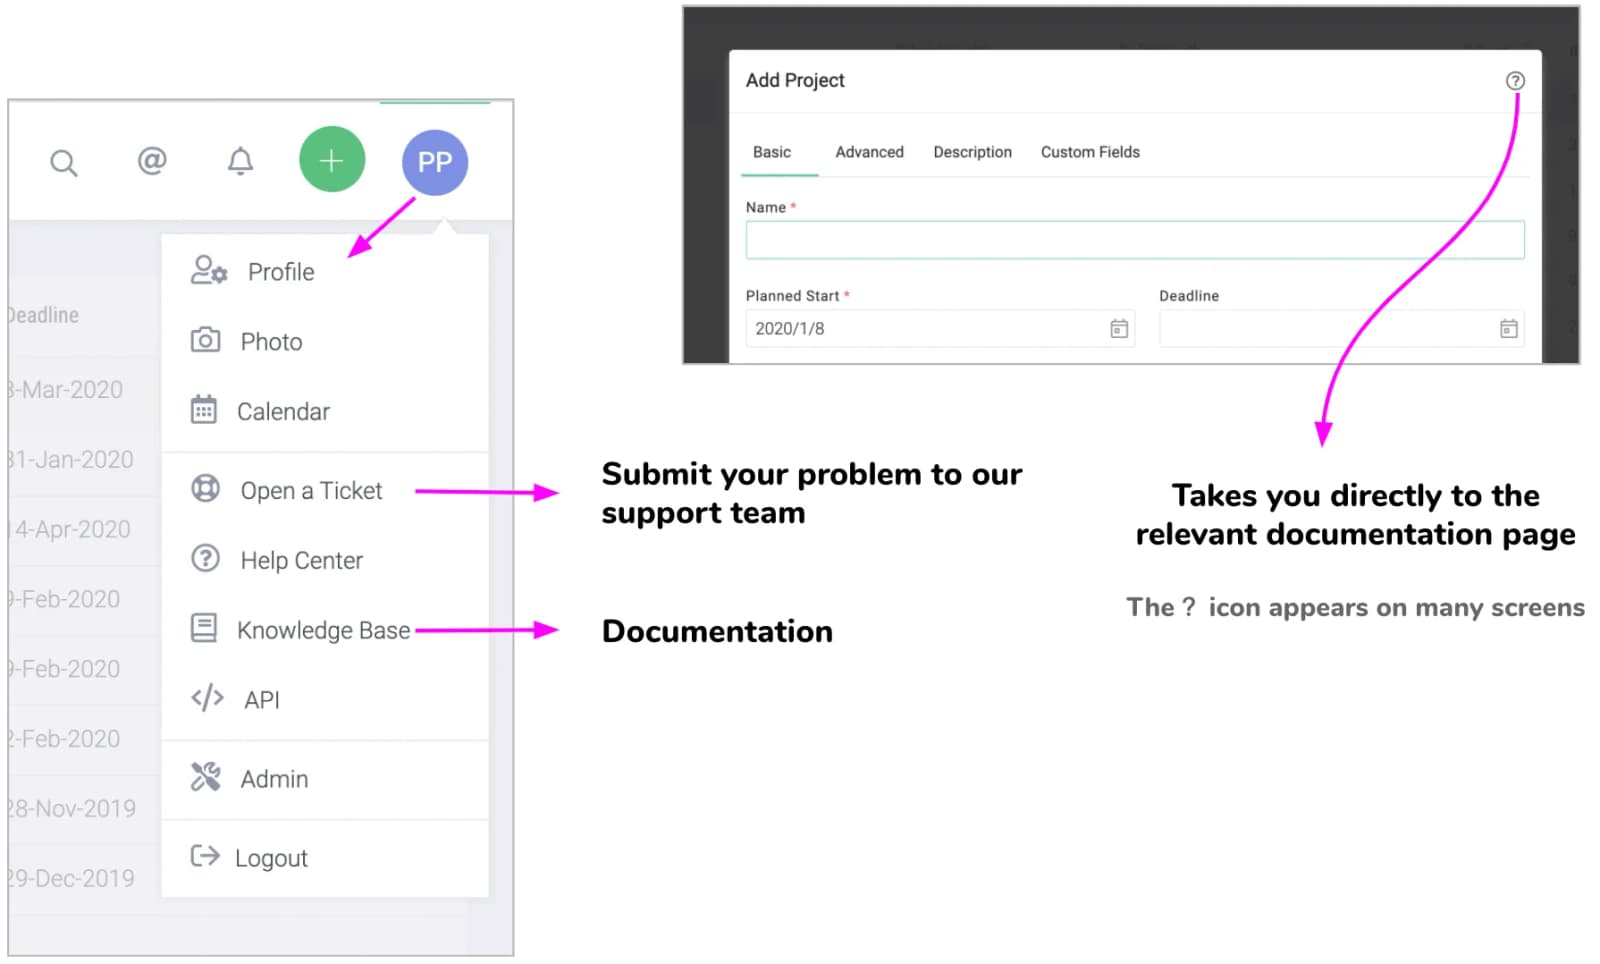
Context sensitive help is available on many pages that will directly take you to the documentation for that topic. Watch out of the icon as shown below.
To ask our support team a question or to go to the documentation portal, click on the appropriate items in Main Menu.
Getting StartedHow-To
Getting Started — for admins
This quick start guide will help you understand how to:
- Turn off unwanted features
- Configure account settings
- Configure password policies
- Customize project settings
- Set up work calendars
- Enter your holidays
- Customize project types
- Add custom fields
- Set up dashboards
- Customize Kanban lanes
- Configure time tracking
- Add users
- Add clients
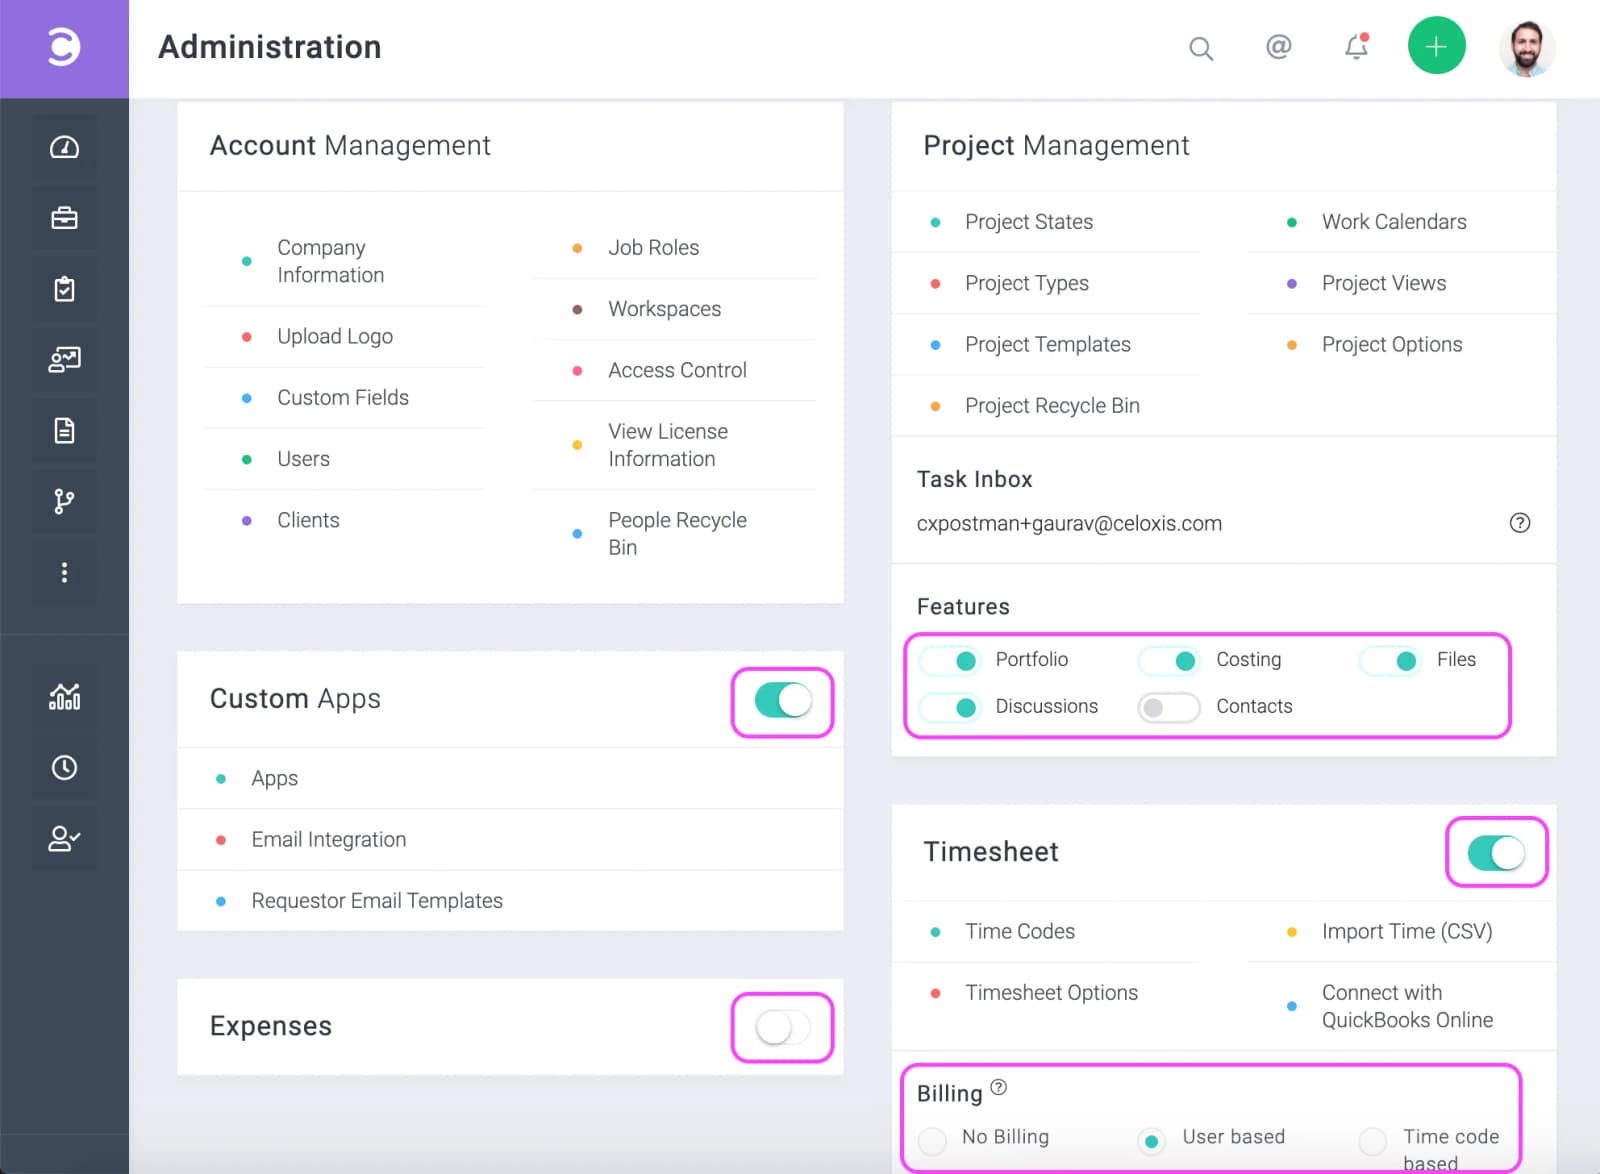
A. Turn off unwanted features
When you turn off features that you do not plan on using, related buttons and menus are not shown to users in your account making the user interface easier to use. To do this go to Main MenuAdmin. Then, switch the features on or off as shown below. In the following image, Expenses and Contacts functionality has been turned off.
B. Configure account settings
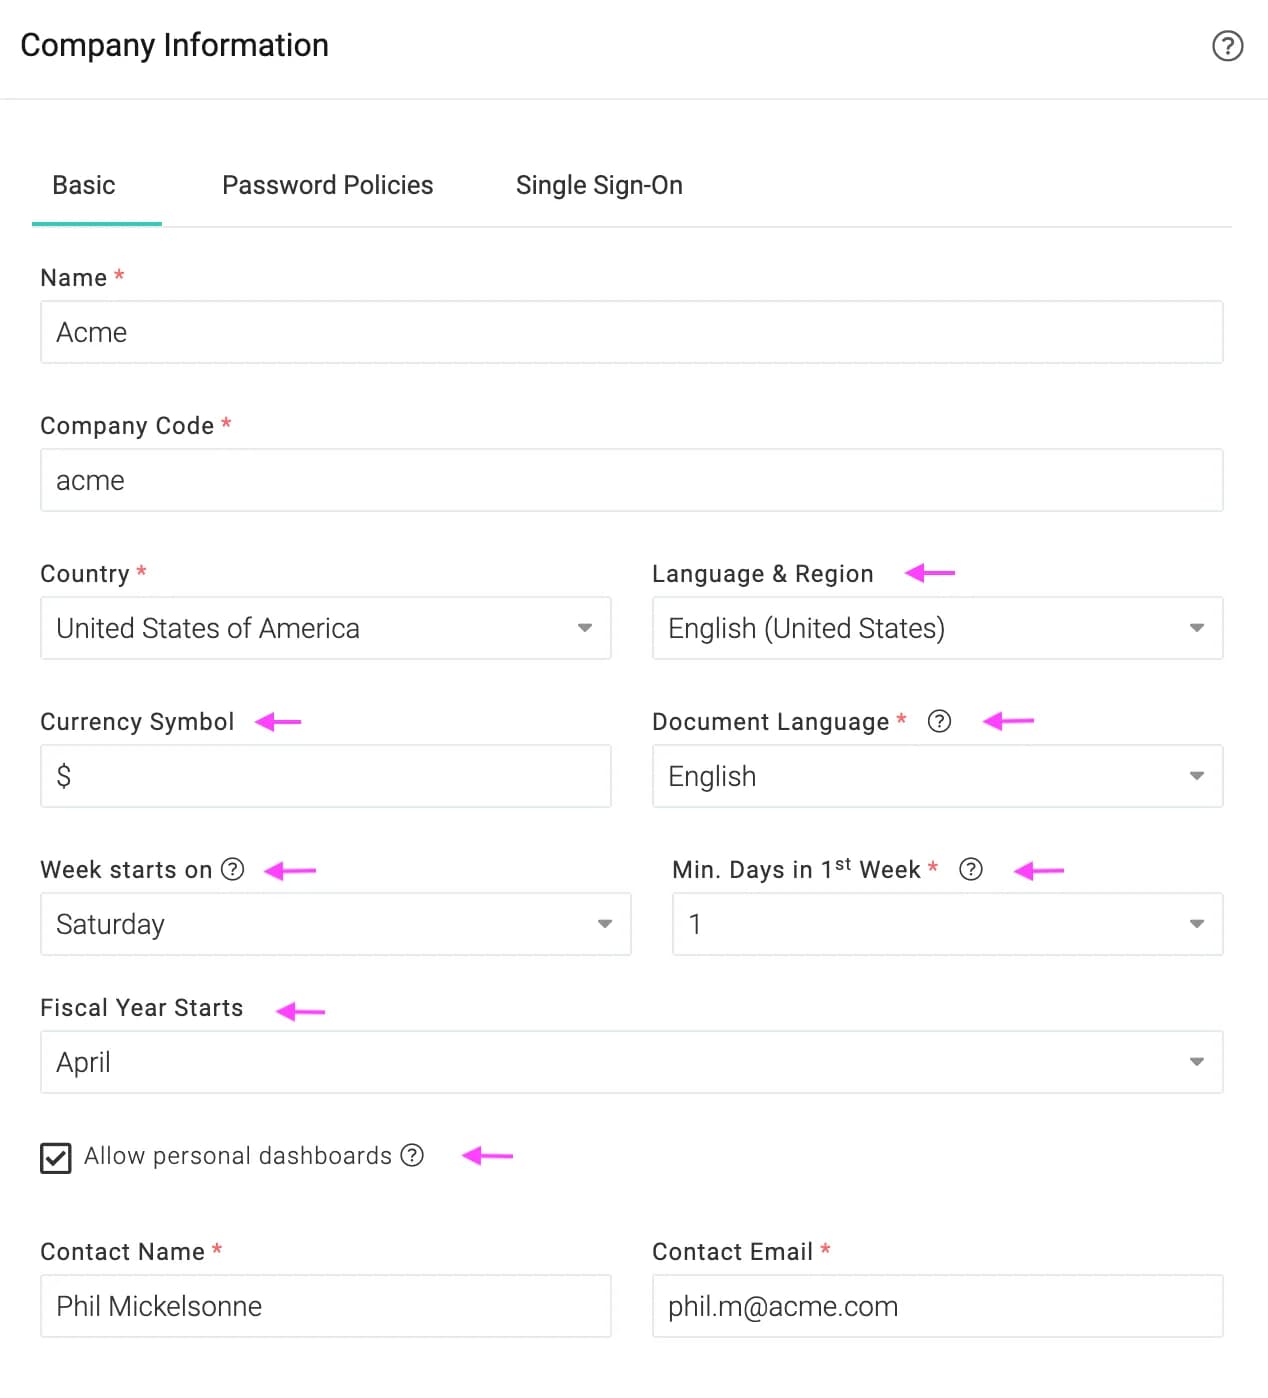
A number of organization widget settings are used while display various user interface widgets like calendars or while displaying reports. Configure the options highlighted in the image below by navigating to Main MenuAdminAccount ManagementCompany Information
C. Configure password policies
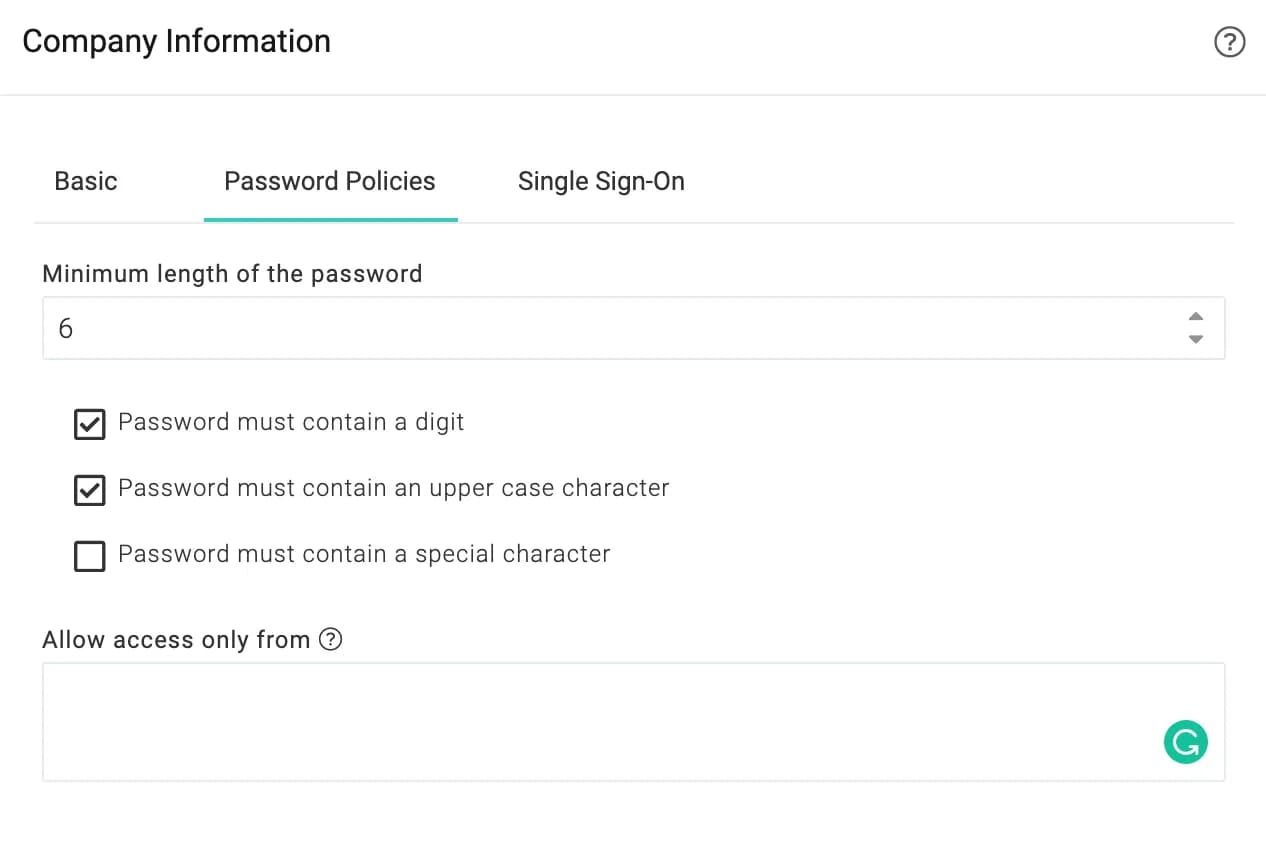
You can configure login settings by navigating to Main MenuAdminAccount ManagementCompany Information and then clicking on the Password Policies tab.
if you use single sign-on, then we recommend that you first get a feel for the software and turn the single sign-on functionality on later.
D. Customize project settings
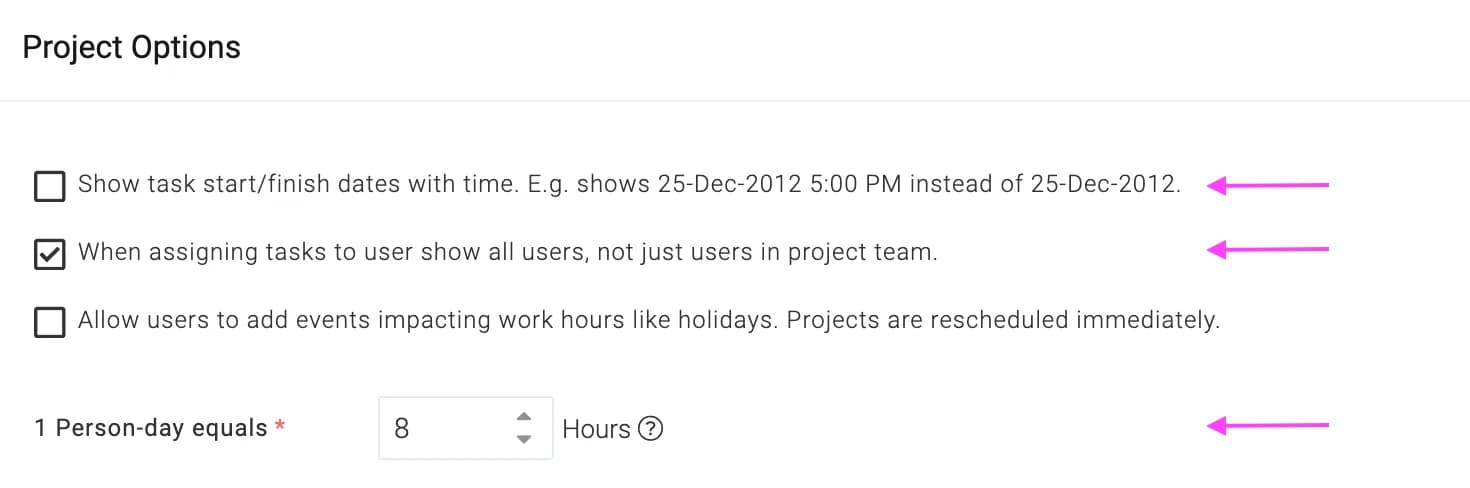
You can customize some basic project management settings by going to Main MenuAdminProject ManagementProject Options. We recommend that you leave the settings as is if you are not sure of your exact requirements.
E. Set up work calendars
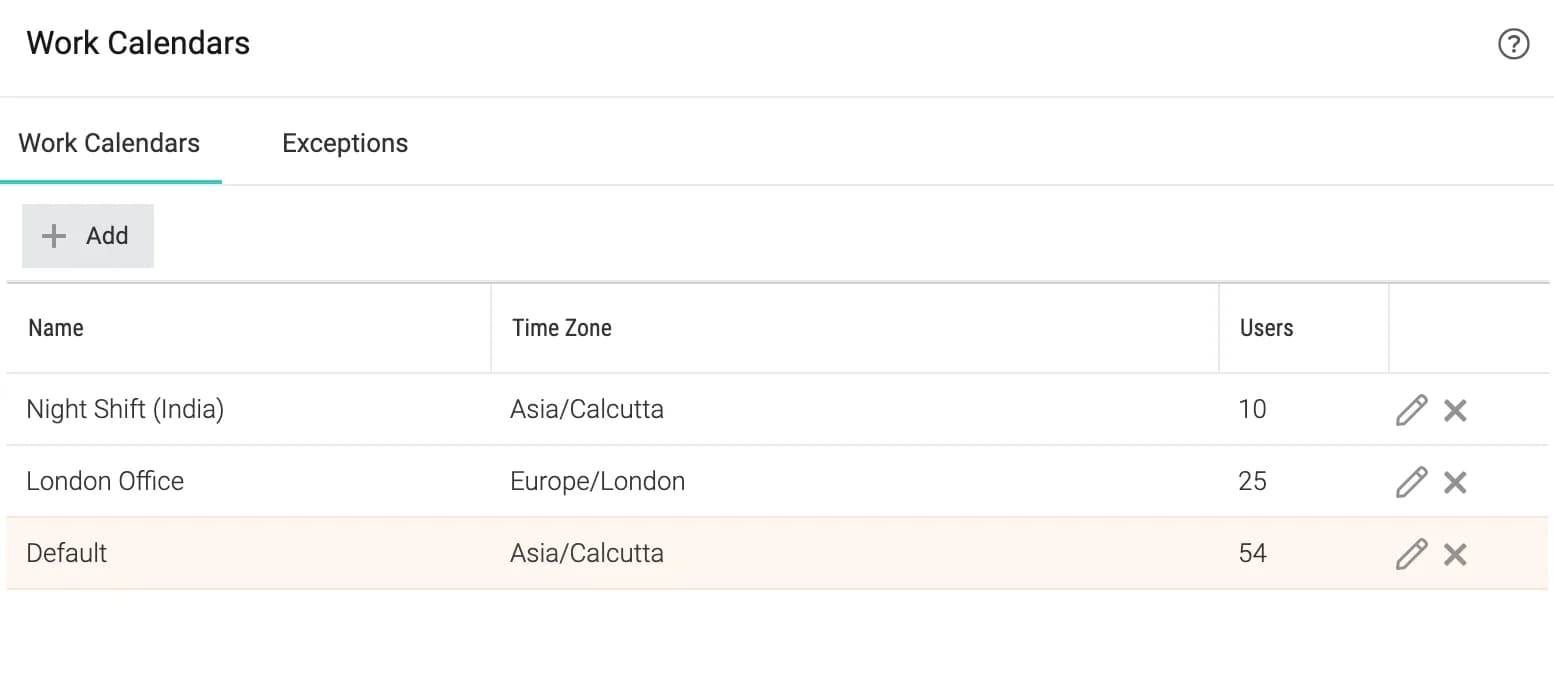
The software has the capability to automatically schedule tasks based on the assignee's work timings and holidays in addition to other parameters like dependencies, constraints, etc. So it is important to set the working timings correctly.
To set up, go to Main MenuAdminProject ManagementWork Calendars. If your users work in different shifts or time zones, create a calendar for each. Name them so it is easy to identify e.g. "Half Day" or "London Office".
F. Enter your holidays
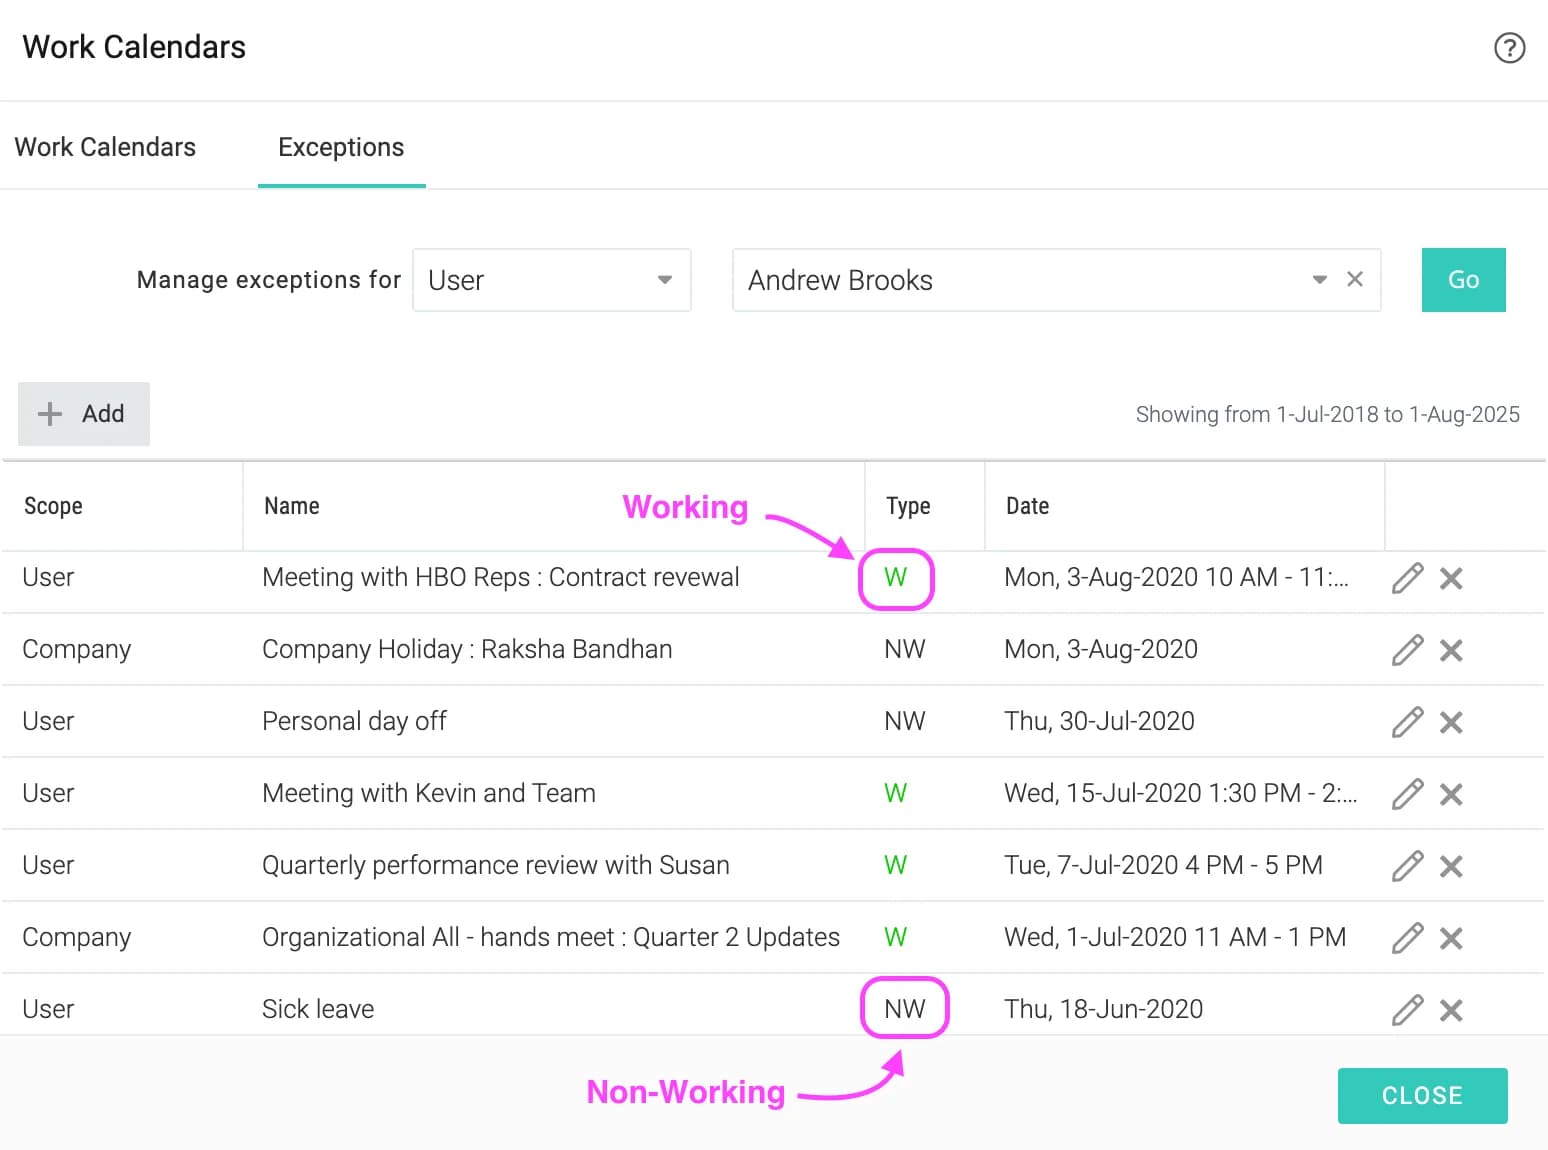
Celoxis will schedule tasks taking holidays into consideration. Holidays can be entered for every one (e.g. Christmas), or for specific work calendars (e.g. 4th July - only for U.S. calendars), or for a specific user (e.g. Joe is on leave from 10th March 2020 to 20th April 2020).
To enter holidays, go to Main MenuAdminProject ManagementWork Calendars and then click on the Exceptions tab.
G. Customize project types
Project types help categorize projects that help you in filtering and reporting. You can also attach different custom fields to different project types. To input your project types, go to Main MenuAdminProject ManagementProject Types.

H. Add Custom Fields
You can create a number of custom fields for projects, tasks, users, issues, risks, etc. Celoxis supports a varierty of custom fields like text, single select, multi select and more. You can even create formula fields.
A number of custom fields have already been created. To edit them or create your own, go to Main MenuAdminAccount ManagementCustom Fields.
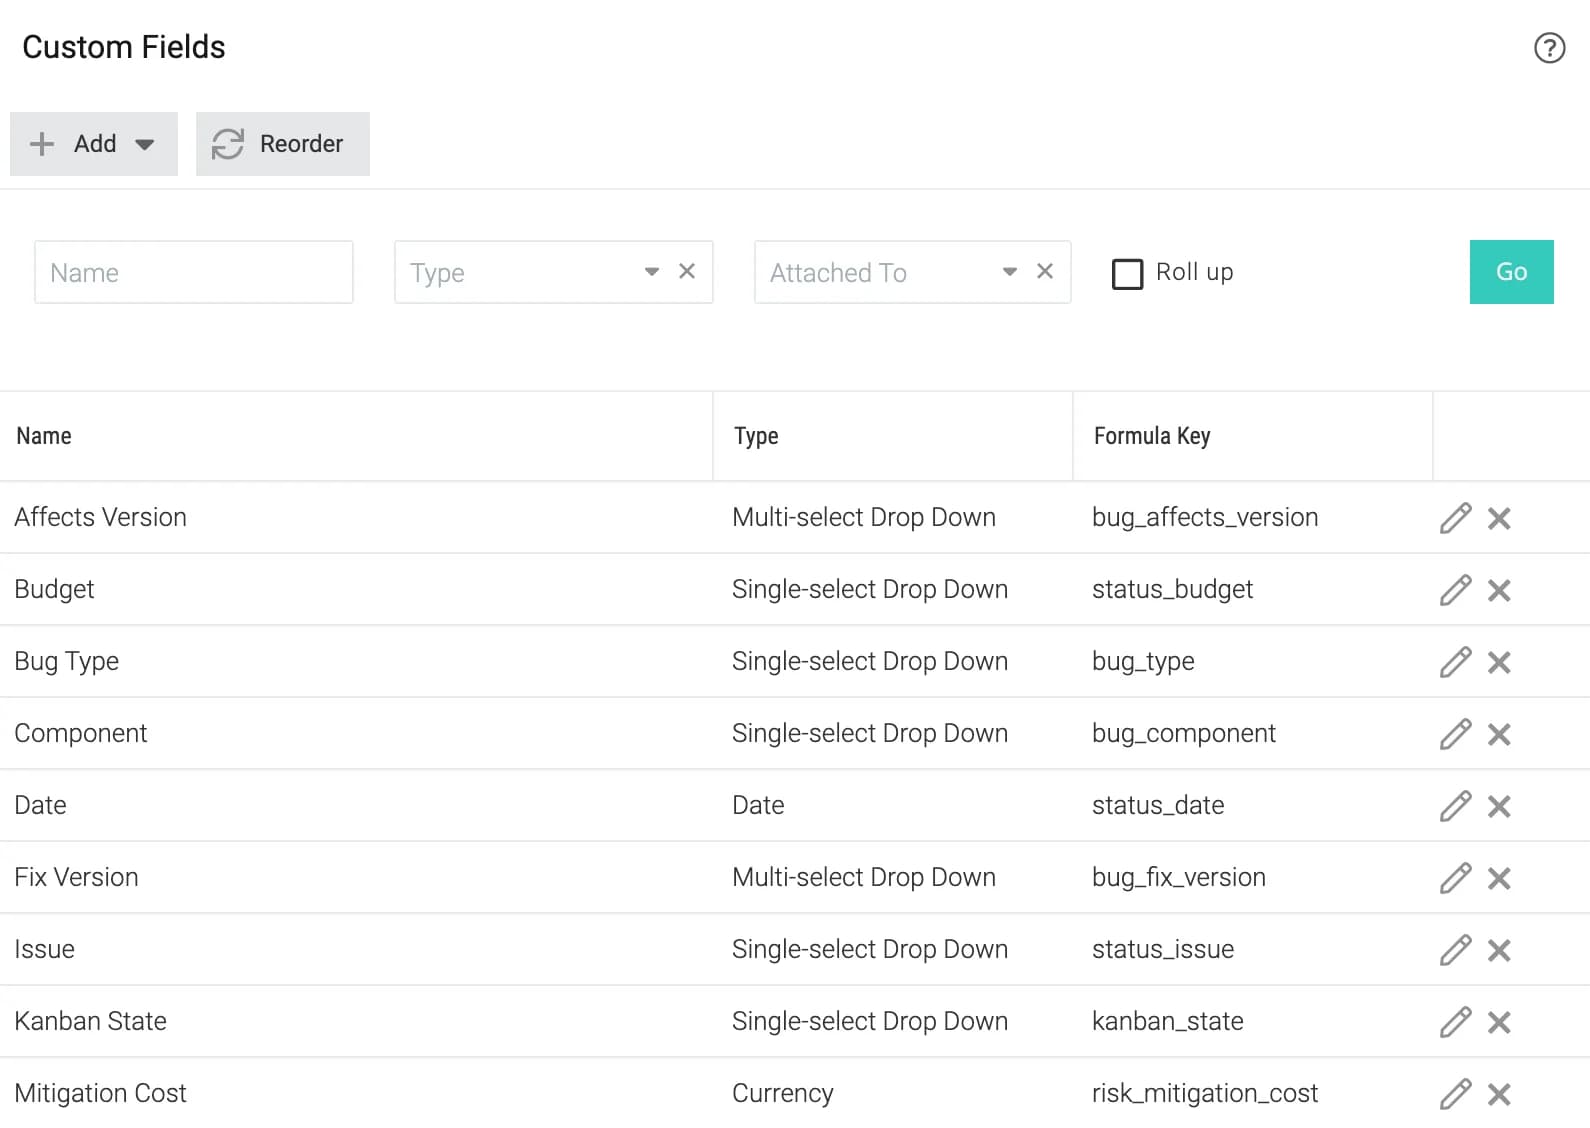
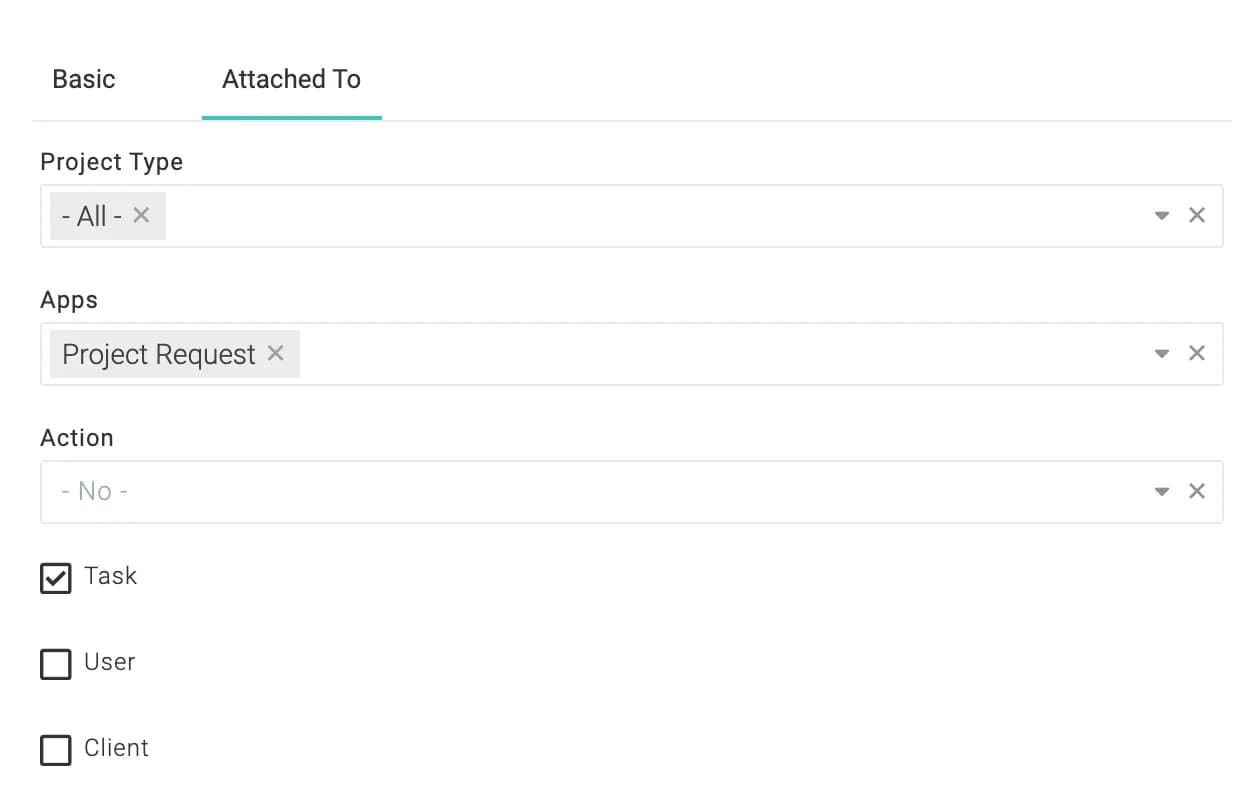
You can attach the same custom field to multiple types. For example, the following custom fields is available for all project types, the "Project Request" custom app and tasks. To change, click on the icon in the list as shown above.
J. Set up Dashboards
Before you add users, you should prepare dashboards for them. We have already created a few dashboards for managers, executives and team members. To view and modify them go to Main MenuReportsAll Reports.
For more information, refer the dashboard section in the getting started for users guide.
K. Customize Kanban Lanes
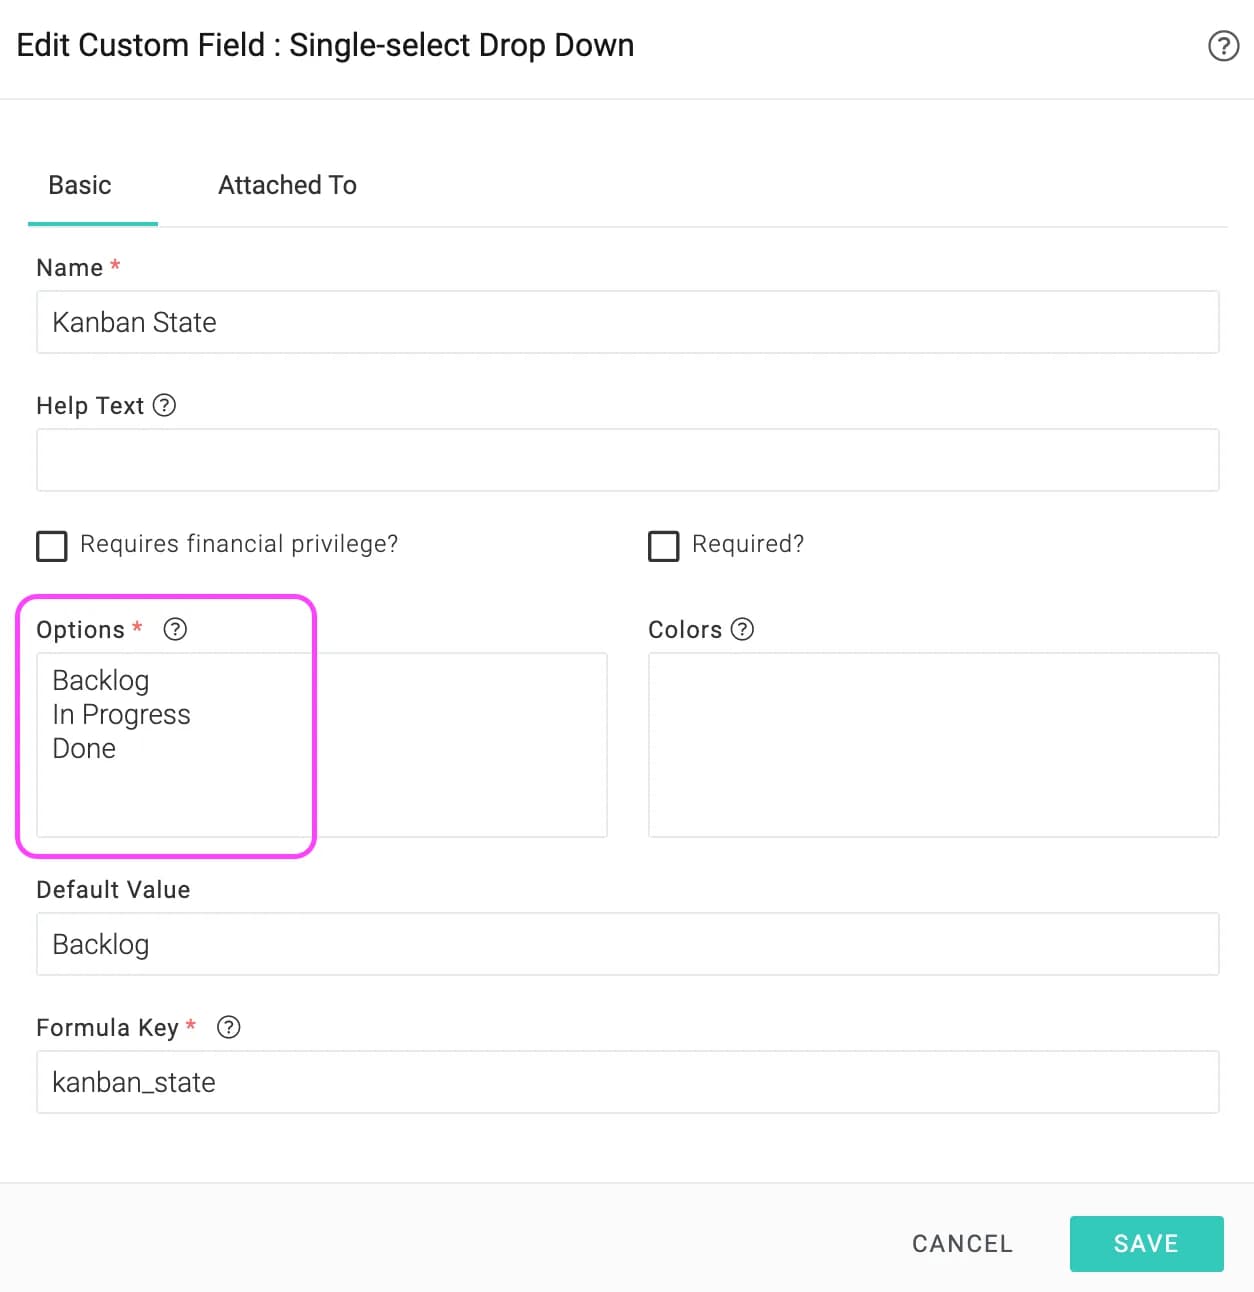
If your organization uses a Kanban like view to track tasks, you should configure your lanes if required. We provide the three most common lanes: Backlog, In Progress and Done..
To change, go to Main MenuAdminCustom Fields and click on icon besides Kanban State field and change the options to the ones you need.
L. Configure Time Tracking
Celoxis provides a comprehensive, flexible and customizable time tracking module. Setting it up is easy.
Time Codes
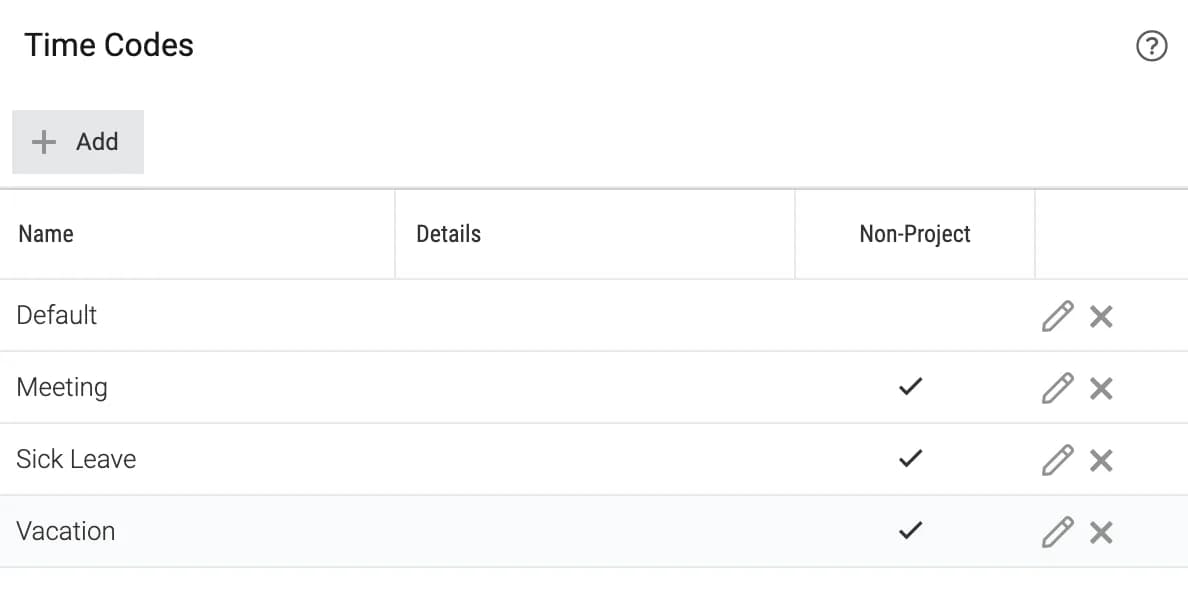
If you do activity based billing, or if you want to categorize time logs, you should customize this list by going to Main MenuAdminTimesheetTime Codes.
Billing Model
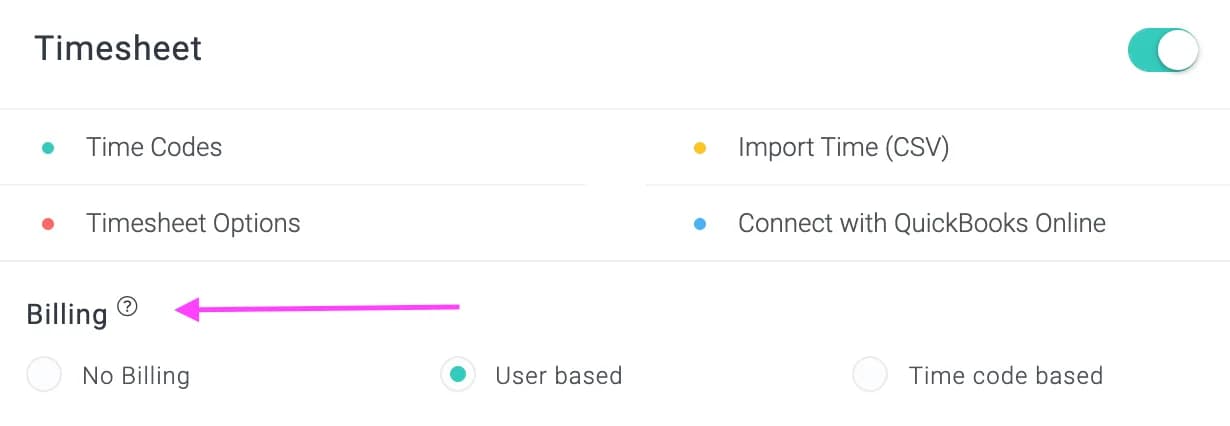
Celoxis provides you the option of turning billing off, or using an activity based billing model where a per hour rate is defined for an activity, or a per user model where a per hour rate is defined for a user. To change, go to Main MenuAdminTimesheet and choose the appropriate option as shown below.
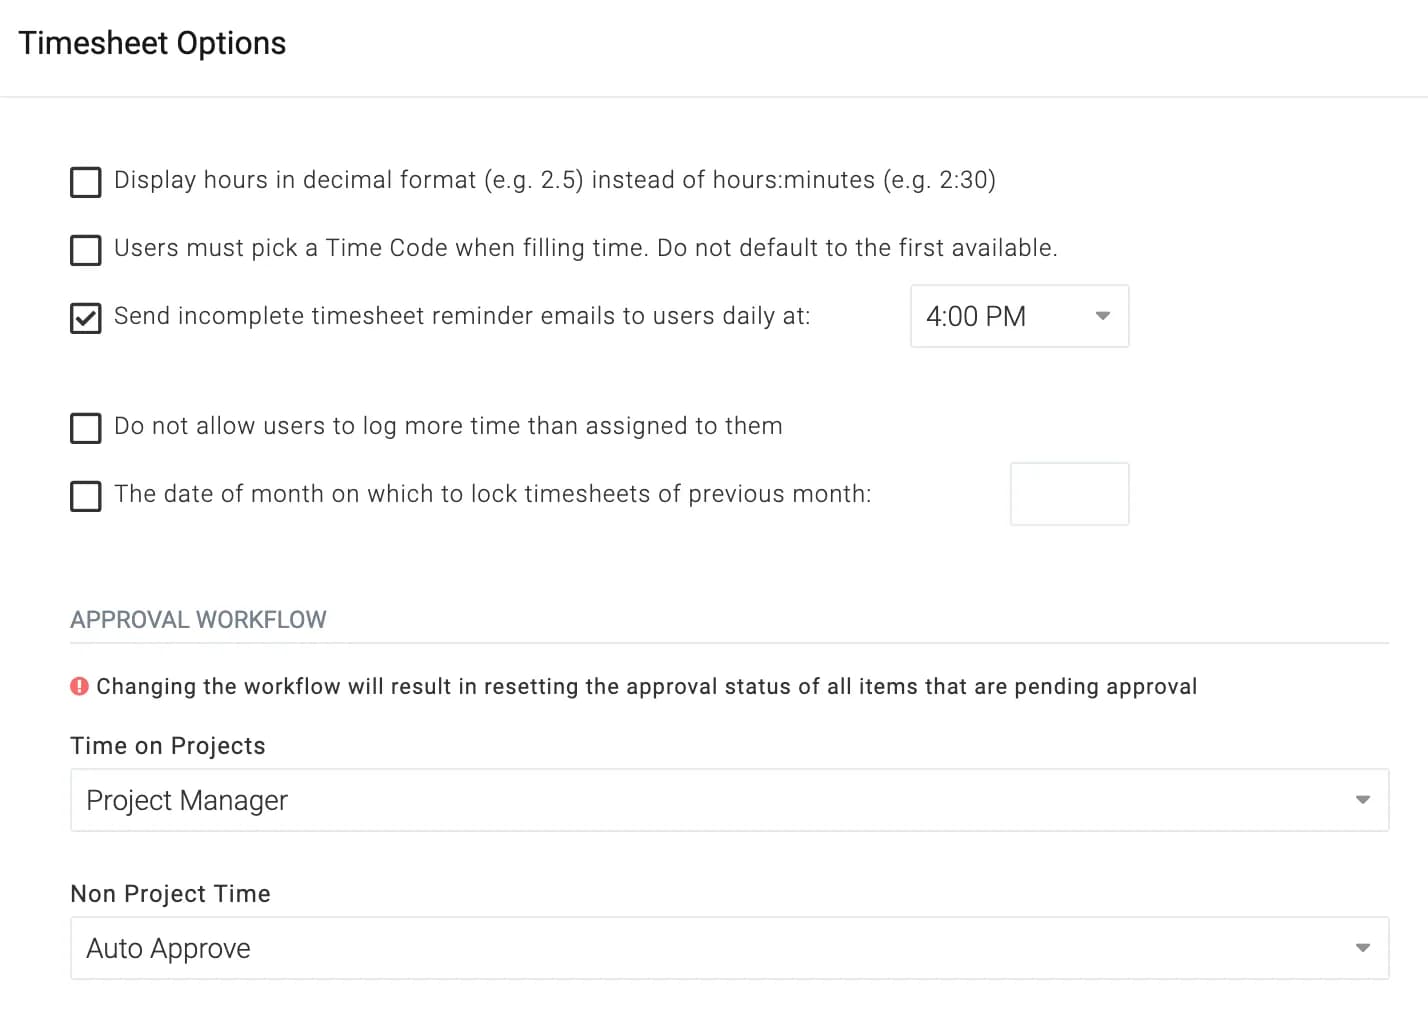
Timesheet Options
Click on Main MenuAdminTimesheetTimesheet Options to customize time tracking as per your requirements. There are many useful options that you should be aware of. If you are not sure, you can always change them later.
M. Add Users
Celoxis allows you to create a user that is "like" some other user – the new user will inherit dashboards, notification preferences, security privileges, etc. thus making it very convenient for you to create similar users.
You can add multiple users in one go by uploading a CSV file. Read More.
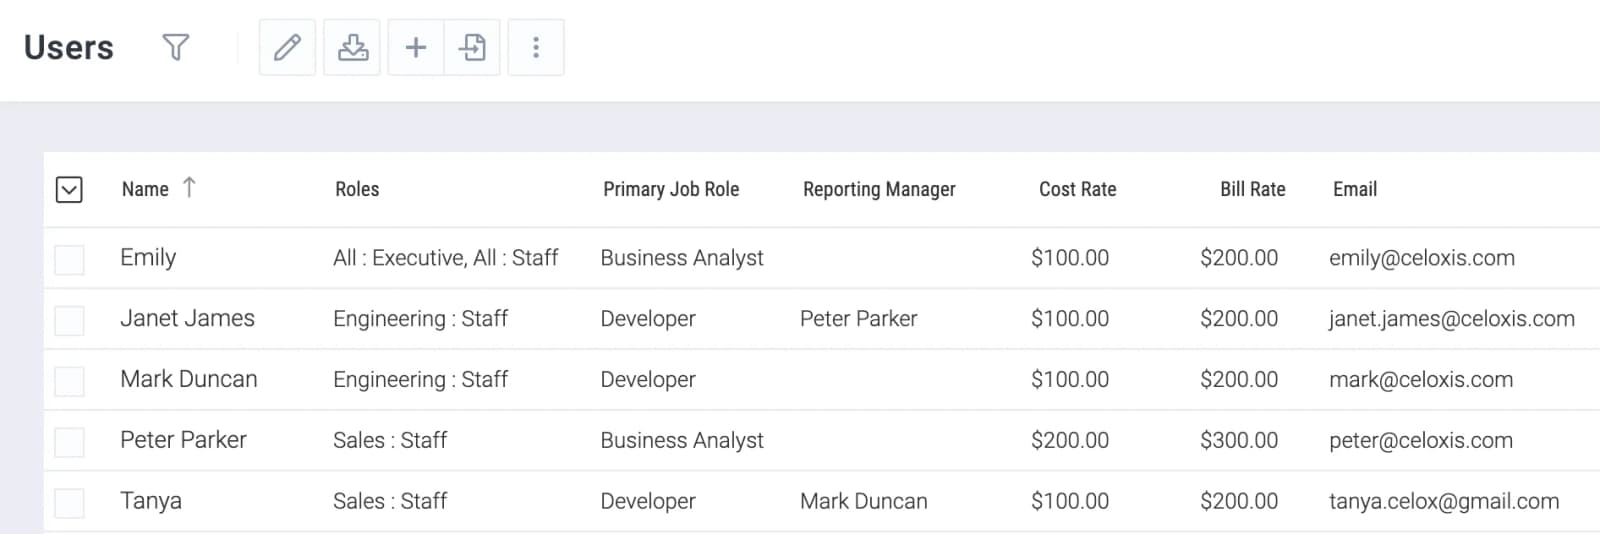
Viewing the user list
Go to Main MenuMoreUsers
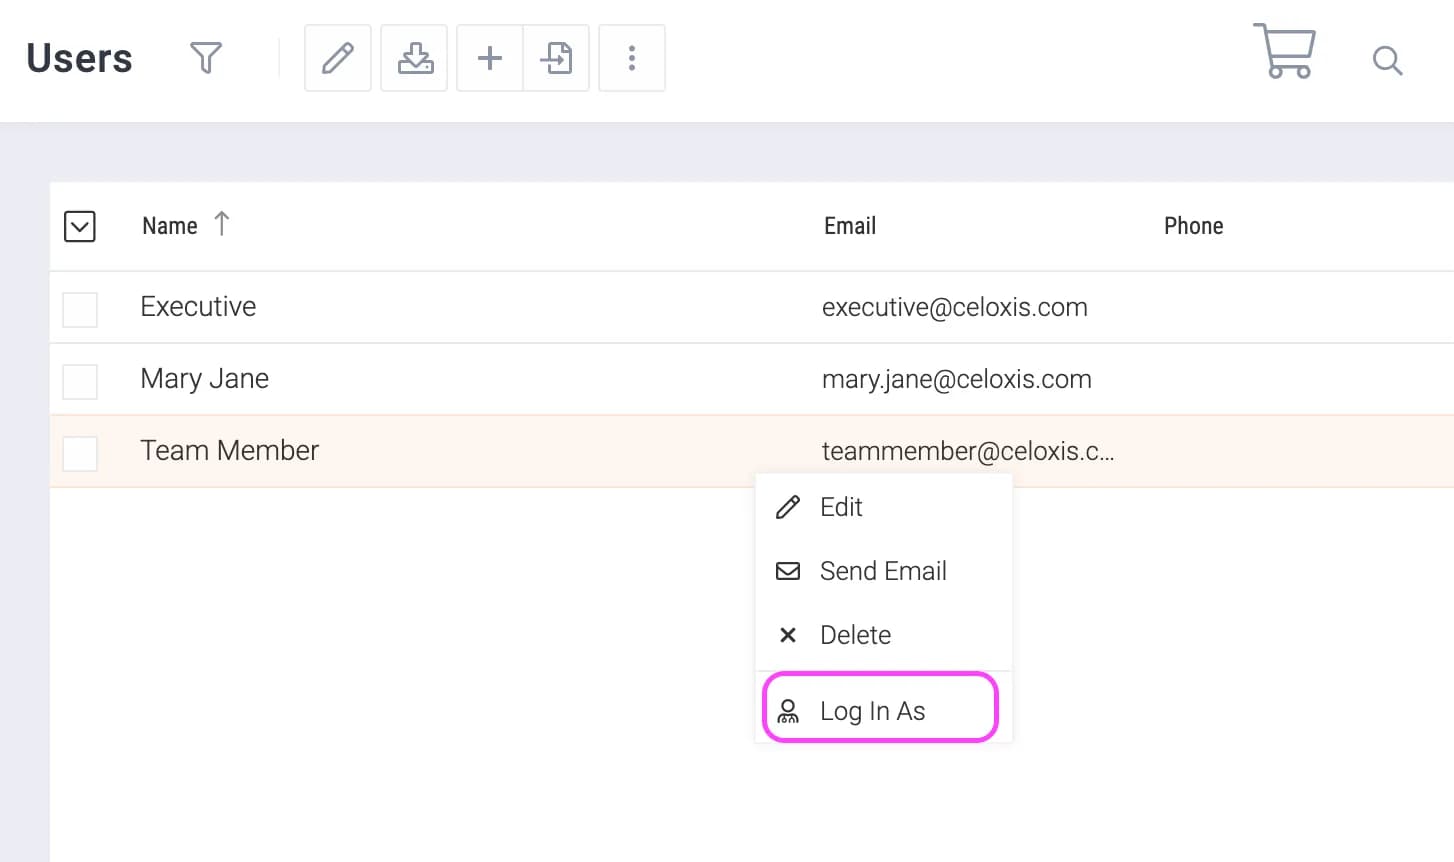
Logging in as another user
To check what any user sees, you can login as that user quickly. Go to Main MenuMoreUsers and click on Log In As for a user as shown below.
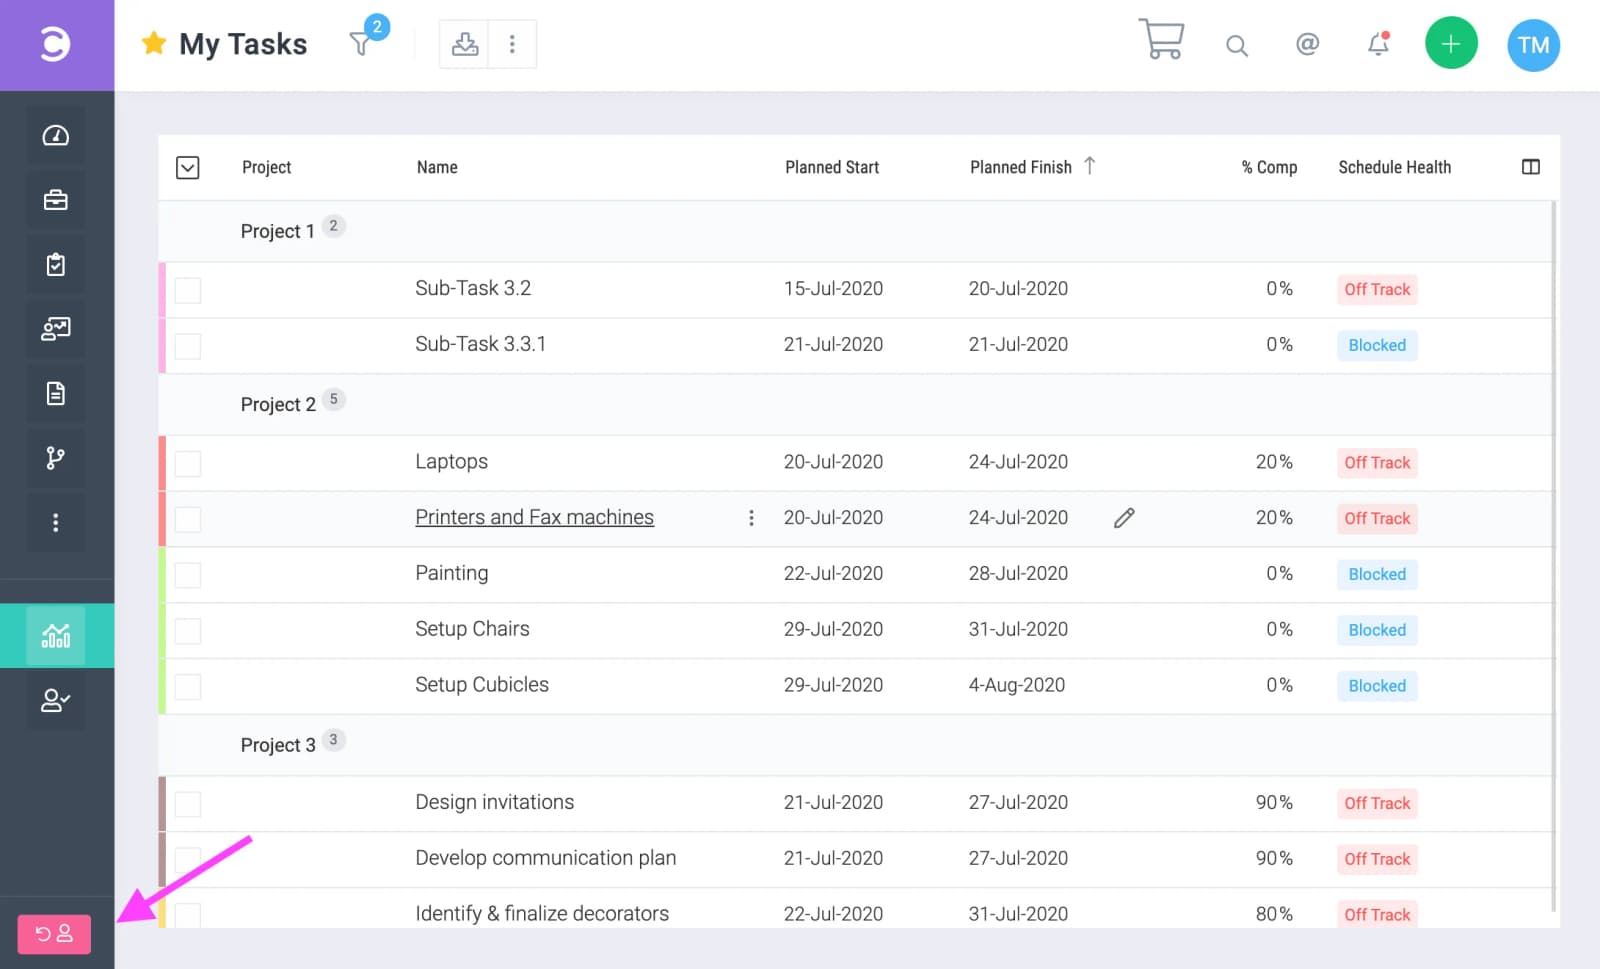
Switching back
To switch back, click on the button as shown below.
N. Clients
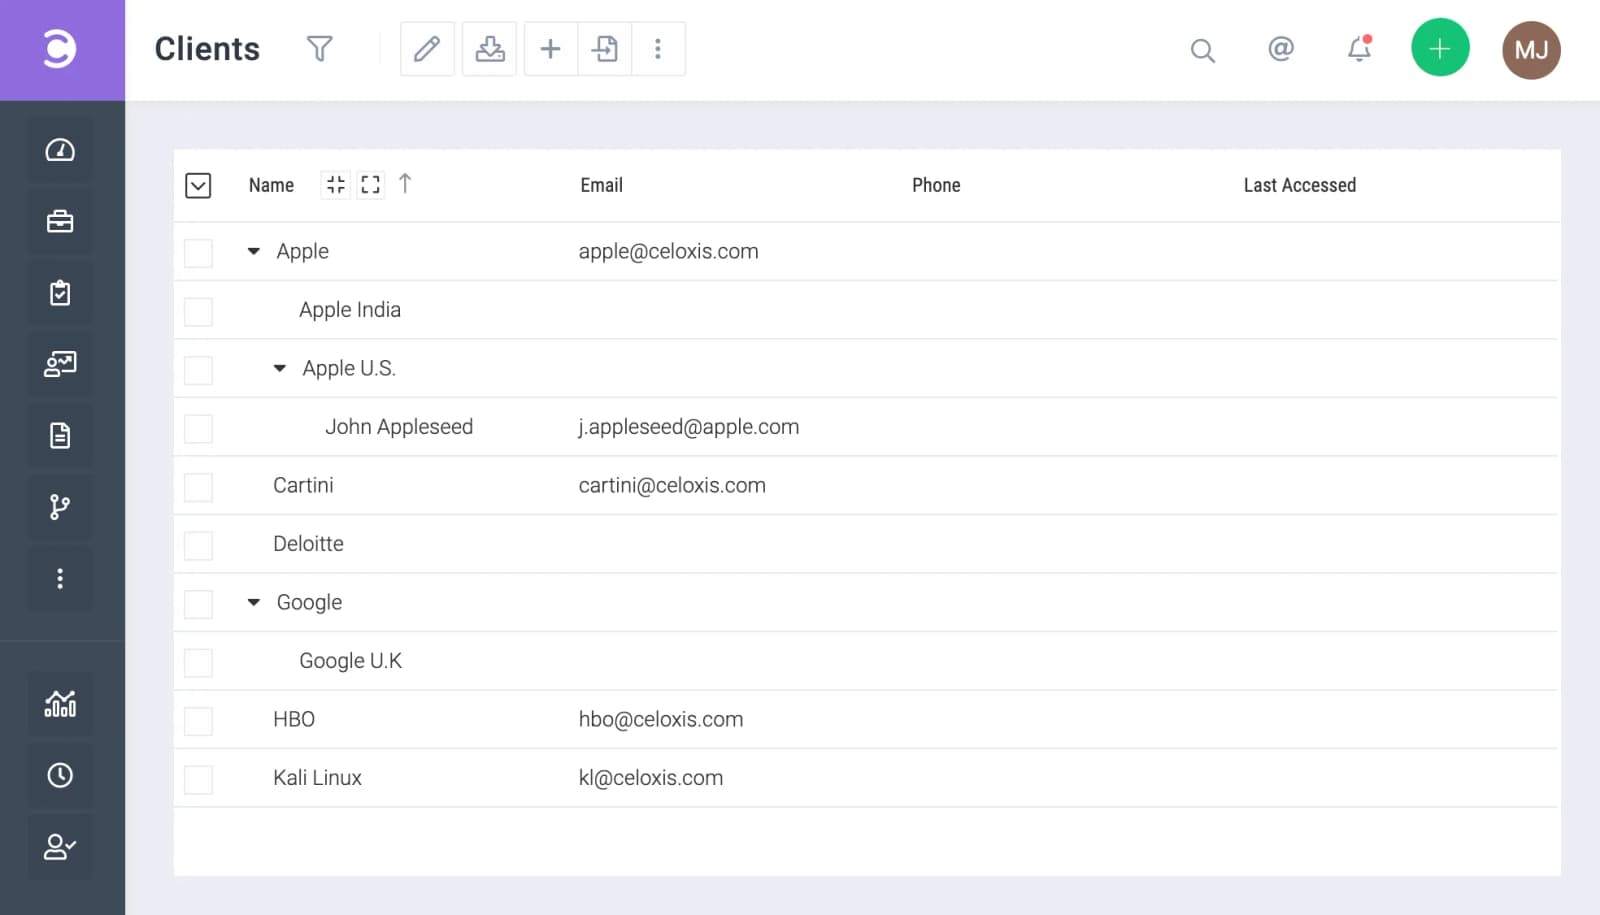
Projects can be associated with clients. You can, optionally, give clients a login and a dashboard so they can access project status and collaborate with your team through the software. To view or add clients, go to Main MenuMoreClients.
Projects
27 articlesConcepts
ProjectsConcepts
Project States
Project states enable you to define and track the project lifecycle from initiation to closure. By default, we provide the following states: Draft, Active, Canceled, On-Hold, Archived; but you can customize them to suit your business.
States also allow you to control some aspects of system behaviour. For example, you could disallow logging time for projects in the Draft and Archived project states.
System behaviour is also different based on the project state's stage.
Stage
Every project state must belong to one and only one of the following project stages: Planning, Execution and Closure. The system will behave differently for projects based on the stage its project state represents as described below:
| RAG Indicators | Email Notifications | New Exceptions Impact Schedule | |
|---|---|---|---|
| Planning | ✕ | ✕ | ✓ |
| Execution | ✓ | ✓ | ✓ |
| Closure | ✕ | ✕ | ✕ |
For example, if you define a project state called Unapproved and set its stage to be Planning, then any project in the state Unapproved will not have RAG indicators nor will it generate email notifications. However, any work exceptions added for work calendars or resources will result in the project plan to be recalculated.
Using project states
A project may belong to only one project state.
Project state can be set on the add/edit project screen under the Custom Fields tab. To modify project state for many projects at once you can use the bulk edit screen.
Project states can also be used in columns, filters, groups, and charts.
Managing project states
Only administrators can manage project states. To manage project states navigate to Main MenuAdminProject ManagementProject States
ProjectsConcepts
Project Templates
If you do projects that are similar in structure, then instead of building your project plan from scratch every time, you can create and save those projects as templates to get a new project up and running quickly.
Using project templates
To create a new project from a template, click on Main MenuProjectUse a Template
Managing project templates
Only administrators can create and manage project templates.
A template can be created from any project. To create or manage project templates, navigate to Main MenuAdminProject ManagementProject Templates
ProjectsConcepts
Project Types
Project types help you categorize your projects. Using our reports, you can get important KPIs like profit, effort and margin aggregated for your project types, thus helping you understand business performance.
You can also setup custom fields specific to your project types to capture relevant business data.
For example, a legal firm may have project types such as Bankruptcy and Patents. Custom fields could be Insurance Company and Loan Number for the former; and Patent number, Patent Sponsor and Patent state for the latter.
Using project types
A project may belong to only one project type.
Project types can be set on the add/edit project screen under the Custom Fields tab. To modify project type for many projects at once you can use the bulk edit screen.
Project types can also be used in columns, filters, groups, and charts.
Managing project types
Only administrators can manage project types. To manage project types navigate to Main MenuAdminProject ManagementProject Types
ProjectsConcepts
Project Clients
Clients are individuals or organizations for whom projects are executed. Associating clients with projects helps in filtering, reporting, charting, and in many other areas.
In addition, you can give your clients access so that they can login to view reports shared with them, engage in online discussions, share files and even participate in business workflows (e.g. bugs, change requests and approvals).
Client access is free.
Client Login
Virtual clients are clients that do not have a username and password. They cannot log in to Celoxis. When you create a client, you can optionally assign it a username and a password. You can also set their login credentials from the edit client screen.
If, at a later time, you wish to withdraw login access, simply blank out the username and password for that client.
To prevent any accidents, clients are not notified about their usernames and passwords. It is up to you to communicate their credentials to them.
Client privileges
Every client account can be configured to have the following privileges:
Allow client to view task information, excluding financial information.: This determines whether clients can view task details. Financial fields (including custom fields) are never shown to the clients.
Allow client to view details of progress update on tasks.: This determines whether clients can view updates and comments on the task.
Allow client to do progress update on tasks.: This determines whether clients can add comments on a task.
If you share reports with your client, then the above privileges override the data shared in reports. For example, if you share a task list report to a client that does not have the Allow client to view task information, excluding financial information. privilege, then that client will see an empty report.
Client Hierarchy
Consider the following scenarios:
- More than one person from a client organization wants to collaborate on a project.
- Your company does projects for different departments (or branches) of a client, but executives want consolidated reporting. For example, your company may do projects for IBM India and IBM France and your CXOs may want a consolidated report for IBM. Also, you don’t want people from IBM India to access IBM France’s projects and vice-versa.
- You want to prevent accidental access of one client to another’s project. For example, you do not want to give CBM access to IBM’s projects because of a typo.
That’s where the concept of Client Hierarchy comes in. Celoxis allows you to create client hierarchies for better reporting, collaboration and access control.
Example
Consider the following clients:
 1    Peter Parker

 2    IBM
 3    ├── John
 4    └── Alisha

 5    Acme
 6    ├── Acme (France)
 7    │   ├── Pierre
 8    │   └── Chloe
      │
 9    └── Acme (India)
10        ├── Ravi
11        └── Suresh
There are a total of 11 clients.
Peter Parker is an individual client. There is no hierarchy.
IBM has two child clients - John and Alisha.
Acme has two child clients - Acme (France) & Acme (India), each having two child clients - Pierre and Chloe for the former and Ravi and Suresh for the latter.
To create this parent-child relationship, use the “Parent” field from the add/edit client screen.
Project Visibility
When you assign a project to a client, it is visible to that client and all its descendants. Continuing with the above example:
| If project's client is... | It is visible to... |
|---|---|
| Peter Parker | Only Peter Parker |
| IBM | Alisha and John |
| Alisha | Only Alisha |
| Acme (France) | Pierre and Chloe |
| Acme | Acme and everybody under it |
Setting project clients
You can set a project's clients from the project's add/edit screen or from project bulk actions. The first client becomes the project's primary client
Clients Reports and Dashboards
You can share reports and dashboards with clients. You can share tabular, pie charts, bar charts and many other views of reports. For more information, read the chapter on dashboards
To share it with a client, select the client in the Visible to Clients field in the add/edit report form. If you pick the All option, the report will be shared with all clients.
You can also control which project tabs are visible to clients in a similar way. Navigate to Main MenuAdminProject ManagementProject Tabs, edit the view and select the clients as described above.
For more information on report and dashboard sharing, read the chapter on report sharing.
Note that clients can modify filters that are marked as promptable in the report's filter tab.
Financial data is never displayed to clients even if those columns are accidentally selected.
Client Actions
Clients can actively collaborate through the system increasing transparency and reducing duplicate work. It also helps maintain an audit trail and ensures things don't fall through the cracks.
| What a client can do | Requirement |
|---|---|
| Start a new project discussion | The project is visible |
| Reply in a discussion | The discussion has the Share with client option checked. |
| Attach file to a project | The project is visible. |
| Attach file to a task | The task is visible. |
| Initiate a new workflow | The custom workflow app has the Clients can initiate this app option checked in the app definition. |
| View an existing workflow | The client is the requestor or the current assignee. |
| Perform a state transition | The client is the current assignee. |
| Add comment to a workflow | The client is the requestor or the current assignee. |
| Add comment to a task | The task is visible and the client has the Allow client to do progress update on tasks. privilege in its settings. |
Viewing clients
Clients can be viewed by admins and those users having the View Client privilege.
To see the client list, from the LHS menu click on MoreClients
Creating clients
Clients can be added by admins and those users having the Add Client privilege.
To add a client"
- Click on Main MenuClient
- In the Basic tab:
- Fill in Name, Email, and Phone number.
- If the client account is part of a hierarchy, enter the parent.
- If you do not wish the client to have a login, enter login and password, click on the virtual checkbox.
- Assign appropriate privileges.
- In the Custom Fields tab, fill in the appropriate custom fields.
- In the Preferences tab, select the appropriate locale, date formats and dashboards.
- Check the Add another check box if you wish to add more clients.
- Submit
Importing Clients from CSV
Celoxis provides you with the ability to import clients from CSV. If you have a Microsoft Excel file, then you can export it in CSV (comma separated values) format and then import it in Celoxis.
To import clients, go to the clients page – Main MenuMoreClients and then click on the Import button. Upload the client in the format described below.
Fields supported:
- Name - mandatory
- Phone
- Username - the login name.
- Password - the plain text password.
- Virtual -
falseortrueto indicate whether the client can login or not respectively. - Custom Fields - you will have to create the fields in Celoxis first
Clients are
notified of their login accounts.
Deleting Clients
To delete a client, click on that client and from the actions choose Delete.
When a client is deleted, all its sub-clients are deleted as well. Data like projects, tasks, issues, files etc. is not deleted.
If you accidentally delete a client, you can go to Main MenuAdminPeople Bin and restore that client.
ProjectsConcepts
Project Team
A project team is a set of users who work on a project. The main advantages in defining a project team are:
- Convenience - you will see only the users in your project team while assigning tasks to users.
- Security - you can assign special privileges to users in the project team. For example, you can configure the system such that any user in the project team can comment on any task in the project.
Defining a project's team
Project team can be set on the add/edit project screen under the Advanced tab.
A few rules to remember:
- Project managers defined for the project are always part of that project's team.
- Users assigned to tasks in a project are always part of that project's team.
Enabling project team capability
To enable the project team capability, navigate to Main MenuAdminProject ManagementProject Options and uncheck the When assigning tasks to users, display all users, not just project team members. option.
For small teams, this capability may be an overkill and is better to disable it.
ProjectsConcepts
Microsoft Project Integration
Celoxis is a great alternative to Microsoft Project. Celoxis' integration with Microsoft Project is one of the most comprehensive in the industry. If you understand how it works, you can achieve a perfect 2-way synchronization with Microsoft Project thus getting the best of both worlds.
Importing from Microsoft Project
You can create a project directly from a Microsoft Project file by clicking on (Main MenuProjectImportX/MSProject) or import tasks into an existing project (Project OptionsImportX/MSProject).
When you import a Microsoft Project file (XML or MPP), Celoxis will import:
- Parent-child relationships
- Dependencies including lead-lag times
- Constraints
- Resource assignments
- The default baseline
What is not imported:
- Calendar options - e.g. hours/day, days/month, etc.
- Resource list
- Custom fields
- Non-default baselines
- Calendars and exceptions
- Time-phased data
Import field mappings
While the field mappings in most cases are self-explanatory (they have the same name in MS Project and Celoxis), some fields deserve a special mention:
| MS Project | Celoxis |
|---|---|
| % Work Complete | % Done |
| Priority | Critical(700+), Major(600+), Normal(500), Minor(400+), Trivial(0+) |
| Task Mode | Manually Scheduled |
Understanding Deviations
Celoxis and Microsoft Project while similar in many ways are different in certain areas (see the list of what is not imported above) and that can cause certain surprises. If dates do not match in Celoxis after importing, ensure that:
- Work calendars and exceptions in MS Project and Celoxis match. Note that MS Project does not support time-zones or fractional non-working times.
- You are not using any of the options or features in Microsoft Project that Celoxis does not import
- You mapped the resources correctly during the import
Exporting to Microsoft Project
When you export a project to Microsoft Project (Project OptionsExportX/MSProject), the following will be exported:
- Parent-child relationships
- Dependencies including lead-lag times
- Constraints
- Resource assignments
- The default baseline
- Work Calendars and Exceptions
- Resources and their individual exceptions
What is not exported:
- Custom fields
- Inter-project predecessors
- Fields that have no corresponding field in Microsoft Project (e.g. workspace, budget, etc.)
- Resource allocation in hours is changed to % because Microsoft Project does not support allocation in hours
Export field mappings
While the field mappings in most cases are self-explanatory (they have the same name in MS Project and Celoxis), some fields deserve a special mention:
| Celoxis | MS Project |
|---|---|
| % Done | % Work Complete |
| Critical(700+), Major(600+), Normal(500), Minor(400+), Trivial(0+) | Priority |
| Manually Scheduled | Task Mode |
| Celoxis Task ID | Number Field 10 |
Understanding Deviations
Celoxis and Microsoft Project while similar in many ways are different in certain areas (see the list of what is not exported above) and that can cause certain surprises. If dates do not match in Microsoft Project after exporting, ensure that:
- Work calendars and exceptions in MS Project and Celoxis match. Note that MS Project does not support time-zones or fractional non-working times.
- You are not using any of the options or features in Microsoft Project that Celoxis does not import
- You have not allocated resources in hours and only used % in Celoxis. Microsoft Project does not support allocation in hours.
ProjectsConcepts
RAG Indicators
RAG stands for Red, Amber and Green. RAG indicators visually indicate the health of projects or tasks with respect to schedule and cost.
Celoxis automatically calculates the RAG indicators for projects and tasks regularly if the project's is in the Execution stage. Otherwise, the RAG indicator is shown as Inactive.
Schedule RAG Indicators
For every project and task, Celoxis automatically calculates its projected finish date based on the current rate of progress once a day. It is the date on which the project or task is likely to finish based on the current rate of progress.
For example, say a task was scheduled to complete in 4 days and after 2 days it is only 25% complete. Celoxis will calculate the projected finish date of the task to be the 8th day instead of the original 4th.
For a project or summary task, its projected finish date is the maximum of the projected finish dates of its leaf-level tasks.
RAG indicators are assigned as follows:
| Off Track | The planned finish date is in the past. |
| At Risk | The projected finish date is after the planned finish date. |
| On Track | The projected finish date is on or before the planned finish date. |
| Done | Task is 100% complete |
| Blocked | Task is scheduled to start but not all its predecessors are complete. |
| Future | Task is scheduled to start in the future. |
| Inactive | Project's state is not in the Execution stage |
Cost RAG Indicators
For every project and task, Celoxis automatically calculates its projected cost based on the current rate of spend once a day. It is the cost the project or task is likely to incur based on the current rate of spend.
For example, say a task's budget is $1000 and it is 25% complete with an actual cost of $200. Celoxis will calculate the projected cost of the task to be the $800 instead of $1000.
For a project or summary task, its projected cost is the sum of the projected cost of all its leaf-level tasks.
RAG indicators are assigned as follows:
| Off Track | Actual cost has exceeded the budget. |
| At Risk | Projected cost exceeds the budget. |
| On Track | Projected cost does not exceed the budget. |
| Inactive | Project's state is not in the Execution stage. |
If budget is unspecified, the planned cost will be used instead while calculating the RAG status.
Calculation of Projections
Calculating projections is a resource intensive operation hence it is infeasible for the system to maintain RAG indicators in real-time.
Celoxis calculates projections once a day on a best effort basis. However, you can ask the system to recalculate projections for a project anytime using ProjectRecalculateStats. You can even recalculate projections for multiple projects using Project Bulk ActionsProjectRecalculateStats from your project list view.
ProjectsConcepts
Work Calendars
A work calendar defines the working and nonworking times for an organization. It specifies the work hours for each work day, the work days for each week, and any exceptions, such as holidays.
You can define many work calendars each with its own time-zone, working hours and exceptions.
Work calendars are used in scheduling tasks.
Using Work Calendars
Every user must belong to one and only one work calendar. Work calendar can be set for a user from the add/edit user screen or from the bulk edit screen.
Every project has a default work calendar. All dates on its interactive Gantt chart are shown with respect to this work calendar's time-zone. The default work Calendar can be set for a project from its add/edit screen.
Managing Work Calendars
Only administrators can manage work calendars. To manage work calendars, navigate to Main MenuAdminProject ManagementWork Calendars
Exceptions (Holidays, Vacations, etc.)
Exceptions are times that are an aberration to the rules defined in the work calendar. Exceptions can be defined for the entire organization (e.g. Christmas holiday), for work calendars (e.g. 4th July holiday only in the U.S.) or for individuals (e.g. Joe is going on a vacation from 3rd to 10th May 2016).
When exceptions are added, modified or deleted, task dates are recalculated. For example, if Mark is sick on a 3rd May and a work exception is entered, all tasks that Mark was supposed to work on 3rd May will be pushed a day ahead.
Working and Non-Working Exceptions
While most exceptions are non-working, you can also enter working exceptions. For example, if Peter is going to work on a Saturday, the 10th of June, you can enter a working exception for Peter on 10th June and all tasks assigned to Peter will be rescheduled appropriately.
Managing Exceptions
Only administrators can add organization wide or work calendar exceptions. To manage exceptions, go to Main MenuAdminProject ManagementWork Calendars and click on the Exceptions tab.
ProjectsConcepts
Project Bin
When you delete a project, it along with all its contents like tasks, time logs and files, is moved to the Project Bin. This allows you to recover from accidental deletions. Once moved, the project will stay there for 30 days after which it will be irrevocably deleted from the database by the system.
Deleted projects and their data never appear in any view or report. For the system, they are as good as deleted.
Recovering a deleted project
To recover a deleted project, navigate to Main MenuAdminProject ManagementProjectRecycleBin and click on the icon. The project along with all its contents like tasks, time logs and files will be restored. Inter-project dependencies are not restored.
ProjectsConcepts
Project Glossary
| Attribute | Read/Write | Description |
|---|---|---|
| Name | RW | A short description. |
| Planned Start | RW | The start date. Tasks that have ASAP constraint and no predecessors will start from this date. Changing this value will reschedule the project plan. |
| Deadline | RW | The date beyond which the project cannot finish. |
| Manager | RW | The primary project manager. |
| Clients | RW | The project clients. Read More. |
| State | RW | The project state. Read More. |
| % Done | R | The overall progress of the project. Read More. |
| Actual Cost (ACWP) | R | The total cost incurred so far. It is the sum of actual costs of all its leaf tasks. |
| Actual Effort | R | The total effort spent so far. It is the sum of actual effort of all its leaf tasks. |
| Actual Revenue | R | The total bill amount to client. It is the sum of all bill amounts for all approved time and expenses in this project. |
| B.Health | R | The color coded health indicator of the project's progress with respect to cost. Read More. |
| Invoiced Revenue | R | The total bill amount for which the client has been invoiced. It is the sum of all bill amounts for all invoiced time and expenses in this project. |
| Planned Cost | R | This is the cost a project is expected to incur based on its plan. It is the sum of all planned costs for all its leaf tasks. |
| Planned Effort | R | These is the total effort that must put in to complete the project as per its plan. It is the sum of planned effort of all its leaf tasks. |
| Planned Finish | R | This is the maximum of the planned finish dates of its tasks. |
| Planned Labor Revenue | R | The total revenue expected from this project. It is the sum of the planned labor revenues of its leaf tasks. |
| S.Health | R | The color coded health indicator of the project's progress with respect to schedule. Read More. |
| Actual Billable Hours | R | The total time that is billable and approved. |
| Actual Finish | R | The date the last task was finished. It is the maximum of the actual finish dates of its tasks. |
| Actual Fixed Cost | R | The fixed cost incurred on a project till date. It is the sum of actual fixed costs of all its leaf tasks. |
| Actual Labor Cost | R | The total labor cost so far. It is the sum of all labor costs of all its leaf tasks. |
| Actual Margin | R | The actual profit margin: Actual Profit ÷ Actual Revenue |
| Actual Non-billable Expense | R | Sum of amounts of approved and non-billable expenses in this project. |
| Actual Non-billable Hours | R | Sum of hours from approved and non-billable time entries in this project. |
| Actual Non-billable Labor | R | Sum of bill amounts from approved and non-billable time entries in this project. |
| Actual Non-labor Cost | R | Sum of amounts of costable expenses in this project. |
| Actual Profit | R | Actual Revenue - Actual Cost |
| Alignment | RW | A number between 0 and 100 that reflects how closely this project's requirements fit within the organizations business, goals, skill sets, and resources. Higher number means better alignment. |
| BCWP | R | Budgeted Cost of Work Performed. Read More. |
| BCWS | R | Budgeted Cost of Work Scheduled. Read More. |
| Baseline % Done | R | The expected % complete of the project based on the baseline. |
| Baseline Budget | R | The budget of the project when it was baselined. |
| Baseline Cost | R | The planned cost of the project when it was baselined. |
| Baseline Deadline | R | The deadline date of a project when it was baselined. |
| Baseline Deadline Variance | R | The difference in days between the current and baseline deadline. |
| Baseline Effort | R | The planned effort when the project was baselined |
| Baseline Effort Variance | R | The difference between the planned and baseline effort |
| Baseline Finish | R | The project's planned finish date when it was baselined. |
| Baseline Finish Variance | R | The difference between the project's planned and baseline finish date. |
| Baseline Start | R | The planned start date of the project when it was baselined. |
| Baseline Start Variance | R | The difference in days between the planned and baseline start. |
| Benefit | RW | A number between 0 and 100 that reflects the potential for financial or operational gain upon successful completion. Higher number means more benefit. |
| Billing Type | RW | The default billing type of new tasks. If billing type is Time & Material, new time logs will automatically be marked as billable. If Fixed Price, then they will be marked as non-billable. |
| Budget | RW | The budget of a project - typically planned cost + buffer |
| CPI | R | Cost Performance Index. Read More. |
| Code | RW | This is a short alpha numeric code that identifies the project. This code should be unique across the company and has to be entered manually. This is useful if you refer to projects with a code. You can also search for projects using the project code. |
| Cost Variance | R | BCWP - ACWP |
| Created | R | Date on which the project was created. |
| Creator | R | User who created the project. |
| Description | RW | A detailed description of the project. |
| FixedPrice | RW | The fixed price of the project (only applicable when Billing Type is Fixed Price) |
| ID | R | The primary key of the project record in the database. |
| Invoiced Expense | R | The sum of all invoiced expenses for this project. |
| Invoiced Hours | R | The total hours for invoiced time. |
| Invoiced Labor | R | The total bill amount of invoiced time |
| Last Modified | R | The date on which the project was last edited or some attribute was modified. |
| Planned % Done | R | The expected percent complete based on the plan. |
| Planned Fixed Cost | R | The total fixed cost of the project. It is the sum of fixed costs of all its leaf tasks. |
| Planned Labor Cost | R | This is the total estimated labor cost of all the tasks in the project. |
| Planned Margin | R | The profit margin as per plan. Margin = Planned Profit ÷ Planned Revenue |
| Planned Non-Labor Cost | R | The total estimated non-labor cost (e.g. travel, food, software, etc.). It is the sum of planned non-labor costs of all its leaf tasks. |
| Planned Profit | R | Planned Revenue - Planned Cost |
| Planned Revenue | R | If the project's billing type is Fixed Price then it is the sum of the planned revenue of all its leaf tasks. |
| Priority | RW | One of the following Trivial, Minor, Normal, High, Critical. |
| Projected Cost | R | The expected total cost of a project based on its current rate of spend. It is the sum of projected costs of all its leaf tasks. |
| Projected Finish | R | The date on which the project is expected to finish based on the current rate of progress. It is max of the project finish dates of its leaf tasks. |
| Projected Hours | R | The total hours this project will require to finish based on the current rate of progress. It is the sum of projected hours for all its leaf tasks. |
| Remaining Hours | R | Planned Hours - ActualHours |
| Risk | RW | The potential negative impact that may arise from this project. |
| SPI | R | Schedule Performance Index. Read More. |
| ScheduleVariance | R | BCWP - BCWS. Read More. |
| Team | RW | The pool of users working on this project. Read More. |
| Type | RW | One of your project types. Read More. |
| Work Calendar | RW | Project's work calendar. Tasks that do not have a resource are scheduled based on this calendar. All dates in the interactive Gantt chart are shown with respect to this work calendar's time zone. Read More. |
Actions
ProjectsActions
Creating a Project
To create a project, click Main MenuProject
Blank Project
This creates a project with no tasks.
Copy Project
This clones the project and its entire task WBS. All project and task fields (including custom fields but excluding constraints), dependencies, resource assignments and file attachments are also copied. The new project is then replanned as per the new project's start date. If the original project had manually scheduled tasks, those tasks in the new project will have a similar duration and will start at the same time after the new project's start.
Use a Template
For more details, click here.
Import Microsoft Project
For more details, click here.
ProjectsActions
Attaching Files
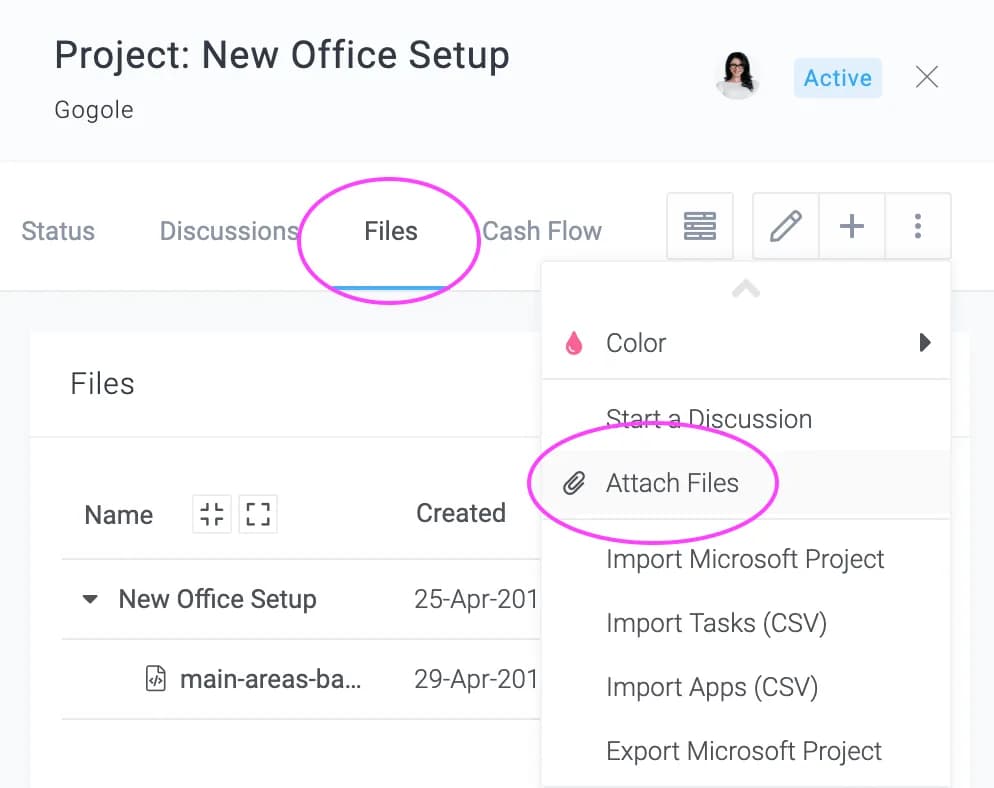
You can attach file or files from your local drive or Google Drive to a project's folder. Click on a project to open its panel and then click Project ActionsAttach Files. Files attached to a project (or its tasks) can be viewed from the Files tab.
ProjectsActions
Overriding Billing Rates
Depending on whether you use user-based billing or time code based billing, either the default bill rate for a user or time code is used while calculating the bill amounts. You can override those rates per project.
To override the default rates, click on a project to open its panel and then click Project ActionsBilling Rates.
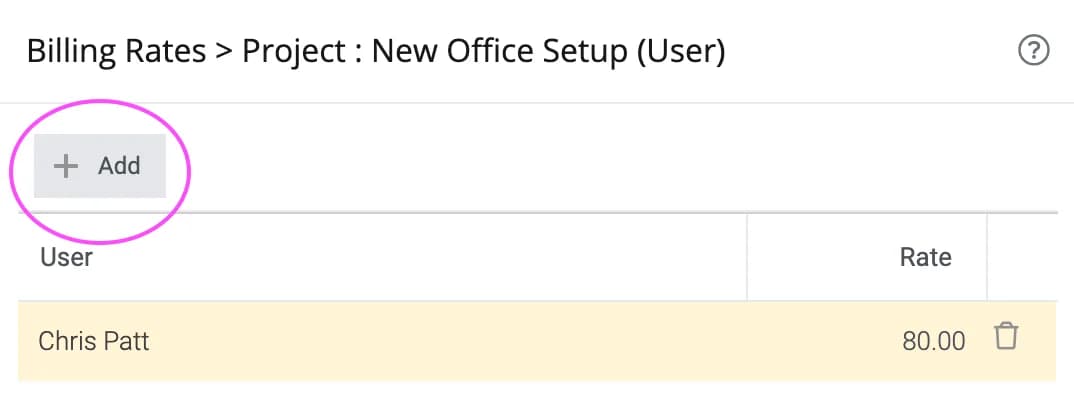
In the above example, Chris Patt's bill rate for the project has been set to $80. As you can see, you can click on the Add button to add a rate, click on the Rate cell to edit a rate, or click on the icon to delete a row which will default the rate for that user back to the default rate.
ProjectsActions
Overriding Cost Rates
By default, the labor cost rate specified for a user is used while calculating the labor cost of a task. You can override those rates per project.
To override the default rates, click on a project to open its panel and then click Project ActionsCost Rates.
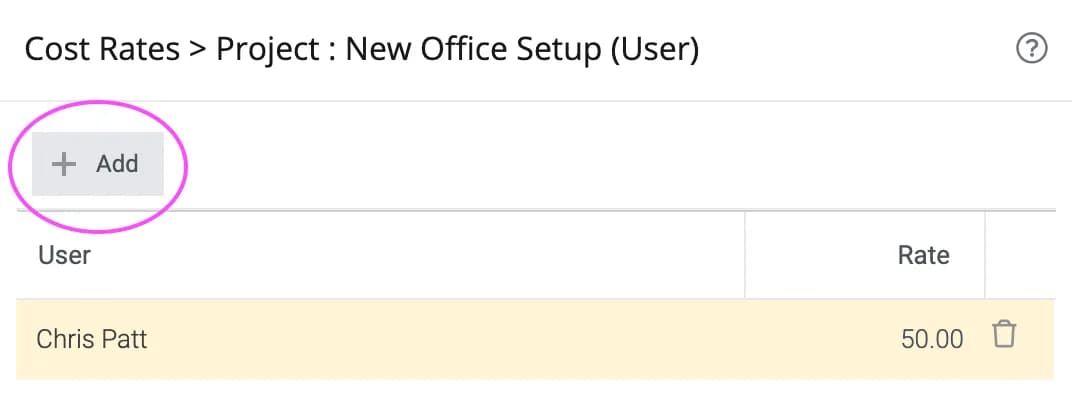
In the above example, Chris Patt's cost rate for the project has been set to $50. As you can see, you can click on the Add button to add a rate, click on the Rate cell to edit a rate, or click on the icon to delete a row which will default the rate for that user back to the default rate.
ProjectsActions
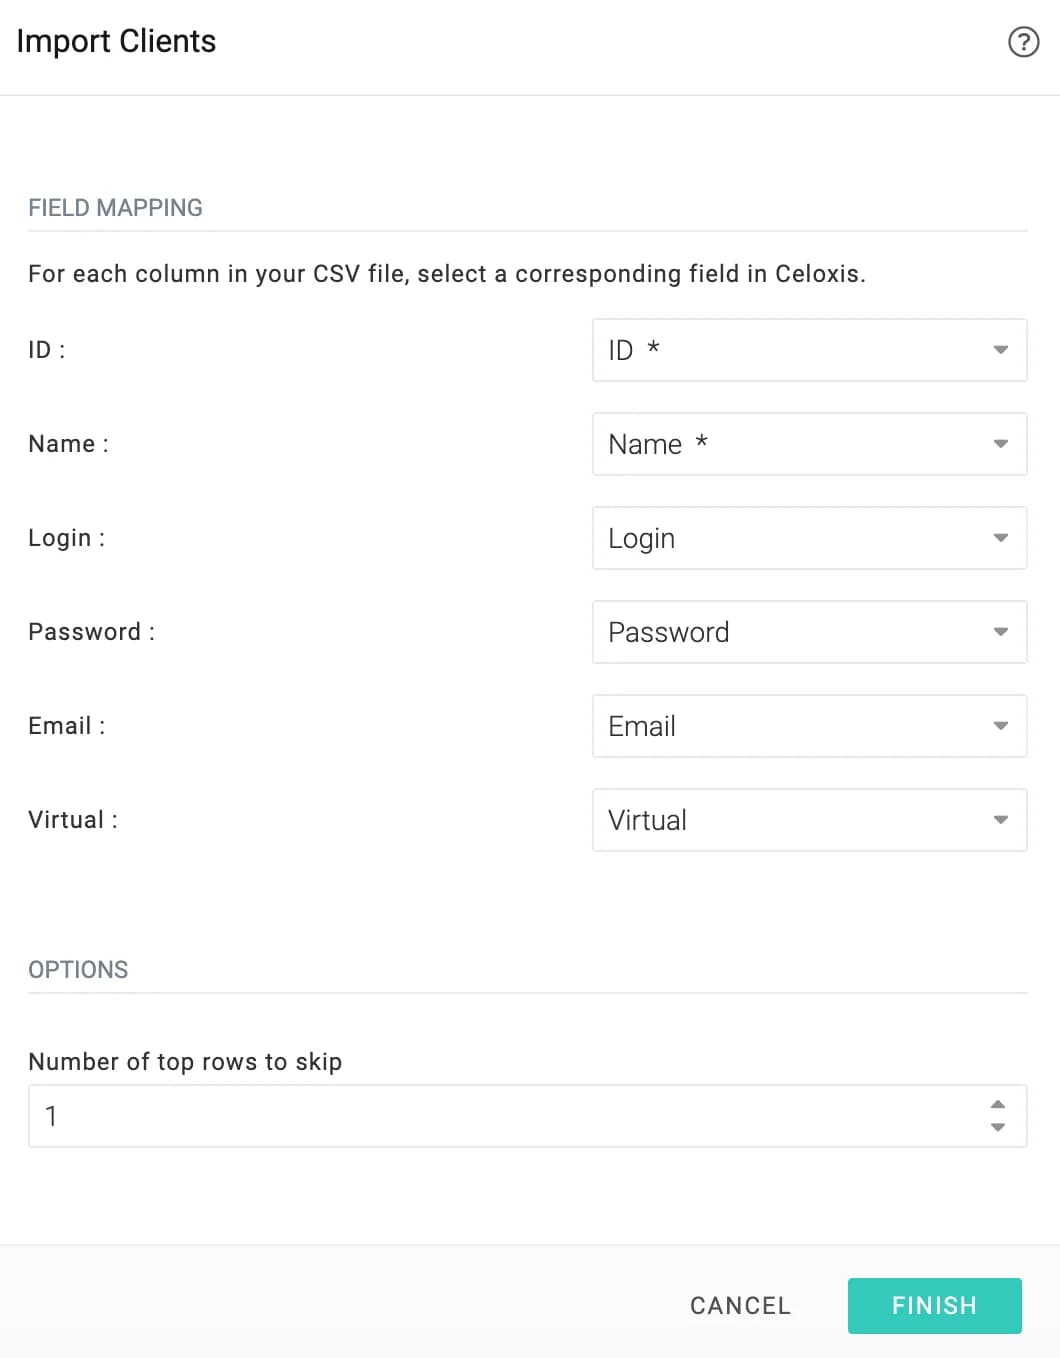
Importing Clients from CSV
Celoxis provides you with the ability to import clients from CSV. If you have a Microsoft Excel file, then you can export it in CSV (comma separated values) format and then import it in Celoxis.
To import clients, go to the clients page – Main MenuClients and then click on the Import button.
Fields supported:
- Name - mandatory
- Phone
- Username - the login name
- Password - the plain text password
- Virtual -
falseortrueto indicate whether the client can login or not respectively. If you specify false or blank, then you must provide a username and password - Custom Fields - you will have to create the fields in Celoxis first
- ID - mandatory, only when you are updating Clients using a CSV file
Updating Clients
Celoxis also provides the ability to update the existing Clients by importing a CSV file. To update, you must include the ID of the Clients in the CSV file.
To find the ID of the Clients, add ID column in the Clients report(Main MenuClients).
For security reasons, no emails are sent to clients. It is up to you to notify them of their login information.
ProjectsActions
Bulk Actions
You can select multiple projects and perform actions on them. Click on the next to the checkbox in the report table header as shown below:
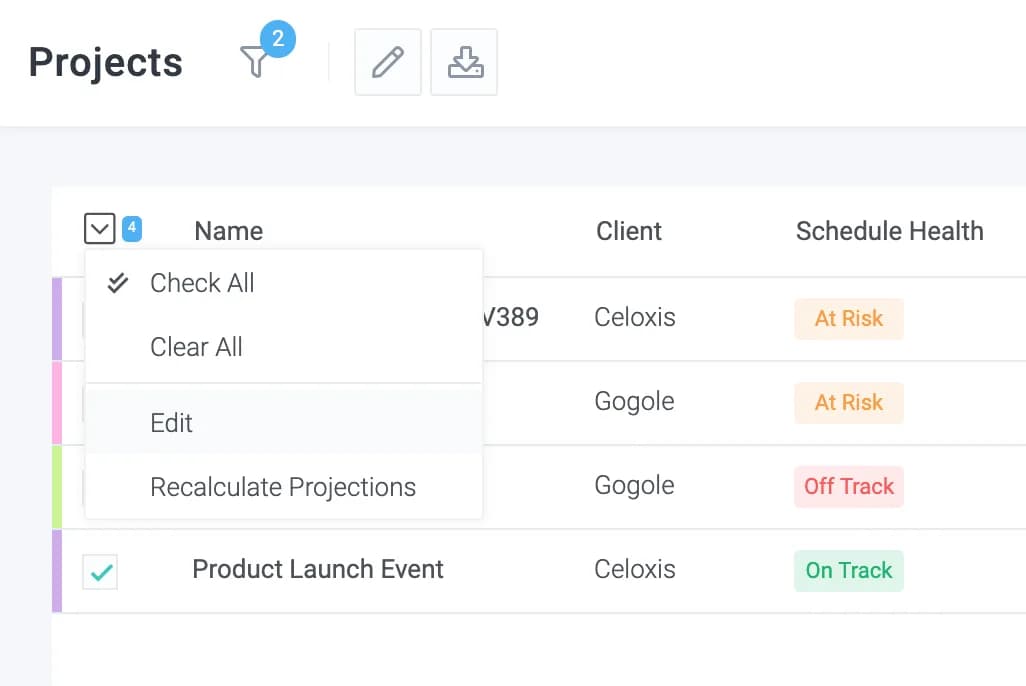
Recalculate Projections
For details, refer the Calculation of Projections section here
Edit
Allows multiple attributes to be modified at once, including custom fields as shown below:
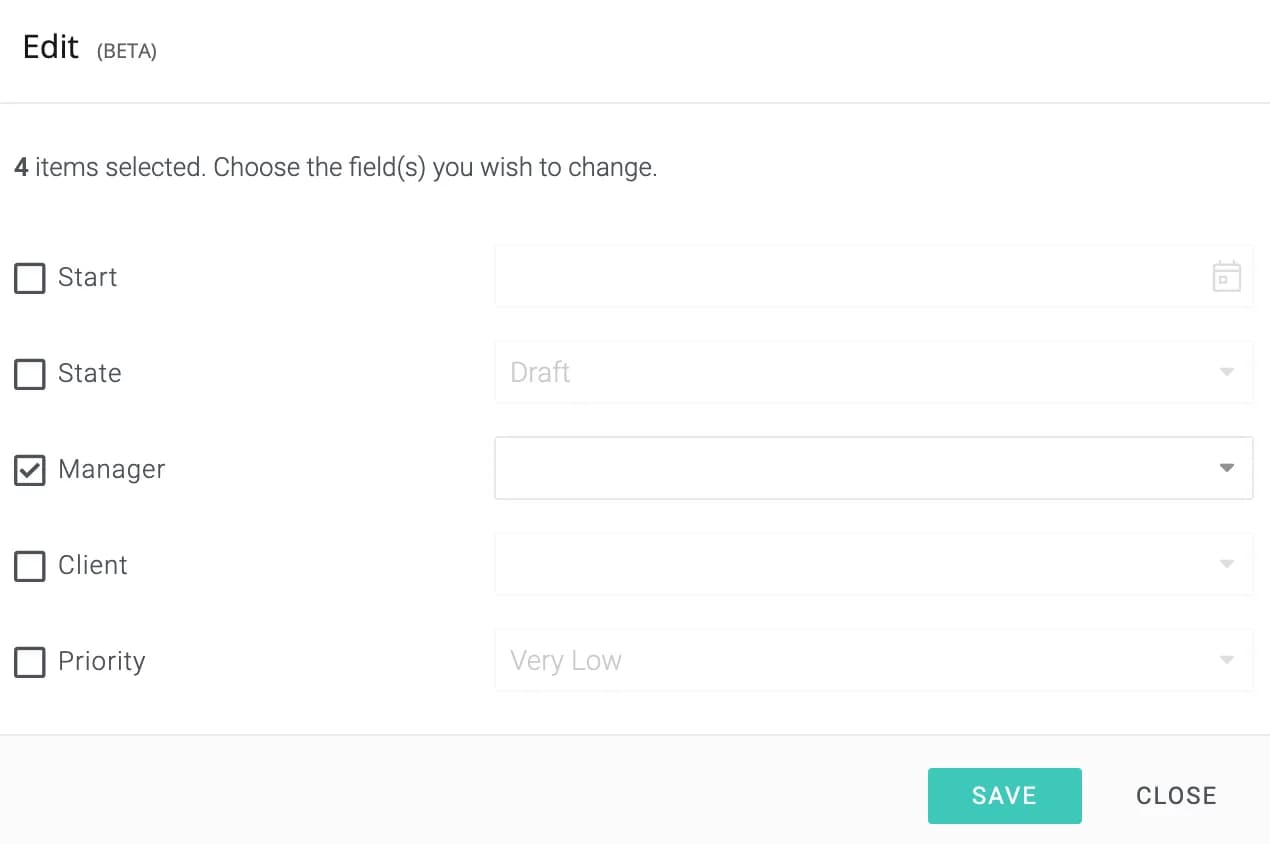
How-To
ProjectsHow-To
Project Portfolio Management
Portfolio management, often referred to as project and portfolio management or PPM isn’t as complicated as one might think. Using Celoxis, you can initiate project requests, develop project scoring model, view project request queues and available resource capacities, achieve desired portfolio balance and track project pipelines and portfolio accounting so that you are always staying ahead of your projects.
Setup
- Enable Portfolio feature in your account (Main MenuAdminProject ManagementFeatures).
This enables the Portfolio section in Projects to capture Alignment, Benefit and Risk parameters for the portfolio. These are the standard attributes we provide for portfolio management. - Create a new Project State ‘What-if’ (Main MenuAdminProject ManagementProject States).
Keep this state in ‘Planning’ Stage and keep ‘Allow Time’ unchecked. We will use this state to perform rudimentary what-if analysis to arrive at a desired portfolio balance. - Import the Project Requests App. (Main MenuAdminCustom AppsAppsImport).
With this you get a standard out-of-the-box project request workflow. You can customize this workflow to suit your business process. Edit the app and uncheck the “Active” checkbox under Basic tab. This way the app is not available to your users till we set up the rest of the pieces. - Develop your Project Scoring model.
Define the additional project attributes that will be potentially important factors to scoring projects. This will be done through custom fields (Main MenuAdminAccount ManagementCustom Fields). Attach these custom fields to all Project Categories and also to the Project Requests App.
In addition to your specific project scoring attributes, you will also need to create the following 3 custom fields and attach them only to the Project Requests App:- - Strategic Alignment (Numeric: 1 to 100),
- - Overall Benefit (Numeric: 1 to 100), and
- - Project Risk (Single-select Drop down: Very High to Very Low).
These are required to match the standard portfolio parameters on the project, so that you can later copy them into your project. Lastly, create a custom formula field “Project Score” that will take in these project attributes and arrive at a potential score for the new project.
- Create a ‘Project Requests Queue’ report for viewing your incoming project request pipeline (Main MenuReportsAll ReportsPlusProject Requests).
In the Output tab, select ‘Tabular’ and choose all columns that are important for your executive approval. Make sure to include the “Project Score” in the list so that you can directly see the calculated score for each project request in the pipeline.
New Project Requests
Each new project enters the system through a project request. The ‘Project Queue’ report that we created comes handy in viewing the incoming project requests and ranking/re-ranking them based on your criteria.
- Go back to your Project Requests App definition (Main MenuAdminCustom AppsApps) and mark this as “Active”. Now this app is available to your users for submitting new project requests.
- For each of your new projects, create a project request in the system (To add click Main MenuProject Requests).
Since a project container is not created as yet, create this app within a workspace (if you have defined workspaces) or select non-project (if there are no workspaces in your company). You will have to establish scoring values for each project request and put them in the respective custom fields on the New Project Requests form. - As your request is approved, you will need to create a project container for your new project (To add click Main MenuProjectNew Project).
Enter the necessary information (such as tentative start date, client, budget, etc.) about this new project in the form. Keep the project in ‘What-if’ state. This way it does not interfere with your other active projects. Additionally, copy over all the scoring parameters from the project request into the project’s portfolio section and the defined custom fields. - Now move the project request associated with this new project under the project itself (Go to the said ProjectRequests itemMove and select the new project from the list). This way, the approved request stays within the project’s repository.
Desired Portfolio Balance
Now that you have created all your project containers, you will need to validate them against your available resource capacities and revise them based on resource availabilities, priorities and strategic importance.
- Check available resource capacities. Go to Main MenuReportsAll ReportsResource Capacity. This is a built-in report that gives you insights into your organizational resource capacities for the near future. Looking at this report you can get a good idea of how your existing resources are stacked up to take in the new projects in your portfolio. You can increase the default period in the report to get farther insights into your resource capacities. You can also search for resources with specific skillsets by using the “Resource: Search” filter.
- Now, for each project, define the WBS and resources. Since the project is in ‘What-if’ state, it will not affect your existing project workload. Open the Resource Load View (Main MenuResource Load). From the filters, add ‘What-if’ to your Project State filter. Now your Resource load will start showing your new projects in addition to your draft and active projects.
- Use the Resource Load View to conduct a rudimentary what-if analysis to understand the impact of your new projects onto the existing resource load.
- From the Resource Load View, you can
Check if there are any resourcing problems You can replace resources, if necessary. Mouseover the task in contention, and select the Edit Resources. You can also shift out tasks by changing their dates (Mouseover the task Edit Task) - If you still have a resourcing issue, change the start date of the other low priority projects so that all other tasks in those projects are rescheduled. However, please note that Celoxis does not currently support an UNDO feature. If you need to revert, you will have to manually revert the project to its earlier state.
Portfolio Reports
Celoxis gives our several best practices portfolio reports for managers and executives that you can use out-of-the box. You can also create your reports.
- Budget Allocations
This is a bar chart report that lays out budget allocations per manager aligned by their projects’ start month and year. This gives a visual insight into your approved budget allocations for managers and their projects.
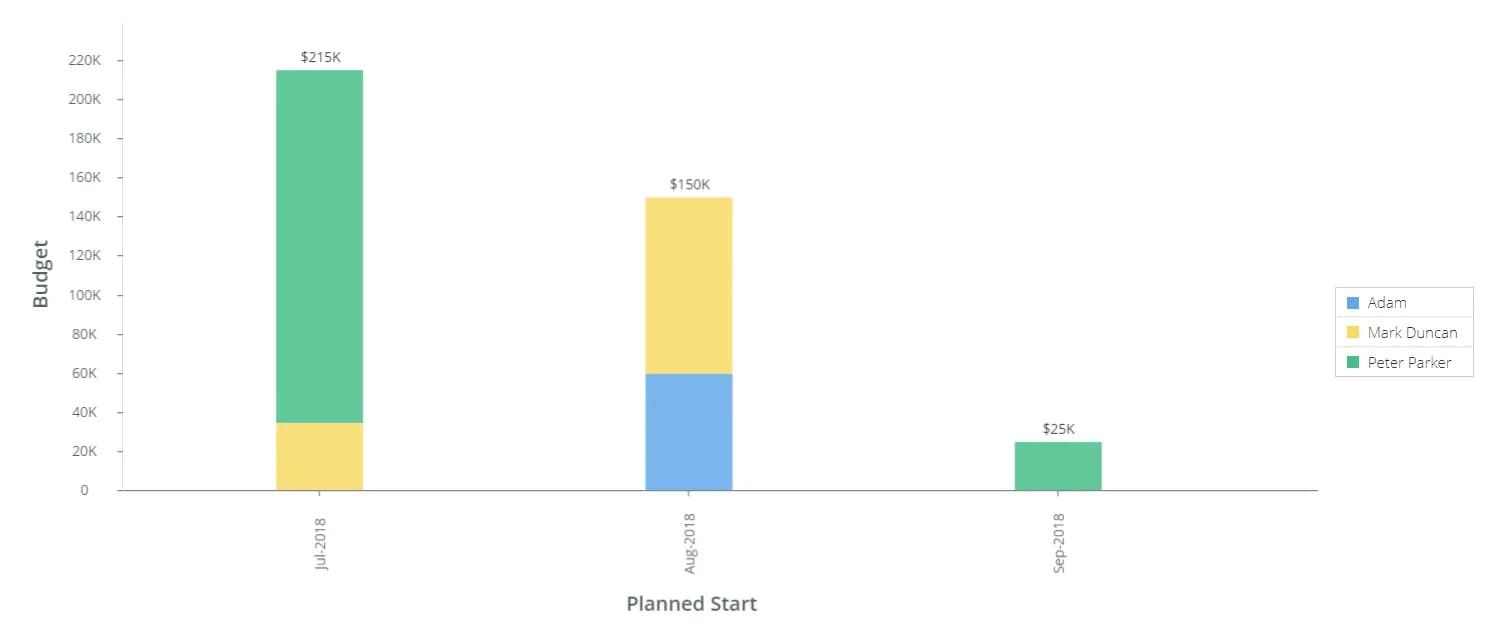
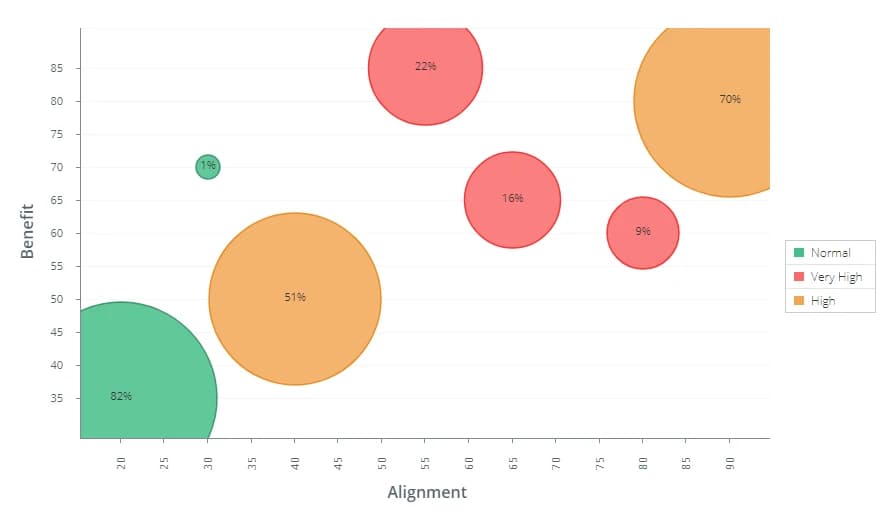
Budget Allocations - Project Portfolio Analysis
This bubble chart gives you a good 30,000 feet overview of how your projects are aligned with organizational strategy and financial or operational benefit. The color coding on the bubbles indicates the perceived risk from the project.
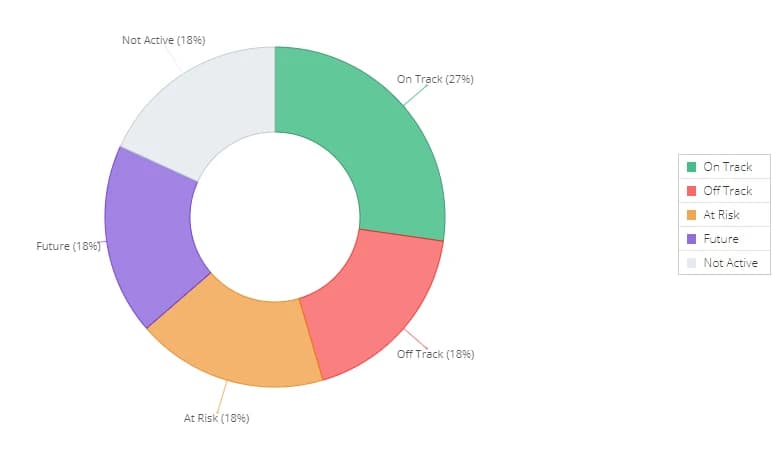
Project Portfolio Analysis - Projects (By Schedule)
This is a tracking report that gives you an overview of all projects in your portfolio and their schedule status.
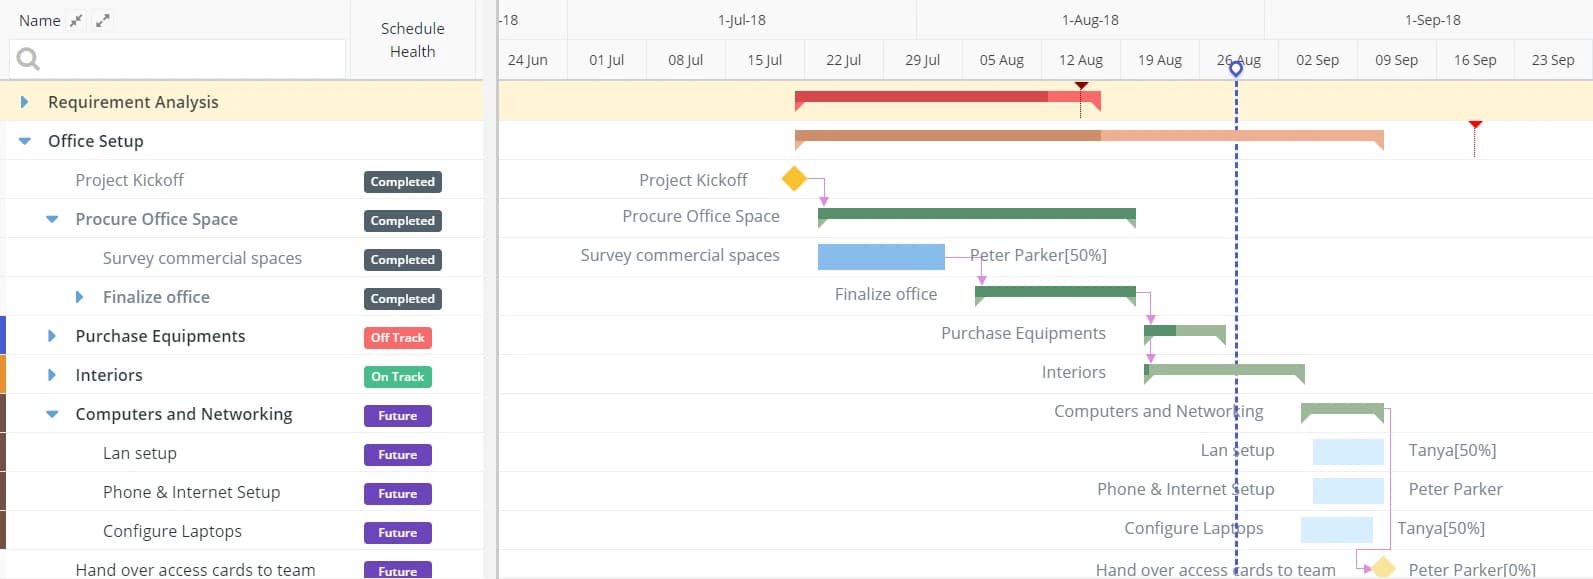
Projects (By Schedule) - Project Status (Gantt)
This is timeline view of all projects in your portfolio. Again a tracking report, and gives managers and executives a good overview of how the projects and their top-level tasks are lined up with their schedules.
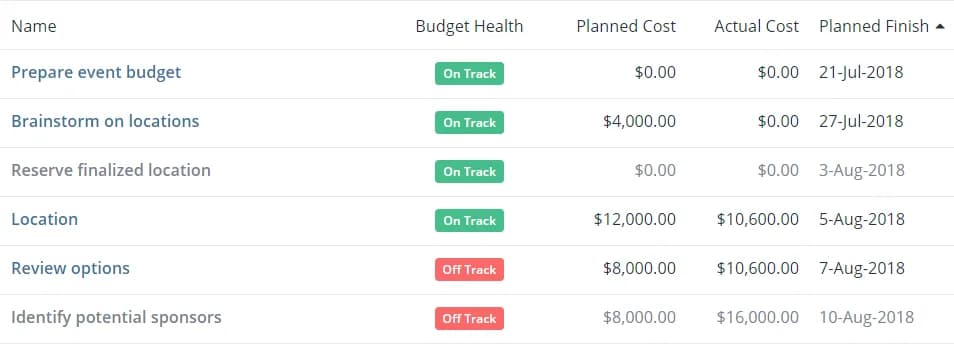
Project Status (Gantt) - Cost Overrun
Cost Overrun is a tabular report that identifies projects whose actuals costs have exceeded their estimated costs.
Cost Overrun - Resource Capacity
With this time-phased report, executives and project approvers can get a clear picture of your resource capacity at any point and make better resourcing decisions for new projects.
Planned Capacity (%) = 1 − Planned UtilizationActual Capacity (%) = 1 − Actual Utilization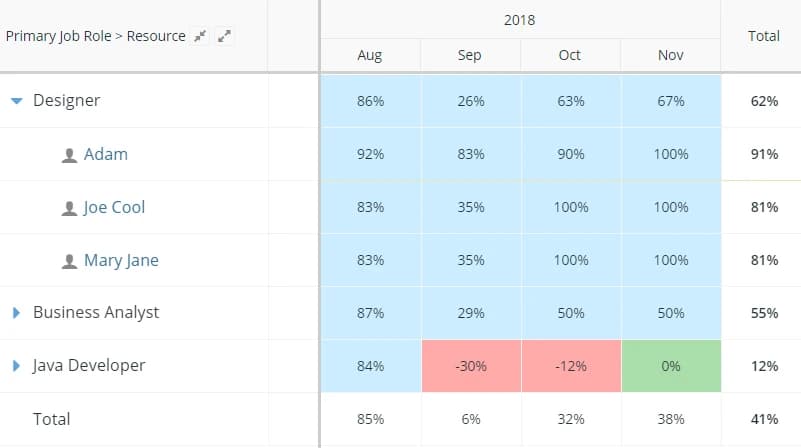
Resource Capacity - Resource Utilization
This report can help track the utilization of resources against the plans.
Planned Utilization (%) = PlaneedEffort ÷ Available HoursActual Utilization (%) = Actual Effort ÷ Available Hours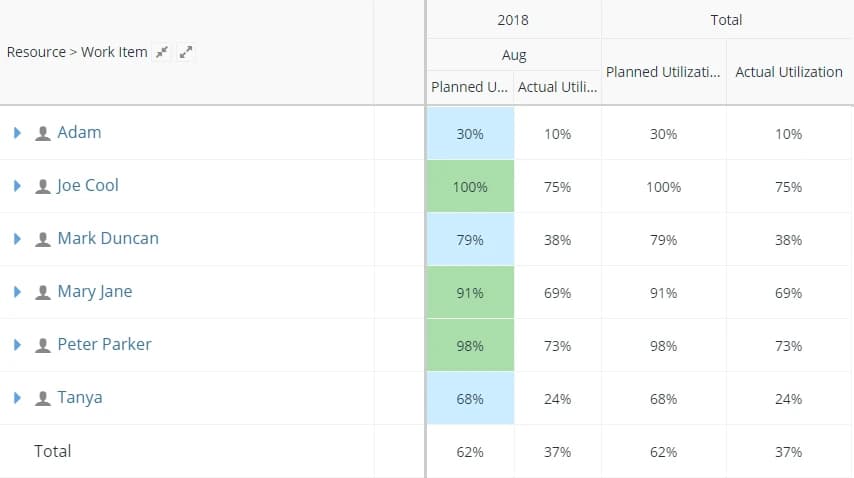
Resource Utilization - Resource Efficiency
This is an excellent report for monitoring resource performance.
Efficiency (%) = Planned Effort ÷ Actual Effort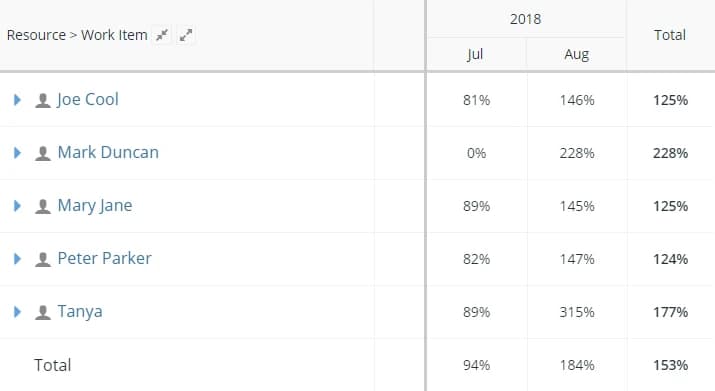
Resource Efficiency
ProjectsHow-To
Budgeting and Costing
Cost is one of the important components of the project management triangle. Celoxis makes it very easy to track budgeting and costing for entire projects, as well as the individual tasks. After following this simple how-to manual, you will be able to easily arrive at the realistic project budget, keeping an eye on the breakdown budgets of the individual tasks. You will also learn, among other things:
- How to specify Fixed and Material cost of each task
- How to properly allocate human resources
- How to track financial state of the projects and tasks through important metrics like Project/Task Estimated Cost, Actual Cost and the Visual Health Indicators.
Arriving at your Project’s Budget
To Budget for a project you must first know what it will cost to execute the project. Once the execution value is established, add a buffer, and a desired margin (if applicable) and you will arrive to a realistic budget figure. Here is how you do this:
First, for each resource you specify a Cost Rate per hour. This will typically be the salary you pay the resource or it could be an hourly rate for a contractor.
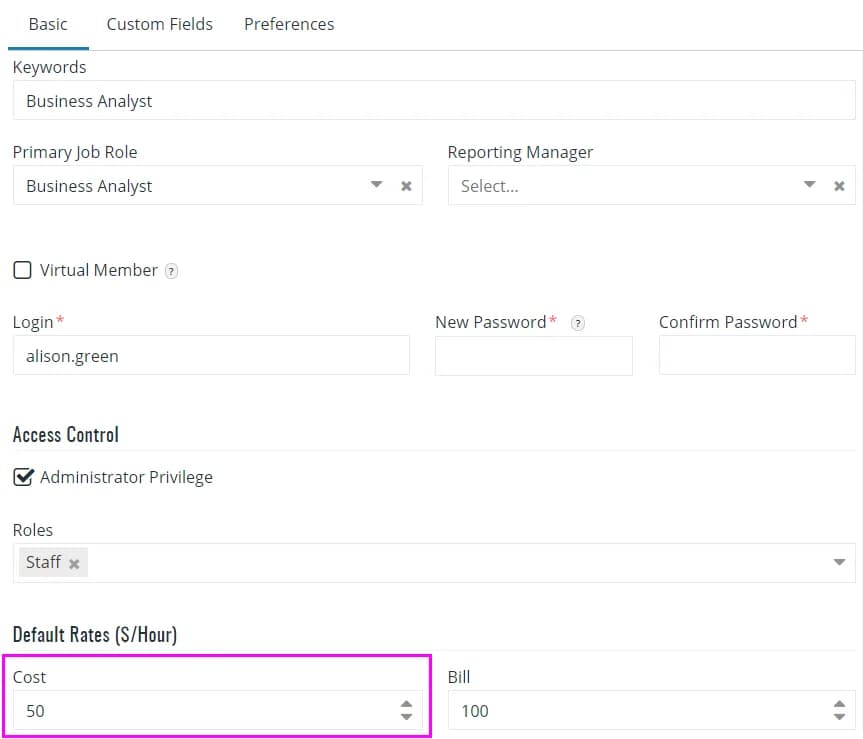
The next step is to create the tasks for your project and assign resources to each task. Celoxis then automatically calculates the cost of the task based on the Cost Rate and the allocated effort of the resource. For example, if Alison’s rate is $50phr and she is projected to work for 10 hours on a given task the cost will be 10*50 = $500. If John (another resource) was to also work on this task, his cost would be added as well. Combined, the costs of Alison and John will constitute the task's labor cost.
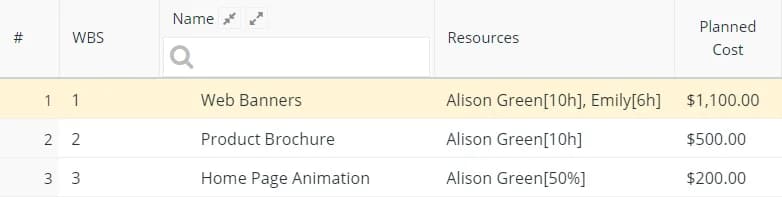
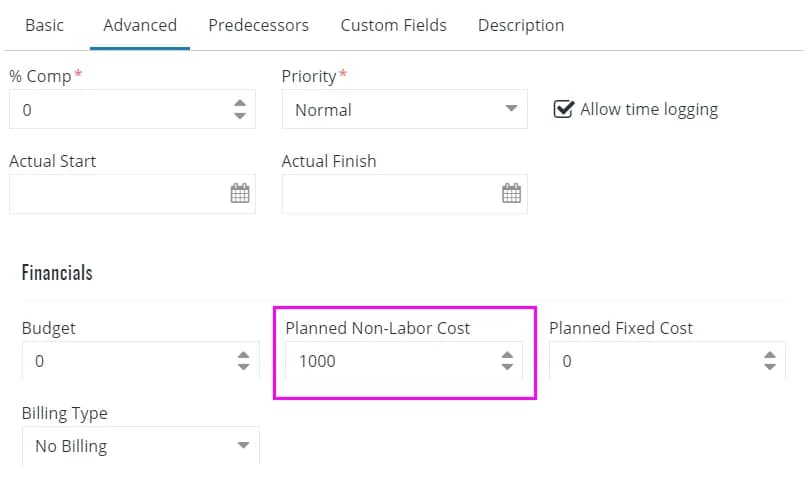
Now let’s say you had to purchase computers worth $1000 for the task #2 on the figure above. You can enter this amount in the Planned Non-Labor Cost field for a task.
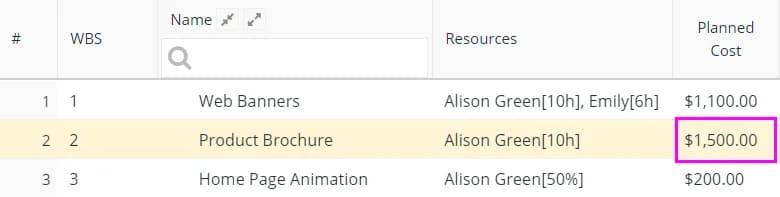
Now the Planned Cost of this task will be $1500 (i.e. $500 + $1000)
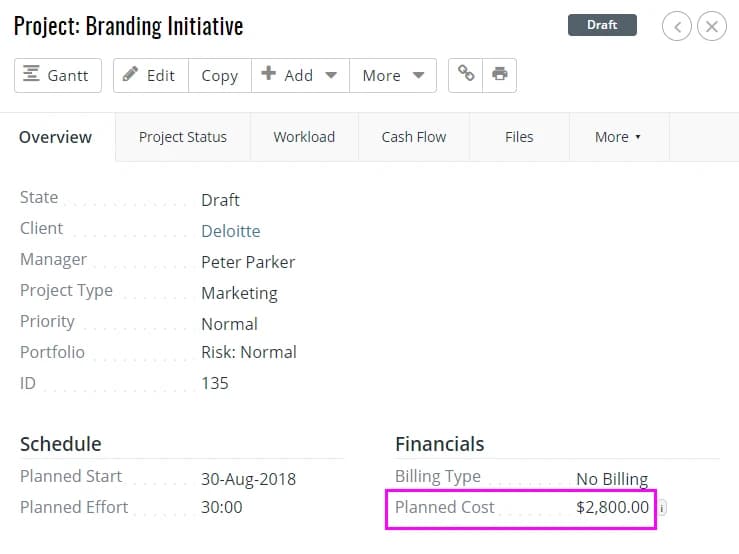
Once you complete this activity for all tasks in your plan, the total sum of Planned Costs of all the tasks will be the Planned Cost for the project. You will use the Planned Cost as a base for the budget of your project.
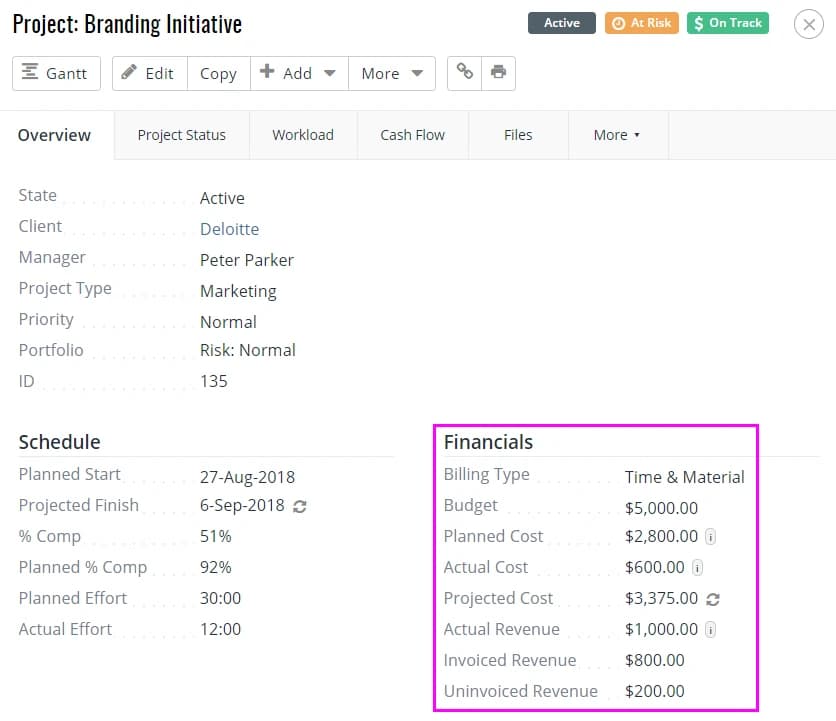
To see the project’s Planned cost, turn to the Financials section of the Project Details tab.
Add your buffer/desired margin to the Planned Cost to set the project’s budget.
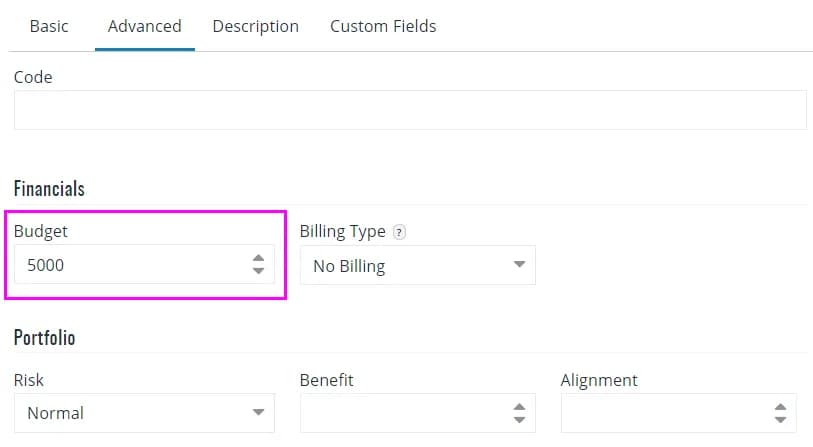
Tracking Actual Costs
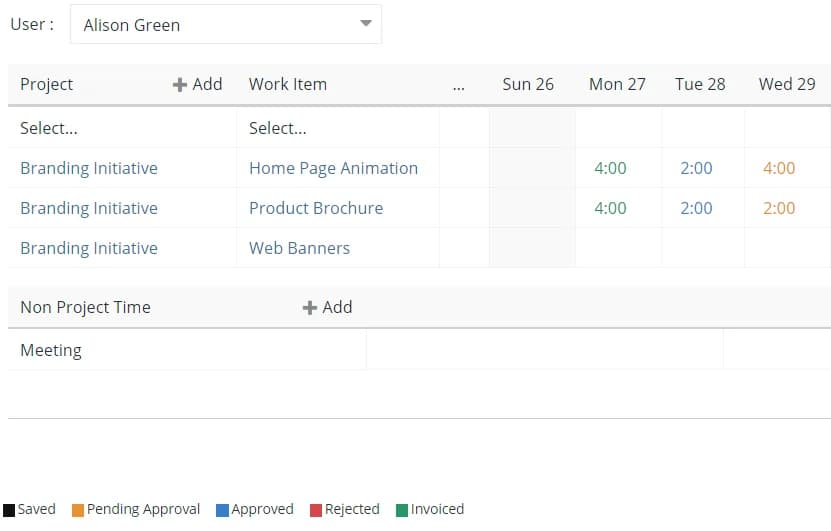
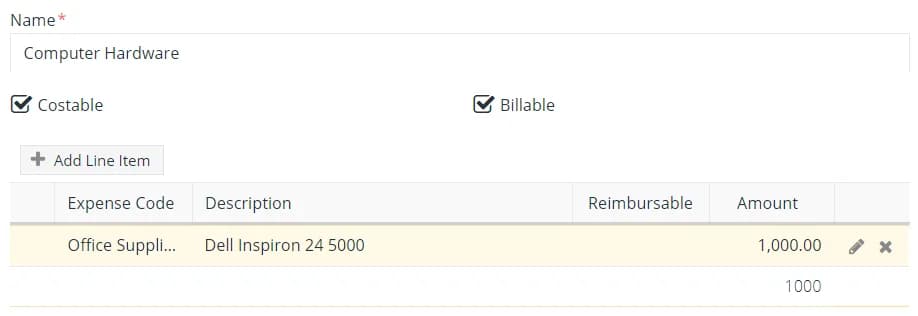
When the work on the project begins, and through the duration of the project, all resources will be filling their timesheets to log the actual hours they spend on each task. Once these hours are approved by the manager, they are used by the system to automatically calculate the Actual Cost of each task. For the non-labor cost, such as the purchase of computers, a resource must add Expenses to the corresponding tasks. The expenses will constitute the Actual Material Cost of each task, and will be added to the overall Actual Cost. Just like in the case of the logged hours, each expense will need to be approved by the manager before it can be factored into the Actual Cost of the task.
Displaying the appropriate columns in the Interactive Gantt will allow tracking of the Budget Status of each task, along with the Actual Effort.
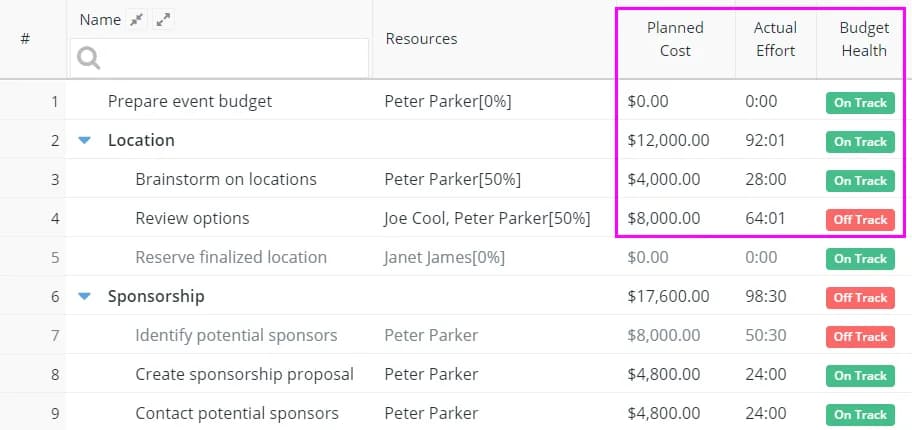
As your team updates status on tasks and log hours or expenses, Celoxis automatically and instantly calculates the Projected Cost for each task. This allows the “early warning” mechanisms such as Budget Health RAG indicators to warn you beforehand if your costs are going to exceed the budget (or estimates). For example, if a task is 50% completed, and has already incurred the cost of $100, then the projected cost of the task is $200.
RAG indicator for the budgetary health of tasks (and for the project)
- Off Track - if the Actual Costs exceeds the Budget. If Budget is not specified, then it considers the Estimated Cost.
- On Track - if the Projected Cost is less than or equal to the Budget (or Estimated Cost, if Budget is unspecified).
- At Risk - if the Projected Cost exceeds the Budget (or Estimated Cost, if Budget is unspecified).
This makes it easy to track the budget status for each task individually. However, in most cases you are likely to be more concerned about the overall health of the project. This information is always conveniently displayed next to the project name.

For the basic metrics of the Project’s financials, turn to the Financials section of the Project’s Detail tab.
Manager and Executive Cross-project Reports
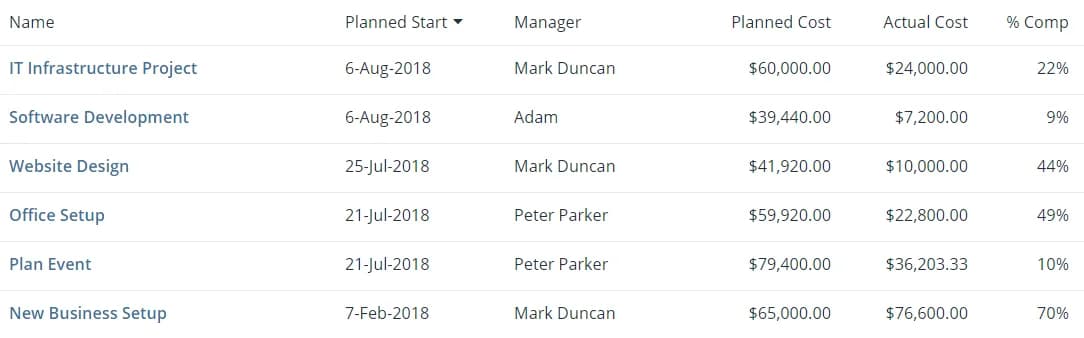
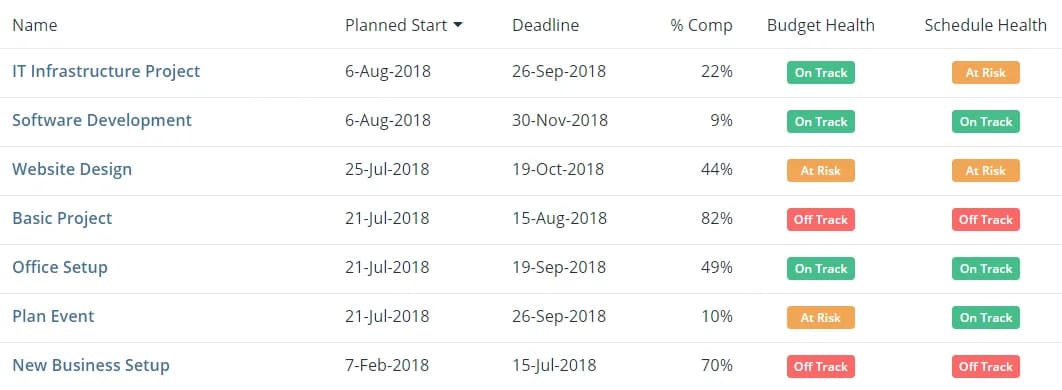
Below are just few examples of the helpful and easy-to-generate reports which can additionally inform you about budget allocations, actual costs and other financial aspects across multiple projects. Each report can be easily configured, grouped, ordered or turned to a visual chart to your liking.
Other Scenarios
- My projects have a pre-allocated budget. Can the system alert me when the planned costs risks exceeding this value?
Yes! Set the project’s budget in the Advanced tab of the Edit Project dialogue, and watch for the financial health indicator of the project. The RAG indicators will warn you if the project’s budget will get off track.
- Some of my tasks incur a fixed fee. How do I account for it?
Make sure to add the Fixed cost under the Advanced tab if the Edit Task dialogue. Then the cost of the task will be calculated automatically when you update the completion progress. For example, if the fixed cost is set to be $1000, and the task is %30 completed, the Actual Cost of the task is %30 of $1000 = $300.
- Some of my tasks may have a budgetary cap which should be met, regardless of who handles the task. How to set this up?
Same as with the budget of a project – set the budget under the Advanced tab of the Edit Task dialogue, then watch for the RAG health indicators. Make sure to display the Budget Status column in your Interactive Gantt to keep the status of each individual task visible.
- We don’t book our resources in the initial project validation stage. How can I arrive at estimated costs with knowing my resources?
Create “virtual” users such as Project Manager, Graphic Designer, Web Developer, etc. Set each virtual user with the appropriate cost for the given role. Allocate the work for the virtual users - this will help you to arrive at the projected cost of the project. Once the project team was named, use the Resources >> Replace a resource function of the Interactive Gantt to replace each virtual user with the actual resource. Note that the allocated hours will remain intact after the replacement.
- We have different resource rates for certain projects. How can I achieve that?
You can specify the project-specific cost rates for every user and for every project using More >> Cost Rate function. If the cost of the user is not specified for the project, it will default to the cost set in the Edit User dialogue.
- What happens when there is a cost adjustment to resources with projects in progress?
The cost for the work already performed will be calculated at the previous rate. The cost of all future work will be calculated using the new rate.
- How do I account for an unplanned expenditure on my project?
Any unplanned expenditure should be added as an expense to an appropriate task(s) of the project. For example, let say that per manager’s approval a resource has purchased a single-user license for a graphic editing software. The cost of the license should then be added to the very task that the software will be used on. Note that the expense will need to be approved by the Project Manager before it can be factored into the cost of the task.
- Can I categorize the activities and expenses incurred across my projects for management reporting?
Yes. Multiple time and expense codes can be set by the Celoxis administrator in the Timesheet and Expenses sections of the Administration page. Typical expense categories may include Travel, Meals, Office Supplies, Vendor fees, etc. Typical time codes may include Meetings, R&D, Marketing, Training and Onboarding, PTO, Vacation, etc.
- Does Celoxis support the Project Baseline?
Yes. Exactly one baseline can be set per project, covering either the entire project, or selected tasks. You can then compare the moving project timeline with the previously set baseline. Since only one baseline exists per project, setting new baseline will override the existing one. Please refer to the Working with Baseline guide in our How-to series.
Conclusion/Final Points
The Celoxis functionality covered in this document are just some of the techniques you can use to your advantage when tracking budgets and costs of your projects. The cross-project reports representing multiple views and slices of your projects’ data can be created, configured and shared easily, forming an accurate at-a-glance view of individual accounts, project portfolios and the entire organization. The multiple input and output data points, including but not limited by those listed below can easily be represented in various reports and visual charts, placing all the crucial data at your fingertips. Just remember that even for the most comprehensive and sophisticated systems, the output data is going to be only as good as your inputs. Always encourage your team to track the required financial data accurately, and enter the time and expense information in a regularly and diligently manner. Then, just leave the rest to the system to supply you with the accurate real time project health representations.
Input fields by you
| Project Budget | cap on the amount that will to be spent on the execution of the project |
| Task Budget | cap on the amount that will be spent on the execution of a task |
| Task Estimated Material Cost | estimated amount to be spent on the materials (non-human resources) for a task |
| Task Fixed Cost | fixed amount that will be spent on the execution of a task |
| Resource Cost Rates | Users’ hourly cost rate |
| Resource Allocation | specifying which resources will work on which tasks, and for how long (% of allocation, or number of hours) |
Some of the outputs that help tracking the projects’ and tasks’ health
| Project Estimated Cost | Sum of the estimated cost of all its tasks |
| Project Actual Cost | Sum of the actual cost of all its tasks |
| Task Estimated Cost | Task labor cost + estimated material cost + fixed cost |
| Task Actual Cost | Sum of approved time, expenses and accrued fixed costs |
| Visual Health Indicator | Colored RAG On Track/At Risk/Off Track labels, indicating the status of the cost in comparison to the its budget (if specified), or its estimated cost. This is shown for each task as well as the project |
ProjectsHow-To
Project Billing
Celoxis provides your organization with two flexible billing models: User based, and Time code based (also know as activity based billing), making it easy to track the billing amounts for different types of projects. Furthermore, Celoxis allows you to have the projects of Fixed price, as well as Hourly billing types, providing for both the flat fee and the time-and-material billing approaches. By following this simple how-to manual, you will be able to easily arrive to the estimated, and actual billing amounts for your invoices, regardless of the billing model your company follows. After studying this manual, you will learn about:
- Setting up the organization’s billing model
- Setting up project’s billing type
- Setting up bill rates
- Tracking actual and estimated billing amounts
- Valuable billing-related input and output metrics
Setting up your organization’s billing model
When setting up Celoxis for the first time, one of the major decisions that will affect every project in the system, is to adopt one of the two available billing models:
- User based
- Time code based
This is done on the Timesheet section of the Administration page. You must have the Administration rights to access these settings. Select the appropriate billing model to instantly affect the settings for the entire system.

In the User-based model, separate bill rates will be added for every billable user in the system. The rates then will be factored into the billing amounts for the projects, both actual and estimated.
To provide the default billing rate for a user, open the user’s settings and enter the desired hourly amount in the Bill field of the Default Rates ($/Hour) section in the Basic tab
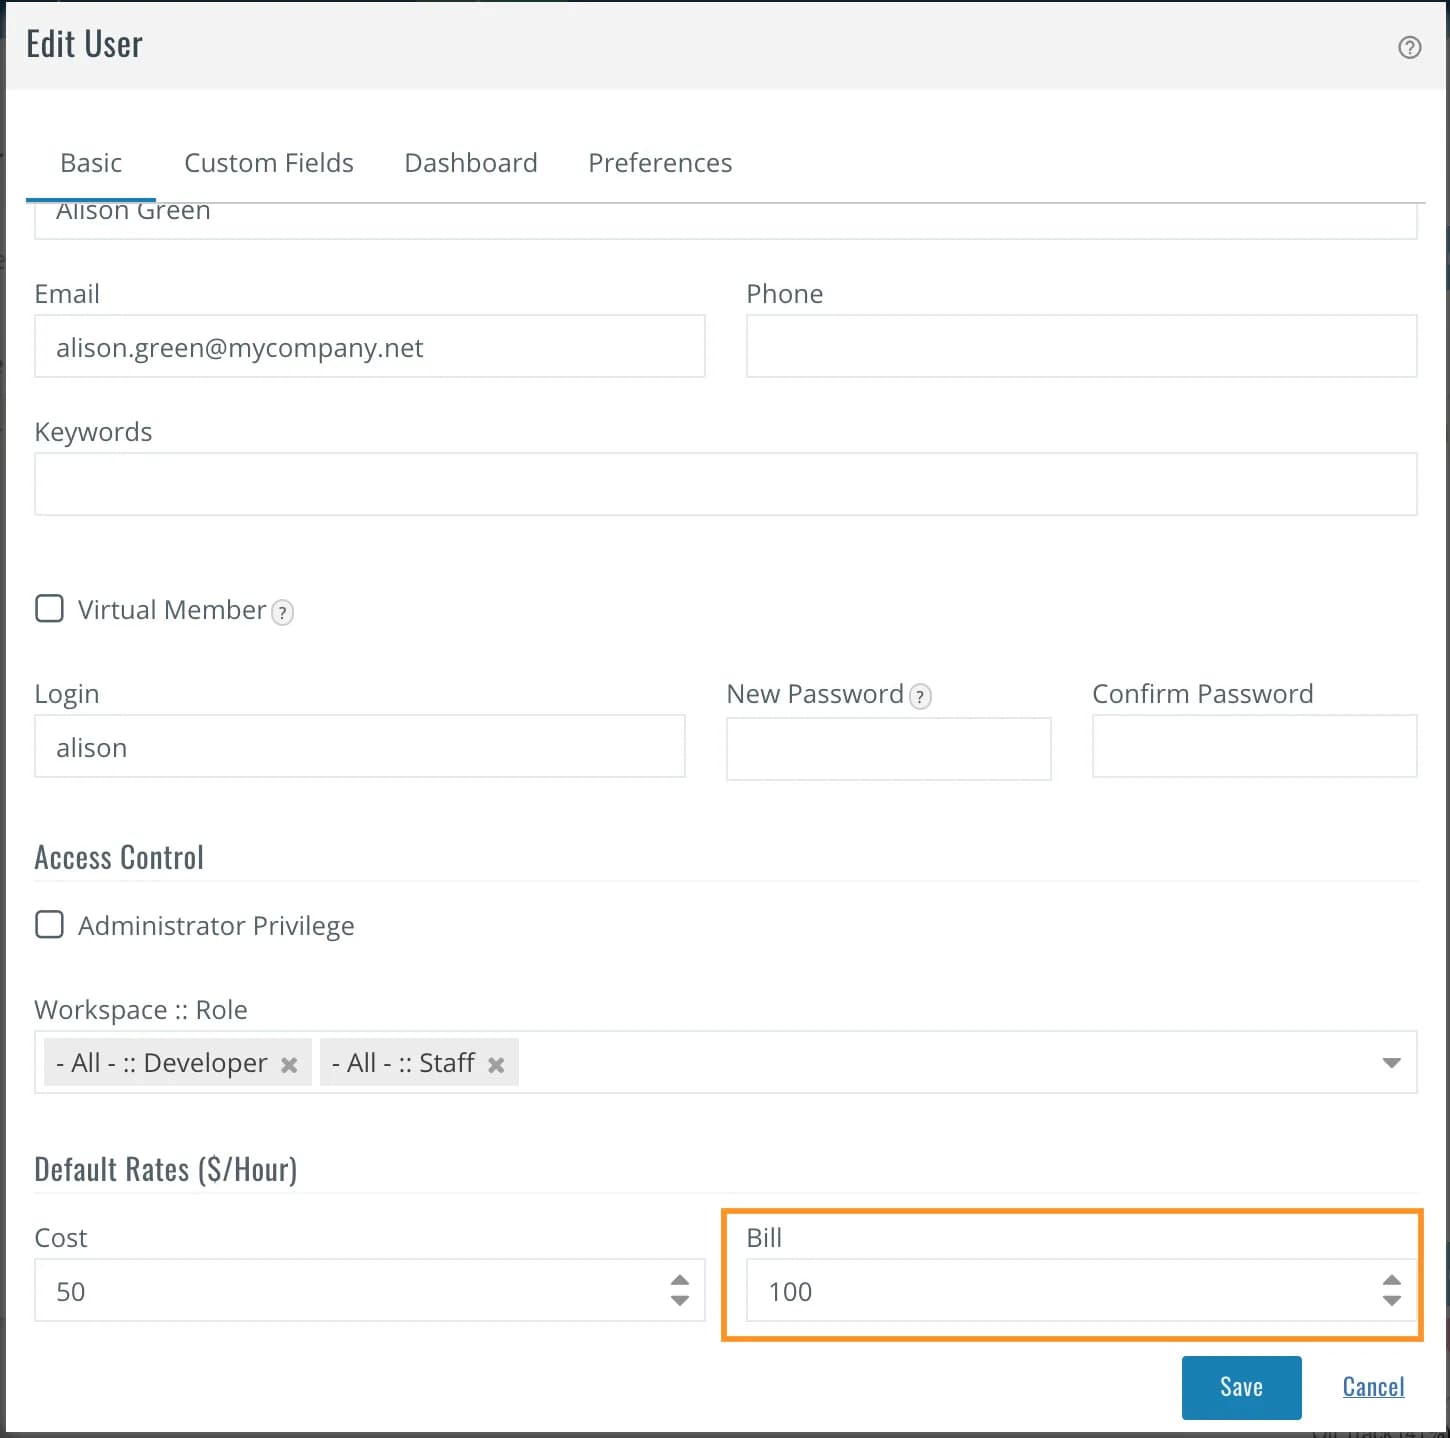
For every user in the system you can have default/company billing rate which will automatically apply to every project. At the same time, you can override rates for any given user on any given project. See the Other scenarios, and frequently asked questions section for more information on this subject.
The billing amount for this model is calculated by multiplying the number of billable hours entered by each user into the timesheet of the project, by the billing rate of the user.
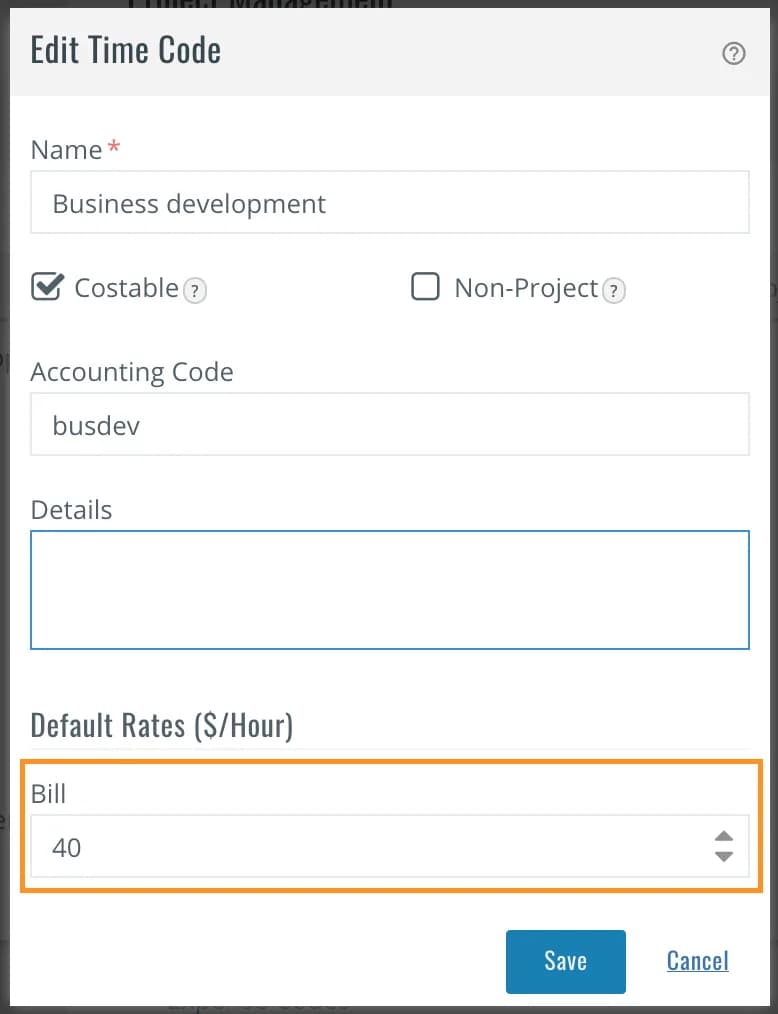
To provide the default billing rate for the time code, navigate to the Administration page (you must have the Admin privileges) and follow the Time Codes link in the Timesheet section. Enter the desired hourly rate amount into the Bill field. Note that the Bill field will only be available, if the company’s billing model is set to Time code based.
Setting up project’s billing type
Celoxis allows you the flexibility to specify Fixed Price or Hourly billing type for each project.
Setting up billing for the Fixed Price projects
In a Fixed Price billing type, the tasks you undertake and bill for, are for a fixed pre-defined price.
To set the project to the Fixed Price type, navigate to the Financials section of the Advanced tab in the Add/Edit Project dialogue. Note that the different billing models are only available to the client projects. For the projects where the client is not specified, the Billing Model field will stay hidden.
Selecting the Fixed Price option from the Billing Model dropdown, opens the new Fixed Price field, allowing you to enter the amount you are planning on invoicing.
When you opt for this type, the ‘billable’ option for expenses and time entries in the project is not checked, by default.

How rates work for Hourly projects
When you choose Hourly from the Billing Model dropdown, the billing amounts are calculated from the hours that the users log in their timesheets. The bill rate of each user is taken either from user’s settings or from the time code, depending upon the company's billing model.
When this billing type is used, the ‘Billable’ option for expenses and time entries in the project will be automatically checked, by default.
Tracking Actual Billing Amounts
With the billing rates set, the actual billable amount for each task is calculated using this formula, which takes in consideration both the labor and the material bills:
Amount (Act, Billable) of a task = Hours (Act, Billable) × Bill rate + Approved and Billable expenses on the taskAmount (Act, Billable) of the project is calculated from the sum of the amounts of the project’s top tasks. Depending upon the org billing model, the bill rates comes from either the user’s bill rate or from the time codes picked in the timesheet.
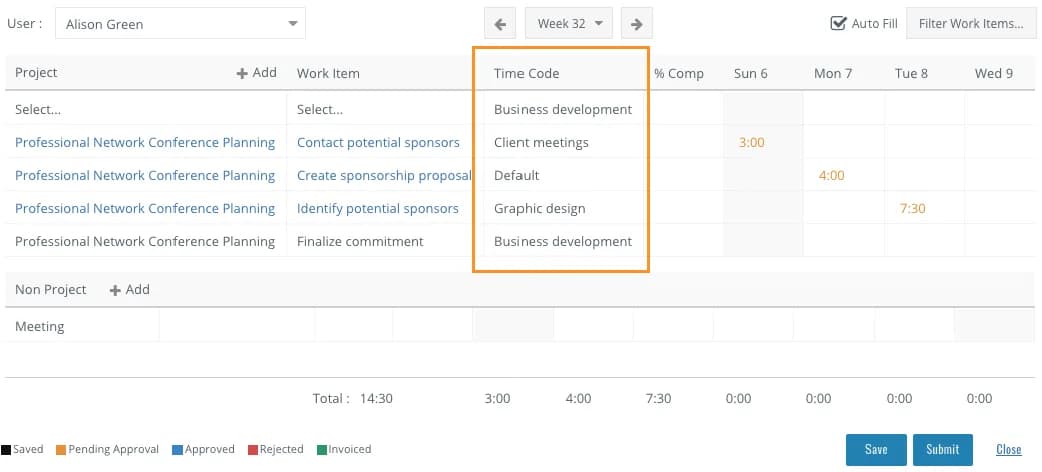
For example, if a resource working at the bill rate $30phr reported 10 billable hours for a task, and the project manager approves the $1000.00 billable material expense for the same task, the Amount (Act, Billable) for this task will be calculated as follows:
Amount (Act, Billable) = 10hrs × $30phr + $1000 = $1300.00Celoxis provides another useful indicator that captures the estimated billable amount for all the labor effort on the project. Amount (Est, Billable) is calculated by using a similar formula, as the sum-product of user's bill rate and estimated hours on that task.
Amount (Est, Billable) of the project is calculated from the sum of the amounts of the project’s top tasks.
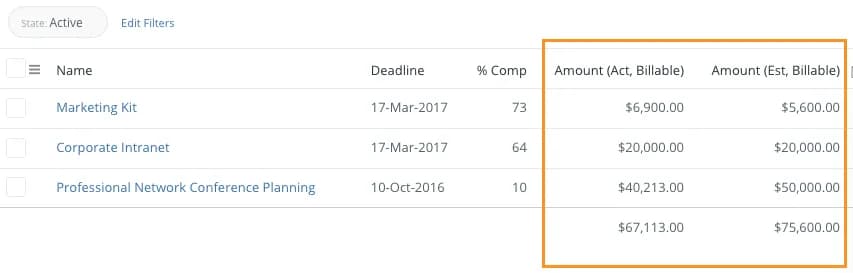
Note that the Amount (Est, Billable) is available and calculated only when the User based billing model is used. In addition, with the User based billing, if project's billing type is Fixed Price, the estimated billing for the project equals the set fixed price and therefore does not provide estimated billing values at the task level.
For Time code based billing, estimated billing cannot be calculated, thus the Amount (Est, Billable) column is not available.
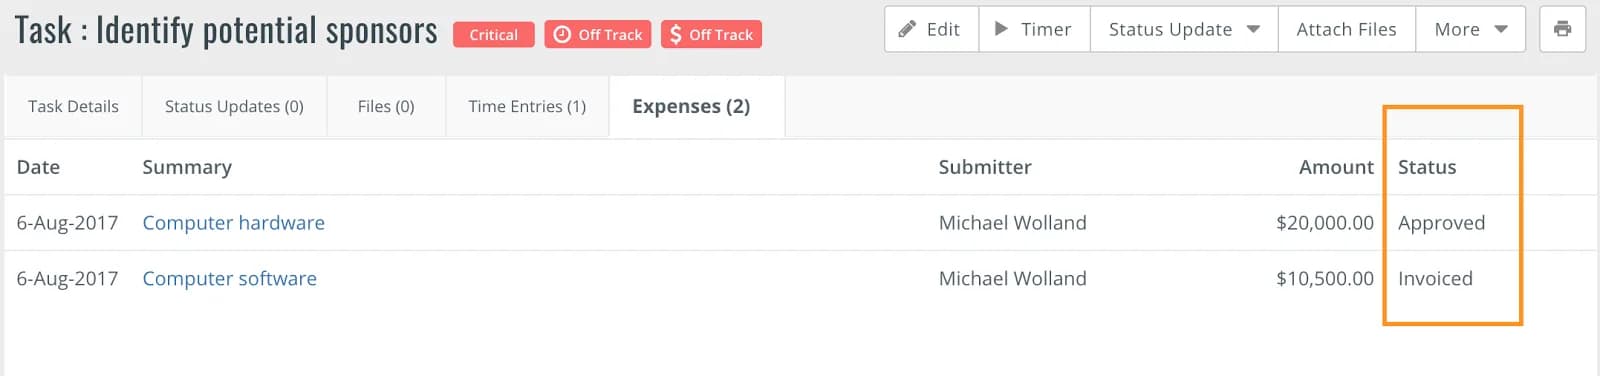
Celoxis also lets you keep track of time entries and expenses that have been invoiced. The Invoice status of the items for any given task can be seen in the Task Details dialogue.
On the organization level, you can also create a cross-project report that shows per project:
- Amount (Expense, Invoiced)
- Amount (Time, Invoiced)
- Hours (Invoiced)
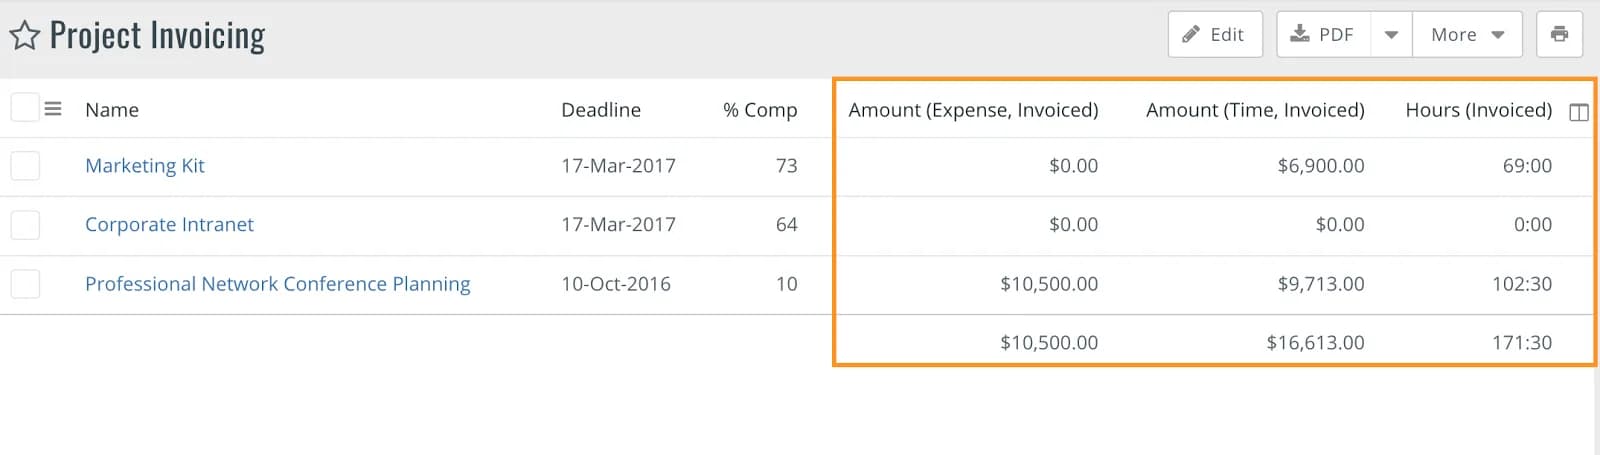
Manager and Executive Cross-Project Reports
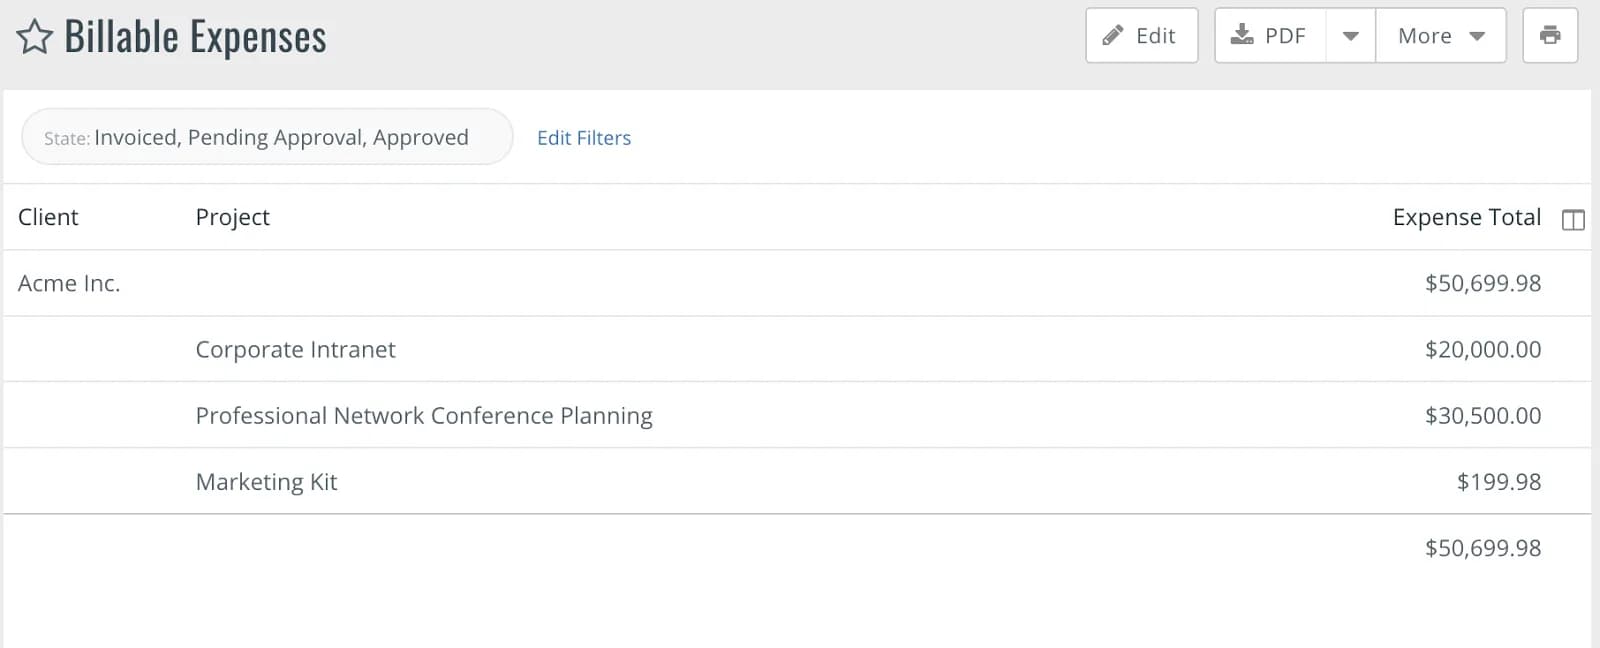
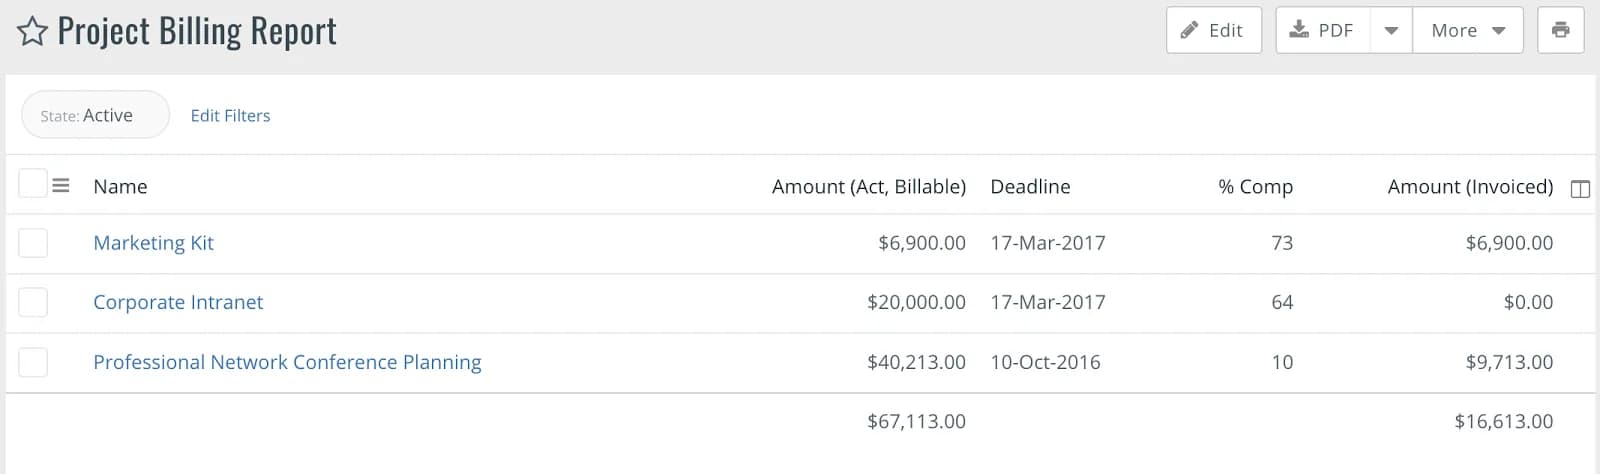
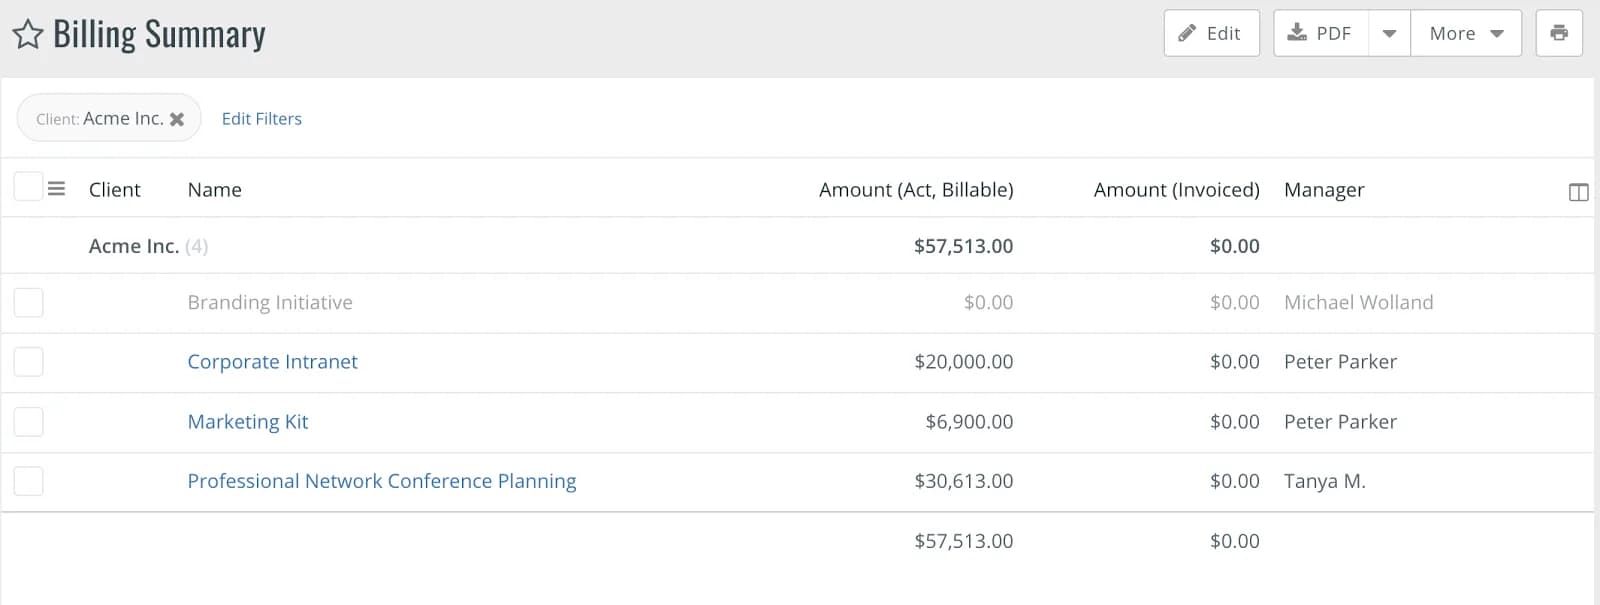
Below are just few examples of the helpful and easy-to-generate reports which can additionally inform you about important billing metrics. Each report can be easily configured, grouped, ordered or turned to a visual chart to your liking.
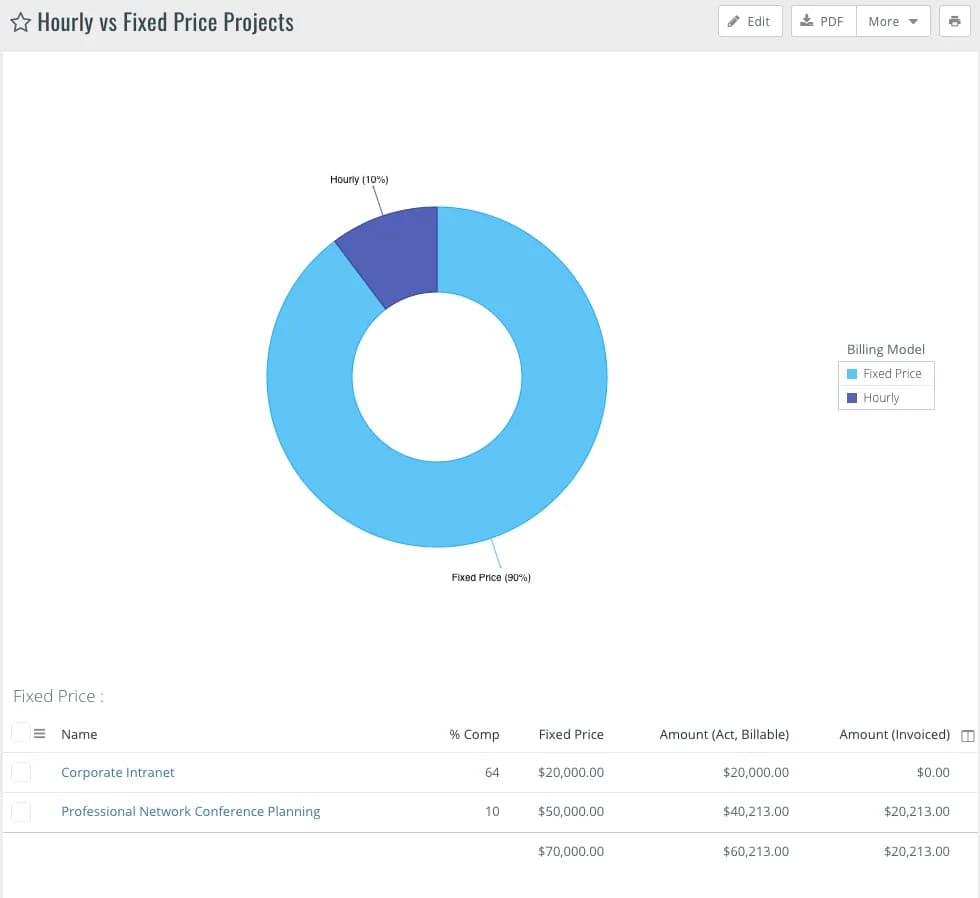
Other scenarios, and frequently asked questions
- What happens if I change the company’s billing model?
This is a major step that may impact the running projects as well as the visible column of the financial reports. Please refer to the Switching between Billing Models article for the complete list of the potential ramifications.
- Why are there the "None" options for the company’s and the projects’ billing models?
The company billing model should be set to None if your organization does not do billing, or if for some reason you do not want to track your billing in Celoxis.
Setting the billing type to None at the project level means that no billing is done for this particular project. This is helpful for internal project, proof of concepts, or pro bono initiatives. - We have different billing rates for certain projects. How can I achieve that?
You can specify the project-specific billing rates for every user and for every project using More >> Billing Rate function. If the billing rate of the user is not specified for the project, it will default to the rate set in the Edit User dialogue.
- What happens when there is a billing rate adjustment to the users with projects in progress?
The actual billing amount for the work already performed will be calculated at the previous rate. The amount of all future work will be calculated using the new rate. If you have any saved entries, and the rate has changed before the entries were committed, the new rate will be used upon commit and approval of the entries.
- What happens when there is a bill rate adjustment to the time codes with projects in progress?
Similar to the users’ billing rates, the billing for the work already performed will be calculated at the previous rate. The billing of all future work (including any saved time entries) will be calculated using the new rate.
- Why some of the time entries and expenses are automatically marked as Billable, while others are not?
Whenever new time entries or expenses added to the projects, they can be marked as billable or non-billable. The project billing model determines the default behavior for the billable checkboxes.
- Fixed Price model – billable is unchecked by default
- Hourly model – billable is checked by default
This default behavior takes in consideration that with the Hourly model, the hours must be tracked in order to generate the proper client invoices, while in the Fixed Price model the invoicing is based on the fixed price but is not affected by the actual efforts spent by the project resources.
- Do you provide integration with any accounting software?
Yes, Celoxis has an out-of-the-box integration with QuickBooks Online for managing and recording invoices. Here’s the link to a short video.
Conclusion/Final Points
As with any type of data, the billing in Celoxis depends on the accuracy and thoroughness of the inputs provided by project managers, administrators and other users. Please make sure you take time discussing the parameters of Celoxis implementation before the system is deployed to the organization, to arrive to the most optimal billing model for your company. By the same token, please make sure your project managers are aware of the differences between the project billing model, and are using the correct model for every project. Finally, encourage your project managers to keep an eye on the users, and time codes’ billing rates, to guarantee that the accurate billing data exists across all projects in the system.
The following input and output fields exists in the out-of-the-box configuration of Celoxis to help with your day-to-date billing needs
Input fields by you
| Company billing model (Requires administrator privileges) | User basedWith this option, you can enter bill rates for every user and these will be applied for calculating the estimated billing and actual billing amount for the projects. The bill rates can be entered while adding/editing users (Company rates) and can be overridden at the project level. Time code basedWith this option, you can enter billing rates against the time codes or services provided by the user. The time codes can be defined at the company level. The rates for these time codes can be entered at company or at project level. NoneBilling model remains undefined. Use this option if you do not plan to do billing in Celoxis. |
| Resource Billing Rate | If the Company billing model is User based, these user bill rates are used to calculate the Estimated Billing and Actual Billing of tasks. Rates defined at a company level can be overridden at a project level. |
| Time Code Billing Rate | If the company billing model is Time-code based, the bill amounts are computed from the rates defined against the Time codes. Time codes rates defined at a company level can be overridden at a project level. |
| Project Billing Model | Fixed PriceIn a Fixed Price billing model, the tasks you undertake and bill for, are for a fixed pre-defined price. When you opt for this model, the ‘billable’ option for expenses and time entries in the project is not checked, by default. HourlyIn an Hourly billing model, the billing is based on the number of hours spent. When you opt for this model, the ‘billable’ option for expenses and time entries in the project is checked, by default. The applicable billing rate depends on the company level setting and can either be User based or Time code based. When the time or expense is approved, billable amount is automatically updated for a task. Billable amounts of individual tasks are rolled up to the summary task and eventually to the project level. NoneProject billing model remains undefined. There is no billing for this project. |
| Fixed Price | The fixed amount to be billed for this project. Available for the project with the Fixed Price billing model. |
| Resource Allocation | Allocating resources for the tasks of the projects is extremely useful for estimating the billing amounts in the user-based billing model. |
Some of the outputs that help with the projects’ billing
| Amount (Est, Billable) | This is the estimated billing amount that the project might incur for completion. This column is only visible when you do user based billing. It is calculated as the sum of estimated billable amounts of all top-level tasks. If the Project's billing model is "Fixed Price" Billing, Amount (Est, Billable) equals Fixed Price value |
| Amount (Act, Billable) | This is the actual billable amount for the project or task. Amount (Act, Billable) of project = Amount (Act, Billable) of all topmost tasks. Amount (Act, Billable) of task = Hours (Act, Billable) * Bill rate + Approved expenses marked as billable. |
| Amount (Invoiced) | Sum of billable amounts of all expenses and all time entries that are marked as invoiced. |
| Amount (Expense, Invoiced) | Sum of billable amounts of expenses that are marked as invoiced. |
| Amount (Time, Invoiced) | Sum of billable amounts of time entries that are marked as invoiced. |
ProjectsHow-To
Managing Scrum Projects
Celoxis is a very flexible platform and quickly adjusts to manage your scrum projects. In this document, we will show you how to setup your projects for Scrum. With Celoxis, you can quickly define and manage your product backlog as well as plan and run your sprints.
Managing the Product Backlog
- Create your Scrum Project with a suitable name from (Main MenuProjectNew Project). Start: Date when your first sprint is scheduled to start Manager: Select a user who is the Product Owner/ Scrum Master. Client: Select the project’s client.
- Now, create a task called “Product Backlog” which is a summary task. This is where the Product Owner will plan and manage backlog items for sprint planning.
- For each user story, the Product Owner will create a task in the Product Backlog Project. The Product Owner will not define any resources or dates at this point. So leave the default dates as-is for every user story added.
- The backlog should be groomed regularly by the Product Owner, stacking up the stories as per their priority and assigning relative size to them. To assign relative size to items (tasks), create a single select custom field “Story Points” using the famed Fibonacci series options. Attach this custom field to tasks and add the column to your Gantt.
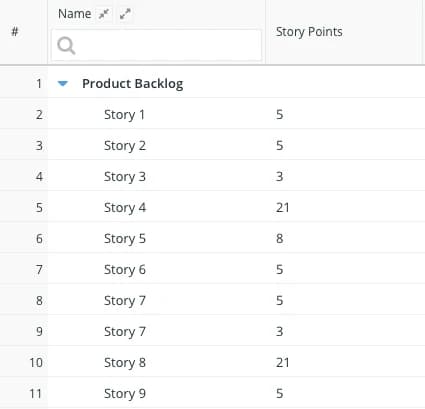
Planning Sprints
- Create your Sprint 1 task (From Gantt click AddTask).
Each Sprint will be represented as a summary task in Celoxis. - Next, expand the Product Backlog and look for stories that the Product Owner, the Team and the Scrum Master think make sense to be done in this sprint. The selection should made based on the target velocity that the team decides for the sprints. Select user stories whose Story Points add up to this target velocity.
- Move the selected user stories from the Product Backlog into your Sprint as subtasks under Sprint 1 (Summary Task)
- Once the user stories are picked up for the Sprint, your team gets to decomposing them into smaller activities or subtasks.
- For each of these activities, the team selects the appropriate dates and assigns resources and estimates the effort.
- Once all stories are converted into tasks, review the sprint to make sure its duration adheres to the sprint iteration. Despite the fact that sprint’s Story Points hits the target velocity, some tasks or activities required to complete them may affect the fixed iterations. In this case, you will need to work with your team to reshuffle the work or remove one of the stories from the sprint (i.e. move it back to the Product Backlog)
Running Sprints
- Once your sprint is loaded and your project is Active, your team can get the work done. Your team can also update the Status field which depicts the current status of the task in the sprint.
- As they work through the items, they can fill Timesheets to log the actual hours spent on each task. Once these hours are approved by the Scrum Master, the system will automatically update the Remaining Work on the task.
Reports
a. Sprint Status
This is tabular report that gives you a real-time picture of all the stories in your current sprint.
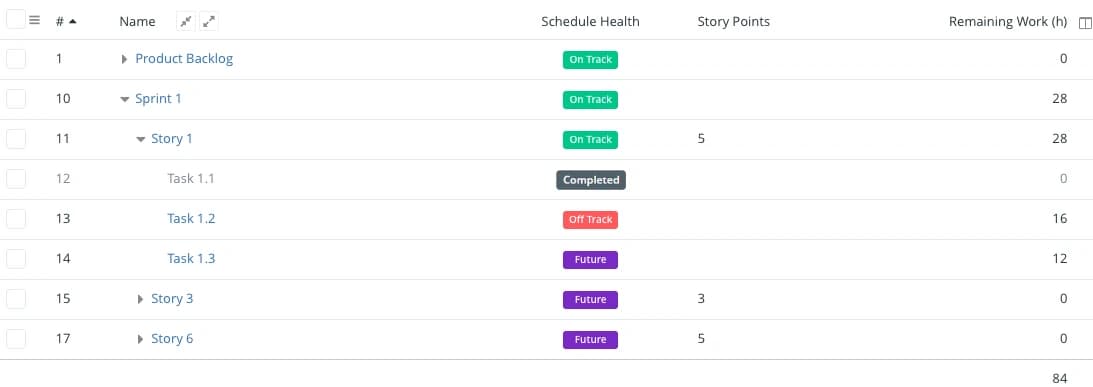
b. Burndown
This chart will help you to see the progress line of your tasks in sprint since it starts to the completion. This makes it effortless for the team to understand if things are going as per plan or if they have to make changes so they can hit the goal on time.
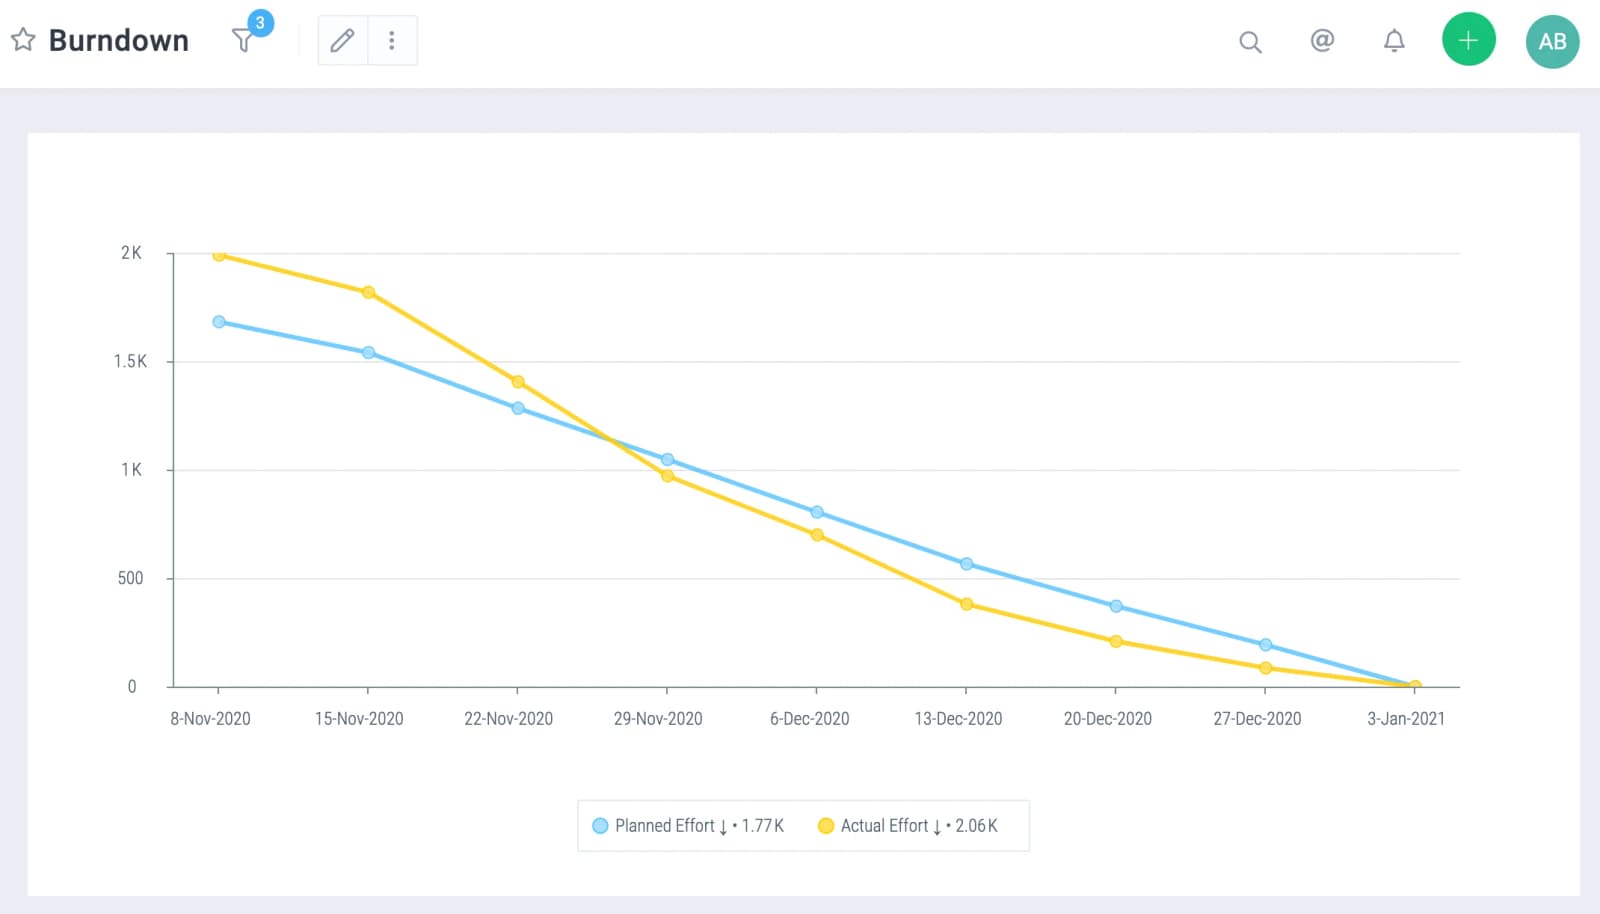
ProjectsHow-To
Project Baseline
You can baseline a project and its tasks, and, in the future, compare actuals versus the baseline values to understand the deviation. Celoxis also supports Earned Value Analysis (EVA). In most scenarios, you would want to think of baseline as the "original estimate". In such cases, you would baseline the project just before kick-off. Celoxis currently supports 6 baselines.
Celoxis currently supports 6 baselines: Baseline, Baseline 1, ... Baseline 5.
Creating a Baseline
To create or delete a baseline, you will required the Baseline privilege.
Go to the project's gantt chart by clicking on . Then click on ToolbarBaselineSetProject. At any point in time, you can also choose to add or reset baselines of selected tasks. For example, if the scope increased and new tasks were added, you can add only these new tasks to the baseline by selecting this tasks and clicking on ToolbarBaselineSetSelected tasks.
The following fields are baselined:
- Planned Start
- Planned Finish
- Planned Effort
- Planned Cost
- Budget
Visualizing the Baseline
Go to the project's gantt chart by clicking on . Then click on ToolbarBaselineGanttShow.
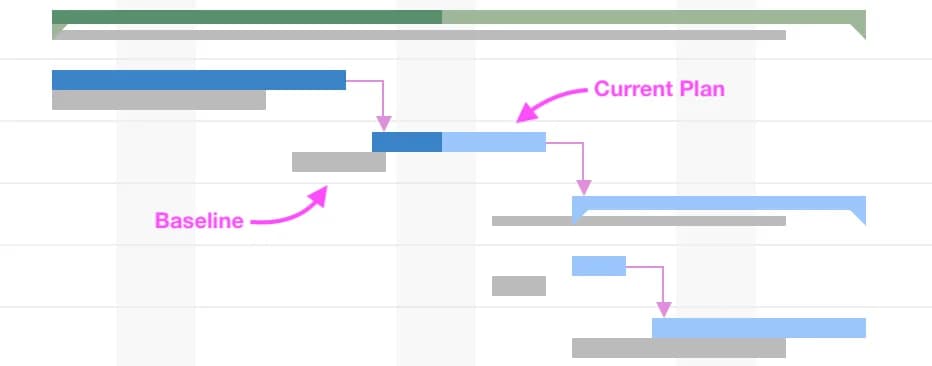
Setting the Default Baseline for a Project
Go to the project's gantt chart by clicking on . Choose a baseline to view by clicking on ToolbarBaselineView and then selecting your baseline. Once data is loaded, click on ToolbarBaselineSet as default to set this baseline as the default. When you see data related to baseline (e.g. CPI, Start Variance, etc.) in reports, the data will be based on this default baseline.
Reporting on Baselines
Once you baseline project, the entire Earned Value Analysis (EVA) attributes like BCWS, BCWP, EV, PV, CPI and SPI are available in project and task reports. If you would to know more about earned value analysis, please read our blog article.
There are many baseline related columns available in projects and tasks.
ProjectsHow-To
Milestone Based Billing
Milestone-based billing is the billing model common in companies with project-driven revenues. This type of billing typically occurs only as certain project milestones have been attained. Tracking the milestones using the project Gantt chart makes it just as easy to track the billing invoices for the project in the same way as the actual deliverable milestones of the project.
Alternatively, depending on how the payment milestones for your projects are structured, you can bill your clients on specific dates regardless of your project’s progress. This too can be achieved using the milestone-based billing techniques suggested in this manual.
At the end of this manual, you will learn how to:
- Define billing milestones that are part of your project.
- Use invoicing reports to track project billing
Invoicing Fields
In this scenario, sending an invoice to the client becomes one of the tasks in the project plan. Using Celoxis default and custom fields, we will create several additional attributes which will allow you to set a special type of task - an Invoice task. You can create custom fields under Main MenuAdminAccount ManagementCustom Fields.
- Date Invoiced
- Name: Date Invoiced
- Type: Date
- Required financial privilege to view: Yes
- Required?: No
- Formula Key: date_invoiced
- Attached To: Task
- Rational: to record the date when the invoice was sent
- Date Paid
- Name: Date Paid
- Type: Date
- Required financial privilege to view: Yes
- Required?: No
- Formula Key: date_paid
- Attached To: Task
- Rational: to record the date when the invoice was paid
- Invoice Status
- Name: Invoice Status
- Type: Formula, use the below mentioned formula. ${ label = 'Unknown'; now = Date.now(); label = !empty entity.date_invoiced ? 'INVOICED' : label; label = Date.before(entity.startCalendar, now ) && entity.date_invoiced < now ? 'OVERDUE' : label; label = !empty entity.date_paid ? 'PAID' : label; label = Date.after(entity.startCalendar, now) ? 'FUTURE' : label; label } ** These options can be customized.
- Required financial privilege to view: Yes
- Required?: No
- Formula Key: invoice_status
- Attached To: Task
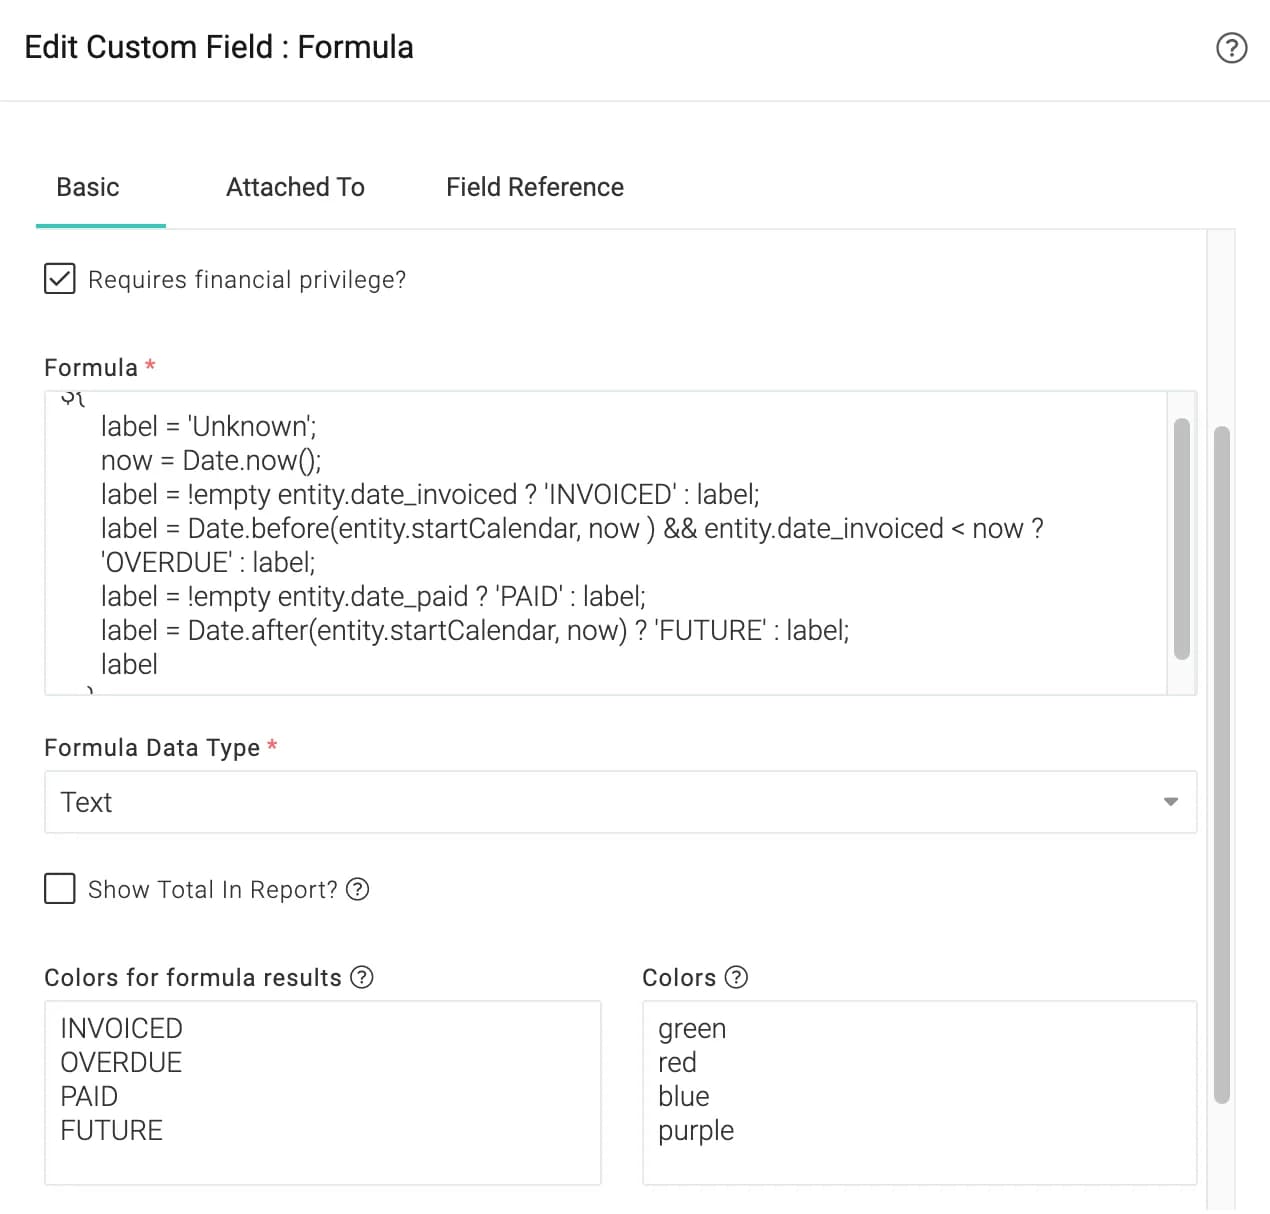
Adding Invoice Milestones to the project timeline
When you put together contracts, or statements of work defining the project (note that this work is done outside of, and independent of Celoxis), you are likely to have the Payment Milestone section of the contract, defining exactly what payments are made, and when. Depending on the rules of the contract, and on the nature of work you perform, the payment milestones may be tied to specific deliverables, specific days or both. In order to track the project’ billing using the task attributes we set in the previous section, you will need to create an Invoice task for every payment milestone, and configure it according to the rules of your contract.
For example, imagine the scenario where you are building a Corporate Intranet for the client, under a $100,000 fixed price contract. Your payment schedule may look something like this:
| # | Project Milestone | % | Amount | Projected Date | Rules and Dependencies |
|---|---|---|---|---|---|
| 1 | Project Kick Off | 10 | $10,000 | 09/25/17 | Invoice on the specified date, regardless of the project status |
| 2 | Conclusion of SRS Phase | 25 | $25,000 | 11/14/17 | Invoice once the specified project milestone was attained |
| 3 | Conclusion of the Development Phase | 25 | $25,000 | 01/02/18 | Invoice once the specified project milestone was attained |
| 4 | Final acceptance | 40 | $40,000 | 01/12/18 | Invoice once the specified project milestone was attained |
| TOTAL | 100 | $100,000 |
In this situation, the payment milestone #1 will need to be manually scheduled in the project plan to occur on 9/25/17, while all other invoices may be delayed, if the project timeline is extended through the duration of the project.
To ensure proper milestone-based billing in this scenario:
- Add the Invoicing milestone tasks to your project plan
These tasks are going to be your milestone tasks (AddMilestone)
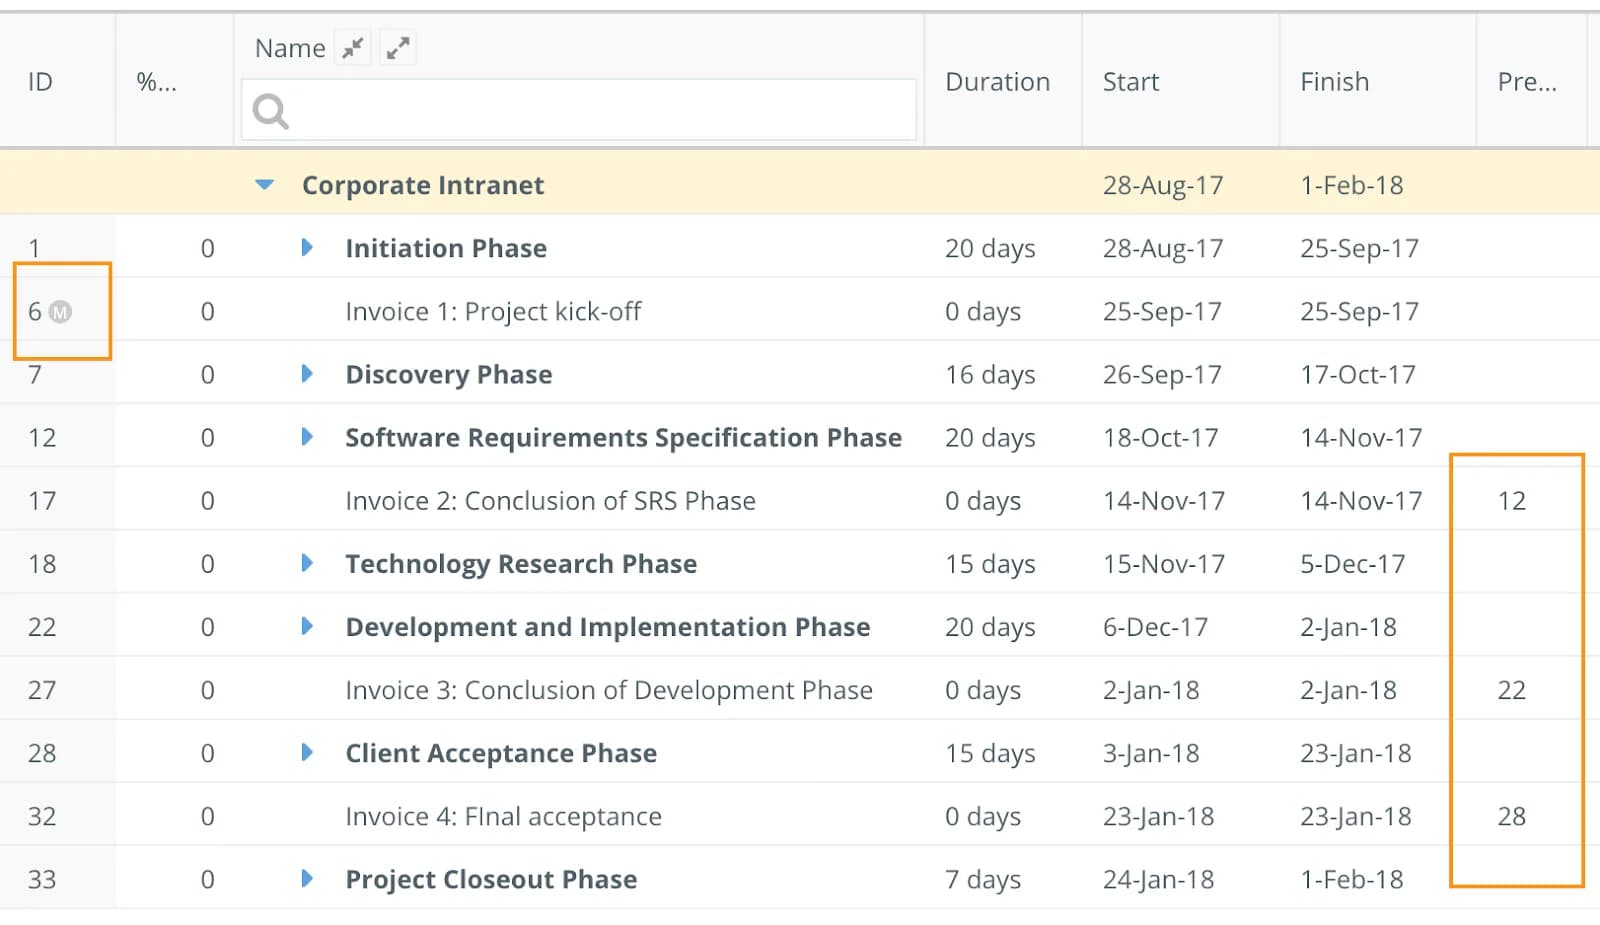
Note that the task 6 is manually scheduled, as indicated by the M icon next to the task ID.
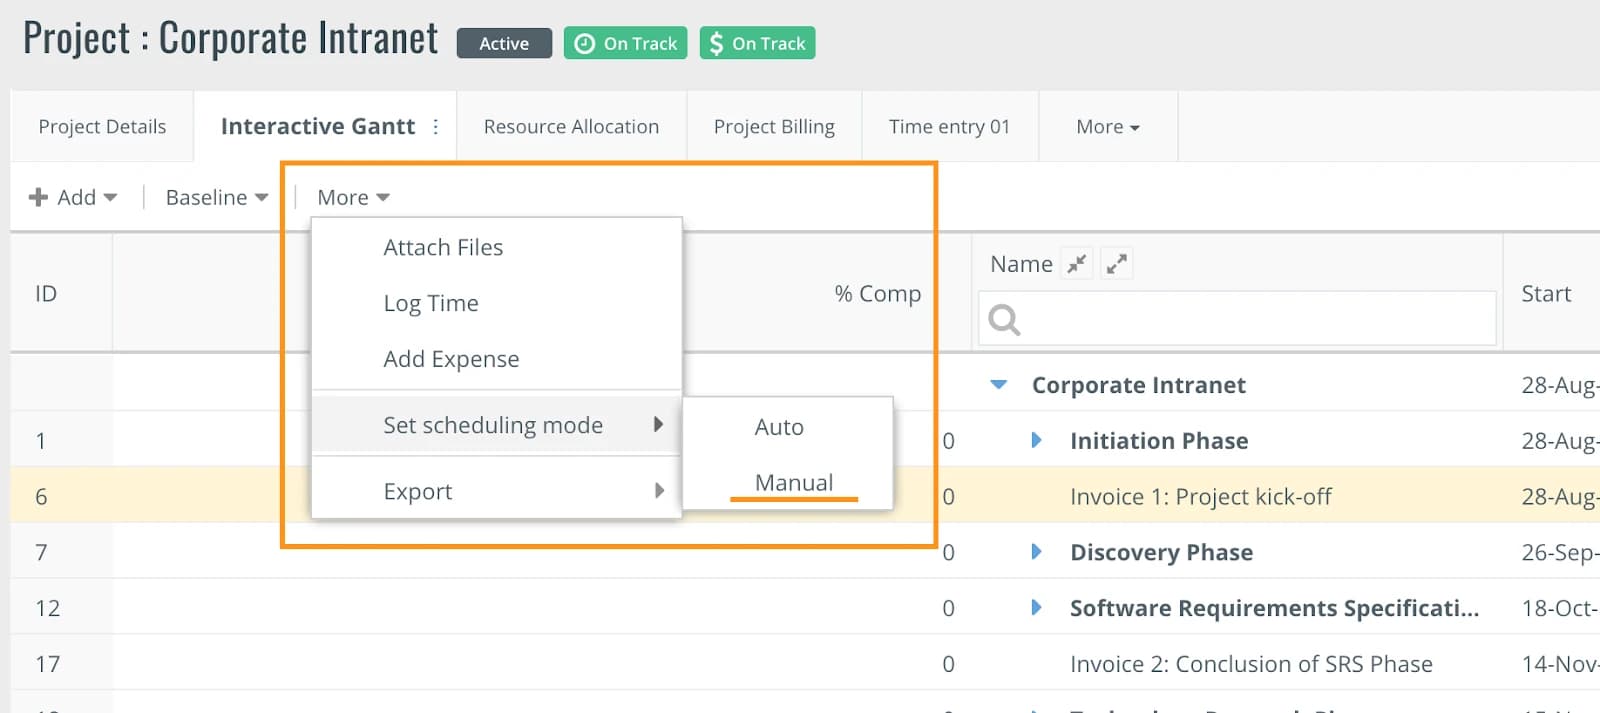
The remaining milestones 7, 27 and 32, are scheduled to start when the preceding phases are complete, as dictated by the project contract.
- Set milestone tasks’ attributes
Here, it is time to put the Fixed Price amounts on these milestones. For each of the Invoice milestone tasks, set these amounts under the Edit TaskAdvanced tab.
- Set Billing Type to Fixed Price
- Set the Fixed Price
- Under the Custom Fields tab, you can also set the Date Invoiced so that you can see the details as described in step 3.
- Status of the invoices
As the project progresses, and you invoice your client, the Invoice Status will automatically be calculated based on logic defined above.
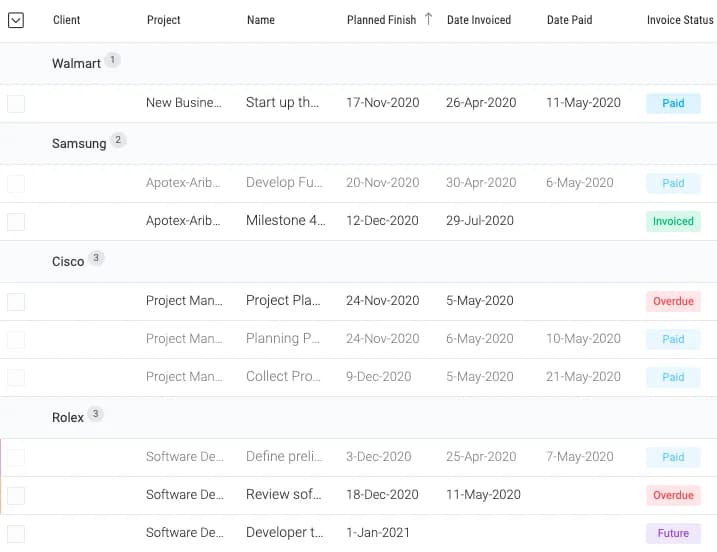
Once the payment is received, you can mark the Date Paid against the milestone so that the Invoice Status automatically sets to Paid.
Invoicing Reports
Below are the examples of the reports that can be used to track the billing of the projects:
Project Billing Milestones
Cross-project table, showing Fixed Price and Invoice Status for all invoices: Paid, Sent or Invoiced.
To create this task-based report, use the Milestone filter set to Yes, including only the tasks which are your payment milestones.
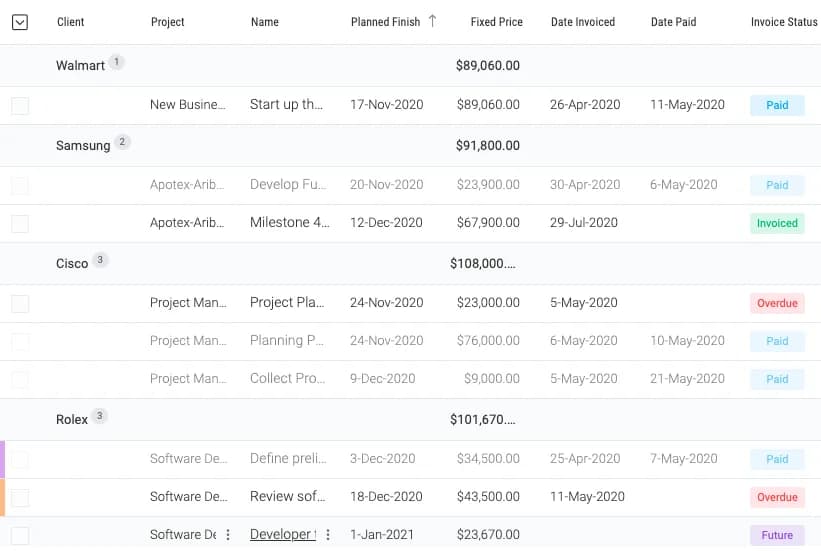
Projects Invoices by Status
Bar chart, showing Invoice Status for all active projects. This is again a task report.
Just like any other chart in Celoxis, this report is interactive. Click on each bar to reveal the detailed information for the invoices of the chosen status.
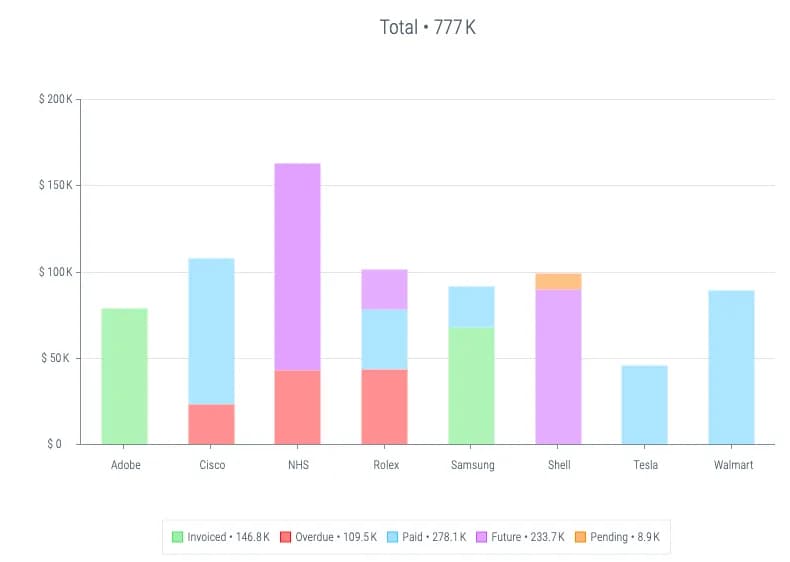
A Sample dashboard for your Accountant to track the Invoice details:

Conclusion/Final Points
As shown in the examples above, it is very easy to create and maintain the milestone-based billing setup in Celoxis.
ProjectsHow-To
New Projects Impact Analysis & Workload
Over the course of normal business, projects need to be properly re-evaluated for appropriate reprioritization. Often, at executive management directive, managers need to address an incoming high priority project request drop into the mix of pre-existing projects. This guide addresses how to:
- Assess the impact of a new project on the existing resource workload,
- Identify under-utilized or free resources,
- Replace resources on tasks,
- Shift out certain tasks to level out the workload,
- If needed, shift out a low priority project completely to a later date.
Assessing Impact of New Project on Existing Workload
- Create a new project state, say Requests (Main MenuAdminProject ManagementProject States). Keep this new state in “Planning” stage and disallow time. This helps keeping the new project requests separate from the regular projects.
- Create a project for your new project request and keep it in “Requests” state (Click Main MenuProjectNew Project). Enter the planned start date for this project.
- From the project’s Interactive Gantt tab, define the WBS and resources. Since the project is in “Requests” state, it will not affect your existing workload.
- Access the Resource Load (Main MenuResource Load). By default, this view will show you pre-existing planned and active projects.
- Edit Filters and Add “Requests” to the Project State Filter. Click on Apply. Now, your resource load view will immediately show you the impact that any new project requests will have on the existing mix and workload.
- Because of the new project request, the impact on the existing workload is high and a lot of resources are overallocated.
- You can download this view (Select “PDF” option from the top right button group) and send this to your executives to show the direct impact of the new requests on the existing mix of projects.
Identify Under-utilized or Free Resources
From the same Resource Load View, you can easily identify the under-utilized or free resources. These are the resources that are color-coded as blue.
Replace Resources on Tasks
You can directly replace resources on problematic tasks (Mouseover the task in contention, and select the Edit Resources)
In the example below, you can Edit the “Survey commercial spaces” task and reassign it to Tanya who is relatively free in that period.
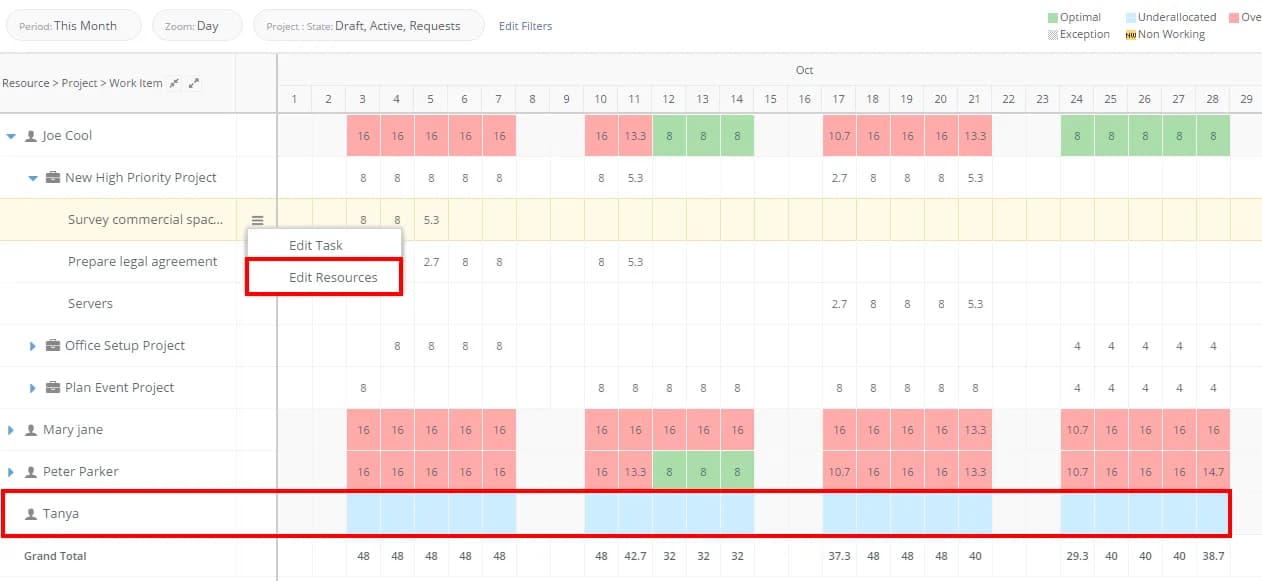
Shift out Tasks
There could be situations where free resources are not readily available. In such cases, you may need to shift out certain tasks that are of low priority and can be easily shifted out. To do this,
- Mouse over the appropriate task.
- Click on the 3-line menu.
- Select Edit Task. Here you can change the task’s start date to a later one.
Shift out Low Priority Projects
If you still have a resourcing issue, change the start date of the other low priority projects so that all other tasks in those projects are rescheduled. To do this,
- Click on the project to open it in a new tab.
- In the new tab, click on Edit (from the top right button group)
- From the Edit Project pop up, change its Start Date. This will automatically shift all tasks (except any manually scheduled tasks) in perspective to the new start date.
ProjectsHow-To
Convert Project Request to a Project
In this article, we will learn to automate a workflow which will create a New Project in Celoxis whenever a Project Request is moved to the Approved state in Celoxis. For this we will be using Zapier, if you are not familiar with Zapier then first read this article.
Automatically convert Project Request to a Project
- Make a Zap
- Choose Celoxis app and Issue Status Updated as the Trigger
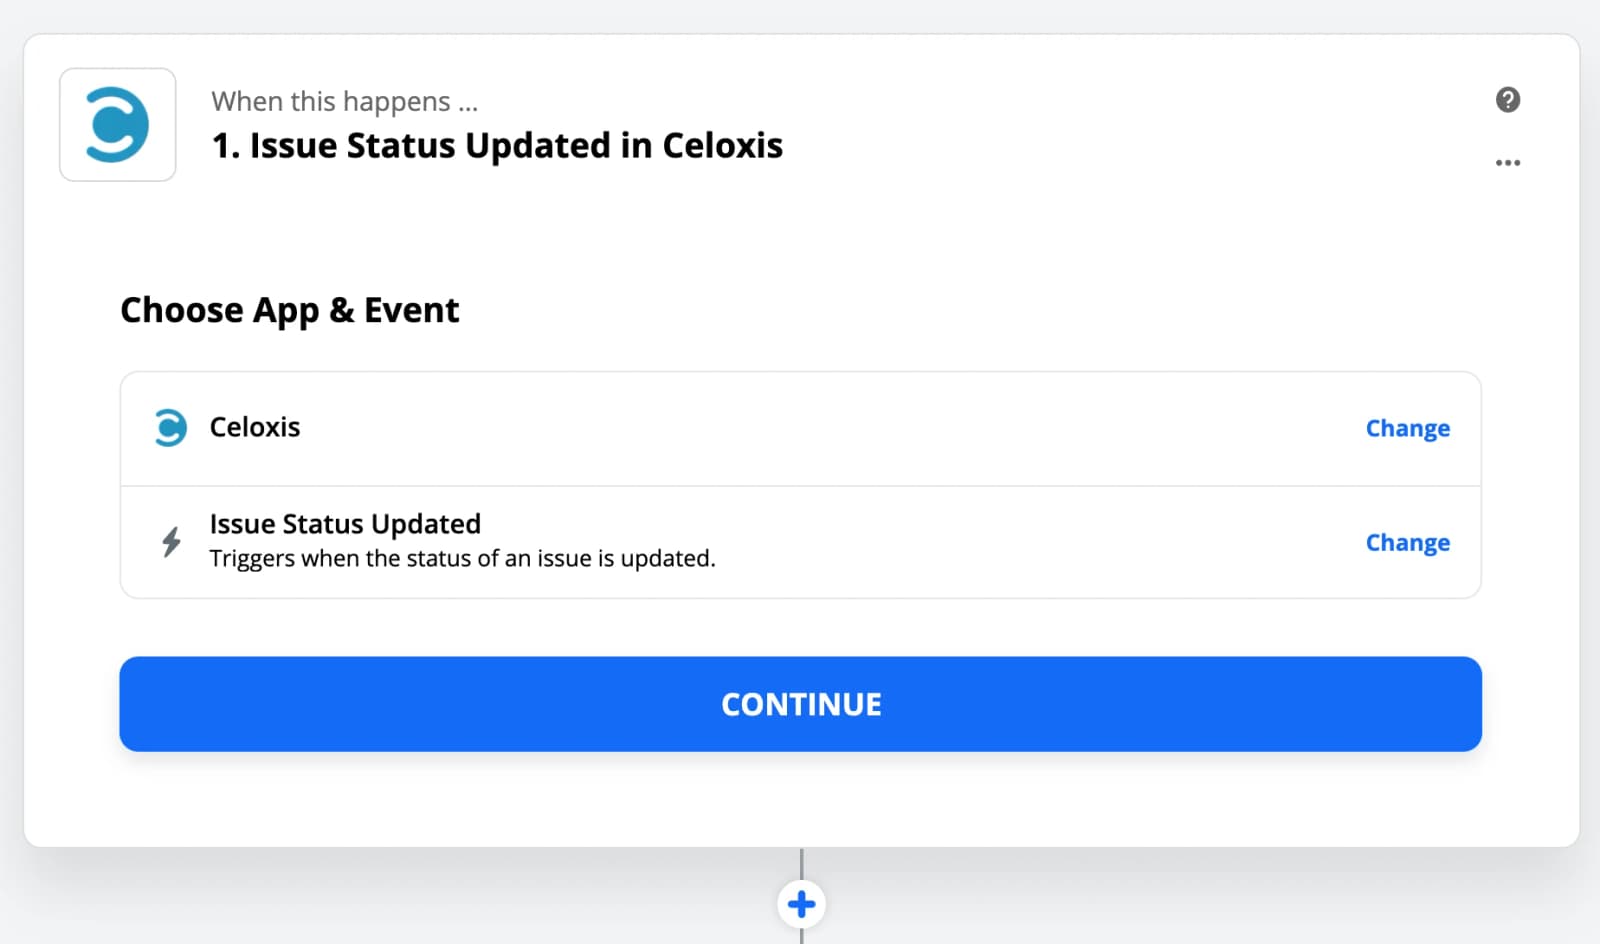
- Sign In to your Celoxis account
If the account already exists then select it from the list.
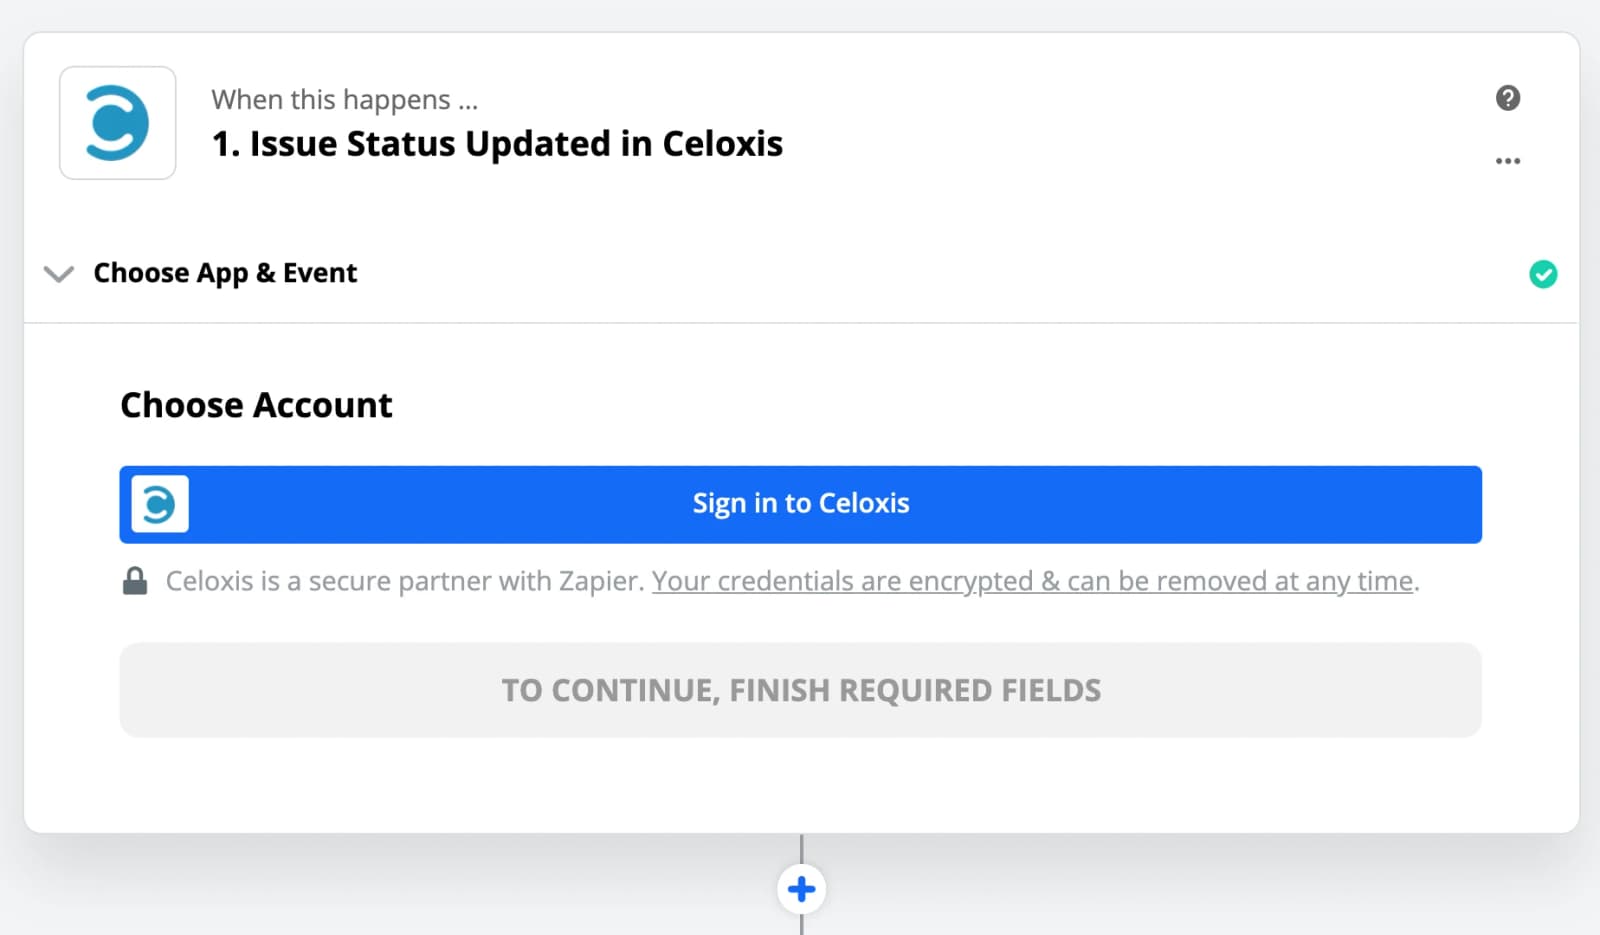
- Paste your Celoxis API key
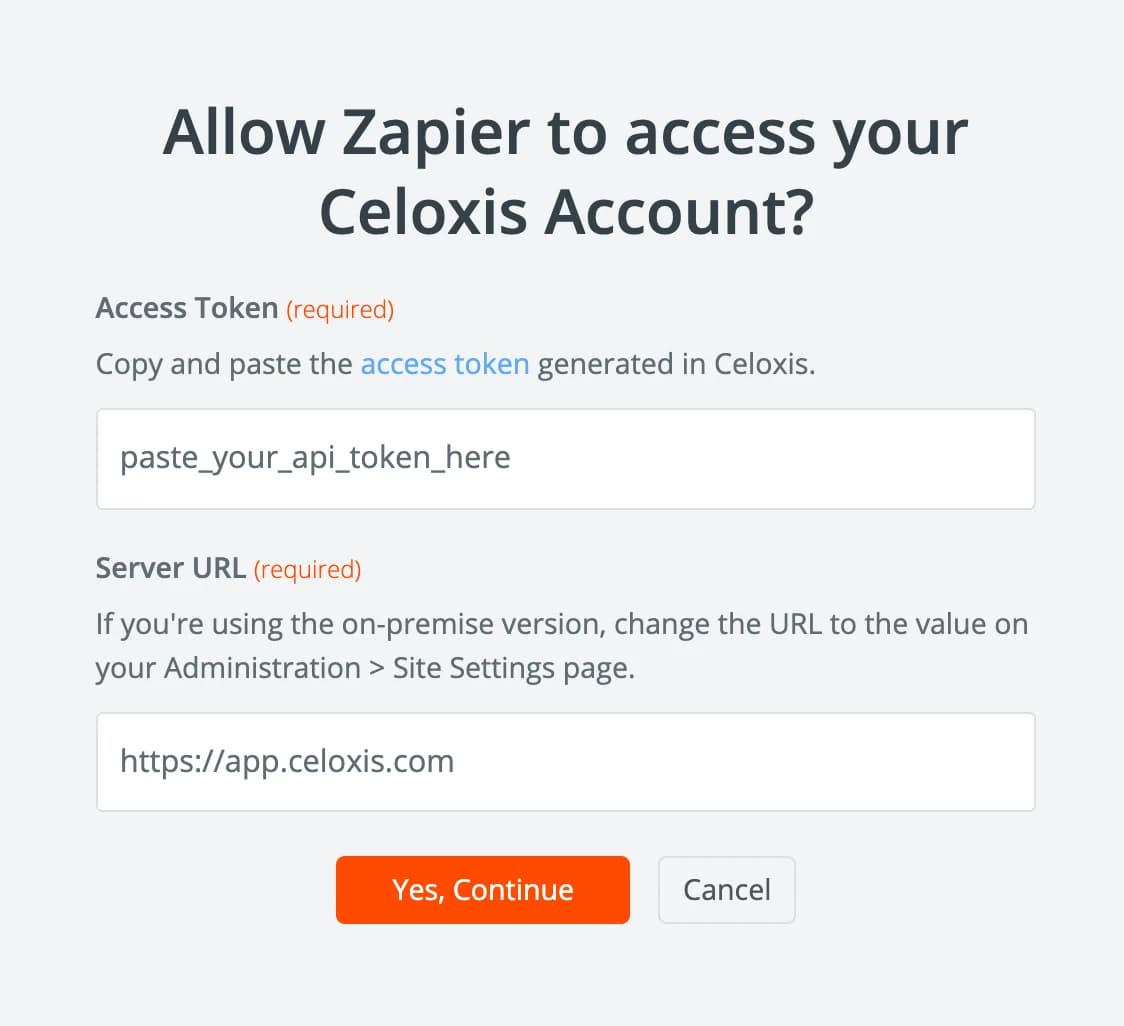
- Check the details and Continue
- Test the Trigger
- Select a Sample
The data from the sample will be used in other steps to set up the Zap.
- Choose the Filter app

- Setup Filter

- Continue

- Test the Filter

- Choose Celoxis app and Create Project as the Action
- Select the account
- Customize the Project
Here you can map all the fields from request app to a project.
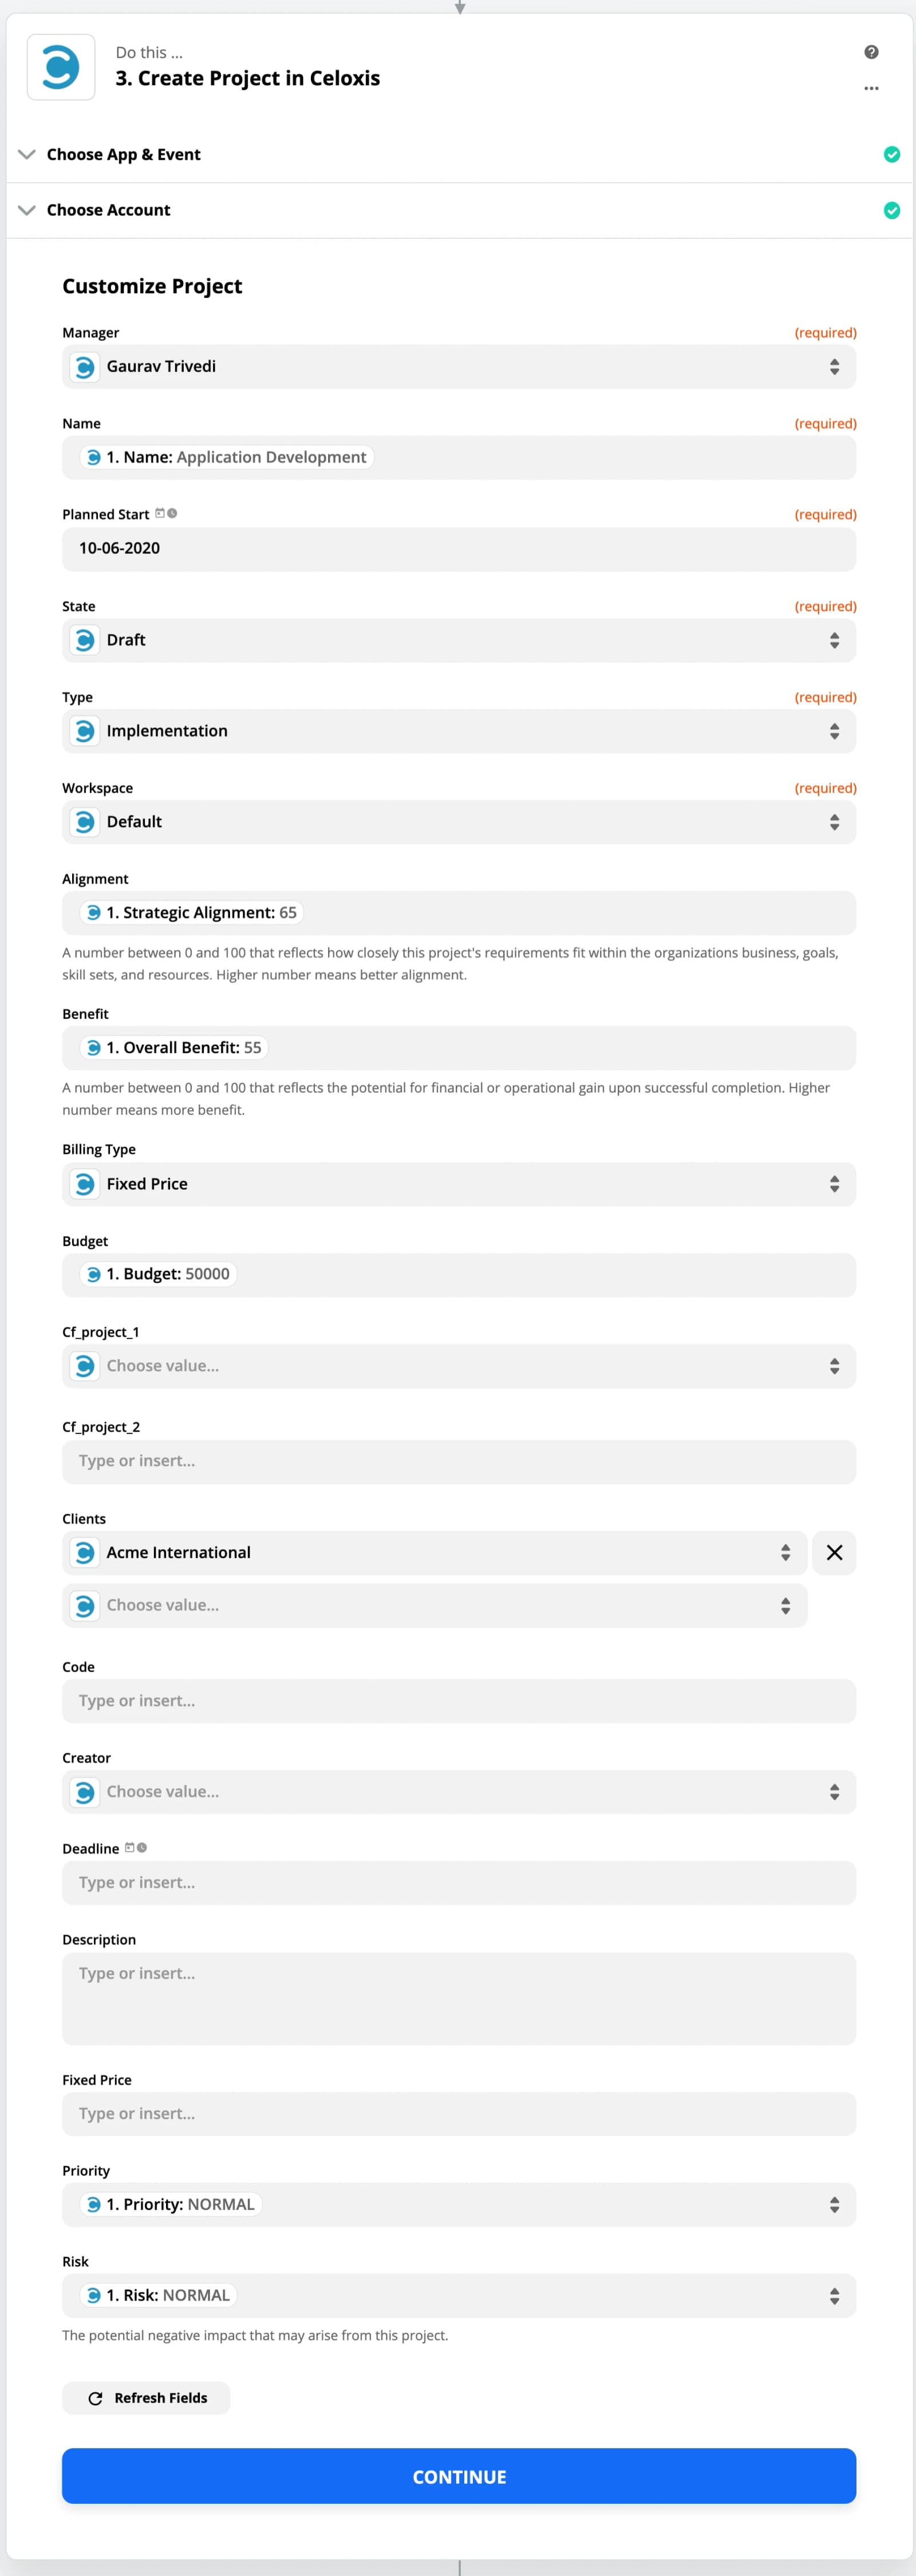
- Test the Action
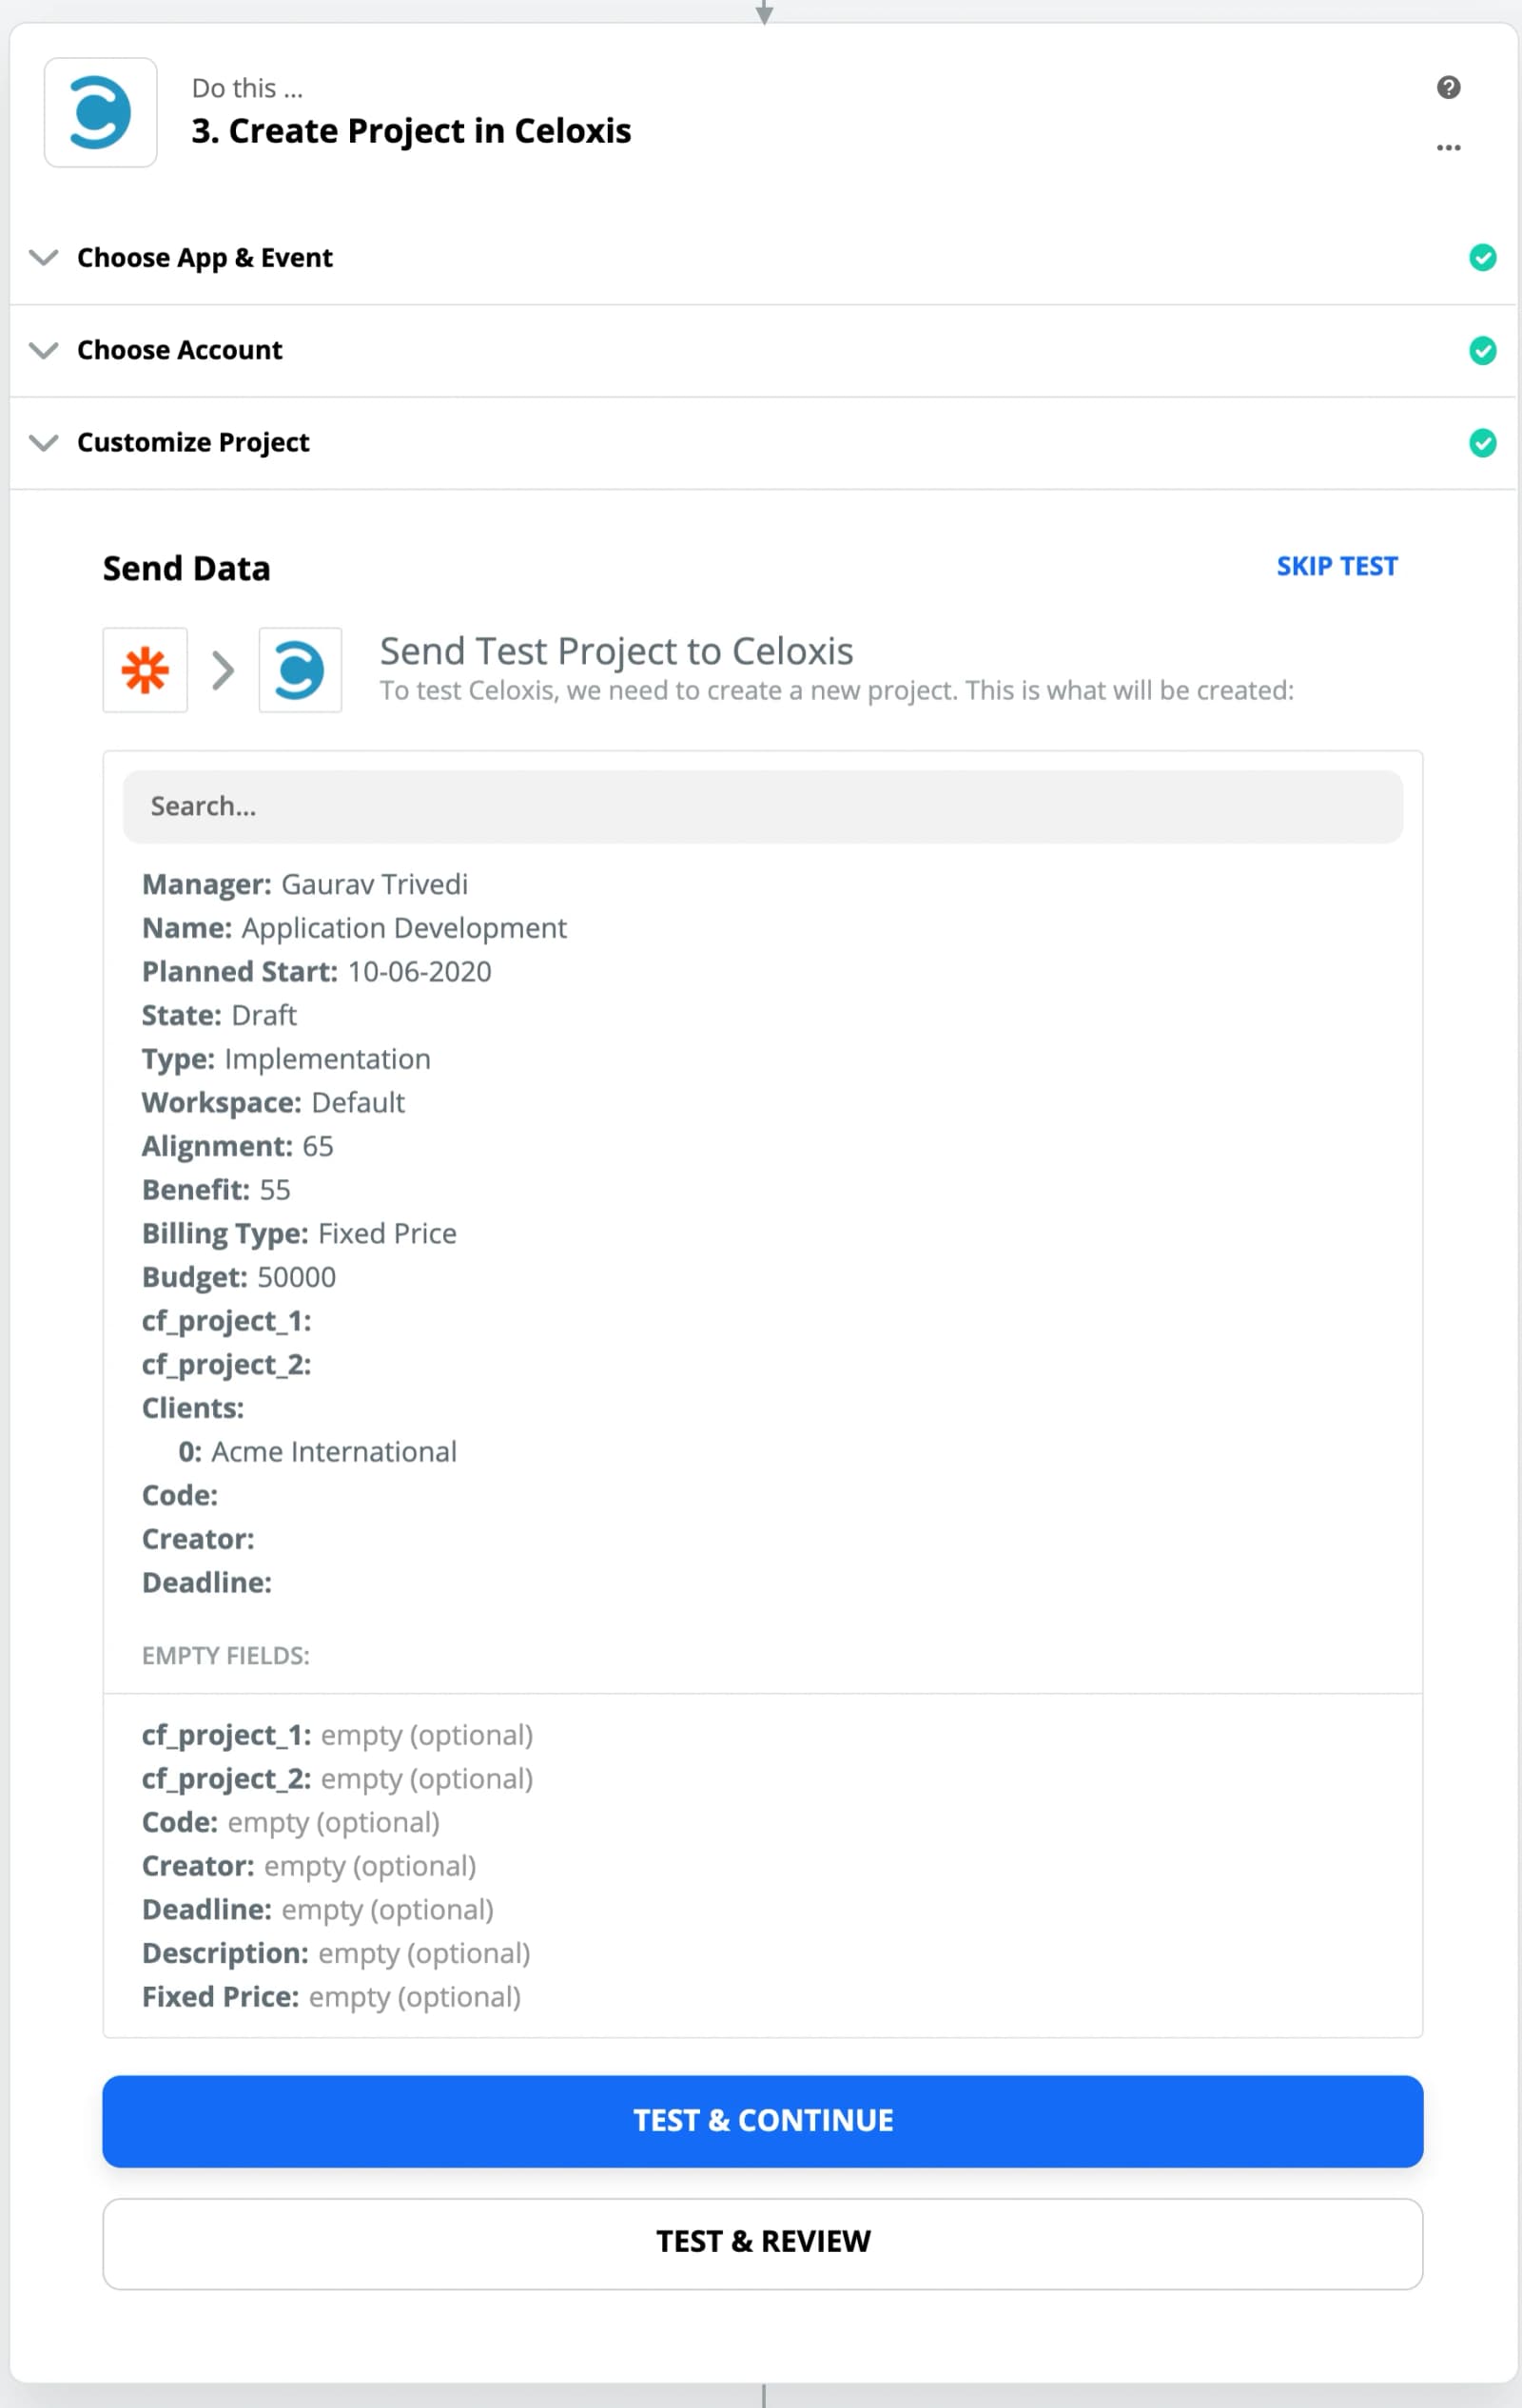
- Turn On the Zap
- Zap is Ready!
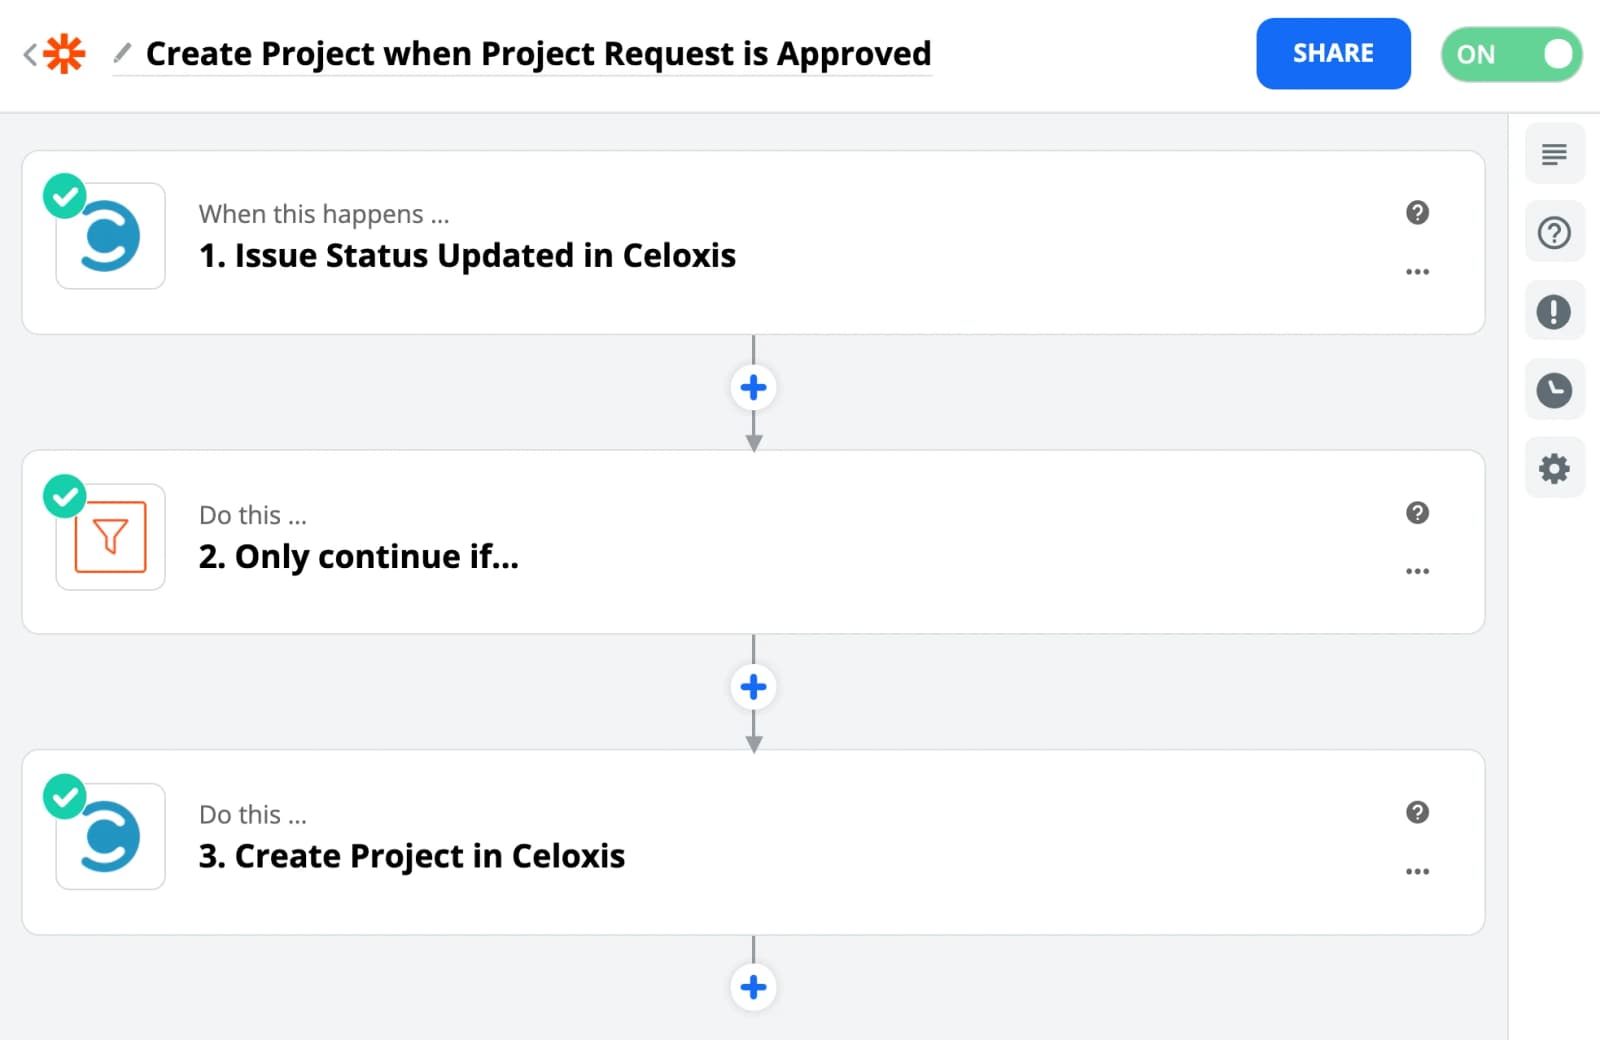
ProjectsHow-To
Backward Scheduling of Project
Celoxis enables you to perform backward scheduling of your projects in cases where the project end date is fixed and cannot be exceeded at any cost.
Backward planning involves starting a plan at the end goal and then working through required steps in reverse-chronological order.
This can be done in Celoxis by following the below steps. Here we will take an example of a simple website project.
- Create a project. Here, define a Deadline as the project end date and since we are planning the project so select the State as Draft and click on Save.
- Create the first task with the End date of the project and add the Must Finish On constraint.
- Add a predecessor task to the first task and put As Late As Possible constraint on the predecessor task and define its duration. Once you set up the duration of Predecessor task, the Start date will be shifted because your last task has a fixed End date. Here, As Late As Possible constraint is set to overcome the buffer time of the predecessor task.
- Since the end date of the last task is fixed, the start date of the predecessor task will keep on shifting as you enter new tasks.
- Repeat steps 3 & 4 until you list down all the tasks for the project.
An alternative and quicker way to do this is to add the columns Constraint Type and Constraint Date in your Gantt and set them through there directly along with setting the predecessors.
- At the end of this process you will get the start date of the project.
- Replace the start date of the project with the date deduced by backward scheduling and your final plan is ready in Celoxis.
FAQ
ProjectsFAQ
Can a project have multiple project managers?
Yes. Click on a project name. This will open its panel. Then click Access Control. On the screen, click on the user icon for Project Manager. Select the user(s) you wish to add as secondary managers and save.
ProjectsFAQ
How do I exclude completed projects from reports?
To exclude completed projects from your view, you need to edit the report and add the filter Schedule Health and check all the options in the drop-down except the Completed value. Save the report for the new filters to be applied.
Tasks
29 articlesConcepts
TasksConcepts
Summary Tasks
If a task has child tasks, then it is called a summary task. Many attributes of summary tasks are rolled up from its child tasks. Some of the non trivial attributes are described below.
Start Date (planned/actual/projected)
It is the minimum of planned/actual/projected start date of its children.
Finish Date (planned/actual/projected)
It is the maximum of planned/actual/projected finish date of its children
Work (Effort)
It is the sum of work of its children.
Constraints
Constraints are not applicable for summary tasks.
Resource allocation
Resources assigned to a summary task will not be factored into the planned cost of the summary task, nor displayed on the resource load charts.
% Complete
% Complete = (W1×P1 + W2×P2 + ... + Wn×Pn) ÷ (W1 + W2 + ... + Wn)For all
leaf-level descendants where
is the work and
is the % complete of its
descendant.
Predecessors
If a summary task has a predecessor, the system considers it to be equivalent to having that predecessor for all its children.
Auto/Manual Scheduling
Since the planned start and finish are calculated from its children, summary tasks are always considered to be auto scheduled.
Budget/Costs/Billing
It is the sum of the budget/costs/billing of its children.
Duration
It is the working time between the task's start and finish date as per the project's work calendar
TasksConcepts
Predecessors
A task's predecessors are tasks that affect its start or finish date.
In the Build farmhouse project, consider two tasks Buy land and Flatten land. You cannot start the land flattening process unless the land has been purchased. Hence, Buy land is a predecessor of Flatten land. Flatten land is called the successor of Buy land.
Once predecessors are entered, that task's start and finish dates are always kept up-to-date by the system when any of the predecessors are rescheduled. In the above example, if the finish date of the Buy land task is pushed ahead by 10 days, Celoxis will automatically push the start date of Flatten land by 10 days.
Types of predecessors
| Finish-Start (FS) | The successor task (S) cannot start until its predecessor task (P) has finished. (Most common) | |
| Start-Start (SS) | The successor task (S) cannot start until its predecessor task (P) has started. | |
| Finish-Finish (FF) | The successor task (S) cannot finish unless its predecessor task (P) has finished. | |
| Start-Finish (SF) | The successor task (S) cannot finish unless its predecessor task (P) has started. (Rarely used) |
Lead Time
In some cases, when a task is nearing completion you may want to begin another task. For instance, 3 days prior to the construction of the walls of your home is completed, you may want to start selecting the color of the paint for the walls. So, for the
task you will select the
task as the predecessor and enter a lead time of 3 days. Lead time is specified as a negative number. E.g. -3d indicates a predecessor with 3 days lead time.
Lag Time
Sometimes a task cannot begin as soon as another task is completed. For example, once you paint the walls, it may take another 2 days for the paint to dry and only then you can begin furnishing the room. In this case, you would select the
as the predecessor of the
task and enter a lag of 2 days. Lag time is specified as a positive number. E.g. 4h indicates a predecessor with 4 hours lag time.
Setting predecessors
Predecessors can be set using the interactive gantt chart or from the add/edit task form. On the interactive gantt, you can set predecessors using:
- Drag-Drop: you can drag from the beginning or ending of a predecessor to the beginning or ending of a successor to create any of the four dependency types.
- Predecessor Column: you can enter the serial numbers of a tasks's predecessors separated by the semi-colon character. E.g. 2;3
- Successor Column: you can enter the serial numbers of a tasks's successors separated by the semi-colon character. E.g. 5;6
- Edit Task Screen: selecting a task and pressing the
ekey (or Right Click Edit) will open the edit task form. You can edit the predecessors as described earlier.
Setting inter-project predecessors
Inter-project predecessors can only be entered from the add/edit task screen. Open the task form using Edit and go to the Predecessors tab. Add a row. First pick the project and then the task dropdown will be populated with tasks from that project.
Note that inter-project dependencies cannot be edited from predecessors and successors columns in interactive gantt.
TasksConcepts
Constraint
Constraints are applied to your tasks to impose restrictions on the way the task's start and finish dates are calculated. Often, they represent real world conditions. Examples:
- The last date to submit a bid is 20th May 2018
- Application testing can begin only after the phone is available in the market on 1st October 2020
| Name | Abbreviation | Description |
|---|---|---|
| As Soon As Possible | ASAP | Schedules the task to begin as early as possible. This is the default constraint for new auto-scheduled tasks. For stand-alone tasks, this will always schedule tasks from the project's start date. |
| As Late As Possible | ALAP | Schedules the task as late as possible, without delaying subsequent tasks. For stand-alone tasks, this will always schedule tasks backwards from the project's planned finish date. |
| Start No Earlier Than | SNET | Schedules the task to start on or after a specified date. Use this constraint to ensure that a task does not start before a specified date. |
| Start No Later Than | SNLT | Schedules the task to start on or before a specified date. Use this constraint to ensure that a task does not start after a specified date. |
| Finish No Earlier Than | FNET | Schedules the task to finish on or after a specified date. Use this constraint to ensure that a task does not finish before a particular date. |
| Finish No Later Than | FNLT | Schedules the task to finish on or before a specified date. Use this constraint to ensure that a task does not finish after a particular date. |
| Must Start On | MSO | Schedules the task to start on a specified date. |
| Must Finish On | MFO | Schedules the task to finish on a specified date. |
We recommend that you use MSO and MFO only when absolutely required as they cause the schedule to be unnecessarily inflexible.
Setting Task Constraints
Task constraints can be set directly from the constraint columns or from the add/edit task screen.
TasksConcepts
Milestone
Milestones are major checkpoints in a project. They can indicate the completion of key project tasks, the commencement of a phase or conclusion of the plan. For example, in a software development project, Research Complete can be a milestone that indicates that all the research activities have been completed and the project is now ready to move to the next step of preparing a Requirements Specification document.
In Celoxis, milestones are tasks that have zero duration and represented by a diamond symbol (◆) in the gantt chart.
Creating milestones
From the Interactive Gantt, click Gantt ToolbarAddMilestone.
To convert an existing task into a milestone, set its duration as zero.
Recommendations
- Set predecessors to your milestones. Doing this will illustrate the impact to your milestones.
- Set deadline (FNLT) constraints on milestones only if necessary as it will make it difficult to flexibly re-plan activities around your milestone.
- Indent milestones so that they appear under the correct WBS element
TasksConcepts
Critical Path
Critical tasks are those tasks which if slipped, could cause delays in the project. The critical tasks can be thought of as the longest dependent sequence of activities in a project plan which must be completed on time for the project to complete on the planned finish date. Critical tasks are automatically calculated by the system and cannot be manually marked.
Read our blog article on critical path for an in-depth look on this topic.
Tasks that have MSO/MFO/SNLT/FNLT constraint are also marked critical and will appear on the critical path.
A task stops being critical when it's completed, because it can no longer affect the completion of successor tasks or the project finish date.
Viewing critical paths
You can view the critical path from the interactive gantt by clicking Gantt ToolbarCritical Path.
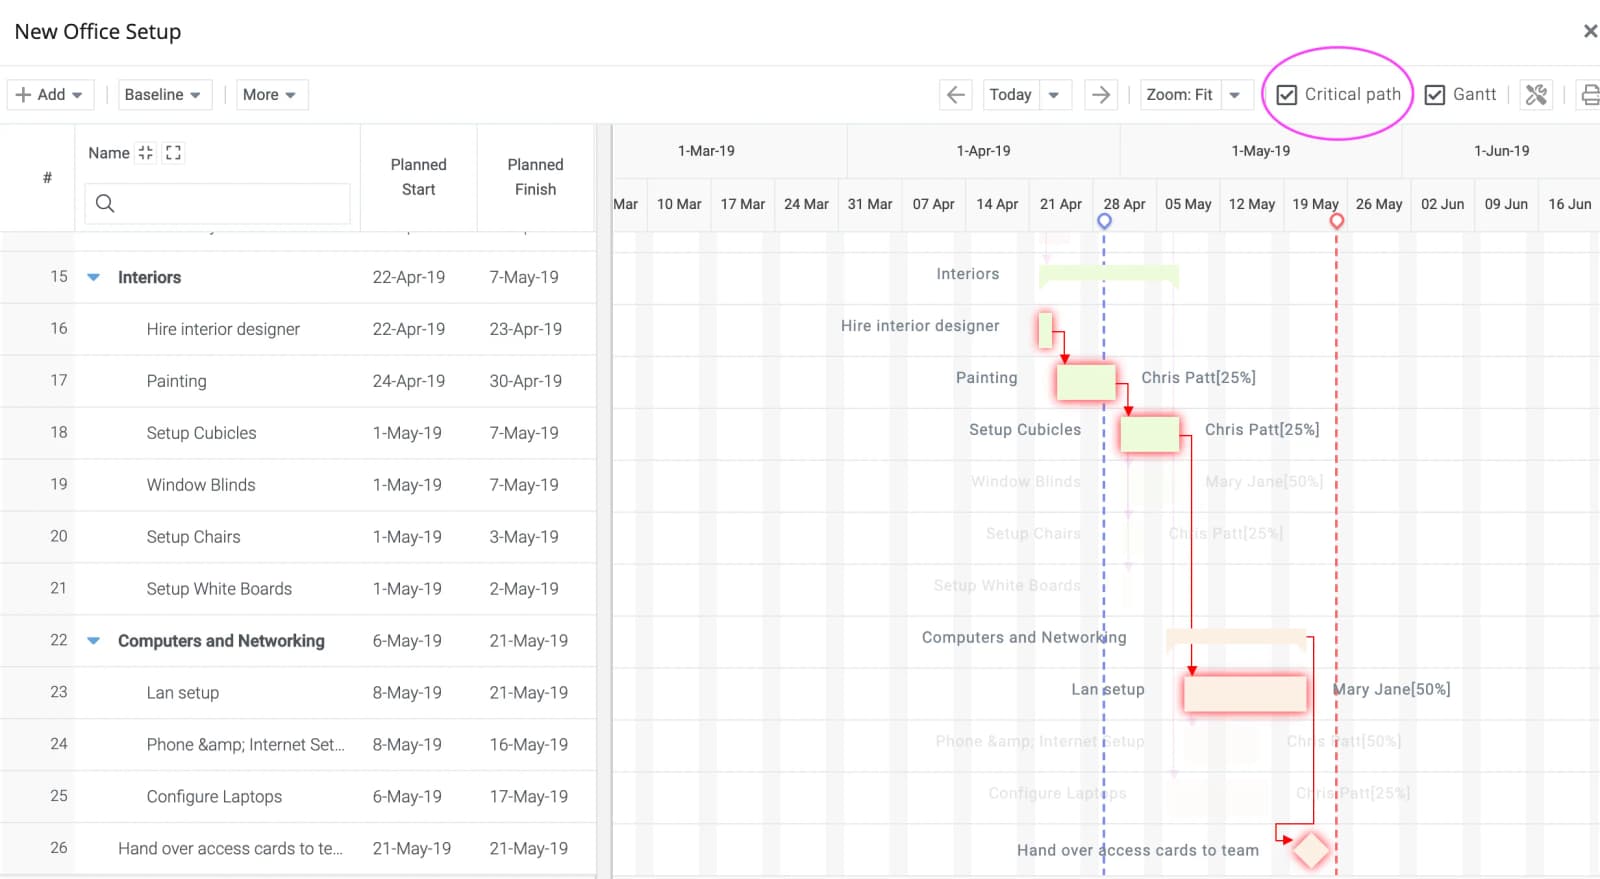
Monitoring critical tasks
Tasks can be filtered using the Critical filter. Using this, for example, you can create a pie chart of critical tasks divided by their RAG indicators. Critical is also available as reporting attribute for tasks.
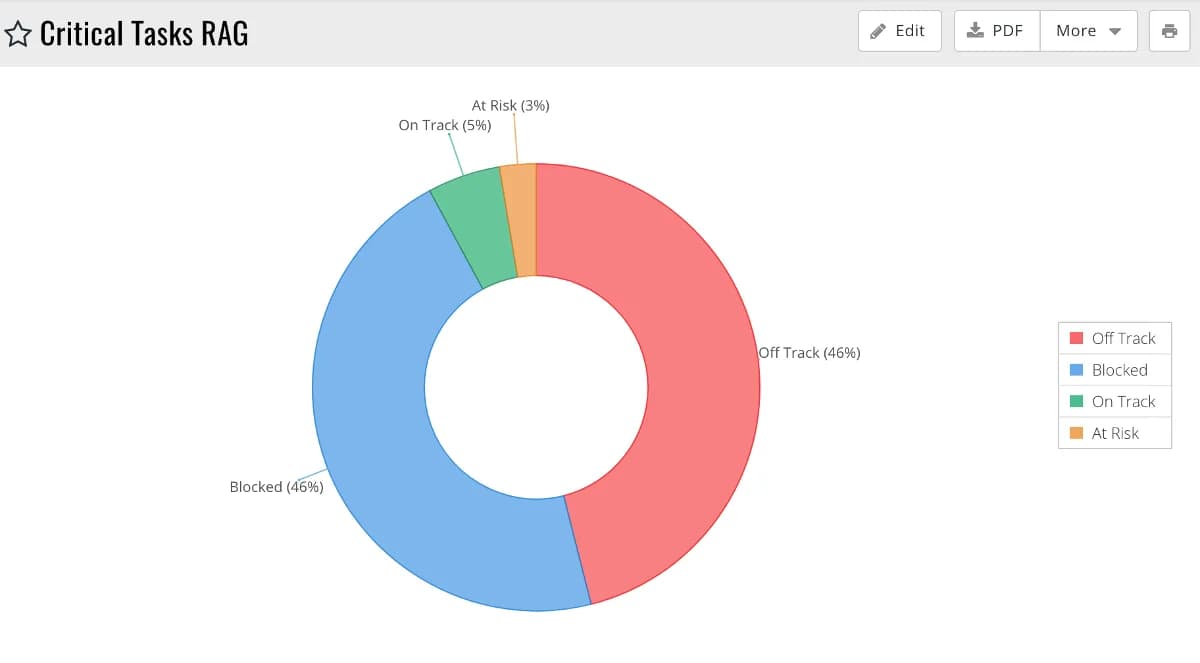
TasksConcepts
RAG Indicators
The topic of RAG indicators has been covered in-depth in this article.
TasksConcepts
Duration, Work, and Units
Duration
Duration is the working time between a task's start and finish dates. For manually scheduled tasks,the duration has no significance.
Effort
Effort is the total amount of time resources will spend working on the task. Read our blog article on duration vs effort.
For manually scheduled tasks, if:
- Allocation is in % – the total work of that task is calculated as the sum: working hours x % allocation for each resource assigned.
- Allocation is in hours – the total work of that task is simply the sum of the individual allocations.
Units
The total allocation (in %) for the task. If a task is allocated – Joe[100%] and Peter[50%], its allocation is 1.5.
Relationship between D, W and U
The relationship between duration, work and allocation units is critical in understanding automatic scheduling of tasks. It is explained in detail in our
.
TasksConcepts
Task Scheduling
Schedule is an important pillar of the project management triangle. Celoxis has a flexible and powerful scheduling engine to help you take control of your project schedule.
Task scheduling is the process of calculating the start and finish dates of tasks. In this chapter we will understand how this is done in Celoxis.
We have already seen how start and finish dates of a summary task are calculated from its children. We shall now see how to calculate the dates for leaf-level tasks.
Manually Scheduled Tasks
Manually scheduled tasks are those tasks that have the Manually Scheduled option set. Celoxis never modifies the start and finish dates of manually scheduled tasks. Its predecessors are treated as FYI only and does not affect the start or finish dates.
The only constraint is that if you assign a resource with non-zero allocation, the resource must have non-zero (any value) allocation between the start and finish date of the task
Automatically Scheduled Tasks
Tasks that are not manually scheduled are automatically scheduled. Celoxis always keeps automatically scheduled tasks up-to-date. When a predecessor is extended, when a resource vacation is added, etc. the task dates are kept in sync.
Factors that affect scheduling of an automatically scheduled task are:
- predecessors
- constraints
- effort
- allocation units
- resource work calendars
- default work calendar (if no resource is assigned yet)
Scheduling Logic:
- First, the task's predecessors are scheduled. Now all predecessors have correct start and finish dates.
- Based on the dependency types, lead and lag, the task's tentative start (or finish if SF or FF predecessors exist) date is calculated. If the task has dependencies on both its start and finish dates (e.g. when a task has both FS and FF predecessors), a date is chosen that satisfies both dependencies. The date can either be a start date or a finish date.
- Next, based on the effort and resource work calendars (or the default work calendar if the task is unassigned), the end date (or start date, if the previous step resulted in a tentative finish date) is calculated. To do this, the scheduler simply tries to exhaust the effort as per the allocation and the date when the effort becomes zero is the new finish (or start) date.
- Finally, constraints are applied. If this results in a change of start or finish, the new date is taken as a base and the complementary date is calculated in the same way as in the previous step.
TasksConcepts
Task Progress
The progress of a task is indicated by its % complete attribute. A value of 0% means that there has been no progress on the task while 100% means that the task has been completed. Celoxis rolls-up the percent completes of tasks to calculate the percent complete of the project.
% Complete Methods
There are three methods to update a task's % complete. They are described below with an example – assume that we have a task T with resources Joe assigned 40h and Peter assigned 10h to it.
Last % Entered
The % complete of a task is the last % complete entered for that task by any user. This supposes a working model where the the person updating the % complete knows the overall status of that task. In our case, if Joe updates the % complete of to 50% and then Peter updates the % complete to 25. The % complete of T will be 25%.
Weighted Average of % entered by each assigned resource
The % complete of a task will be calculated as a weighed average of the % completes entered by resources assigned to it. This supposes that when a resources enter % completes, they are indicating their how much of their work is complete, not the overall progress of the task. The % complete of the task is calculated as:
% Complete = (W1×P1 + W2×P2 + ... + Wn×Pn) ÷ (W1 + W2 + ... + Wn)For all n assignees where Wi is the planned effort and Pi is the % complete of its ith assignee.
Let’s say Joe enters 50% while Peter enters 100%. The % complete of T will be: (50×40 + 100×10) ÷ (40 + 10) = 60%.
Auto-calculated from time logged against the task
In this model, users do not enter the % complete, rather it is calculated based on the time logged against the task. The formula is:
% Done = Actual Effort ÷ Planned EffortActual effort is the sum of all approved hours for that task.
A few things to note in this model:
- Users will not be shown the % complete field as that value is calculated.
- If time logged exceed the planned effort the % will show as 100%.
- Once a task starts and you think that the task's effort has been over or underestimated, you should decrease or increase the planned effort of the task. Otherwise the task may never show up as completed or may prematurely indicate as completed.
We recommend that this only be used in projects when the time logged will always match the planned effort. E.g. tasks such as “Do 20 hours of research”.
Specifying the % complete method
The default % complete method for tasks can be specified from the project add/edit screen's Advanced tab.
% Complete of Summary Tasks and Projects
% complete of summary tasks and projects is automatically calculated as a weighted average from its descendants as per the formula:
% Complete = (W1×P1 + W2×P2 + ... + Wn×Pn) ÷ (W1 + W2 + ... + Wn)For all
leaf-level descendants where
is the work and
is the % complete of its
descendant. If a leaf-level task is unassigned, its duration (in hours) is used instead of its work in the calculation.
TasksConcepts
Resource Assignment
When you assign a resource to a task, Celoxis allows you to specify whether you want the resource to work full time (100%), half time (50%), any other fraction (e.g. 30%) or even a certain amount of hours (e.g. 20 hours).
Entering the correct allocation is important when you want to monitor resource workload. E.g. if Joe is scheduled to work 100% on task T1 from M-F and also 100% on task T2 in the same time period, the resource load chart will show Joe as overloaded that week. This is because the total effort expected by each task will be 40 i.e. a total of 80 but Joe works only 40 hours per week. If you intended that Joe work half the time on T1 and half the time on T2, then you should set Joe's allocation to 50% for both tasks.
If you want to ensure that your resources are optimally allocated, you should enter the correct estimations while allocating resources. Only then can the system show a true picture of the workload distribution.
In the following sections, let's assume that Mary works 36 hours per week, Monday through Friday as:
| M | T | W | T | F | Total |
|---|---|---|---|---|---|
| 8 | 8 | 4 | 8 | 8 | 36 |
Allocation in percentage (%)
When you allocate a resource in % on a task, you tell Celoxis the fraction of time will that resource be dedicated on a task from his work hours.
For example, Mary works 8 hours per day and you allocate her 50% to a task, it means she will work 50% every day. Let's see how the system will allocate her the work per day:
| Allocation | M | T | W | T | F | Total |
|---|---|---|---|---|---|---|
| 100% | 8 | 8 | 4 | 8 | 8 | 36 |
| 50% | 4 | 4 | 2 | 4 | 4 | 18 |
Allocation in hours (h)
When you allocate a resource to work N hours on a task, it means that that resource will spend a total effort of N hours on that task from the task start to finish. N is proportionally distributed every day as per the resource’s working hours that day.
Let's see how the system would distribute her work if Mary was assigned 9h to a task that ran M-F:
| Allocation | M | T | W | T | F | Total |
|---|---|---|---|---|---|---|
| 9h | 2 | 2 | 1 | 2 | 2 | 18 |
On a task, you can either allocate resources in % or in hours but not both at the same time.
Assigning resources
There are many convenient ways of assigning, replacing or removing resources on tasks.
To assign resources on single task
On the interactive gantt, click on the resource cell -or- double click on the resources next to the task bar.
On the task overview or tasks list screens, Click on the icon that appear next to the resources.
From anywhere, click on Task ActionsEdit and click on Resources.
To assign resources on multiple tasks
On the interactive gantt, select the tasks and Right Click then Assign Resource.
To replace or remove a resource on multiple tasks
On the interactive gantt, select the tasks and Right Click then Replace a resource. To remove, do not select anyone to replace the resource with.
TasksConcepts
Start, Finish & Duration Rules
When you create tasks from API, CSV Import or using the Add Multiple action from the gantt, you can create tasks by specifying or not specifying the start, finish and duration attributes. This chapter helps you understand how Celoxis sets the attributes that are unspecified.
In the following table, we shall use S for Start, F for Finish and D for Duration. The symbol manual is set to true if the creator has indicated his preference for creating manually scheduled tasks. Also, auto means that the system will use scheduling logic to calculate that attribute.
| What you specify | Behaviour |
|---|---|
| <Nothing> | |
| S | |
| F | |
| D | |
| S & F | |
| S & D | |
| F & D | |
| S, F & D | |
Also, if the task is deemed to be manually scheduled and if S and F were specified but without time i.e 00:00 hours, then S/F time will be set to the start/end working time on their respective weekdays. If that day is a non-working day, then most common start and end times during a work week will be used instead.
TasksConcepts
Checklist
Users having ‘Add Comment’ privileges can add checklist items against tasks and app items. Checking off the item will complete the item. The checklist does not impact the task progress.
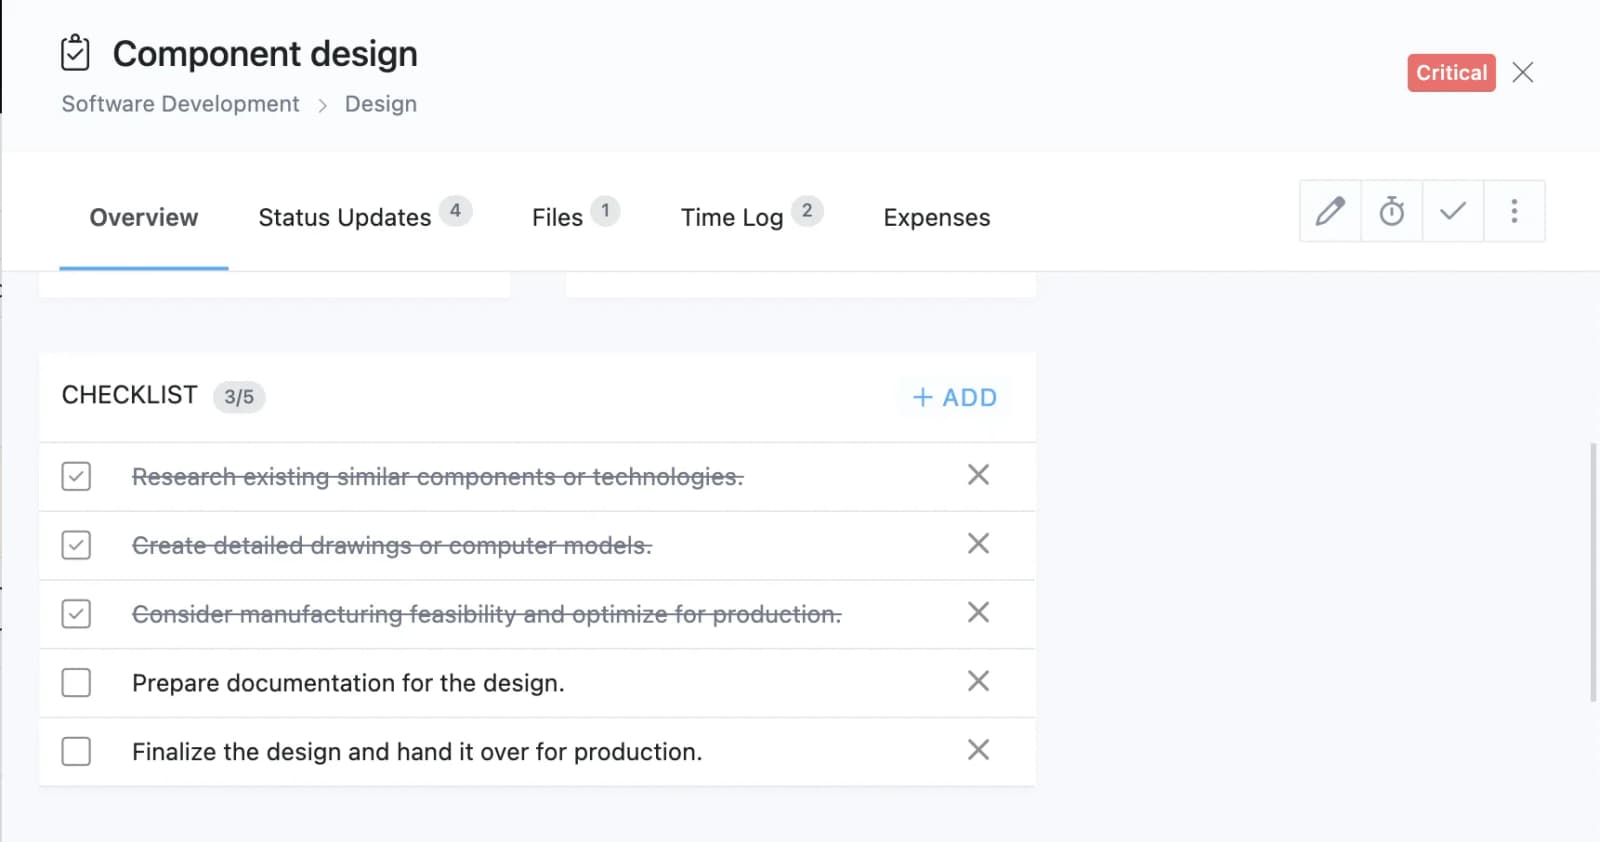
TasksConcepts
Task Glossary
| Attribute | Read/Write | Description |
|---|---|---|
| Name | RW | A short description. |
| Planned Start | RW | The date at which the task is scheduled to start. |
| Planned Finish | RW | The date at which the task is scheduled to finish. |
| Manually Scheduled | RW | Celoxis will never change the start and finish of manually scheduled tasks. Read More. |
| Duration | RW | The duration of the task. It can be entered in these formats. Read More. |
| Planned Effort | RW | The total hours of effort required to complete the task. Read More. |
| Schedule Type | RW | One of FixedEffort, Fixed Duration, Fixed Units. Read More |
| Constraint Type/Constraint Date | RW | Task constraint. Not applicable for summary tasks and manually scheduled tasks. Read More. |
| Resources | RW | Resources assigned on the task. It can be entered in this format. |
| % Done | RW | The percentage of work done. Read More. |
| Planned % Done | RW | The percentage that the task is expected to have completed by now. This value is an approximate value and will not be accurate if resources working on the task have working or non-working exceptions in the task duration. |
| Priority | RW | The task's priority. |
| Allow time logs | RW | Indicates if time can be logged against this task.. |
| Actual Start | RW | The date on which the task is supposed to have started. When any update on the task is logged, it is deemed to have started. If actual start date was not specified, it defaults to the planned start date or the date of the update whichever is earlier. |
| Actual Finish | RW | The date on which the task is supposed to have finished. When the task is marked as 100% complete, the actual finish date, if not specified, is update to the planned finish date or the date of the update whichever is earlier. |
| Budget | RW | Task budget. Typically, Budget = Planned Cost + Buffer. |
| Planned Non-Labor Cost | RW | The total estimated non-labor cost for this task. E.g. travel, food, software. |
| Planned Fixed Cost | RW | The cost that will be incurred on the task regardless of whether time is logged or expenses filled. |
| ID | R | The primary key of the task record in the database. |
| WBS Code | R | The Work Breakdown Structure (WBS) code of the task |
| Projected Start | R | The date on which the task is expected to start based on the projected finish dates of its predecessors. |
| Projected Finish | R | The date on which the task is expected to finish based on its current rate of progress. For summary tasks, it is max of the finish dates of its leaf tasks. |
| Milestone | R | A zero duration task. Read More. |
| Critical | R | Indicates task is on a critical path. Read More. |
| Actual Effort | R | The sum of approved hours logged for this task. |
| ProjectedHours | R | The total hours this task will require to finish based on the current rate of progress. Projected Hours = Actual Hours ÷ % Complete. For summary tasks, it is the sum of projected hours of its leaf tasks. |
| Actual Billable Hours | R | The total hours of approved and billable time logged on this task. |
| Actual Non-billable Hours | R | The total hours of approved and non-billable time logged on this task. This amount can be used to identify the "missed" billing opportunities for this task. |
| Planned Cost | R | The total cost expected to be incurred on this task. Planned Cost = Planned Labor Cost + Planned Non-Labor Cost + FixedCost |
| Actual Cost | R | The total cost incurred on the task so far. Actual Cost = Actual Labor Cost + Actual Non-labor Cost + Actual Fixed Cost |
| Projected Cost | R | The expected total cost of a project based on its current rate of spend. |
| Actual Labor Cost | R | The total of labor cost for each approved time entry logged on this task. |
| Update (Last) | R | The latest comment or progress update entered against a task. |
| Planned Labor Revenue | R | The sum of user's effort × user's bill rate for each resource assigned to this task. (Only available if you have user-based billing). |
| Invoiced Hours | R | The total time for all its invoiced time entries. |
| Invoiced Labor | R | The sum of the bill amounts for all its invoiced time entries. |
| Invoiced Expense | R | The sum of all invoiced expenses for this task. |
| Invoiced Revenue | R | Invoiced Labor + Invoiced Expense |
| Baseline % Done | R | The expected % complete of the task based on the baseline. |
| Baseline Budget | R | The budget of the task when it was baselined. |
| Baseline Cost | R | The planned cost of the task when it was baselined. |
| Baseline Effort | R | The planned effort when the task was baselined |
| Baseline Effort Variance | R | The difference between the planned and baseline effort |
| Baseline Start | R | The task's planned start date when it was baselined. |
| Baseline Start Variance | R | The difference between the task's planned and baseline start date. |
| Baseline Finish | R | The task's planned finish date when it was baselined. |
| Baseline Finish Variance | R | The difference between the task's planned and baseline finish date. |
Actions
TasksActions
Creating tasks from email
Celoxis can create tasks from emails sent to it. This is especially useful when you don’t have the application open in front of you or you are on the go.
Emails have to be sent to a specific address and be in a specific format. Task is created from the from, to, cc, subject, body, attachments and priority as described below.
To (special address)
The email address to which the email should be sent can be found under Main MenuAdminProject ManagementTask Inbox. We recommend that you save it as a contact under "Celoxis Add Task” or something equivalent.
From
The user whose email address matches the from email address is considered to be the creator. This user must have Add TaskGranted in the project in which the task is to be created.
To and Cc
Users in Celoxis whose email address matches the email address of the email's recipients are assigned to the task with 100% allocation.
Subject
The subject should start with the name of the task followed key-value pairs of attributes encodes in square brackets. An example is shown below.
Add missing images in footer [project:Fifadom.com][parent:Images]
The above will add a task named “Add missing images in footer” in the project whose code or name is Fifadom.com under the summary task named “Images”.
Project is mandatory, rest all attributes are optional. Attributes supported in the subject are:
| Project | Name, code or ID of the project where the task should be created. |
| Start | Start date of the task. You can specify a relative date like 5d which would mean 5 days from today, or enter a specific date in the same format you use in the Celoxis application. |
| Finish | Finish date of the new task. You can specify a relative date like 5d which would mean 5 days from today, or enter a specific date in the same format you use in the Celoxis application. |
| Parent | Name of the parent task under which the task should be created. The task will be created last in the hierarchy. If there are multiple tasks with the same name then, the task will be created under the first parent task found. |
| Duration | Can be specified in d (days), h(hours), m(minutes) or mo(months). E.g. 3d. |
| % Done | % complete of the task |
Body
The body of the email becomes the description of the task.
Attachments
All file attachments are attached to the task.
Priority
The value of the X-Priority header is checked to determine the task's priority. If it is 1 then the task's priority is consider High, if it is 5 then the priority is set to Low, otherwise it is set to Normal.
TasksActions
Importing Tasks from CSV
Celoxis provides you with the ability to import tasks in a project from CSV. If you have a Microsoft Excel file, then you can export it in CSV (comma separated values) format and then import it in Celoxis.
To import tasks in a project, first click on the project and then click Project ActionsMoreImport Tasks (CSV). Alternatively, if you are in the project Gantt chart, you can click AddImport CSV
Rules
Decimal NumberDo not use currency symbol or thousands separator. For example $10000.5 or 10,000.5 is not allowed. 10000.5 is allowed. BooleanSpecify either TRUE or FALSE. Empty text will be treated as FALSE. DateSpecify dates as YYYY-MM-DDThh:mm:ss E.g. 1994-11-05T08:15:30 corresponds to November 5, 1994, 8:15:30 am. You can also specify YYYY-MM-DD where time is not material. E.g. 2021-12-25 corresponds to 25th December 2021.
Fields
| WBS Code | Use this to create the project's WBS (parent-child relationships). If we enter WBS codes as shown below on the left, you will get the task structure on the right. WBS CodeTask 1A 1.1B 1.2C 1.1.1D 1.1.2E 2F ► Project │ ├── A │ │ │ ├── B │ │ │ │ │ ├── D │ │ │ │ │ └── E │ │ │ └── C │ └── F |
| Name | Mandatory |
| Description | |
| Planned Start | Date |
| Planned Finish | Date |
| Predecessors (WBS Codes) | Semicolon separated WBS codes of predecessors |
| Duration | Enter in the duration format described here. |
| Planned Effort | Decimal number. Effort in hours. |
| Resources | Enter resources in the format described here. |
| % Done | An integer between 0 and 100. |
| Manually Scheduled | Boolean |
| Priority | One of VERY_HIGH, HIGH, NORMAL, LOW, or VERY_LOW |
| Schedule Type | One of FIXED_WORK, FIXED_DURATION, or FIXED_UNITS |
| Constraint Type | One of MSO, MFO, FNLT, SNLT, FNET, SNET, ASAP or ALAP. Read more. |
| Constraint Date | Date |
| Actual Start | Date |
| Actual Finish | Date |
| Budget | Decimal number |
| FixedPrice | Decimal number |
| Planned Fixed Cost | Decimal number |
| Planned Non-Labor Cost | Decimal number |
| Billing Type | For No Billing, specify NONE, for Fixed Price specify FIXED_PRICE, and for Time & Material specify TNM |
| External Key | String. The key or id of this task in another system e.g. JIRA |
| Custom Fields | You will have to create the fields in Celoxis first. |
To read more about tasks dates,
.
TasksActions
Exporting Tasks to CSV
To download the project, navigate to Gantt and then click on MoreExportCSV. This will download the project plan with the columns you have selected on Gantt.
You can then open this in Excel using the steps below. To open the exported file (CSV) in Excel:
- Open a New Excel Document, or open a new worksheet in your existing Excel workbook. Navigate to the Data tab.
- Click on the From Text button.
- Navigate to the folder holding the .csv file you want to open and click on the correct file name.
- Click Import, the Text Import Wizard will open.
- Make sure you choose the Delimited radio button/checkbox under Original Data Type in the open dialog box.
- Select the My data has headers checkbox as well, click Next.
- Select the checkbox corresponding to the correct delimiter which is comma(
,). It is important to choose this delimiter to ensure the data fields can be properly parsed during the import. - Click Next, in the Data Preview field, only the first column of data will be highlighted. Drag the horizontal window control all the way to the right.
- While holding down the
Shiftkey, click on the final column heading. This should select and highlight every column in the Data Preview pane. - Choose Text as your Column Data Format. Every column should now be labeled Text in the Data Preview pane.
- Review the Data Preview window to ensure your data looks the way it should. Click Finish.
Your data should appear in your spreadsheet, organized in columns and with the original headers.
TasksActions
Copying and Moving tasks
Copying tasks copies task attribute, attached files and security while moving tasks also moves the attached entities like time logs, expenses and updates.
Copying or moving tasks in the same project
- Open the project's interactive gantt chart
- Select the tasks to copy or move
- Press
Ctrl+Cto copy orCtrl+Xto cut - Select a task underwhich to copy/move these tasks and press
Ctrl+V
Copying tasks from a different project
- Open the project's interactive gantt chart in which you want to copy the tasks to
- Click AddCopy from another project from the toolbar
- Select a project and choose tasks to copy. If you choose a summary task, its descendants will also be copied.
- Submit the form
A copy of the tasks will be created.
Moving tasks to a different project
- Open the project's interactive gantt chart from which you want to move the tasks
- Select the tasks to move
- Right click and choose Move
- Select the destination project
Tasks will be moved to the new project. The rolled-up data of both, the new and old, projects are updated.
TasksActions
Updating Task Progress
Celoxis makes it easy for users to indicate their progress on tasks. In addition to entering comments on a task from its task screen, you can:
- Update progress of many tasks in bulk.
- Update progress of a task via email.
- Update progress of a single task, which is the topic of this chapter.
Clicking on the for a task in a task list will open a menu having convenient options to update progress.
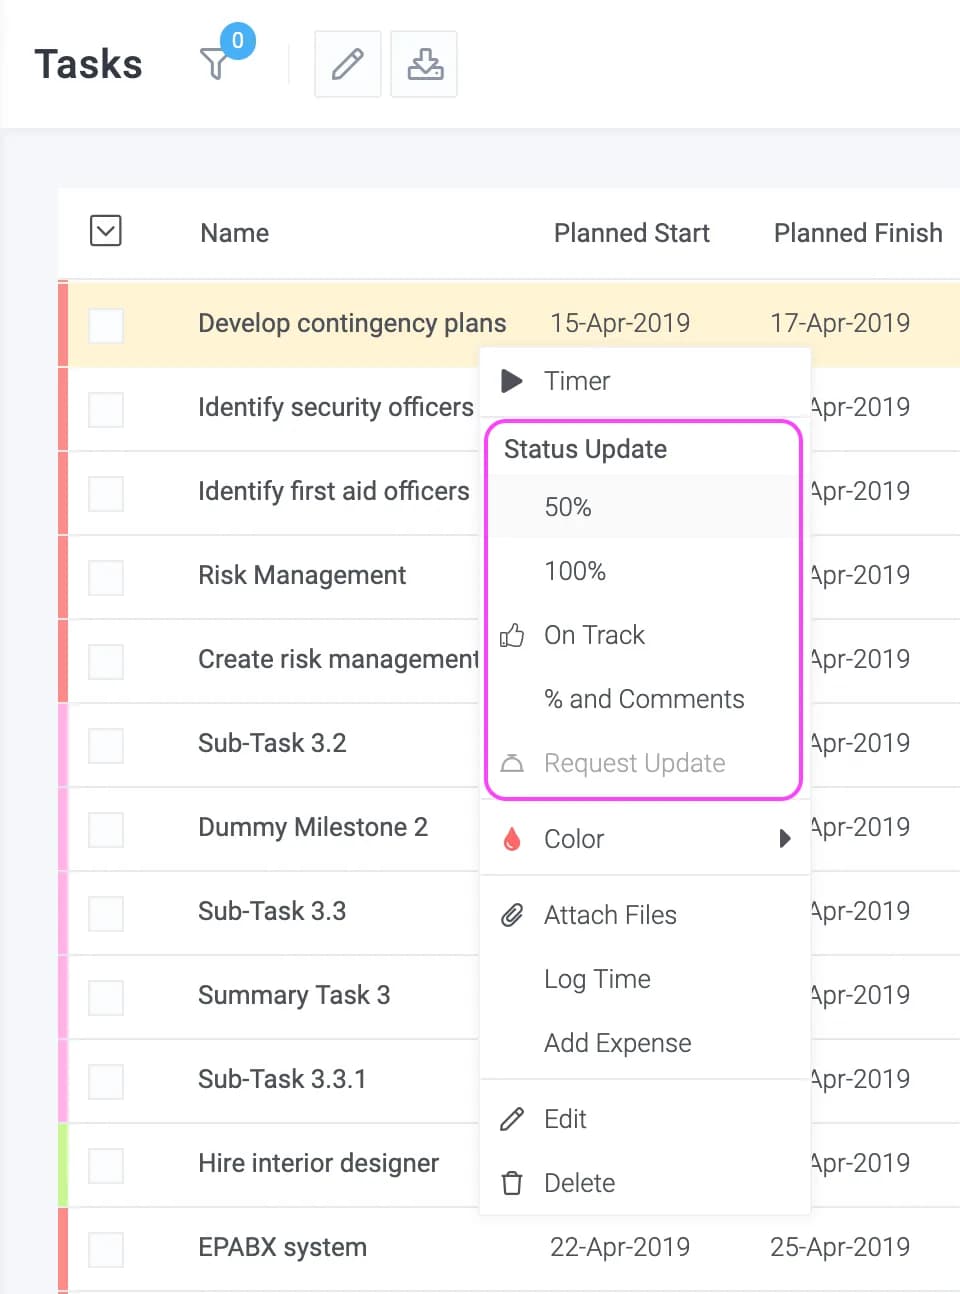
| 50% | Sets the task % complete to 50% |
| 100% | Sets the task % complete to 100% |
| On Track | Set the task % complete to its planned value. Read More. |
| % and Comments | Opens up a form where you can record a detailed update as well as log time. |
% and Comments
As you can see from the below image, you can log a custom % complete, enter comments and also log time. You can also enter actual start and actual finish dates if you wish, else the system will assume that the task started and finished on time.
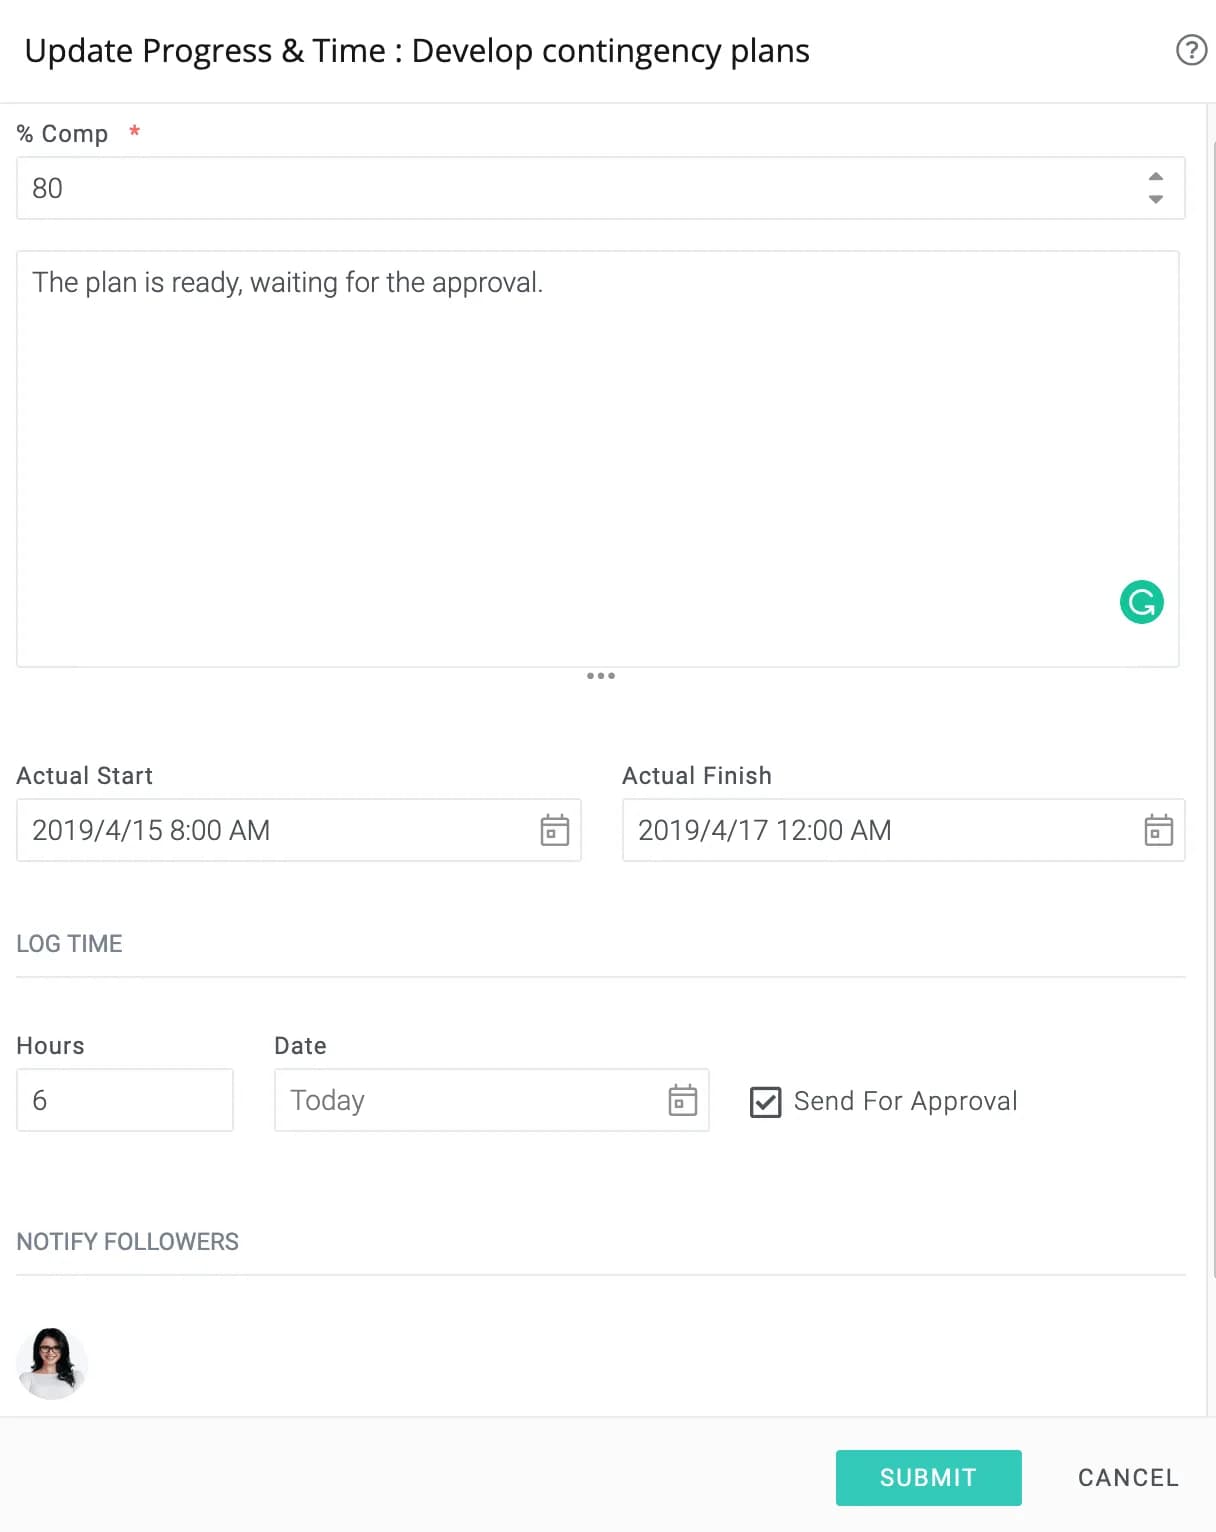
TasksActions
Updating Progress from email
In addition to logging an update using the web interface, task assignees can also reply via email to file their update. When managers request an update, assignees get an email like this:
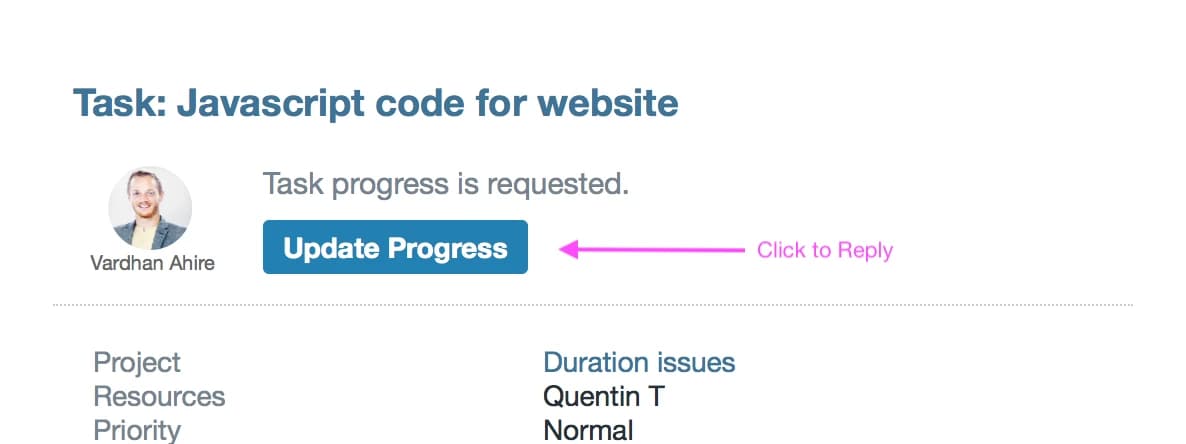
Clicking on the Update Progress button as shown above, opens up a new email compose window in which you can modify the subject to fill in % complete, hours and time code. All are optional. You can also attach files and add a description that will become the progress update's text. A sample is shown below:
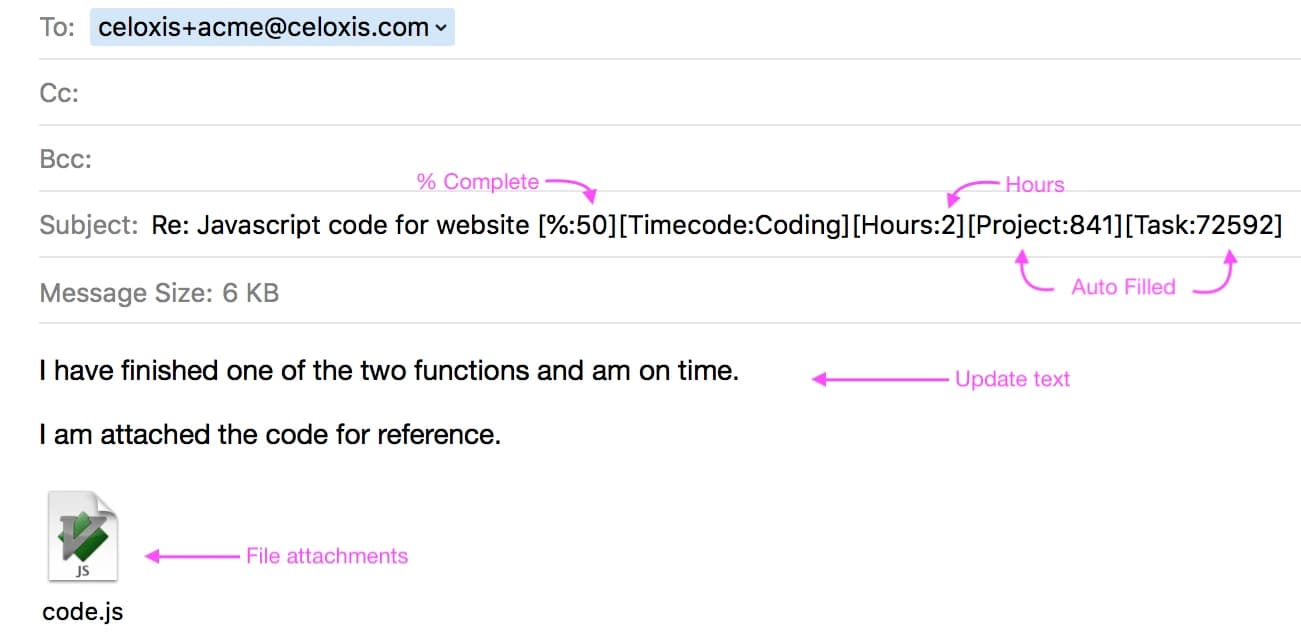
A few minutes after the email is sent, this progress update will be added to the task. If you have put in hours, time will also be logged and sent for approval.
TasksActions
Recurring Tasks
You can create copies of a task in a recurring pattern of you choice.
- Open the interactive gantt in the project in which you want to create the recurring task.
- Create a task and name it appropriately e.g. Weekly Meeting.
- Right click on the task and click on Recur.
- Enter the desired recurrence pattern. In the following example, we have chosen a weekly pattern.
- Submit
Celoxis will create new tasks as per your recurrence pattern as shown below:
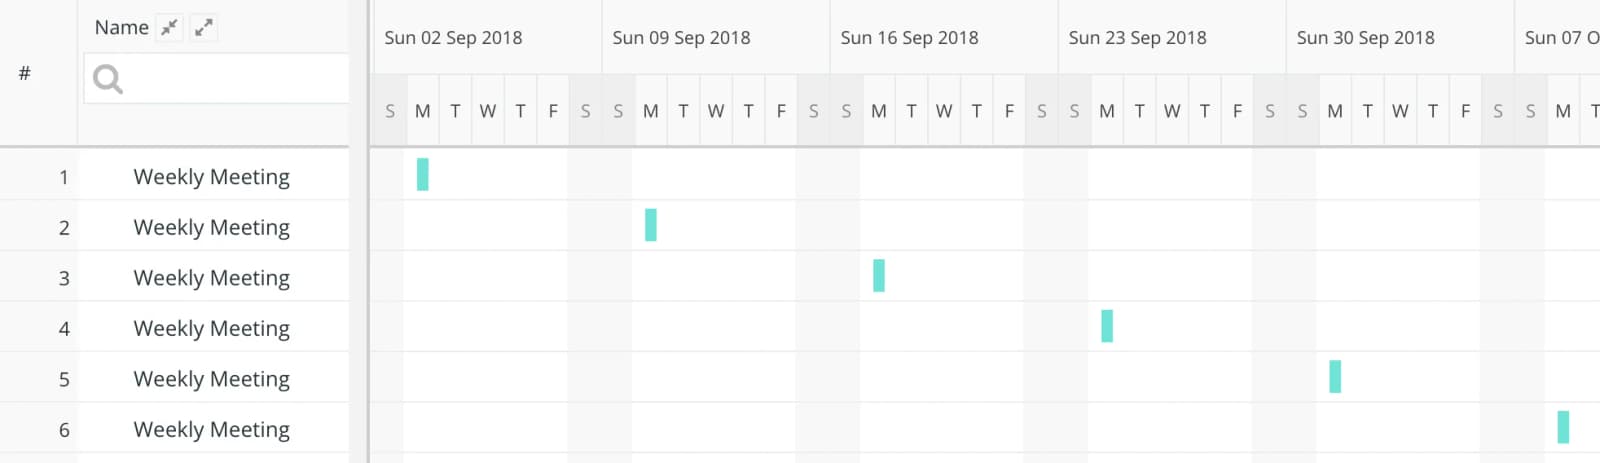
TasksActions
Splitting Tasks
Things don't always go according to plan. Interruptions have become normal and you need a quick way to handle them in a way that keeps your plan accurate. That's where this functionality helps. There are two common interruption scenarios:
- You want to suspend an in-progress task and postpone the remaining part.
- You want to reassign an in-progress task to someone else.
In both cases, you want to capture the "done" part and do something else with the "remaining" part.
What happens when a task is split
Let's take an example where we want to split a task T that is of duration 6d. In the above example:
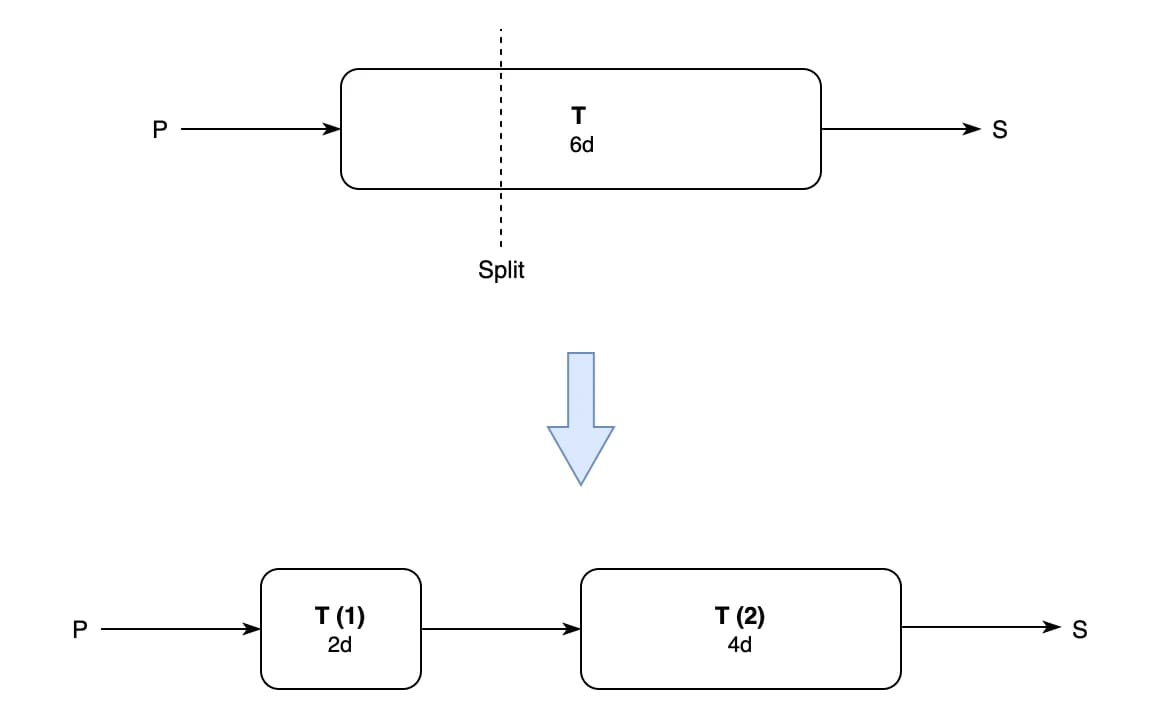
- Task T is split into two parts: T (1) and T (2).
- The predecessors of T become the predecessors of T (1) while its successors become the successors of T (2).
- An FS dependency created between T(1) and T(2).
- The effort, budget, duration and fixed price are divided in proportion as well. For example, if the budget was $600, the budget for T (1) will be $200 while it will be set to $400 for T (2).
- Custom fields are identical in both T (1) and T (2)
- If you select the Create a container task for the two split parts option while splitting, the baseline for T would be moved to the summary task, else it will remain with T (1).
Once a split has happened, you can now reschedule T (2) and/or assign it to someone else.
How to split a task
- Open Interactive Gantt
- Select a task and right-click on it
- Select Split Task: {0}
- Split On: The date on which the second part of the task should start.
Create a container task for the two split parts: If you would like to automatically create a summary task that contains the two parts of the split task. - Submit
TasksActions
Requesting Updates
You can request an update on tasks from their assignees. There are two ways to do this: for a single task, click Request Update, while for multiple tasks you can use the bulk actions.
Assignees get an email to which they can simply reply to to record their update. They can also specify the % complete, log time and more as described in this chapter.
TasksActions
Attaching Files
You can attach one or more files to a task from your local drive or from Google drive. Click on the task to open the slide panel and then click on Attach Files. Files attached to a task can be viewed from the Files tab on the slide panel.
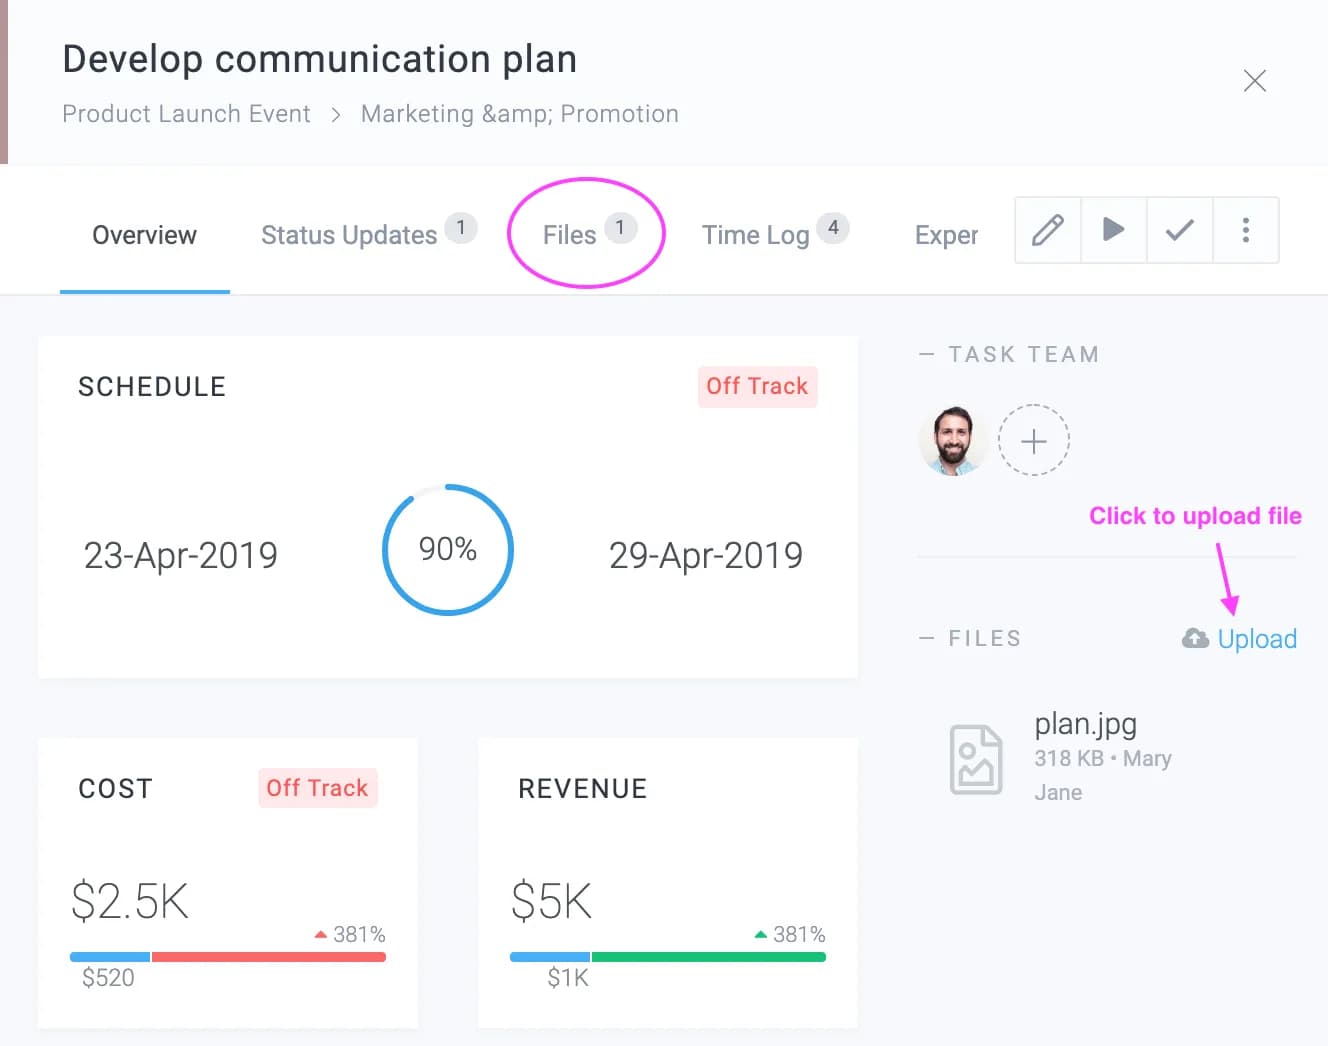
TasksActions
Following Tasks
If you follow a task, you will be notified about activities happening on the task e.g. when someone adds a comment or when someone attaches a file. The notifications will be through email as well as through the notification center. If you are an assignee or a project manager, then you are automatically notified and there is no need to explicitly follow the task.
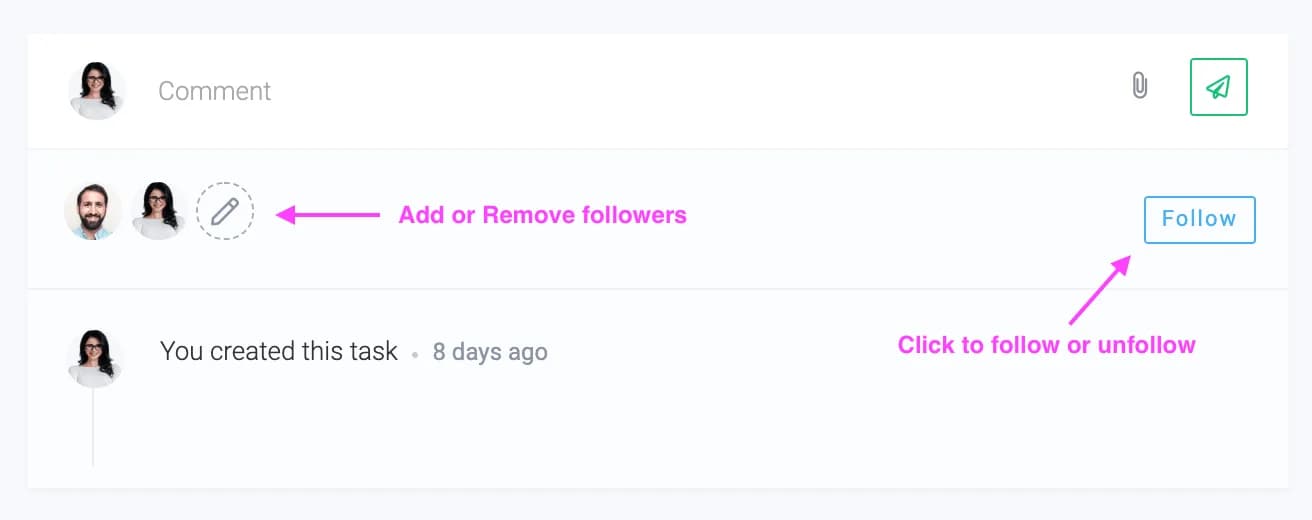
Unfollowing
To unfollow a task, simply click on the Unfollow link on the task screen on in the footer of the email notification.
TasksActions
Bulk Actions
You can select multiple tasks and perform actions on them. Click on the next to the checkbox in the report table header as shown below:
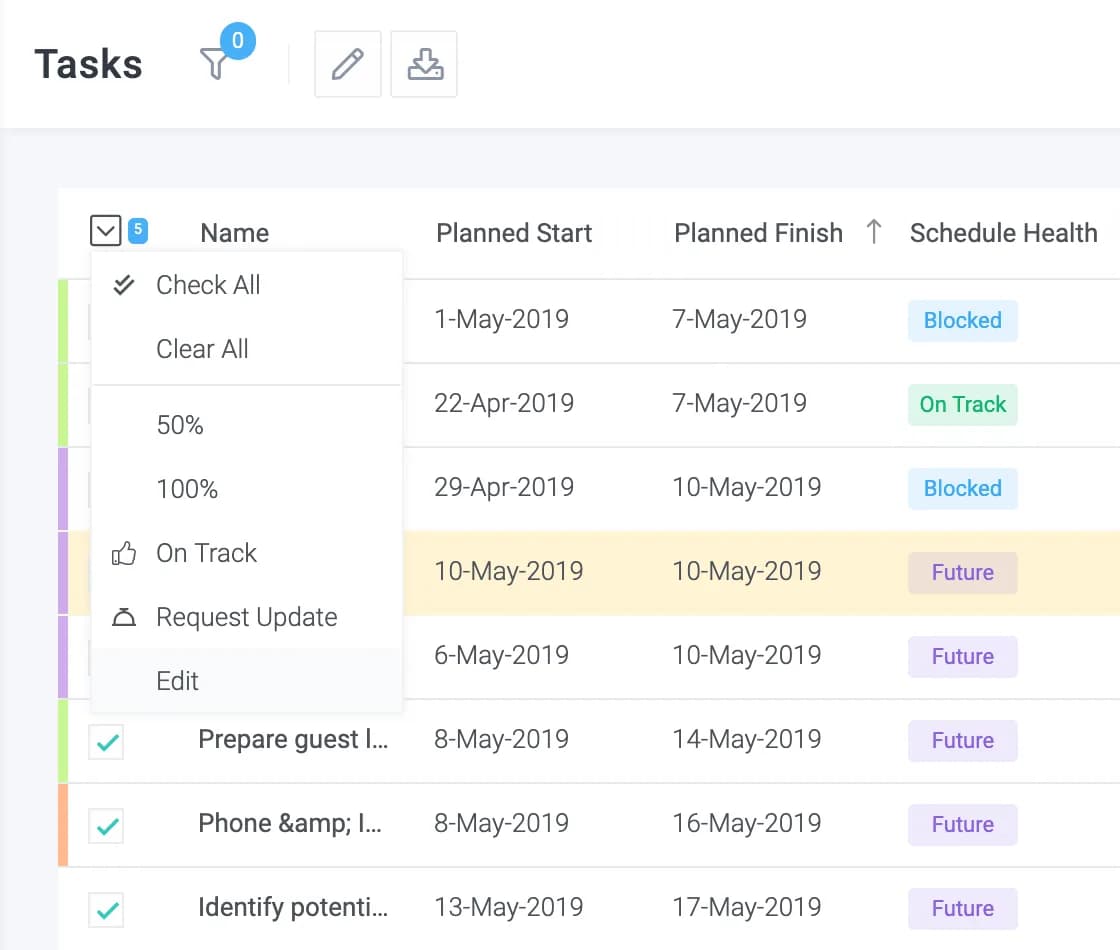
50%, 100% & On Track
Updates the % complete of selected tasks. For "On Track", read this.
Request an Update
Sends an email to the assigned resources asking them for a progress update.
Edit
Allows multiple attributes to be modified at once, including custom fields as shown below:
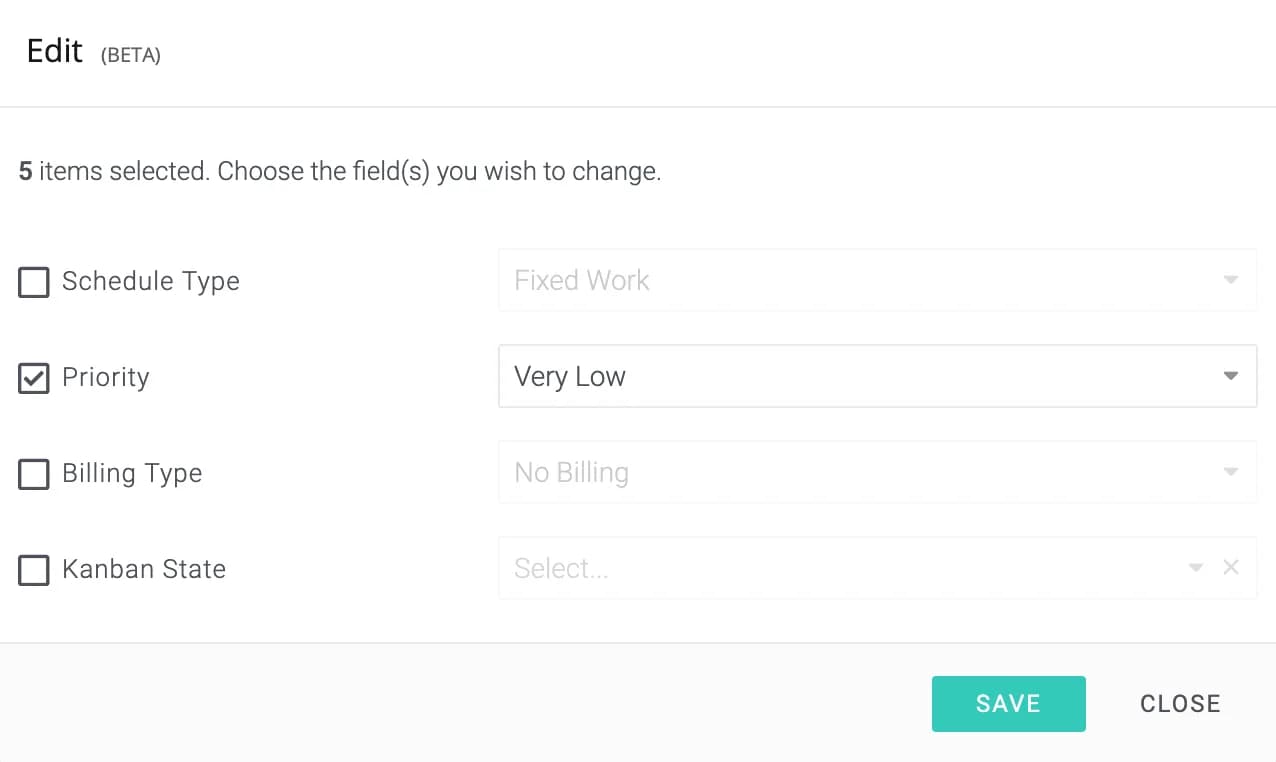
How-To
TasksHow-To
Working with Gantt
Gantt in Celoxis provides a graphical overview of the project schedule. This is useful for the Project Manager to schedule his projects and keep track of them. The different features like the Export, Baseline, etc. help him with preparing and driving the project plan more efficiently.
The Gantt chart features include:
- Creating the WBS i.e your tasks, sub-tasks, milestones with start and finish dates
- Drag - Drop tasks to re-order them in hierarchy
- Add Constraints
- Drag - drop-dependencies
- Expand-collapse the task list
- Assign users on tasks
- Updating task progress
- Printing the Gantt
- View the schedule with different Zoom levels
- Auto Save and Manual Save options
Configuring the Gantt
The first time you access the Interactive Gantt of a project, you are presented with the below options to be configured. This is then remembered per person across all projects in Celoxis as a user preference. You can change this setting from the icon.
| Default new tasks to "Manually Scheduled" | Whenever a new task is created in Celoxis, the scheduling mode i.e., Auto-scheduled or Manually scheduled is dependent on this selection. For more on scheduling modes, refer here |
| Automatically save my changes | Changes made to the project plan are auto saved. If the option is unchecked, you need to manually click on Save everytime you make changes. |
| Show name in Gantt area | This option if checked, will show the project/task name of the Gantt part (right-part). |
| Show resources in Gantt area | This option if checked, will show the resource name of the Gantt part (right-part). |
Keyboard Shortcuts
| Add new task | n |
| Edit Task | e |
| Delete Task | Delete key |
| Indent Task i.e create a sub task | I |
| Outdent Task | o |
| Move task Up | u |
| Move Task Down | d |
| Copy Task | Ctrl+C |
| Paste Task | Ctrl+V |
| Cut Task | Ctrl+X |
| Save | Cntrl+S |
FAQ
TasksFAQ
How do I switch from a auto-scheduled task to manually scheduled?
The scheduling mode of a task is determined from the Gantt preference which is saved per user. However, you can change the scheduling mode of one or more tasks from the Gantt. To do so, select the tasks and click on MoreSetSchedulingMode to the desired one from the Gantt.
TasksFAQ
Can I share the Gantt chart with my client?
Yes, you can create a report of type Task and the Output type as Gantt. On the Report's edit page, under the Visible to Client drop-down pick the client with whom you wish to share.
This report will then appear under the Reports menu for the client.
TasksFAQ
How can I understand if a task has dependency on a task in another project?
Once you add the dependecy, it will be shown as below:
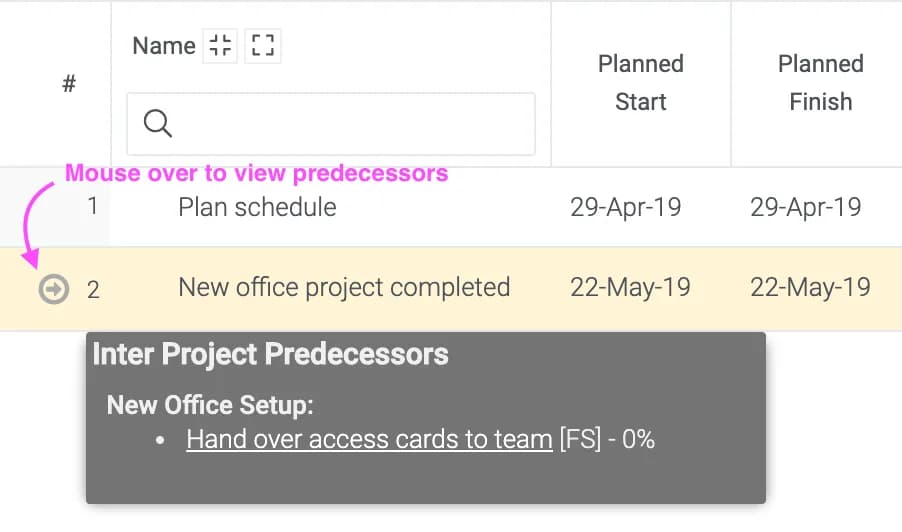
For more details, refer the Setting inter-project predecessors section here.
Time
15 articlesConcepts
TimeConcepts
Time Workflow
A time entry in Celoxis passes through various states as shown below.
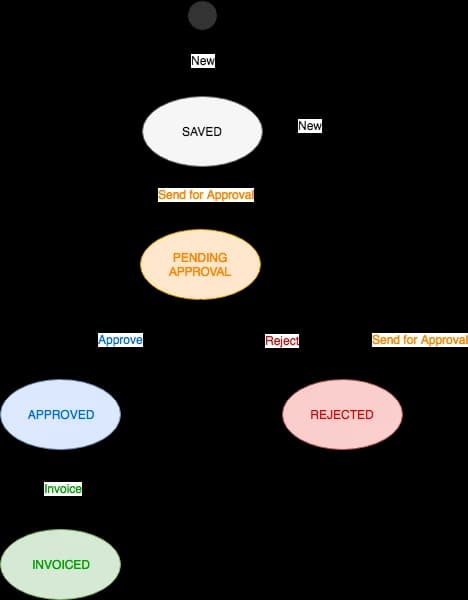
Saved
Saved indicates that the time entry has been saved but not submitted for approval.
- Anyone with add time privilege can create a time entry in this state.
Submitted
Pending approval indicates that the time entry has been submitted for approval.
- Anyone with add time privilege can create a time entry in this state.
- The submitter can continue to edit time entries in this state.
Approved
Approved indicates that the time entry has been approved by
approvers setup in your approval workflow.
- Anyone part of the approval workflow can approve time.
- Once approved, that time entry cannot be edited by the submitter. However, anyone with the Approve privilege can make changes to the time entry.
- Information from approved time entries like hours, cost and revenue are rolled-up to their respective work items and projects.
- During approval, the time entry is updated with the latest bill and cost rate.
Rejected
Rejected indicates that the time entry has been rejected by
approver.
- Anyone part of the approval workflow can reject time.
- The submitter is notified through an email.
- The time entry will start showing in the weekly timesheet screen of the submitter where it can be edited or deleted and can be resubmitted for approval.
- A rejected time entry resubmitted for approval has to go through the entire approval workflow.
Invoiced
Invoiced indicates that the time entry has been marked as invoiced.
- Only time entries marked as Billable can be invoiced.
- Anyone with Invoice privilege can invoice a time entry.
- Once invoiced, the time entry’s invoiced hours and revenue are rolled-up to their respective work items and projects. E.g. invoiced revenue and invoiced hours.
TimeConcepts
Time Codes
A time code represents an activity type for a time entry. For example, a software development company may want to track activities like Programming, Designing and Testing, while a legal firm may want to track activities like Litigation, Research, Meetings, etc.
Time codes help in:
- Filtering: you can filter time entries based on activities and perform bulk actions on them.
- Reporting: you can aggregate information about your activities and create pie, bar and various other types of reports. For example, software development companies can understand the total time spent in Programming or Designing.
- Billing: if your organization uses activity based billing i.e. the billing rate is based on the activity performed not who performs it, then you can define billing rates for time codes. When time is logged, the appropriate bill rate gets applied to that time entry based on it's time code to calculate its bill amount.
Non-project time codes
Some activities are not associated with projects yet that time has to be accounted for. E.g. Meetings, Sick Leave, and Paid Vacation. This can be done using non-project time codes. A non-project time code is like a regular time code but with its
flag turned on.
Using time codes
Time codes are selected by the submitter while logging time. Time codes can be selected on the weekly time screen or while logging time on work items.
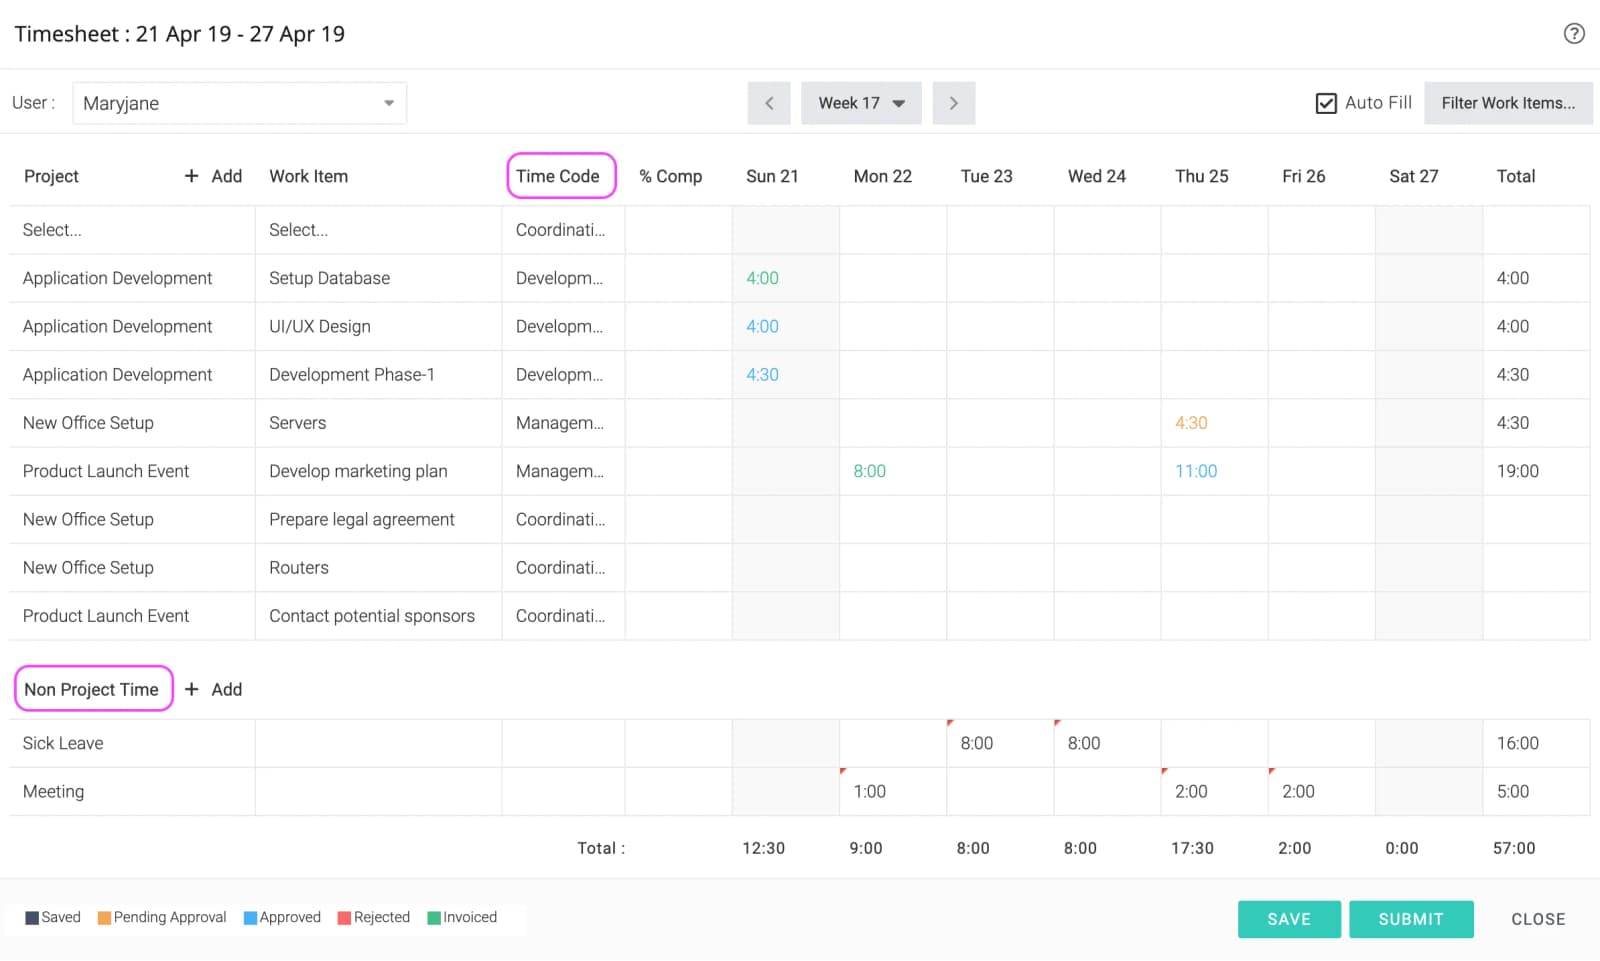
Managing time codes
Only administrators can manage time codes. Navigate to Main MenuAdminTimesheetTime Codes.
Costable
Every time code has a costable flag. When time is logged, if it's time code is costable, then the time entry is marked as costable. Costable time entries are considered towards project cost. Most of your time codes will be costable, however, some could be non-costable e.g. Unpaid Vacation and Unpaid Sick Leave.
TimeConcepts
Billing and Costing
In addition to tracking hours, timesheets are also used in calculating labor costs and for billing clients.
Labor Cost
All costs associated with time entries are labor costs since they are directly associated with human labor. Whether a time entry is considered towards project cost depends on its Costable flag. By default this is set based on whether its time code is costable or not. But this can be changed by a user having the Approve Time privilege.
Cost Rates
If time entry is marked as costable, its cost rate is the cost rate of the time entry's owner. If the owner's cost rate has been specifically set for that project, it is used. Otherwise, that resource's default cost rate is used.
If time entry is not marked as costable, its cost rate is set to zero.
Setting the default cost rate
A user's default cost rate can be set from its add/edit screen or from the bulk edit user screen.
Setting a project specific cost rate
You can override the default cost rate for users per project. Click on a project link that will slide in the project screen; then click Cost Rates.
Setting cost rates for a specific time entries
Users having the Approve Time privilege can edit a time entry (or many using the bulk edit time screen) and set a cost rate.
Billing
Whether a time entry is considered for billing depends on its Billable flag. By default this turned on if its work item's Billing Type is set to Time & Material. But this can be changed by a user having the Approve Time privilege. Note that changing the billing type of a work item will only affect its future time entries.
Celoxis supports two types of billing models:
- Time code based — This is when you bill your clients based on the activity performed, not on who performs that activity. For example, a software development may decide to charge a rate of $50 per hour for a junior Java developer; it does not matter which exact user does that work. In this case bill rates are defined per time code.
- User based — This is when the bill rate depends on the user performing the activity. For example, in a legal firm a star lawyer may charge twice the rate for the same kind of work. In this mode, bill rates are defined per user.
Your organization can have only one model at a time and administrators can select it from Main MenuAdminTimesheetBilling.
Overriding rates for a project
Like cost rates, billing rates can also be overridden per project. Click on a project link that will slide in the project screen; then click Billing Rates.
Setting bill rates for a specific time entries
Users having the Approve Time privilege can edit a time entry (or many using the bulk edit time screen) and set a bill rate.
TimeConcepts
Approval Workflow
You can setup a multi-level approval workflow for time entries. For a time entry to be marked as approved, it has to be approved by all the approvers. If any of the approver rejects it, the time entry is sent back to the submitter. On resubmission, the entire approval workflow is started.
For time on projects
| Auto Approve | All the time entries to be automatically approved as soon as they are submitted for approval. |
| Supervisor | Approval is required from the reporting manager of the time entry's owner. |
| Project Manager | Approval is required from a project manager of that time entry's work item's project. |
| Supervisor > Project Manager | Approval is required from the reporting manager followed by the project manager. |
| Project Manager > Supervisor | Approval is required from the project manager followed by the reporting manager. |
For non-project time
| Auto Approve | All the time entries to be automatically approved as soon as they are submitted for approval. |
| Supervisor | Approval is required from the reporting manager of the time entry's owner. |
Changing the workflow will result in resetting the approval status of all items that are pending approval. They will have to start from the first approval.
TimeConcepts
Timers
You can use timers in Celoxis to keep track of time spent on your work items. Timers can be used in tasks as well as your custom apps.
Timers can be started on work items using the icon in the toolbar as shown below. Once a timer is started, it automatically pauses the earlier running timer. Also, you can use the icon to pause a timer from a work item.
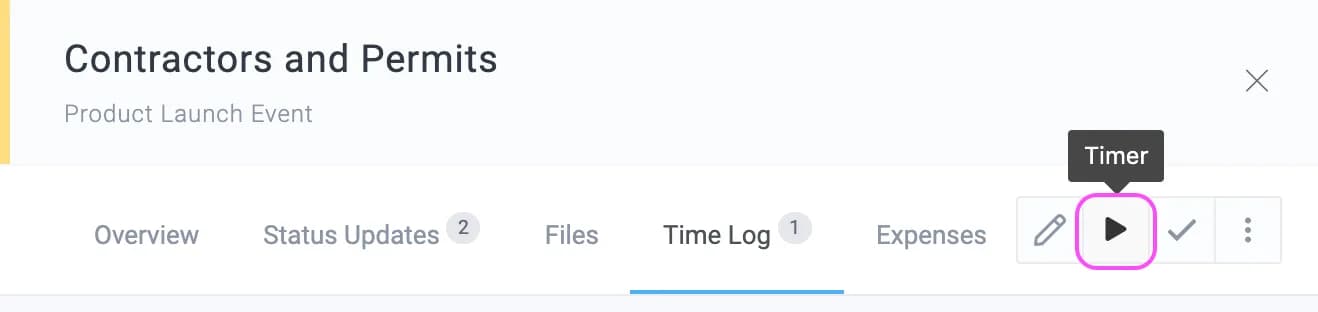
Once a timer is started, it is shown in green color at the bottom in LHS menu. You can click on it to view all you recent timers. This is also a convenient way to pause a timer or restart a new one.
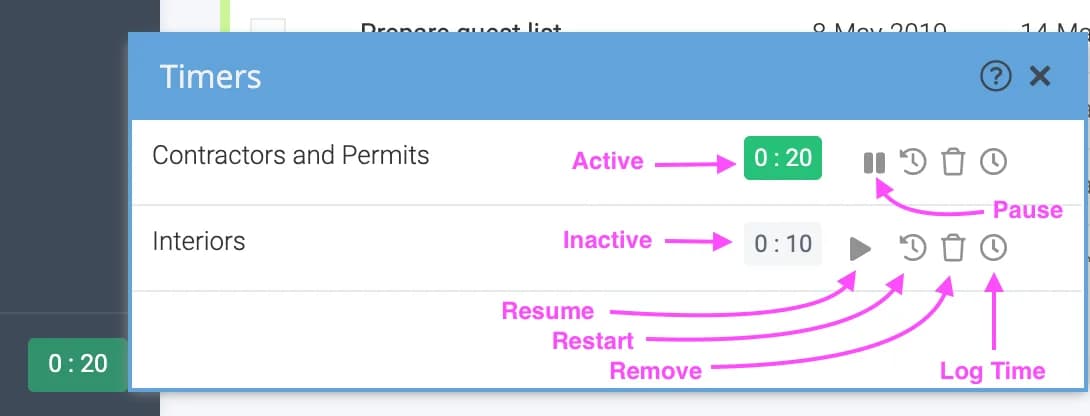
Timer Enhancements
- A Delete option to remove all inactive timers. Earlier, you had to remove them one at a time
- The timer popup remains open after you have performed actions like Log time, pause etc., so you can take the next action. Earlier, it would close, adding an extra click to re-open the pop-up.
- Timer actions on the task panel will refresh the timer action on the LHS panel.
TimeConcepts
Time Glossary
| Attribute | Read/Write | Description |
|---|---|---|
| Work Item | RW | The task or custom-app item name against which this time was. |
| Date | RW | The date of this time entry. |
| User | R | This time entry's owner. |
| Project | R | This time entry's project. |
| Hours | RW | This time entry's hours. |
| State | R | The current state of this time entry. One of: Saved, Submitted, Approved, Rejected, Invoiced. Read More. |
| Approved On | R | Date on which time entry was approved by everyone in the approval workflow. |
| Approver Comments | RW | Comments entered by the approver at time of approval. |
| Rejected On | R | Date on which time entry was rejected. |
| Rejection Comments | RW | Comments entered by the approver at time of rejection. |
| User Comments | RW | Comments entered by the user at time of creating/editing the time entry. |
| Accounting Code | RW | The accounting code for this entry's time code. |
| App | R | The custom-app item for which this time entry was logged. |
| Bill Rate | RW | The per hour rate at which the time will be billed. Read More. |
| Billable | RW | If no, the revenue of this time entry is set to zero. |
| Created | R | Date on which the time entry was created. |
| Creator | R | The user who created this this time entry. This could be different than the user attribute of this time entry if the creator used the proxy privilege to log time for another user. |
| ID | R | The database primary key of this record. |
| Invoiced By | R | The user who invoiced the time entry. |
| Invoiced On | R | Timestamp on which time entry was invoiced. |
| Revenue | R | The bill amount associated with this time entry. If this time entry is billable, then Bill Rate × Hours, else 0. |
| Task | R | The task for which this time was logged. |
| Time Code | RW | The activity against which the hours were spent. Read More |
| Cost | R | The cost associated with this time entry. If this time entry is costable, then Cost Rate * Hours, else 0. |
| Cost Rate | RW | The per hour rate at which the time entry's cost will be calculated. Read More |
| Costable | RW | Indicates whether this time entry will be considered towards cost or not. |
Actions
TimeActions
Filling Weekly Timesheets
To fill your weekly timesheet, click on Main MenuTimesheet. The weekly timesheet screen is a quick, powerful and convenient way to log time as well as update task progress.
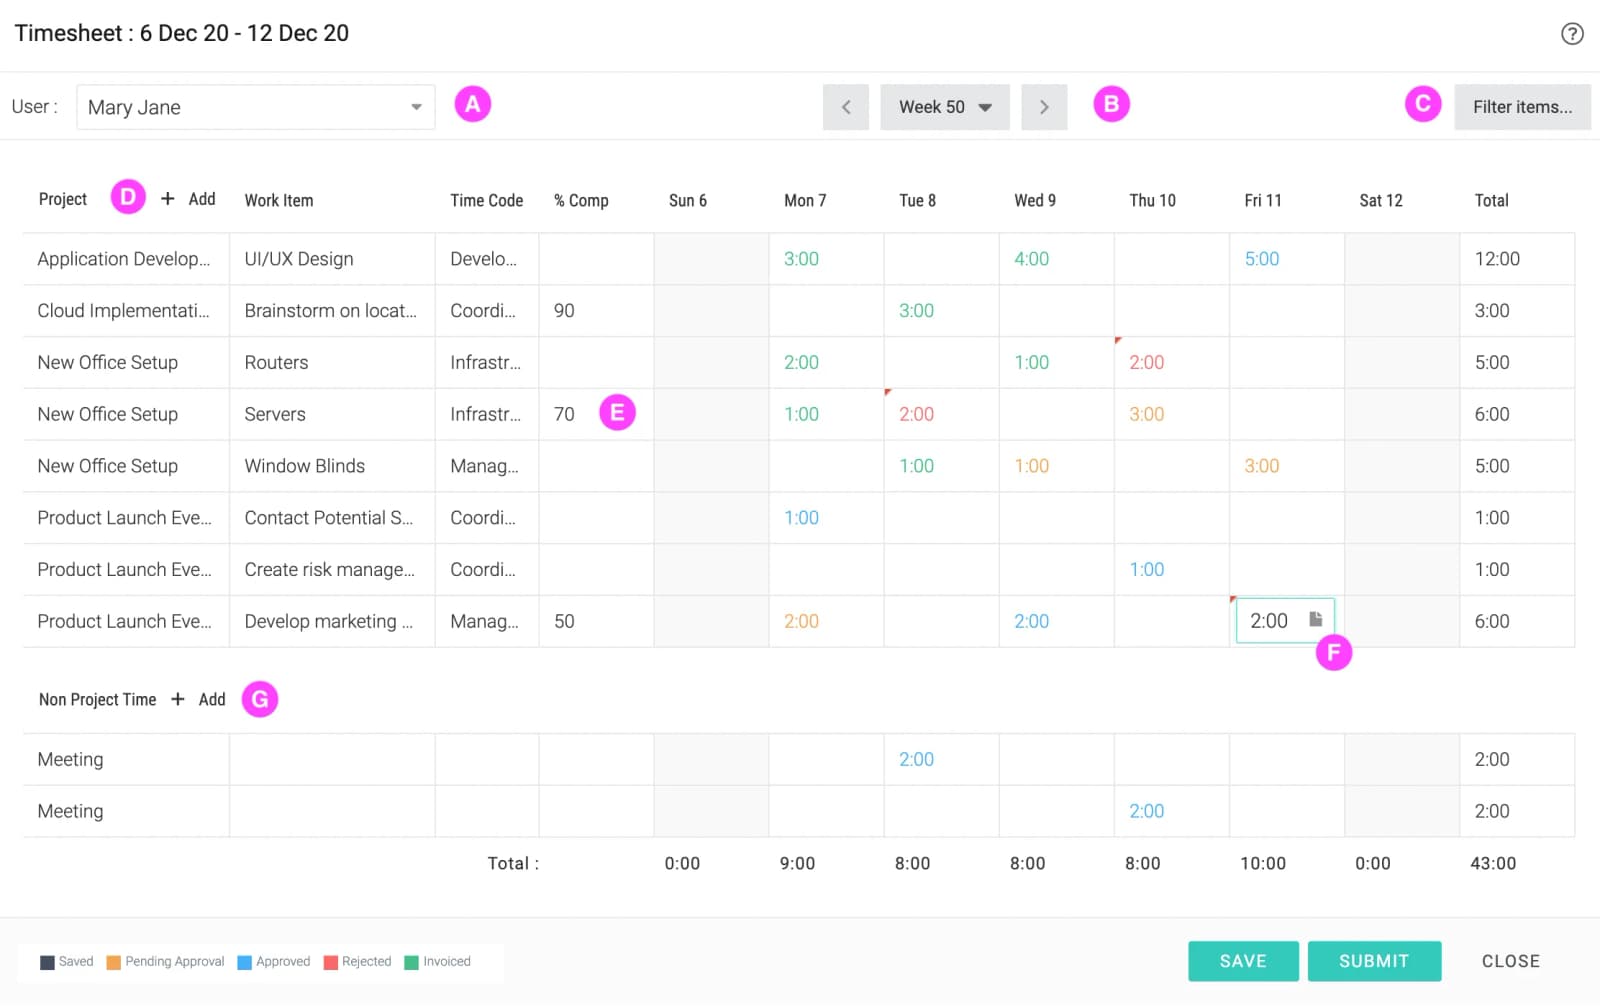
| A | You can select another user for whom to fill time if you have the Time ProxyGranted privilege. |
| B | Navigate to previous or next week or jump to any date. |
| C | The projects and work items that you can select here are controlled by this option. Prefill Timesheet With Workitems - The screen comes pre-filed with rows with work items if Auto or Same work items as submitted option is selected. |
| D | Click to add more rows. |
| E | You can enter a % complete for a task and enter comments |
| F | Click on a cell to enter hours and click on the to add a comment for an individual time entry. |
| G | Click to add non-project time rows. |
You can click Save to save the timesheet or Submit to save as well as submit the timesheet for approval.
TimeActions
Approving Timesheets
You will need the Time & Expense > ApproveGranted privilege to approve time-entries. To approve time-entries, click Main MenuApprovalsApprove Time.
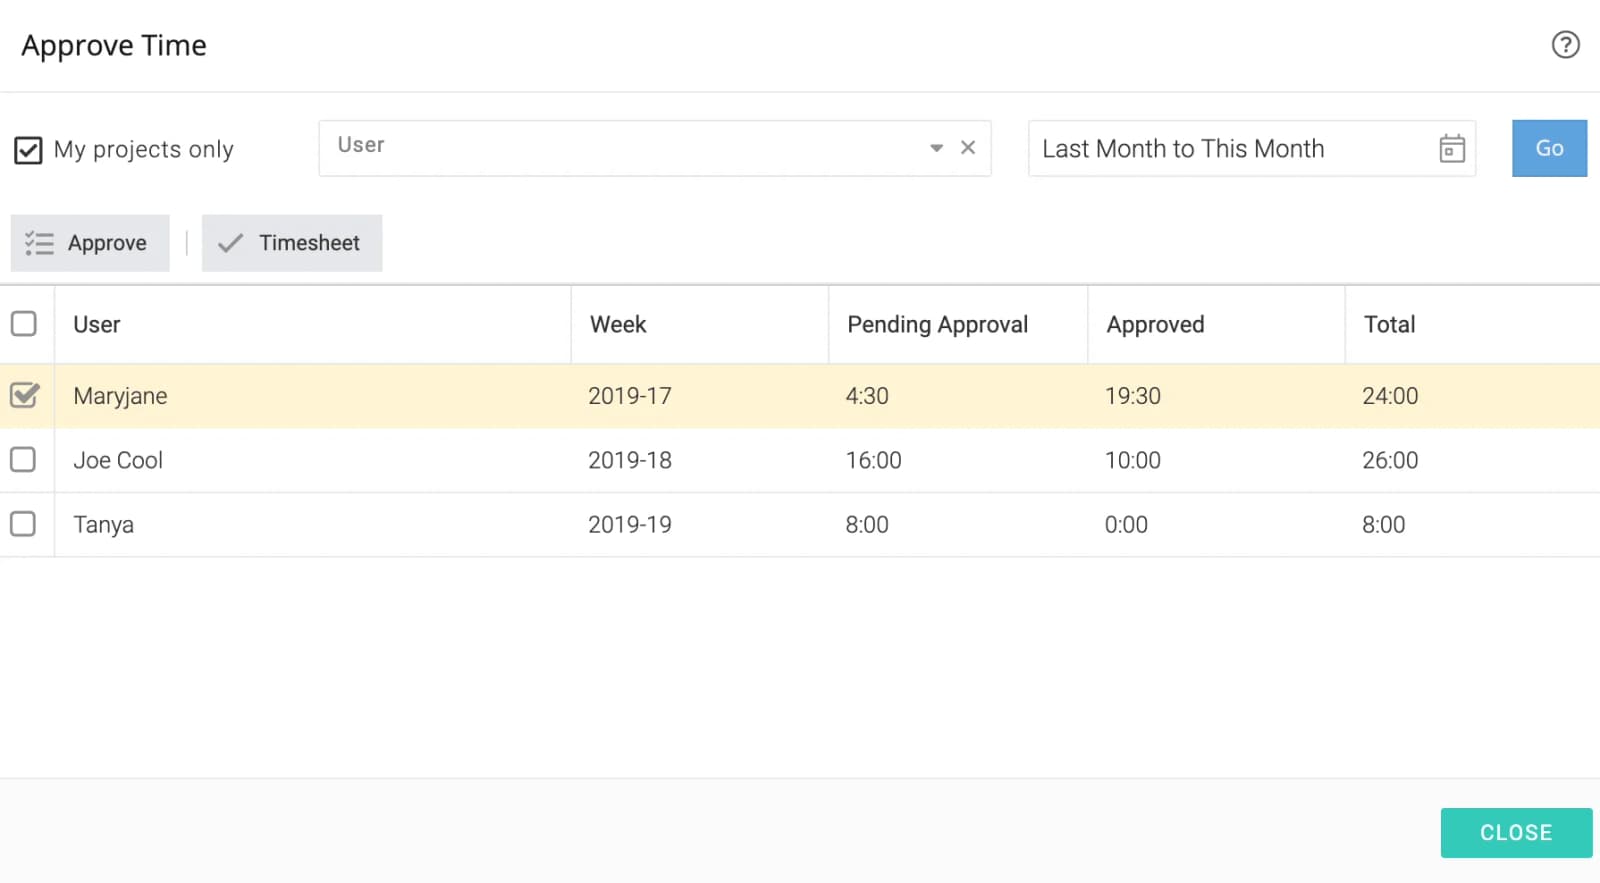
The above example shows time-entries submitted by Tanya and Joe Cool. You can check the boxes besides the users and then click Approve to approve all time-entries in one click OR click Timesheet to open Timesheet view to see the individual time-entries before approving.
TimeActions
Handling Incomplete Timesheets
The Incomplete Timesheets report helps you identify and remind users who have not filled their timesheets.
To view incomplete timesheets, click Main MenuReportsIncomplete Timesheets.
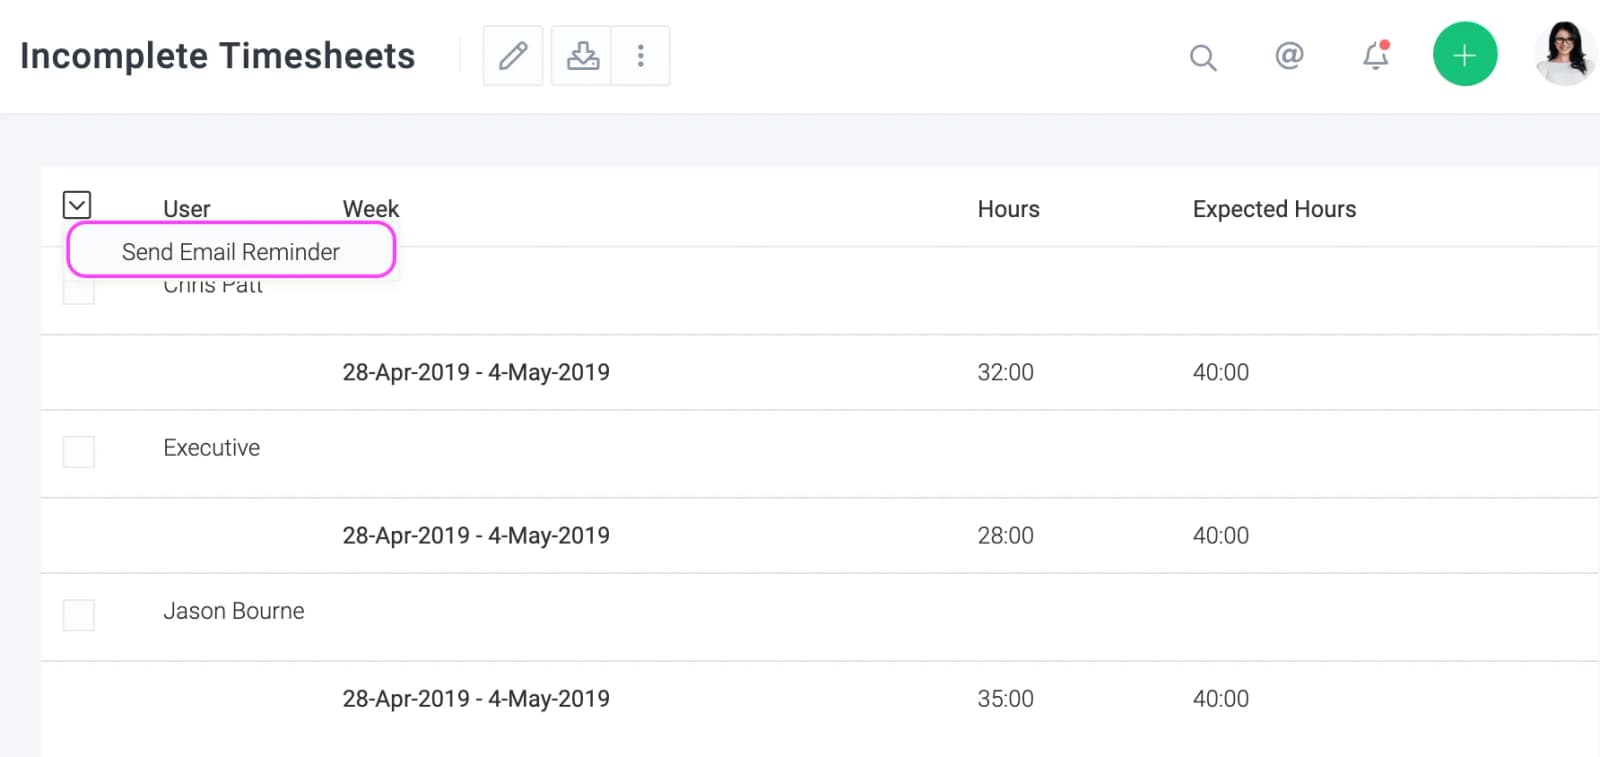
Customizing the definition of "Incomplete"
If you click on Edit Filters above, you can customize the value of the Hours (Submitted) filter. You have two options:
- Less than working hours – If Joe is supposed to work 40 hours per week and a non-working exception of 4 hours has been added, then Joe is supposed to log 36 hours of time. Anything below this will be treated as an incomplete timesheet.
- Less than N hours – You can decide the N and all uses who have logged time less than this value will be shown.
Setup daily timesheet reminders
If you have administrator privileges, you can set this up from Main MenuAdminTimesheetTimesheet Options. Check the Send incomplete timesheet reminder emails to users daily at option and select the time you want the emails to be sent and click on Save. The time selected is as per your company’s time zone.
TimeActions
Invoicing Timesheets
By marking time entries as invoiced, you are indicating that the client has been sent an official invoice from your company. You will need the Time & Expense > InvoiceGranted privilege to mark time as invoiced. To mark time as invoiced, click Main MenuApprovalsInvoice Time. This will show a list of all billable time entries that have been approved but not invoiced.
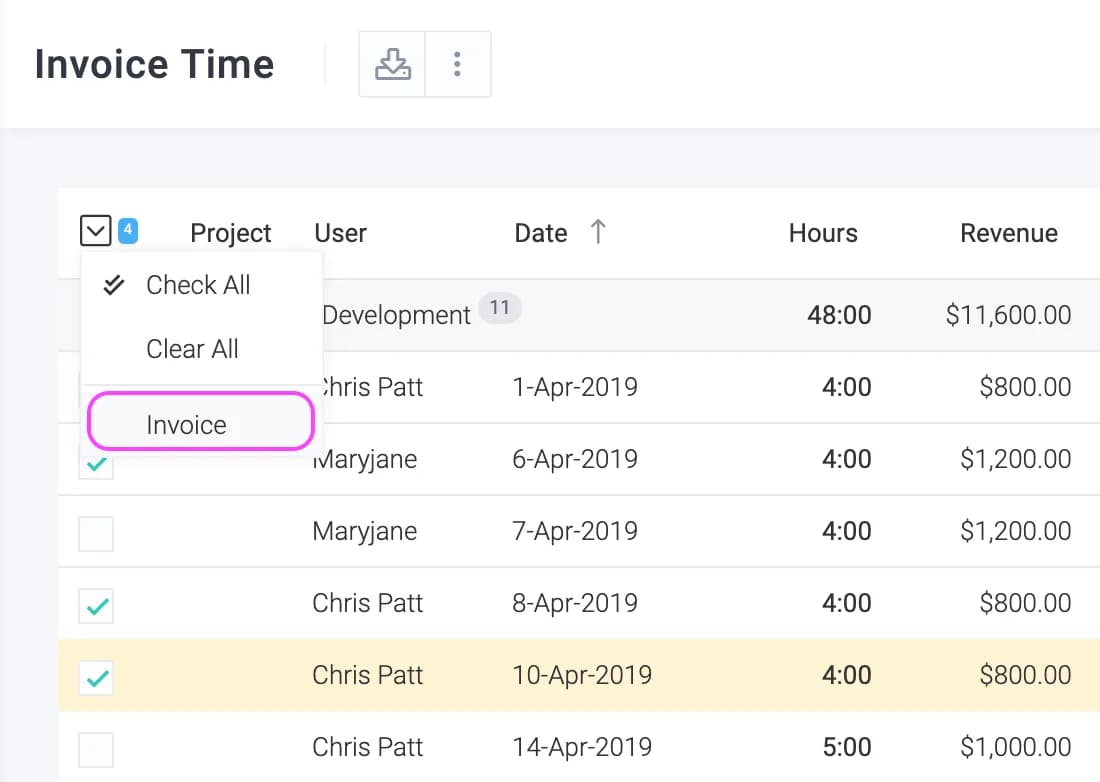
TimeActions
Bulk Actions
You can select multiple time entries and perform actions on them. In any time log report, Click on the next to the checkbox in the report table header as shown below:
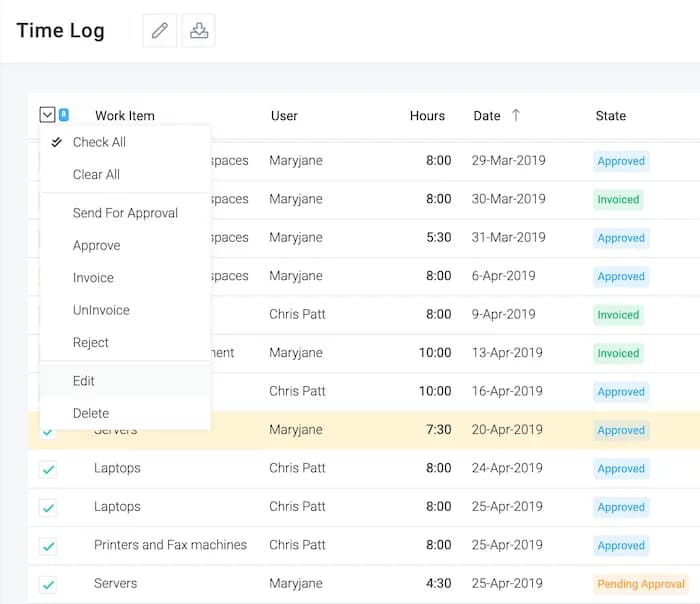
To perform an action, you will need the appropriate privilege. Also, time entry has to be in the correct state as per the workflow. So if you try to invoice an unapproved entry the action will fail.
Edit
You can set individual attributes of time entries or update the bill and cost rates to the latest values. The latter is especially useful when you have modified the rates and you need to update time entries with the new ones.
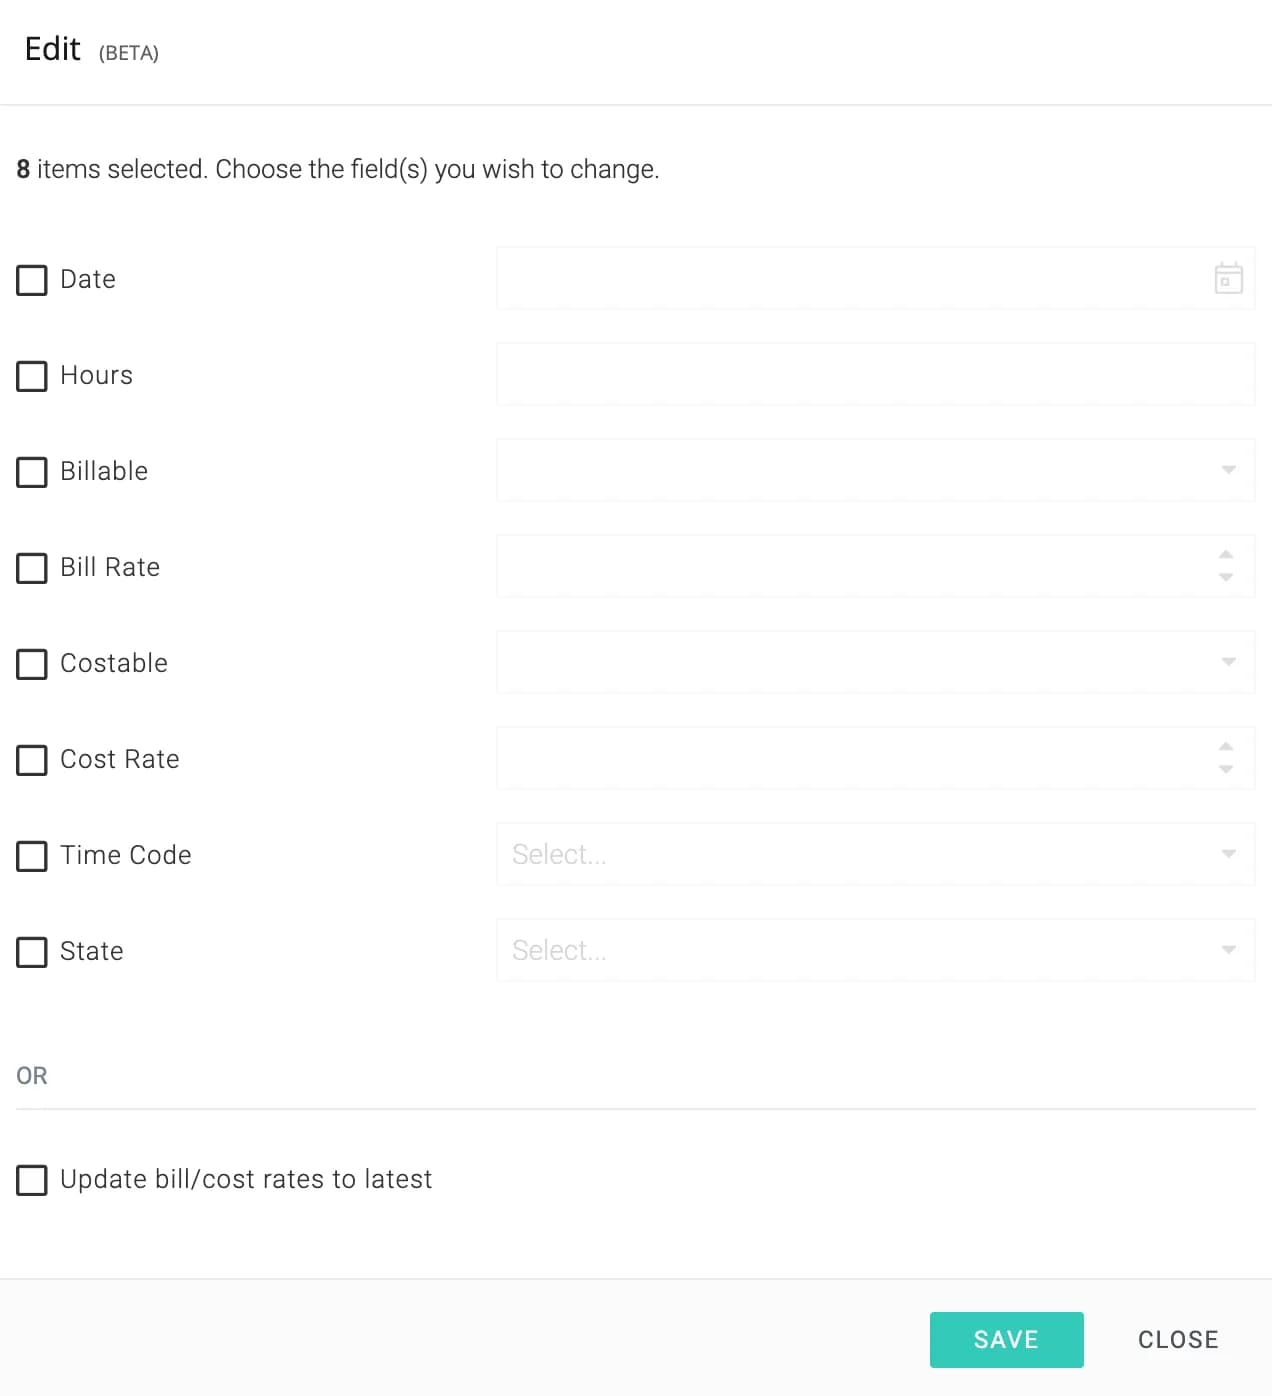
TimeActions
Timesheet Customizations
If you have administrator privileges, you can customize policies related to logging time for your organization from Main MenuAdminTimesheetTimesheet Options. Some of the non trivial options are covered below.
Limit time to Allocated hours
This policy allows enforces that uses cannot log more hours than they are allocated on a task.
For example, if user Joe is assigned 5 hours to a task then he can fill a total of 5 hours against that task. Let us assume he has already submitted 2 hours for this task in the previous week in addition to the 2 hours that were already approved. If he tries to log time of 1 hour each on Monday and Tuesday against for this task, the total hours will be 6 (2 approved, 2 already submitted, 2 hours being submitted now) and hence will not be allowed to submit the timesheet.
- This policy is checked only when submitting time for approval or editing time submitted for approval.
- While approving or after approval, it can be changed by whoever has privilege to approve the time
- Same logic is used when importing time via CSV and API.
Locking Timesheets
This policy prevents logging time for a month on a cut-off date.
For example, some companies follow a monthly invoicing of customers, and they don’t want users to accidentally submit time for the previous month. To avoid these errors you can enter a cut-off date of the month after which no more time can be logged for the previous month. Continuing with the example, say you invoice your customers on the 10th of each month. You can specify a cut-off date like 5th of every month. This allows users to complete their timesheets for the previous month by the 5th of the month. After that they cannot fill time for the previous month. Approvers get till the 9th to finish approving the time logs before they are invoiced on the 10th.
- If today is 3rd of May, and you have set the cut-off to 5, you can fill time for the month of April (previous month) but not for March or February. Those are already locked as the date for them has already passed.
- The lock date is checked only when a user is submitting time for approval, or editing time that is already submitted for approval.
- While approving OR after approval, it can be changed by whoever has the privilege to approve the time.
- Same logic mentioned above is used when importing time via CSV and API.
TimeActions
Importing Time from CSV
Celoxis provides you with the ability to import time entries from CSV. If you have a Microsoft Excel file, then you can export it in CSV (comma separated values) format and then import it in Celoxis.
To import time entries, navigate to Main MenuAdminTimesheetImport Time (CSV).
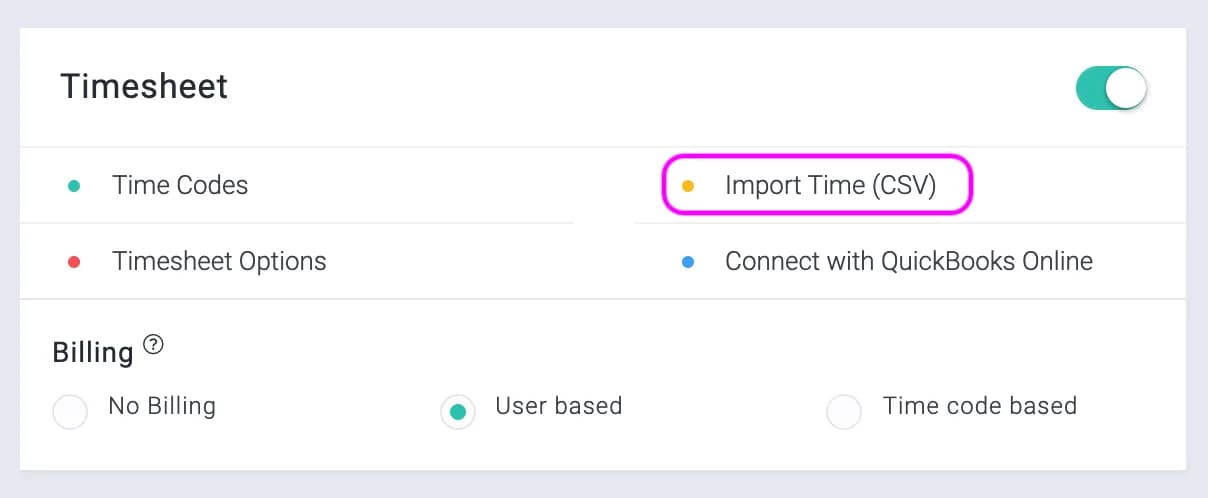
For reference, you can download a sample CSV file by clicking on
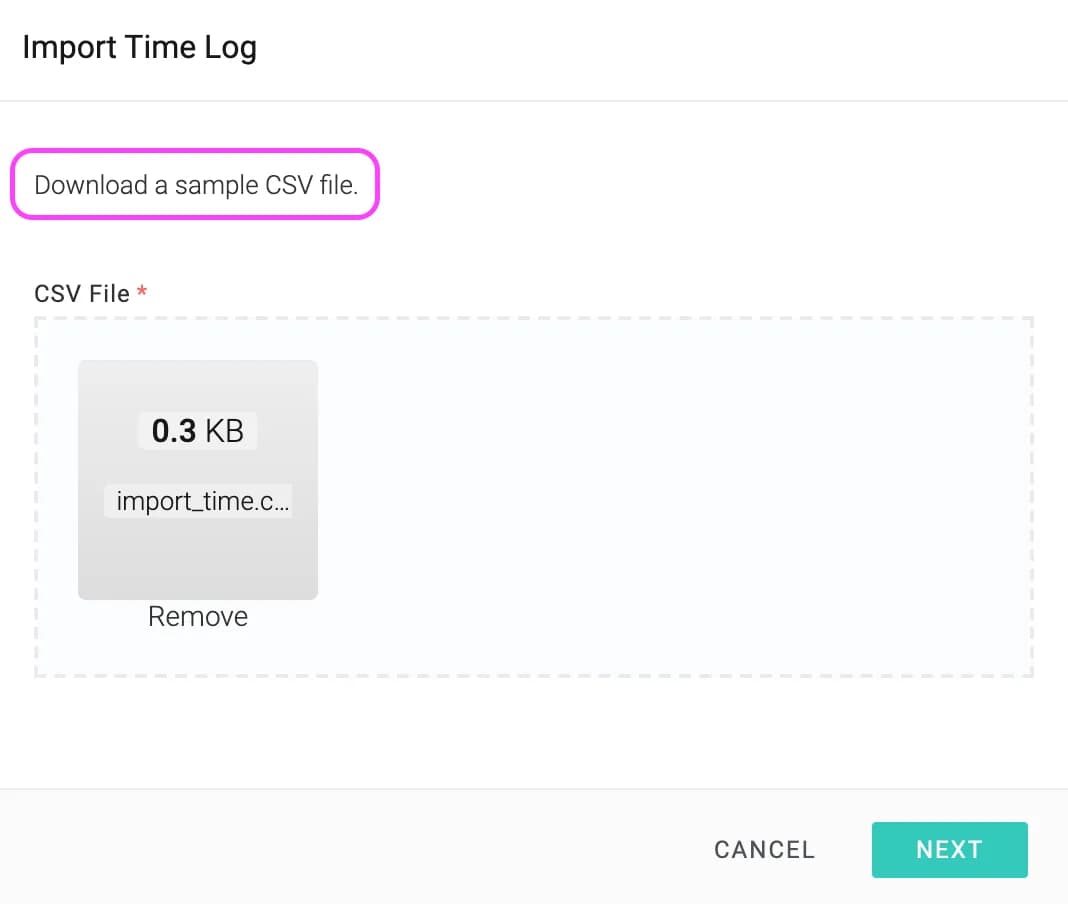
After uploading the CSV file you need to map each column in CSV file to the corresponding field in Celoxis. By default, Celoxis automatically maps the fields for you but you can also select a different column from the dropdown list. You can even use the
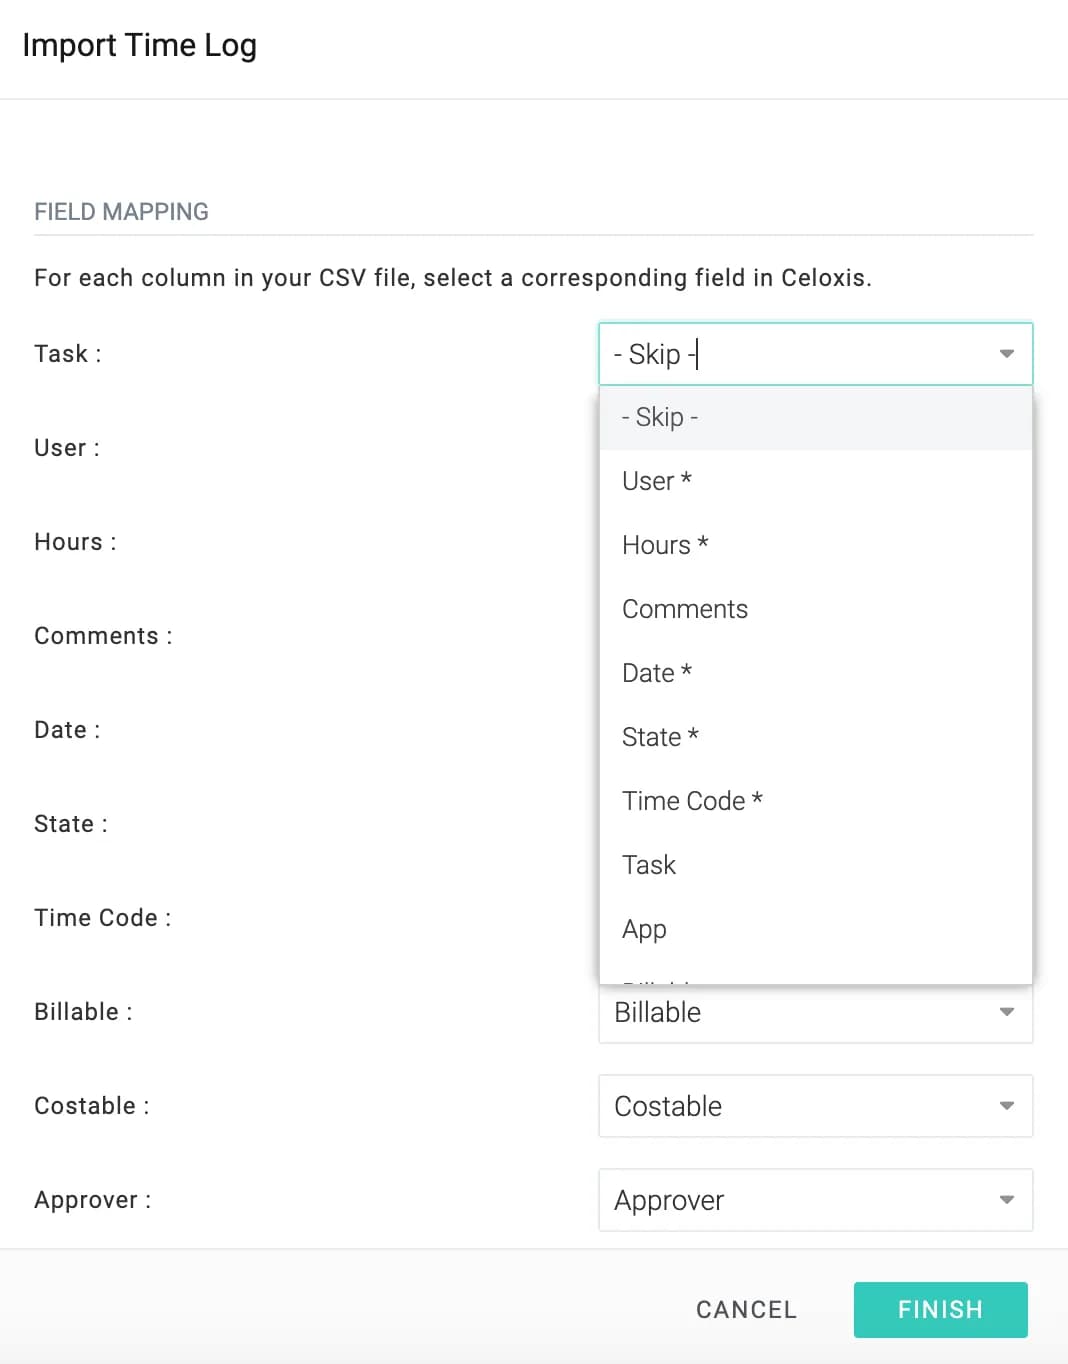
option for a field that you want to be automatically mapped by Celoxis.
Fields supported:
- Task/App
- User - mandatory
- Hours - mandatory
- Comments
- Date - YYYY-MM-DD format, mandatory
- State - mandatory
- Time Code - mandatory
- Billable
- Costable
- Approver
- Invoiced By
- Custom Fields - you will have to create the fields in Celoxis first
- ID - mandatory, only when you are updating time entries using a CSV file
Updating Time Entries
Celoxis also provides the ability to update the existing time entries by importing a CSV file. To update time entries you must include the ID of the time entries in the CSV file.
To find the ID of the time entries, add ID column in the Time Logs report(Main MenuTime Logs).
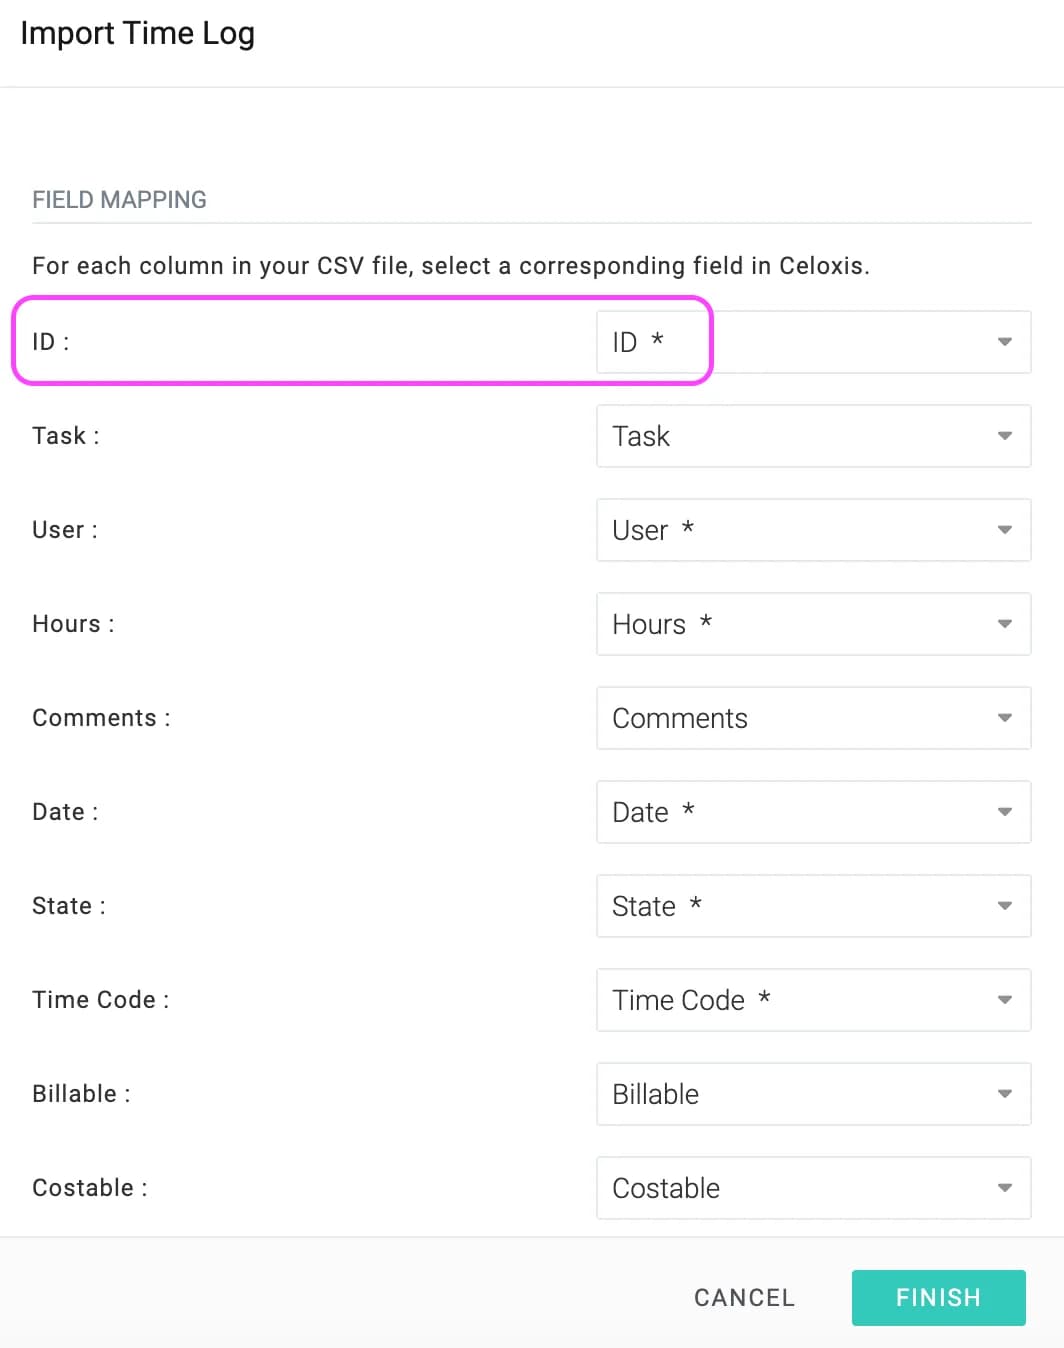
How-To
TimeHow-To
Overtime Calculation
This article helps you understand how you can manage overtime hours and arrive at project costs and billing using the time codes in Celoxis.
Steps
- Define additional Project Time codes for each of your overtime activities and mark them as costable. For example, if you have existing time codes as Research, Design, Development, then create additional overtime time codes such as Research (OT), Design (OT), Development (OT).
- Define regular cost and bill (if user-based billing) rates for your users.
- In case of Time code based billing, also define the overtime bill rates for your overtime time codes.
- Create a ‘Time Entry’ report with below details,
Name: Overtime Entries Select a filter ‘Time Code’ and select all overtime time codes in this filter Select a filter ‘User’ and mark it as promptable Output: Tabular. Select the columns as Date, Hours, Cost Rate, Bill Rate Group By: User, Time Code - When users want to log overtime hours, ask them to select appropriate overtime time code in the timesheet.
- When approving time entries, filter the report (created in step 4) based on a specific user E.g. User: Joe Cool. This will display all the overtime entries by Joe Cool.
- Now select all the overtime entries and click on bulk edit action.
- In case of time code based billing model, select Cost Rate option, and set the overtime cost rate.
- In case of User based billing, select the Cost Rate and Bill Rate options and then set the overtime cost rate and bill rate.
- Approve the time entries.
Sample Reports
- Regular vs Overtime (Tabular Report)
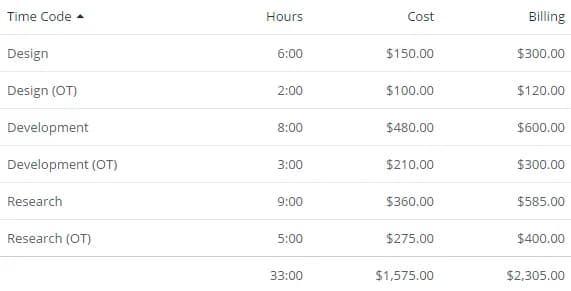
- Overtime Distribution (Pie Chart Report)
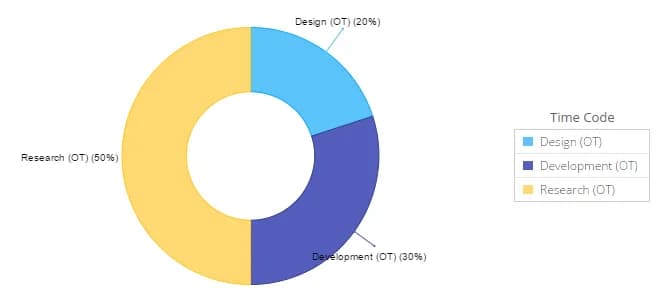
FAQ
TimeFAQ
Can my time-entries reflect the changed rates for my users?
Yes, Celoxis allows you to apply the new rates for time-entries already submitted or approved. When the time-entry is saved or submitted for approval, the new rates are automatically updated during approvals.
However, once a time-entry is approved, you need to consciously edit them to apply the new rates using the bulk actions.
For steps, refer here.
Expense
8 articlesConcepts
ExpenseConcepts
Expense Workflow
An expense in Celoxis passes through various states as shown below.
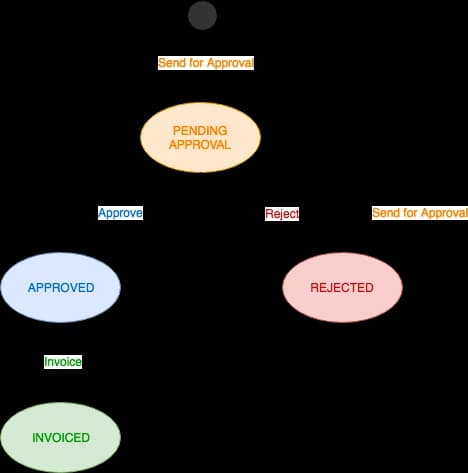
Submitted
Pending approval indicates that the expense has been submitted for approval.
- Anyone with Add Expense privilege can create an expense in this state.
Approved
Approved indicates that the expense has been approved by the project manager.
- Once approved, that expense cannot be edited by the submitter. However, anyone with the Approve privilege can make changes to the expense.
- Information from approved expense like cost and revenue are rolled-up to their respective work items and projects.
Rejected
Rejected indicates that the expense has been rejected by the project manager.
- The submitter is notified through an email.
Invoiced
Invoiced indicates that the expense has been marked as invoiced.
- Only expense marked as Billable can be invoiced.
- Anyone with Invoice privilege can invoice an expense.
- Once invoiced, the expense’s invoiced revenue are rolled-up to their respective work items and projects.
ExpenseConcepts
Expense Code
An expense code represents an expense type for an expense line item. Some common expense codes are Meals, Gas, Phone, etc.
Expense codes help in reporting. You can aggregate information about your activities and create pie, bar and various other types of reports. For example, you can understand how money is being spent across various avenues.
Using expense codes
Expense codes are selected by the submitter for each line item. You can use expense codes in filters, output columns and even charts.
Managing expense codes
Only administrators can manage expense codes. Navigate to Main MenuAdminExpensesExpense Codes.
ExpenseConcepts
Billable and Costable Expenses
The submitter of an expense can mark it as billable and costable. If an expense is marked as billable, its total amount is added to the work item's and consequently its project's revenue. If the expense is marked as costable, its total amount is added to the work item's and consequently its project's cost.
ExpenseConcepts
Expense Glossary
| Attribute | Read/Write | Description |
|---|---|---|
| Expense | RW | A short description. |
| Created On | R | Date on which expense was submitted. |
| Submitted By | R | The user who submitted the expense. |
| Project | RW | Project against which the expense was added. |
| Task | RW | Task against which the expense was added. |
| State | R | The current state of this expense. One of the following: Submitted, Approved, Rejected, Invoiced. Read More. |
| Expense Total | RW | Total Expense amount including the line items. |
| Approved On | R | Date on which expense was approved. |
| Approver | R | Name of user who approved the expense. |
| Accounting Code | R | The accounting code of this item's expense code. |
| Attachment | R | A file attachment (e.g. a receipt). |
| Billable | R | Indicates whether this expense's amount should be added to its task's revenue. |
| Costable | R | Indicates whether this expense's amount should be added to its task's cost. |
| Expense Code | RW | The expense code of the expense line item. Read More. |
| Expense Item Amount | RW | Amount of the individual line item of the expense. |
| Expense Item Date | RW | Date when the expense was incurred. |
| Reimbursable | RW | Indicates whether the line item amount should be reimbursed to the submitted. E.g. if the item was paid using a company credit card, then it would not be while if the item was paid by the submitter's credit card then it would.. |
Actions
ExpenseActions
Adding Expenses
Expenses can be added against tasks. Each expense can have multiple line items. Each line item can be assigned an expense code like Travel, Food etc.
To add an expense, Main MenuExpense. Alternatively, you can also click on a task and from the task screen click Add Expense.
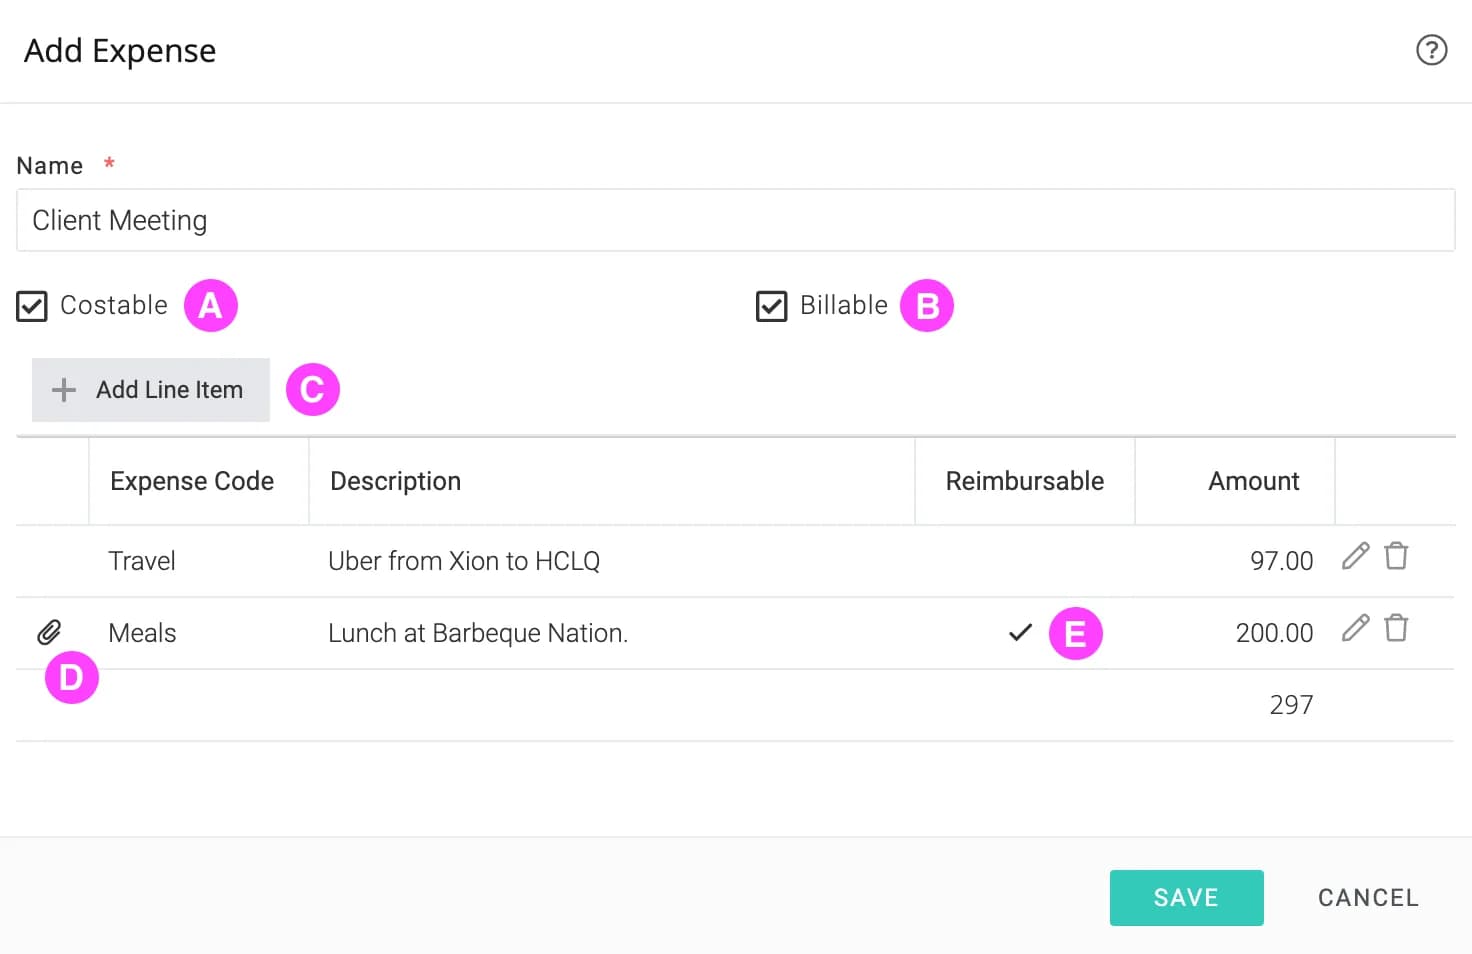
| A | If marked as costable, the total of the expense will be added to the task cost (and project cost) after the expense is approved. |
| B | Indicates that the client will pay for it. If marked as billable, the total of the expense will be added to the task revenue (and project revenue) after the expense is approved. |
| C | Click to add a line item |
| D | Indicates that a receipt has been uploaded for the line item. |
| E | Reimbursable means that the submitter has to be reimbursed for this item. The next line item has probably been paid by using a company credit card and hence not required to be reimbursed. |
ExpenseActions
Approving Expenses
You will need the Time & Expense > ApproveGranted privilege to approve expenses. To approve expenses, click Main MenuApprovalsApprove Expenses.
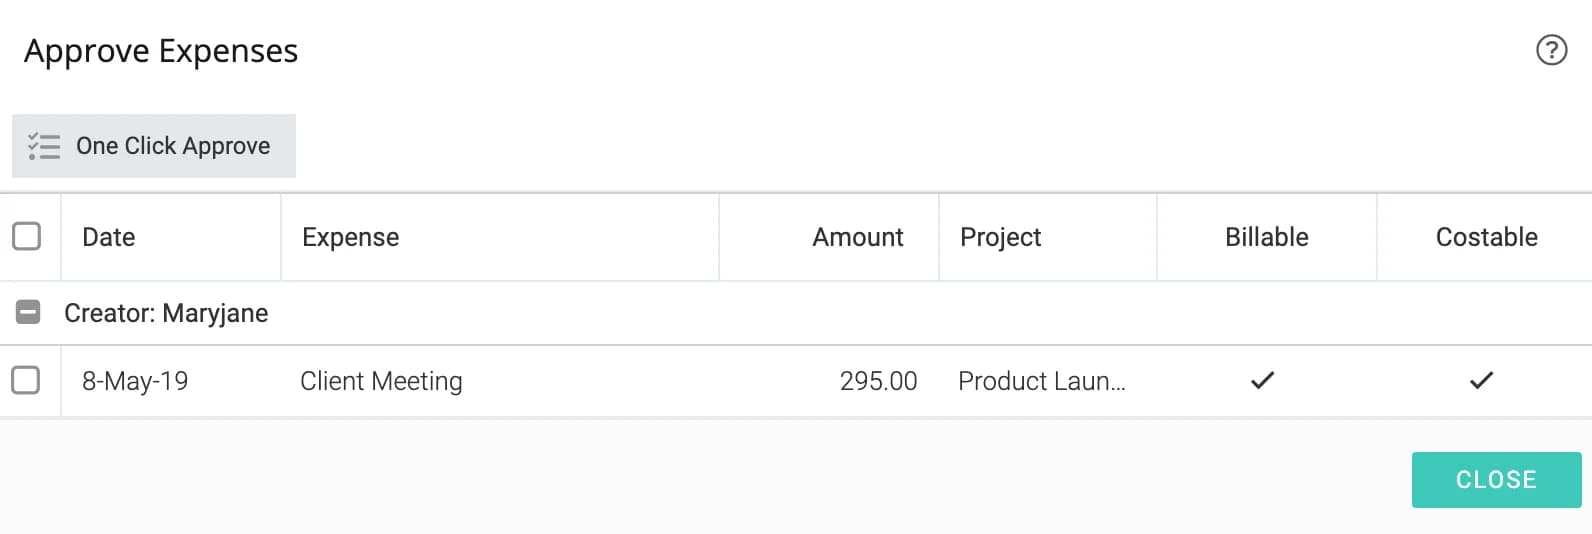
The above example shows two expenses submitted by Tanya. You can click on an expense to approve or reject them individually OR select one or more expenses and click on One Click Approve to approve them in bulk..
ExpenseActions
Invoicing Expenses
By marking expenses as invoiced, you are indicating that the client has been sent an official invoice from your company. You will need the Time & Expense > InvoiceGranted privilege to invoice expenses. To invoice expenses, click Main MenuApprovalsInvoice Expenses. This will show a list of all billable expenses that have been approved but not invoiced.
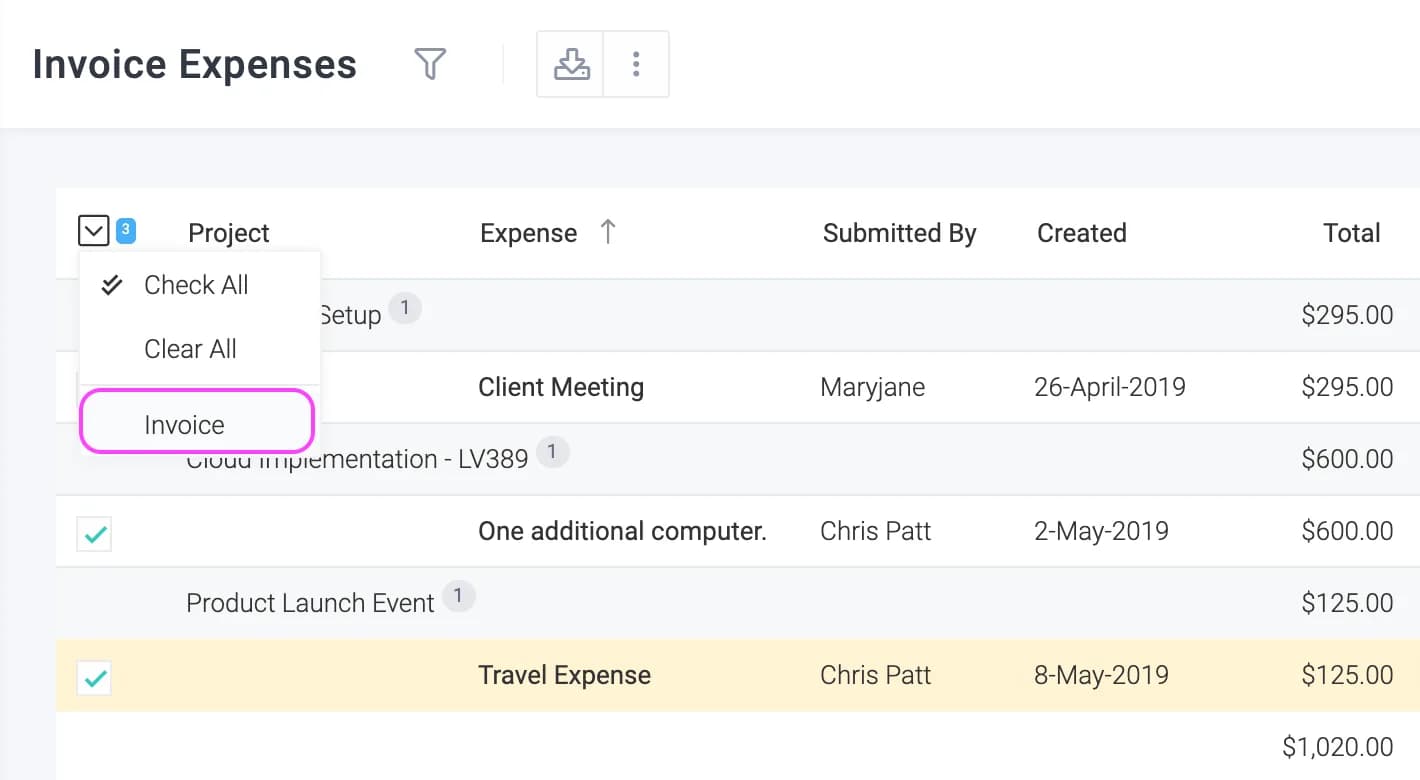
FAQ
ExpenseFAQ
Is it possible to edit approved expenses?
Yes, you can edit the approved expenses if you have the requisite privileges. You need to have Time & Expense > EditGranted and Time & Expense > ApproveGranted privileges to be able to do this.
Collaboration
20 articlesConcepts
CollaborationConcepts
Notification Center
The notification center is used to communicate events and messages about items you are interested in. Events could include that someone completed a task in your project, or you received a new reply to an online discussion, or a new version of the file you are interested in is available, etc. The following image shows 2 new notifications and 1 new mention.
In-App Notifications
In-app notifications are events that happen in items that you follow, manage or own. The include new work assignments, modification to items, updates on tasks, replies in online discussions, etc. The number of unread notifications appear above the icon. You can click the icon anytime to view your recent notifications.
Clicking on any item in the panel will open that item's panel while clicking on Mark All Read will mark all unread notifications as read.
@ Mentions
@mentions is the best way to grab your colleague's attention to a work item. You can mention a user while:
- Adding a comment on a task or updating its progress.
- Performing an action, reassigning or adding a comment to an app item.
- Participating in discussions.
The number of unread messages appear above the
icon. You can click the icon anytime to view recent messages directed at you.
Clicking on any item in the panel will open that item's panel while clicking on Mark All Read will mark all unread messages as read.
Mentioning a User
The easiest way to mention a user is to click the icon in the text field's menu as shown below. Also, if easier, you can simply type @<first-name>, @<last-name>, @<username> or @<first-name><last-name> in the text field. In the following example, Emily and Tanya will see this message in their mentions when they login.
CollaborationConcepts
Followers
At times, you need to track updates on work items where you are not assigned but are related to the work you're doing. By following a work item:
- You get updates via email notifications about the updated on the work items.
- You can even reply to the emails, which will then add your comments against that work item.
Following a work item is a great way to stay up-to-date with its updates and comments. When you follow a work item, you see its updates in the Activity Stream and receive instant email notifications.
Follow a Work item
Assignees of a task or app item and the State Manager/Project Manager automatically follow that task or app item. To begin following a work item:
- Click on Follow link on the panel of the task/app item.
- Alternatively, go to the task or app item's actions menu and click Follow.
CollaborationConcepts
ActivityStream
The Activity Stream report allows you to view the recent happenings on projects, tasks, bugs, etc. that you are assigned to, manage or follow. This report can also be placed on one of your dashboards. An example is shown below:
As you can see the history is grouped by each object and the recent happenings for that object are shown. You can click on View All to view all activities since that object's creation. There is also a comment area where you can put in your comment. And like any other report, you can customize what you wish to see.
CollaborationConcepts
File Version Control
Files often go through an evolutionary process and undergo a series of revisions. In teams, a file often involves contributions by different people. Without some kind of control, some important questions become difficult to answer:
- Do I have the latest version of the file?
- Am I overwriting someone else's changes to this file?
- Who all are working on this file?
- What changes were made since the last version that we sent to the customer?
Using Celoxis, you can answer these and many other questions. Celoxis offers a basic version control system that is simple, intuitive and user-friendly.
Basics
Files in project and task folders can be version controlled. The basic process is:
- Check-out a file
- Make changes on your local computer
- Check-in a file
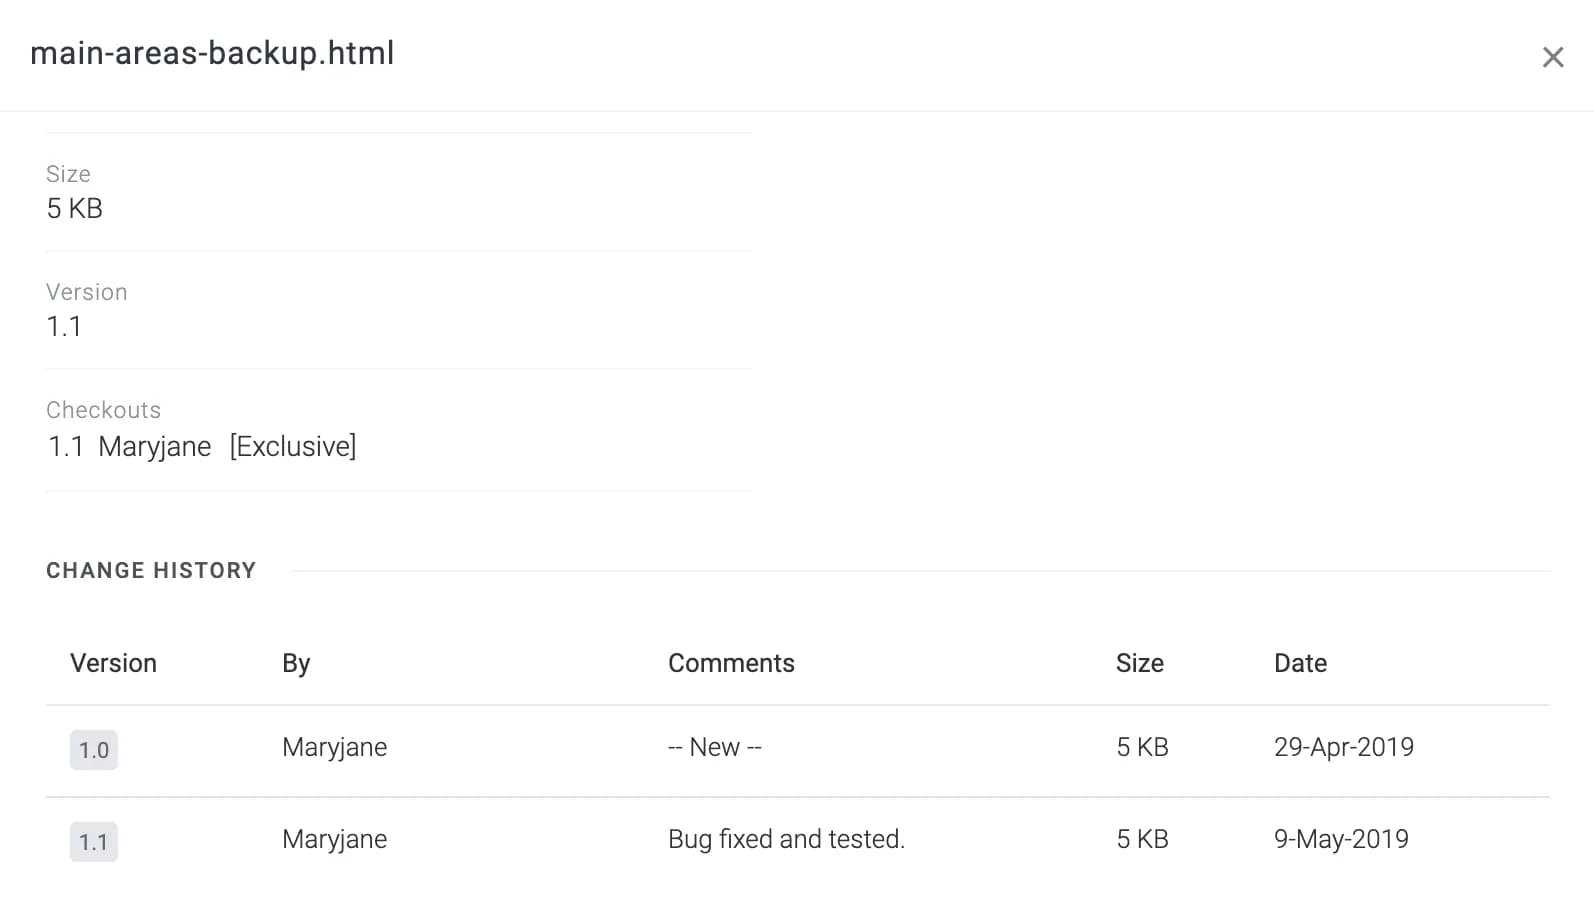
Checkout
Checking out a file indicates to the system and your team that you intend to make modifications to that file. After check-out, you can keep this copy on your personal computer, make changes to it and then check it back in.
Multiple users can check-out a file at the same time except if a check-out has been marked as exclusive mode. An exclusive check-out means that no one else can perform a check-out on that file until you check it in or revert your check-out.
If someone else checks in a file while you are working on it you will be notified. For instance, if you have a version 1.3 of a file and some one checks in a version 1.4, you will be notified that you have an older version.
To check-out a file
Click Checkout.
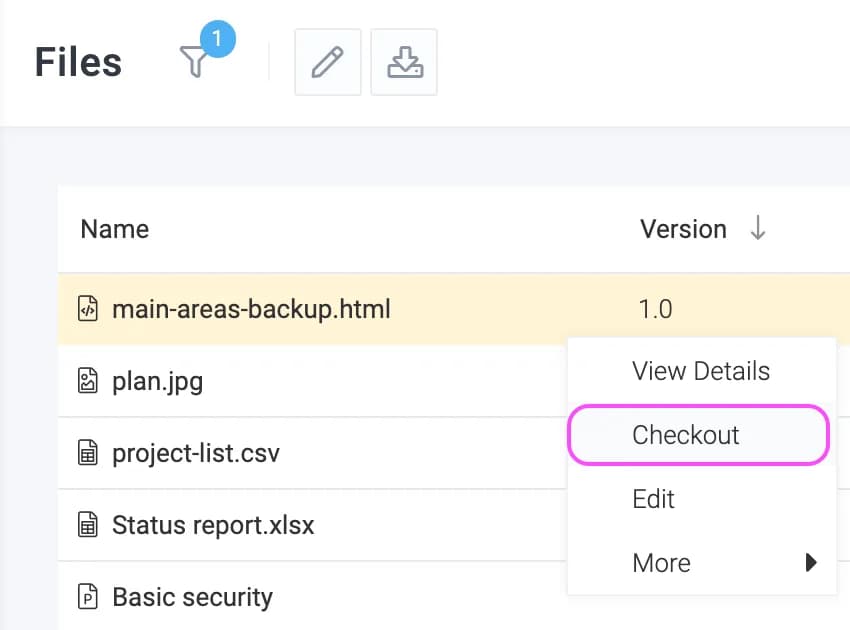
To undo a check-out
If you have checked out a file but decided that you do not need to update it, you can revert the check-in by clicking Revert
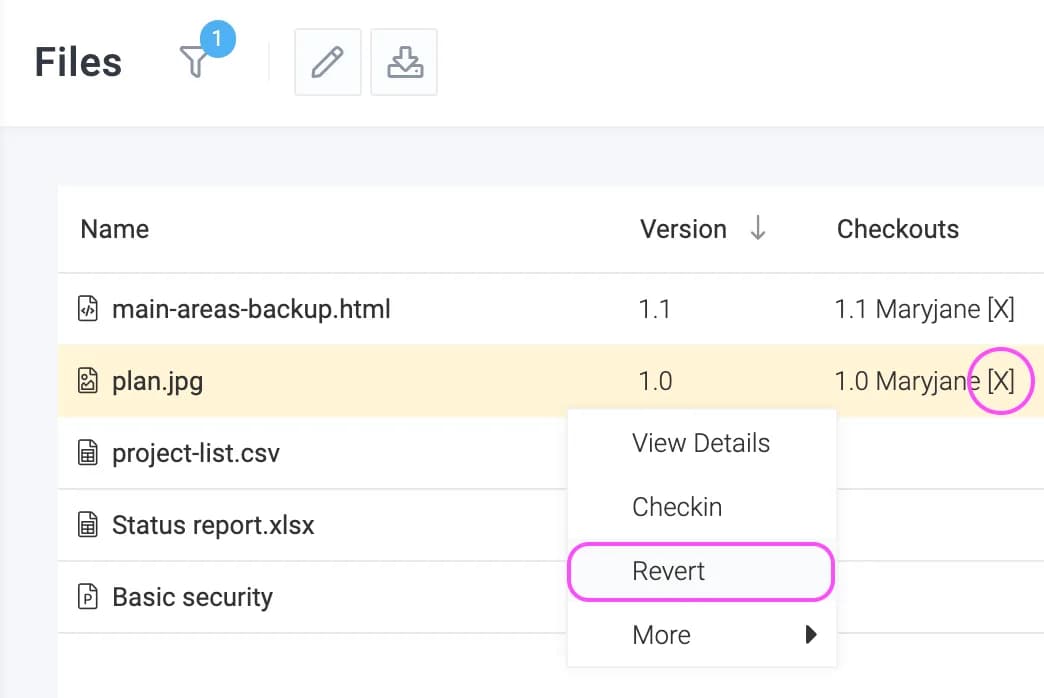
Viewing current check-outs
If you select the versions column, or on the document info screen, you can see the list of users who have checked the file out. An X indicates that the check-out is exclusive.
Checkin
Once you are done with your changes to the file on your computer, you must perform a check-in for your team to see it. When you check-in a file, you have to upload the new version of the file and enter your comments. The system maintains a history of all check-ins.
Celoxis also warns you of potential conflicts. For instance, consider the following scenario:
- You checked out version 1.0 of a file on Monday in a non-exclusive mode because you want to add a few chapters.
- Joe checks out the same version i.e 1.0 on Tuesday to correct a few spelling mistakes.
- After correcting typos, Joe immediately checks it back in to create version 1.1. Now these corrections obviously don't show up in your file since you have an earlier copy. At this point, Celoxis will send you an email notification indicating that a new version of the file is available indicating that your version is possibly outdated.
- If you try to check-in your file, Celoxis will warn you that there was a checkin on the same file while you were making your changes and hence a potential for conflict. After this warning, you will need to merge the changes (e.g. using Microsoft Word's merge feature) and check the file back in.
To check-in a file
Click Checkin. You have the choice of indicating it as either major change (e.g. 1.2 → 2.0) or a minor change (1.2 → 1.3). Version numbers do not affect system behavior and can be used as per your business policies. A best practice is to indicate a check-in as major when you intend to send it to your client.
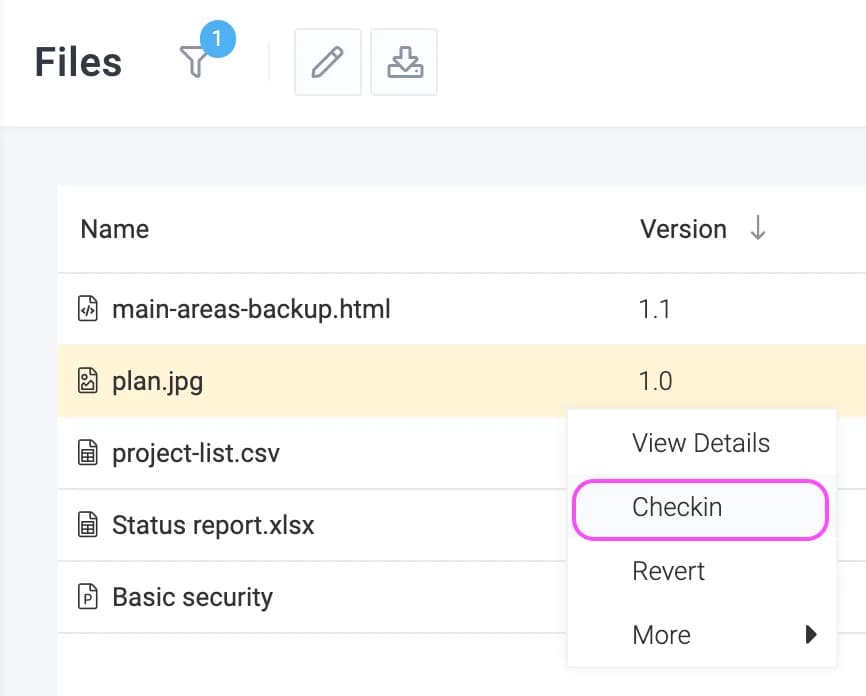
Revision history
To view all the revisions along with the comments, click View Details. You can also download a specific version of the file.
CollaborationConcepts
Scheduling Impact
When you add calendar events, you can indicate the impact it has on resource availability. For example, if you are going to an off-site meeting for a day, you would not want any tasks to be scheduled for you that day.
When you add calendar events, you can indicate the impact on availability in the following ways:
- No – this event has no impact on availability
- Yes, Working – will add the event duration to the availability of the owner as well as all invitees who have accepted the invitation.
- Yes, Non-Working – will remove the event duration from the availability of the owner as well as all invitees who have accepted the invitation.
CollaborationConcepts
Event Sharing
Sharing controls how others see your calendar. If you mark your event's sharing as:
- Private — The event is not visible to any user other than yourself and invitees.
- Show as busy —The event is shown as 'Busy' and no details are shown other than to you and the invitees.
- Public — The event is shown to everyone.
Actions
CollaborationActions
Conducting Discussions
You and your team can conduct discussions in a project. You can also decide to involve the project clients in the discussion. An example where a team discusses the about a design is shown below.
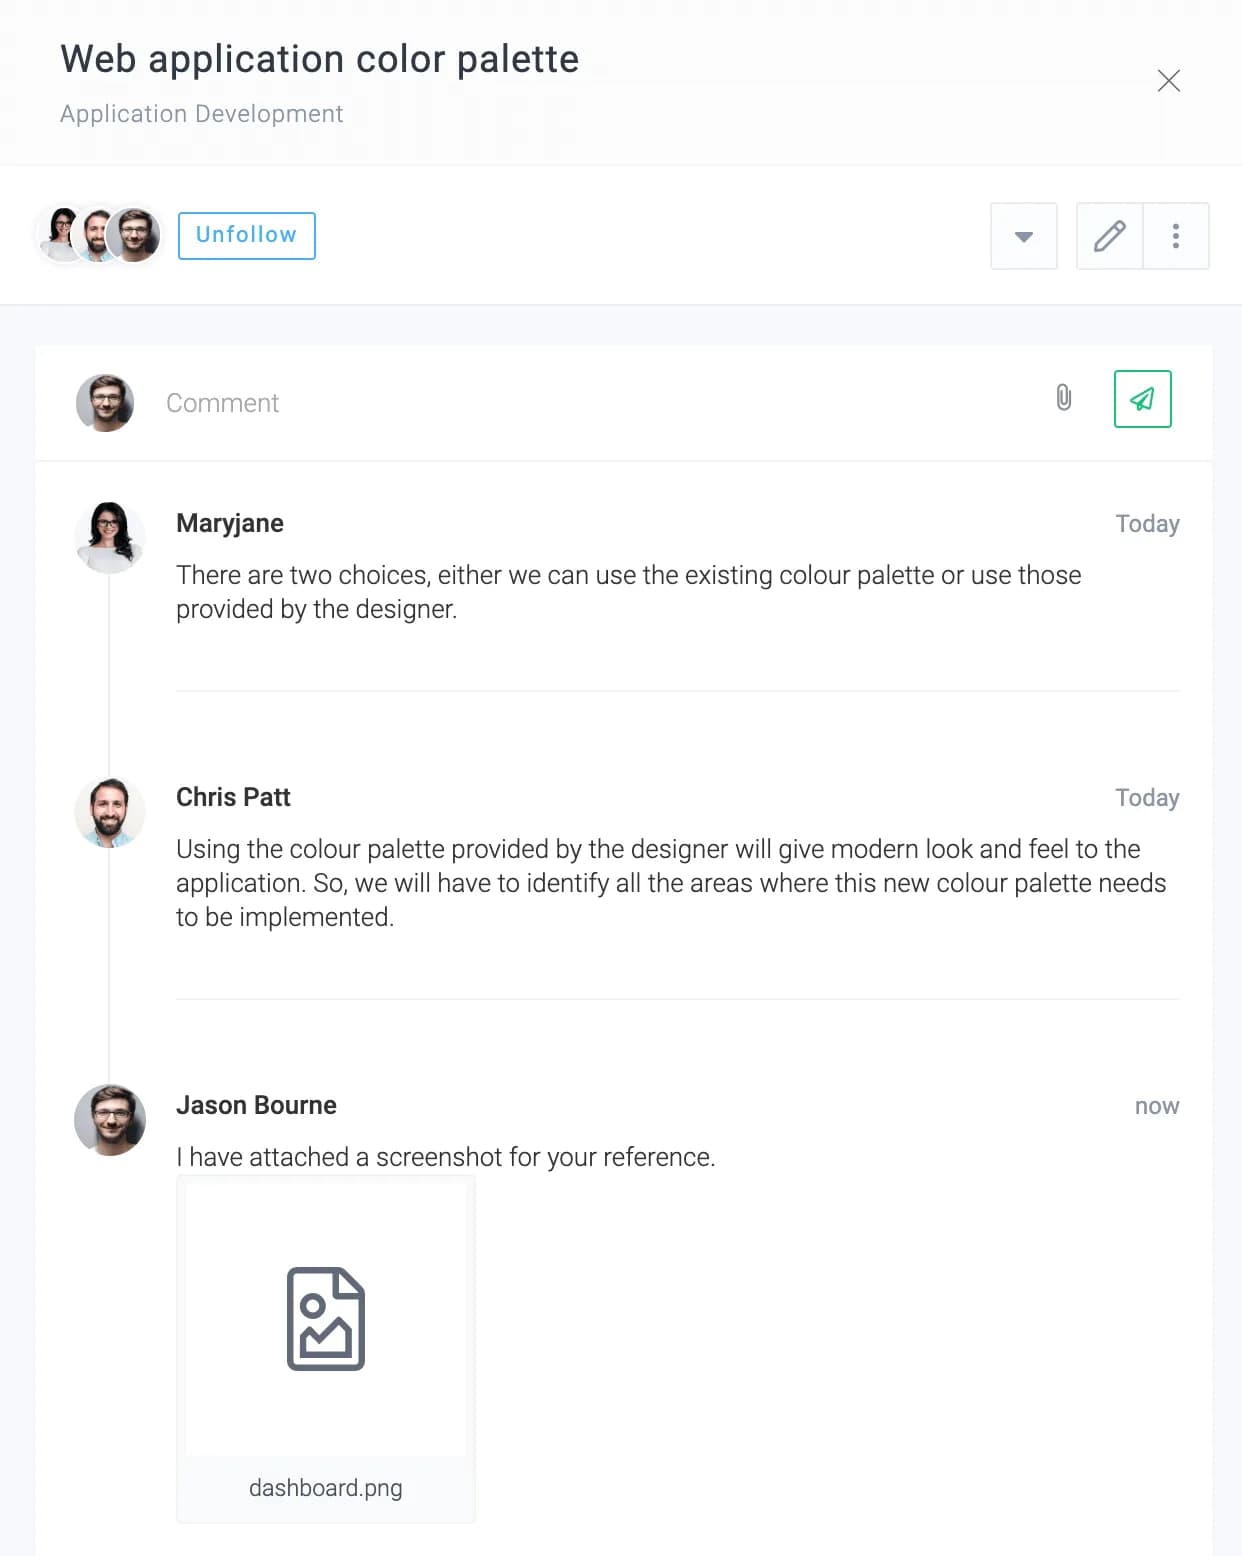
Initiating a Discussion
To start a discussion, click Main MenuDiscussion. Alternatively, you can also click on a project to open its panel and then click Start a Discussion.
Managing Participants
Participants can view the discussion and also get email notifications of all replies. They can simply reply to the email and even add attachments and the discussion will be automatically updated.
To manage participants click on Edit button. You can change the followers or decide whether to give access to the project's clients from this form as shown below.
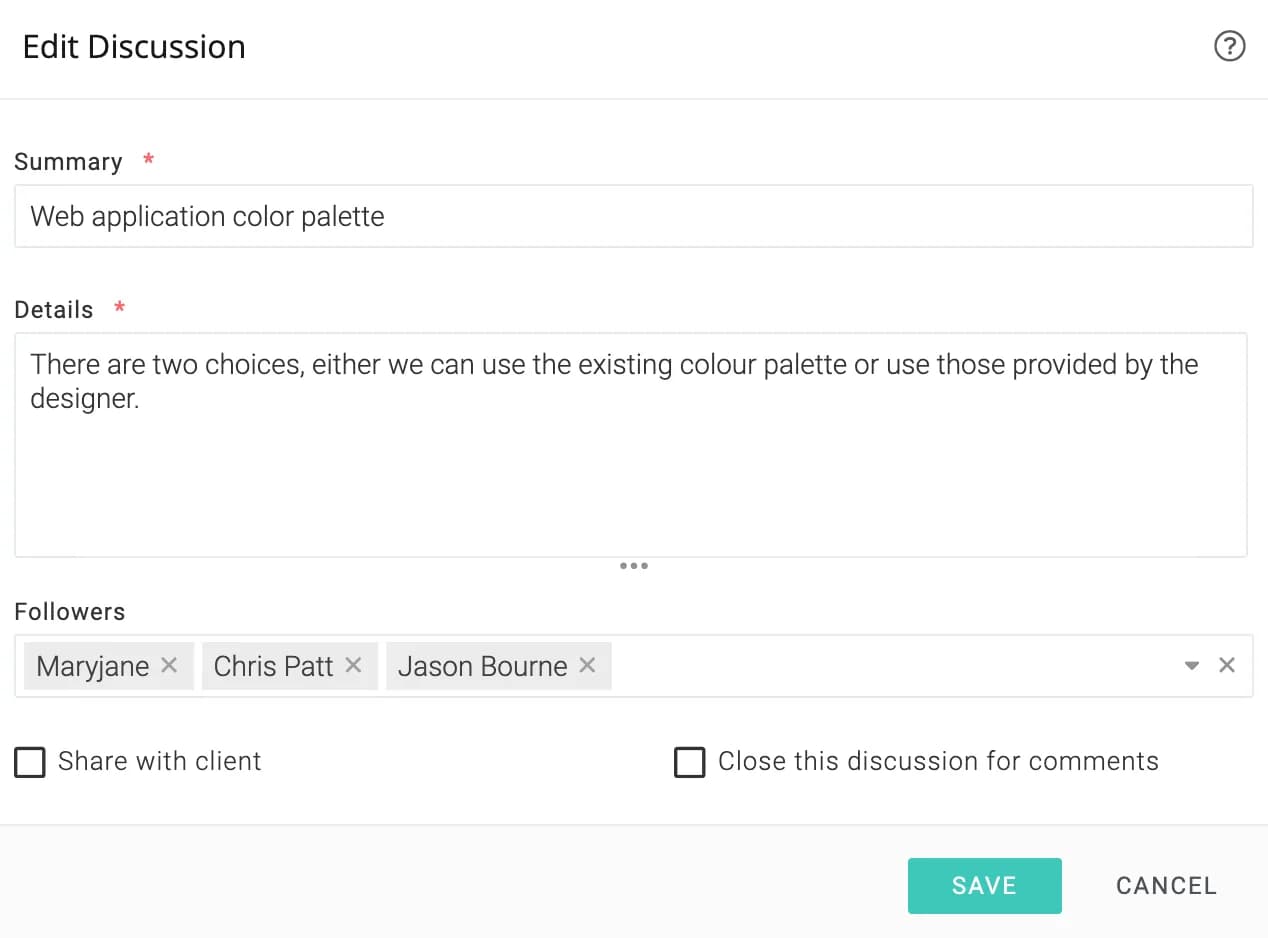
Closing a discussion for comments
If you close a discussion for comments, no more posts will be allowed in it. To close, click on Edit button and check the Close this discussion for comments as shown in the image above. You uncheck this option at any time in the future.
CollaborationActions
Replying via emails
Celoxis sends email notifications on work items when you are either assigned to or manage a work item. You are also sent email notifications when you follow work items.
In either case, you can reply to these emails to record your comments. If you attach files in your email reply, they will be attached to the work items.
Unsubscribing from email notifications
If you are a follower and want to stop receiving email notifications, you can unfollow that work item by clicking on the Unfollow link in the email footer. If you are not a follower but are assigned to or manage the work item, you can adjust your email preferences.
CollaborationActions
Attaching Files
Attaching files to projects
For details click here.
Attaching files to tasks
For details click here.
Attaching files to custom app items
For details click here.
CollaborationActions
Adding Links
Like adding files, you can also add links to folders by clicking on the icon for the folder and clicking Add Link.
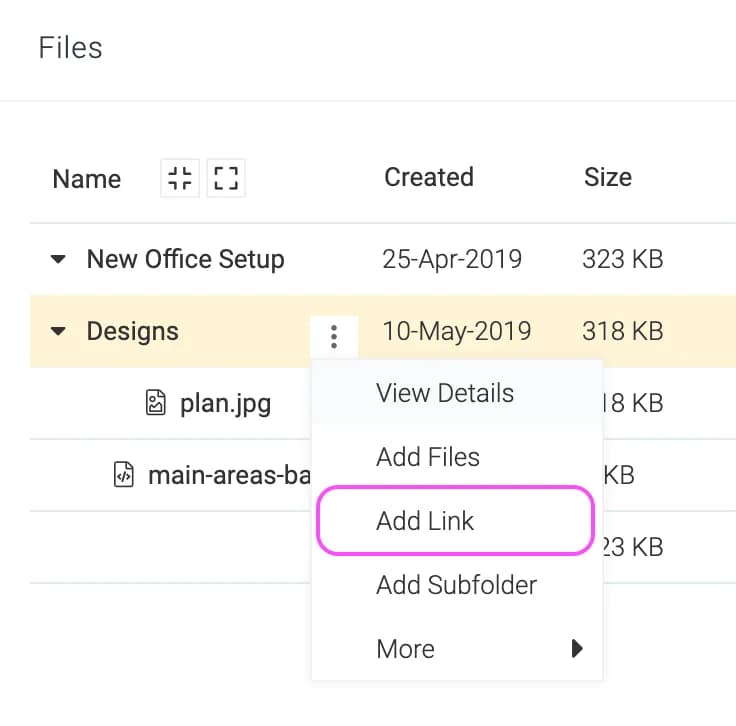
CollaborationActions
Adding Folders
Every project has its own folder by default. In most cases, you will be uploading files to this folder. If you have a lot of documents, you can create sub-folders in this folder. The following example shows that the project has two sub-folders Home Page Samples and Logos.
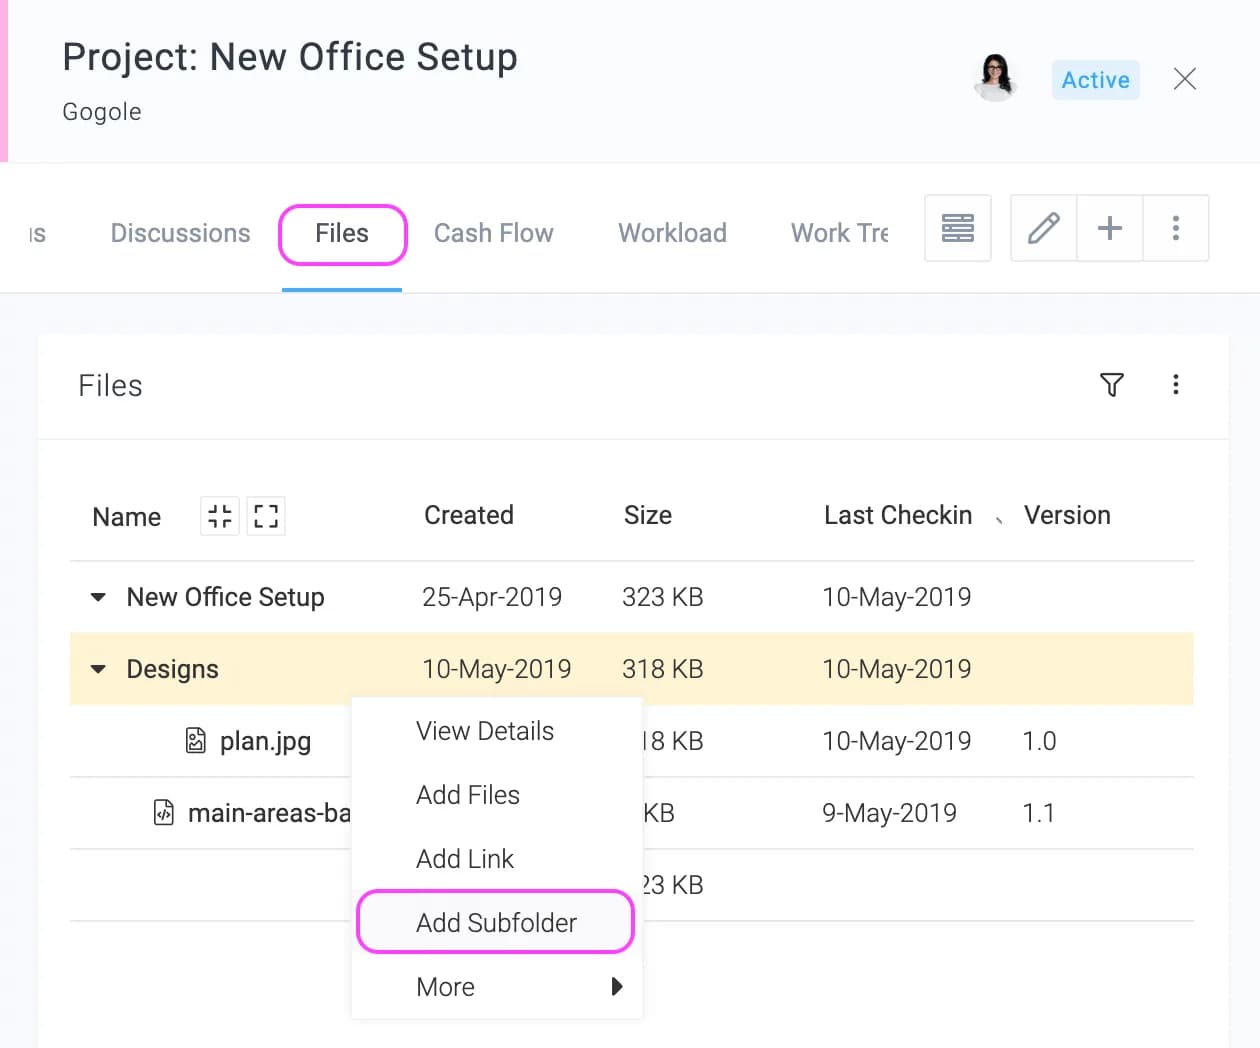
To add a sub-folder, click on a project to open its panel and then click on the Files tab. From the menu besides the project name folder, click on Add Subfolder as shown above.
CollaborationActions
Moving Files
As the project progresses, you might realize that the scope of the document or the documents in a folder is for another project or was simply attached to the wrong project or task.
In such situation, you can move the file/folder to the correct project/task using the Move option available under the Document actionsMove of the document.
CollaborationActions
Viewing Changelog
To view all the revisions along with the comments, click View Details. You can also download a specific version of the file. The following image shows the version history. Clicking on the version number will download that version of the file.
CollaborationActions
Adding Events
You can add events in your calendar and if you have administrative privileges, you can also add events for other users, for a work calendar or for the entire company.
To add an event, click on the user icon on top-right and then Calendar. In the new page, click in the date cell on which you wish to add the event.
| For Whom? | The user for whom you are creating the event. To add for a work calendar, choose Everyone in calendar... and select the work calendars. To add an event for all users in your company choose Everyone. |
| Name | A short description of your event. |
| EventIsNonWork | Whether this event affects how tasks are scheduled. Read More. |
| EventSharing | How this event will appear to others. Read More. |
| Start | The date on which you want to start the event. |
| Reminder | If set, the user will receive an email notification at the time as a reminder. |
| Recur | The recurring pattern for this event. |
| Invitees | Other users attending this event. If this event impacts scheduling, then it impacts tasks assigned to these invitees too. Read More. |
| Time zone independent | Check this option the event is going to happen at different times e.g. 25th December (Christmas) happens at different times. Uncheck this option when the event is going to happen at the same time e.g. a world-wide product launch. |
How-To
CollaborationHow-To
How do I export my Calendar to Outlook?
Follow the steps below to export the Celoxis Calendar to Outlook.
- Get the URL of the Celoxis Calendar.
- Copy the link.
- Now, go to the Calendar in your Outlook application.
- Click on Open Calendar > From Internet.
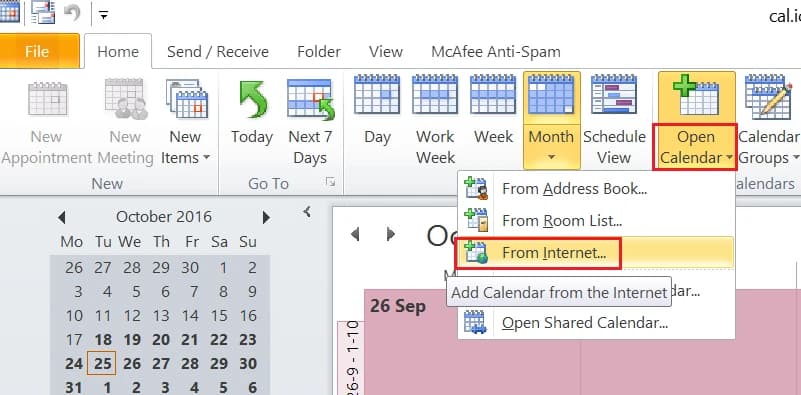
FAQ
CollaborationFAQ
Can clients participate in discussions?
Yes, clients can participate in discussions once they are added to it as Followers. For more on Followers, refer here.
CollaborationFAQ
Can I see other users Calendar?
You can view calendar of other users. Events marked as "Public" by that user are shown and you can view details of the events. Events marked as "Busy" will show as "Busy" for the duration of the event. "Private" events are not shown.
To view them, click on the Users drop-down and select the user whose events you wish to see.
CollaborationFAQ
Is the content of the document available in the search results?
Yes, the document content is searched. Your search results will have the name of the document if any matching keywords are found.
CollaborationFAQ
How do I know which files are attached to a Task or project?
In a Document report, there is a filter Attached To which helps you filter documents that are attached to a project or task.
CollaborationFAQ
Can I share the documents with clients?
Yes, you can share a document with a client. When upload documents, you will see a checkbox Share with client which once checked, will show the document in a document report shared with a client.
Custom Apps
21 articlesConcepts
Custom AppsConcepts
Introduction
Custom Apps are powerful workflow-driven applications built by customers like you. You can define the steps, people involved at each step, capture custom fields and even define time-out rules. All this with our super powerful reporting capabilities makes Custom Apps a great complementary tool to the rich project management capabilities in Celoxis.
Customers are using custom apps to manage leave approvals, client change requests, equipment quality checks, software bugs, and many more! If you are using spreadsheets to maintain something, think about moving to Custom Apps.
The power of custom apps is best illustrated by a scenario. Acme Consulting has created a bug tracking application in Celoxis.
Acme's customer sends an email to
bugs@acme.comwith an image as a file attachment.The bug is automatically created in Celoxis along with the image as its attachment.
Quentin, from the QA team, starts seeing the bug in the Unverified Bugs pane on his dashboard.
He verifies that it is indeed a bug and marks the bug as Verified.
The bug is automatically routed to Dave, a software developer.
Dave is notified via email and also sees the bug in the Bugs assigned to me pane on his dashboard.
Dave fixes the bug and marks the bug as Resolved. While doing this, as per the company's policy, he also enters the list of files modified in a custom field.
The bug is automatically assigned to the same user who verified the bug (Quentin) to test.
The company policy is to test all bugs within 72 hours but Quentin misses it.
An email is automatically sent to the QA manager and Quentin about the lapse and the bug is marked as delayed.
Quentin verifies the fix and marks the bug as Closed.
An email is automatically sent to the customer about the fix.
Customer likes Acme.
As you can see Celoxis created the bug from email, then routed it to the right people, and as they completed their bit of the work, captured necessary information from them before moving it to the next person’s bucket, and at the same time keeping a watch for any delays.
Custom AppsConcepts
Workflow
We shall learn about building custom apps through an example. We will build a simple bug tracking application. We shall assume we have two teams: Developers - they fix bugs, and QA (short for Quality Assurance) - they test the fixes by developers. We will to the model the following bug workflow:
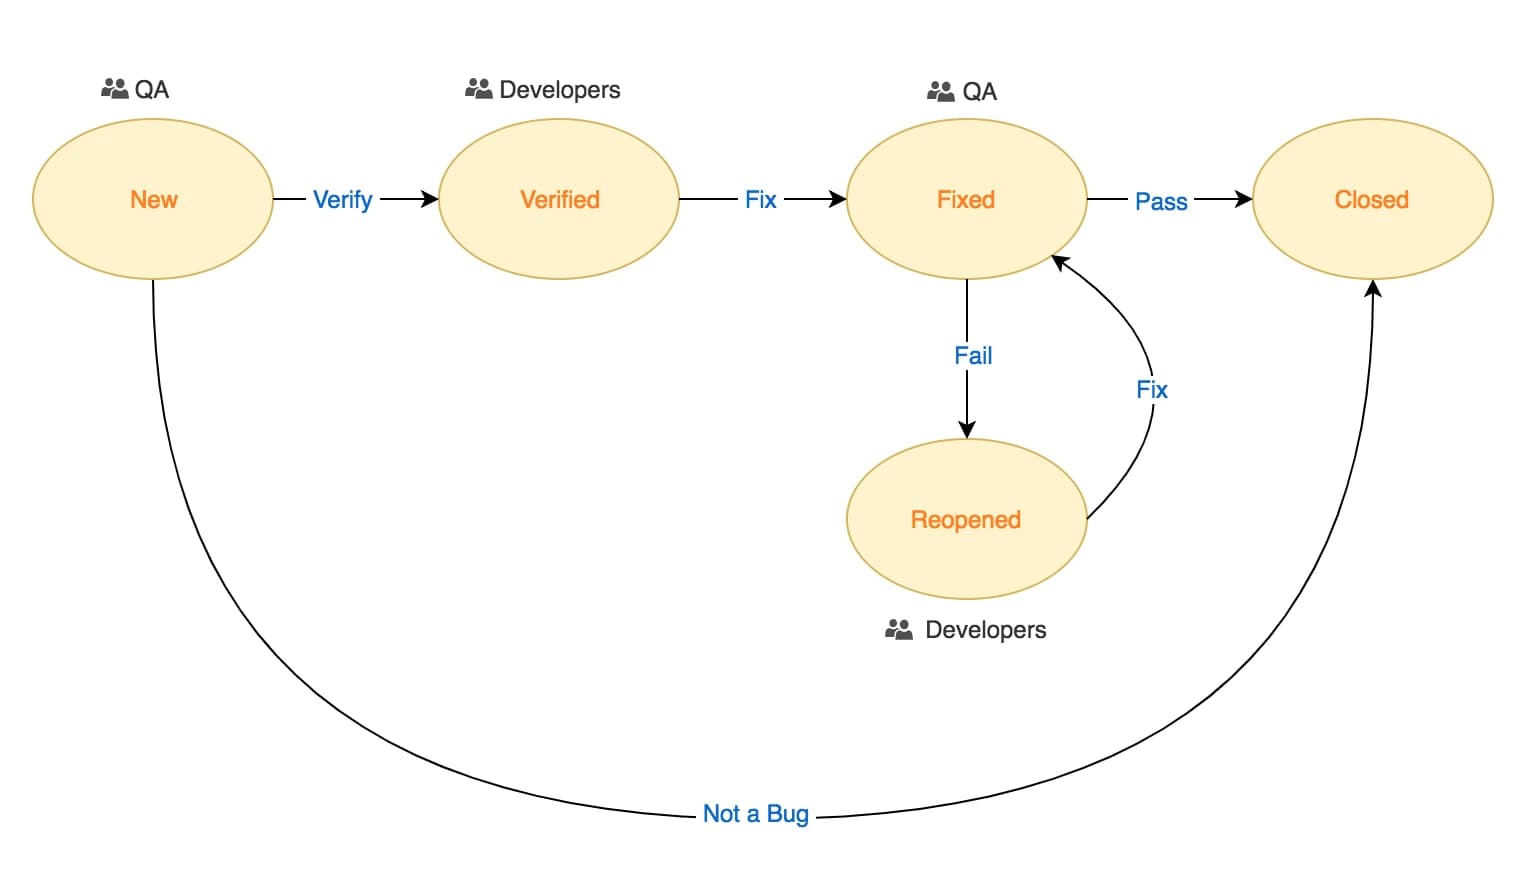
In plain english, the diagram translates to:
- When a bug is reported, it is in the New state.
- QA verifies the bug. If it is not a bug, the bug moves to Closed; else to the Verified state.
- A verified bug fixed by a developer moves to the Fixed state.
- The fix is then tested by QA and the bug moves to Reopened, if test fails; or Closed, if the test passes.
- A Reopened bug fixed by the developer moves to the Fixed state.
Each bubble is represents a stage in the bug life-cycle while each arrow an end-user action. Next to each state we have defined the team responsible for it. Also, note that there is no way for a bug to move from any state directly to any other state e.g. A bug cannot move directly from
to
We, ourselves use our own bug tracking application but we have a lot more states to indicate whether a test case was present, if documentation was updated, if a test case was added, etc. Similarly you can make the workflow as complex or simple as you like. But for now, let's stick to the simple workflow that we discussed above.
Creating an App
To create an app, go to Main MenuAdminCustom AppsApps and click on
. You will see a form with many tabs. We will cover each tab below.
The Basic tab
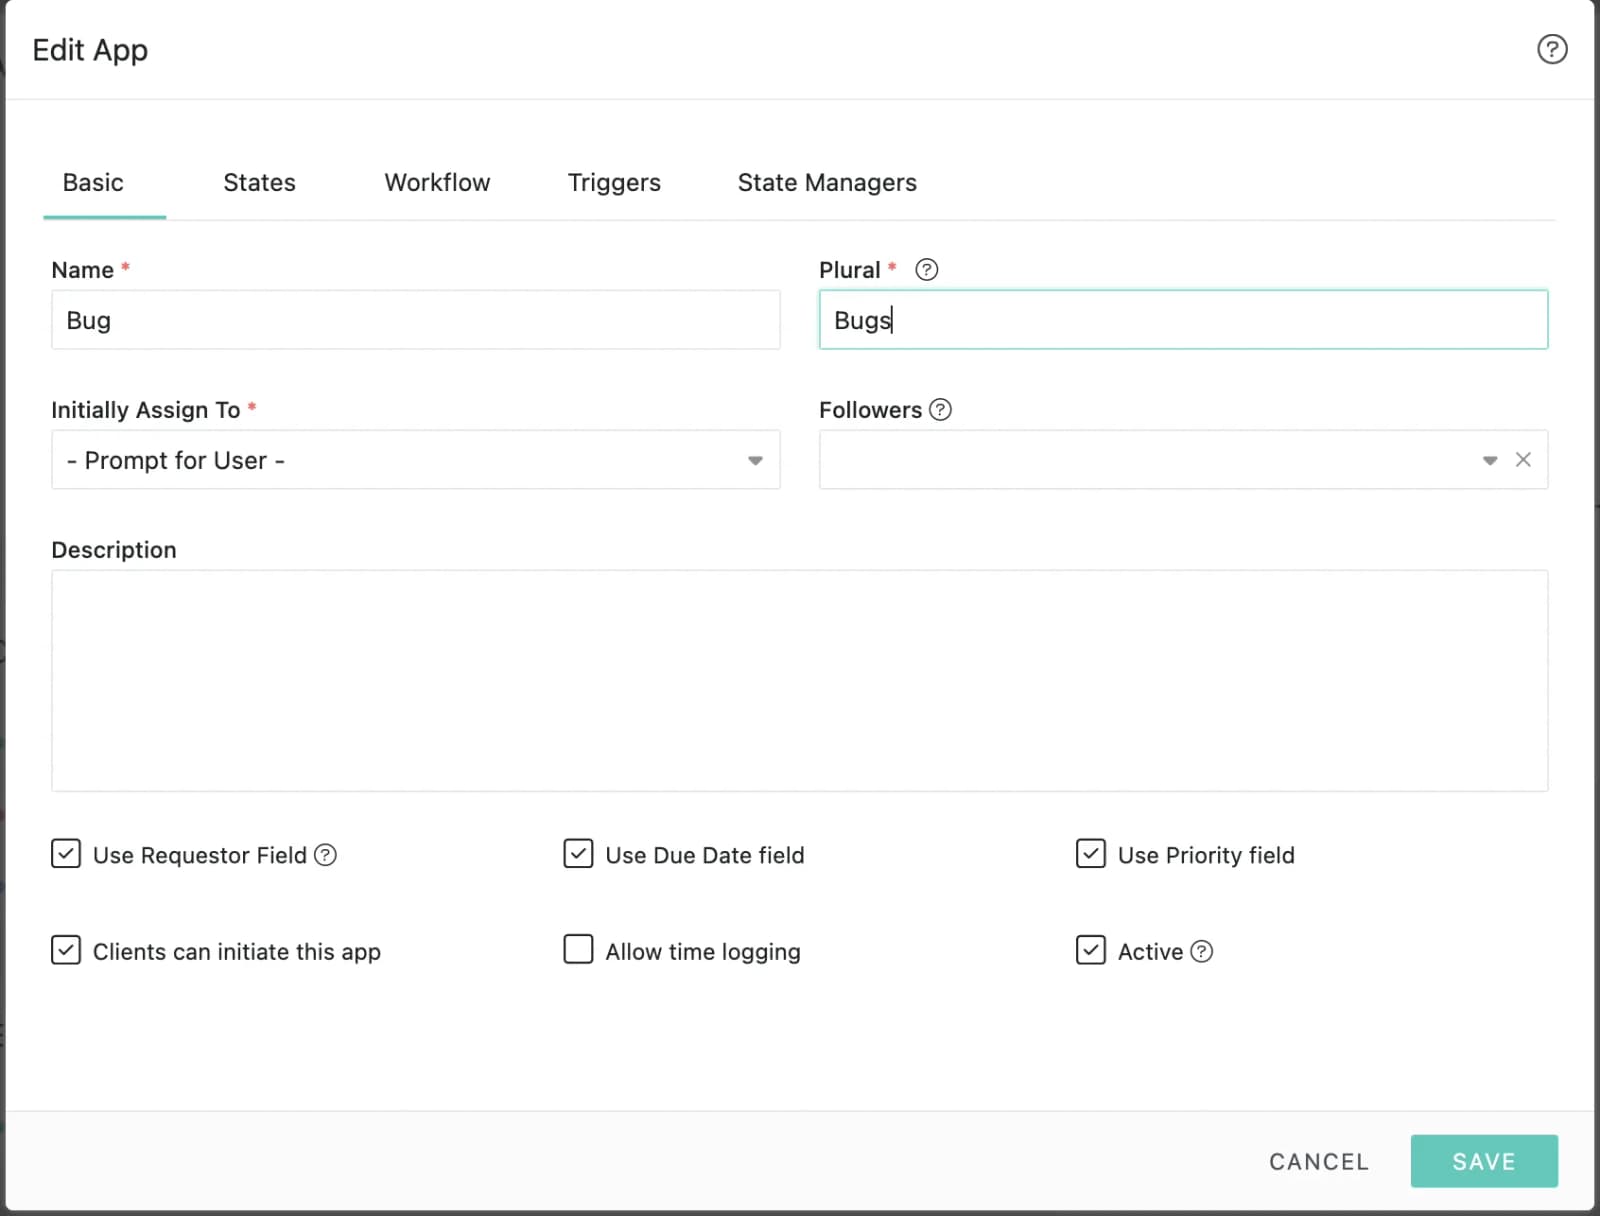
This tab defines some basic properties of the app. In addition, it also controls certain behaviours of the app.
| Name | The name of your app. We will put Bug here. |
| Plural | The plural name for the name. |
| Initially Assign To | Select the user who will be automatically assigned to new instances. |
| Use Requestor Field | By default the creator of an app item is also the requestor for that app item. However, there could be cases where you would want to initiate an app on someone else's behalf and have notifications and updates sent to that person and not the creator. In our app, we would want our support agents to be able to open bugs on behalf of a customer, but we would like updates to be sent to the customer. So we turn it on. When enabled, you will see a Requestor field on while creating a new instance of an app. |
| Use Due Date field | This option determines whether to enable or disable the due date field on the Add/Edit app item. Since we don't want to use the Due Date field, we check this option. |
| Use Priority field | This option determines whether to enable or disable the Priority field on the Add/Edit app item. Since we don't want to use the Priority field, we check this option. |
| Allow time logs | Whether to allow logging time on the app item. We would like our developers and QA team to log time, we so check this option. |
| Clients can initiate this app | Whether you want your clients to create new instances. We would like our clients to report bugs, so we check this option. |
| Description | A brief description for your app. |
| Followers | Select the default followers. Followers will receive notifications when there is reassignment, state change or new comments. |
| Active | Whether to enable or disable your app. Marking it as inactive will not delete existing instances of that app. |
The States tab
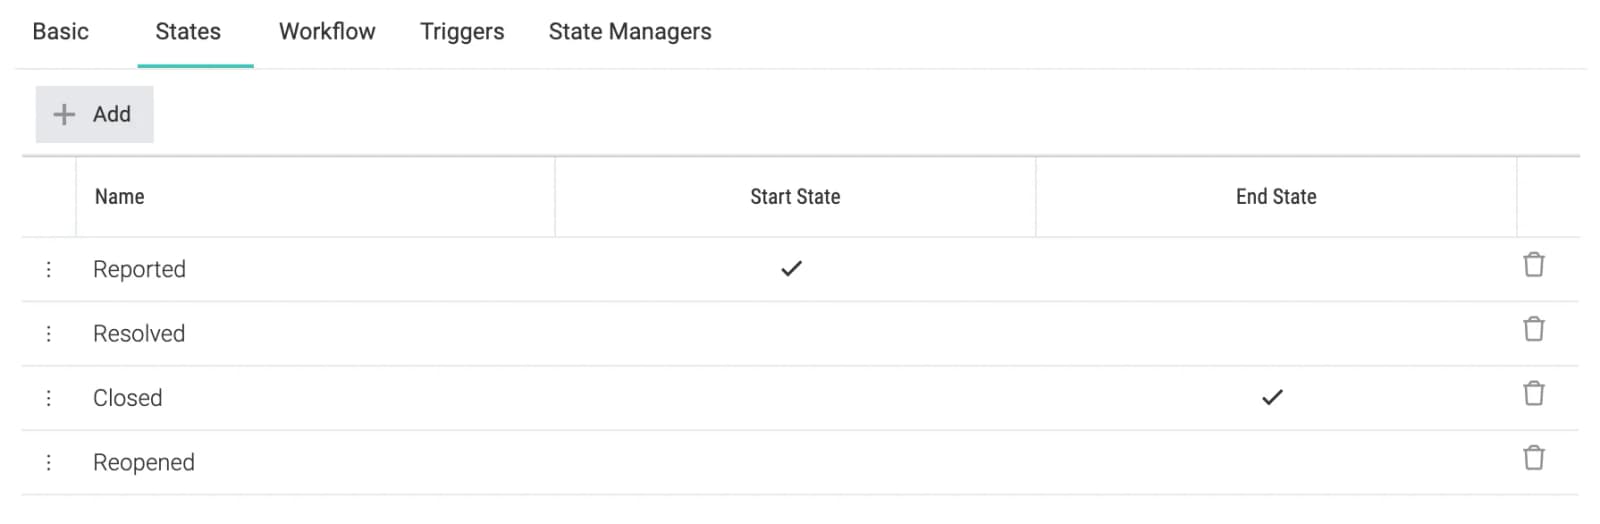
This tab defines the states of the app. You can also mark the start and end states in the workflow. We have listed all the states in our bug workflow.
| Start State | Wen an app item is created, it is moved to this state. In our case it is New. |
| End State | When an app item moves to this state, the process is considered as finished. In our case it is Closed. |
The Workflow tab
This tab defines all the
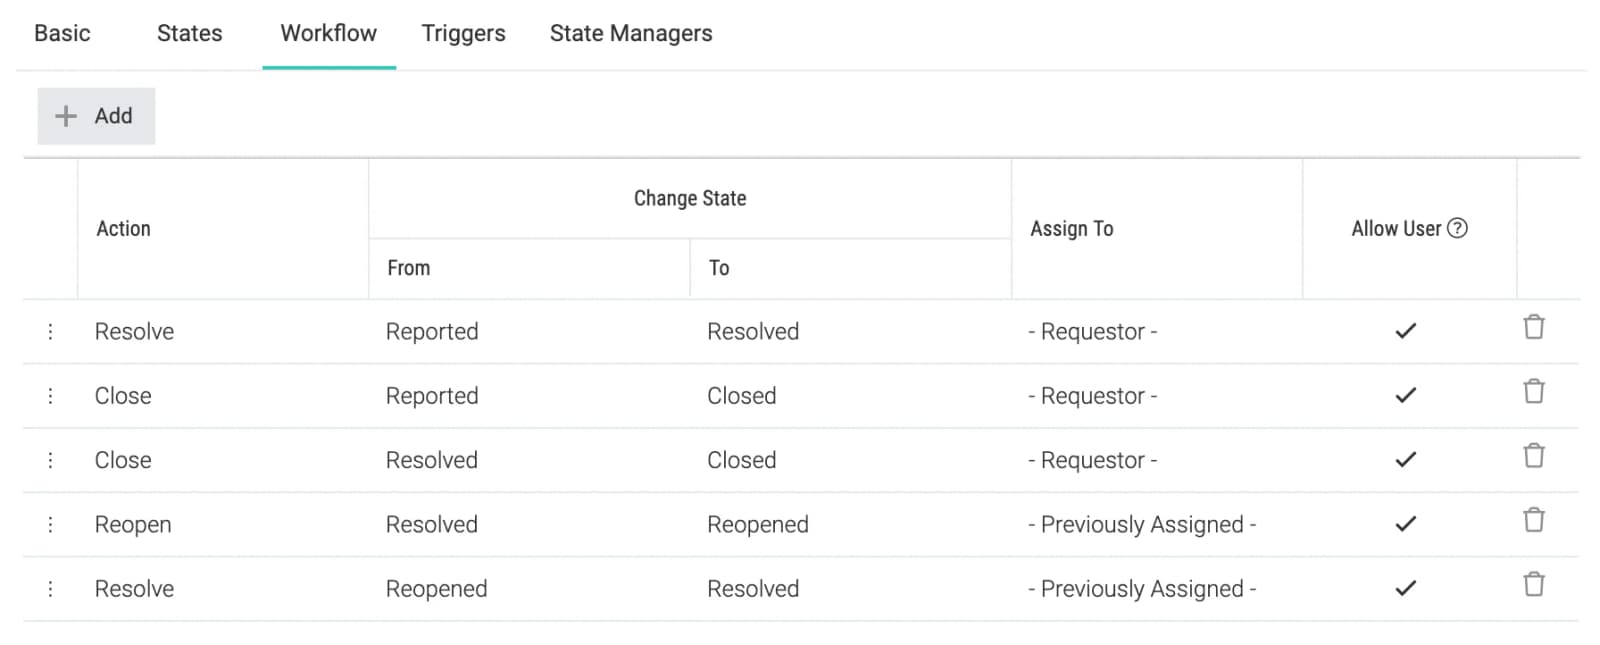
in the workflow diagram. Each arrow represents an end-user action. We shall see more about its usage later on in the documentation.
| Action | The name for the action. This will be used in action menus for bugs. |
| From | The state where the arrow originates. |
| To | The state where the arrow terminates. Once the action is performed, our bug will be moved to this state. |
| Assign To | The user to whom the workflow will be assigned to after the action is performed. Prompt in Role: Developer indicates that the user performing the Verify action on the bug will be presented with a list of developers from which to choose the new assignee. |
| Allow User | Determines whether this action can be performed by a user. In some cases, we would not want end-users to perform the action. E.g. in help desk systems, unresponsive tickets are automatically closed after a few days of inactivity. |
The Triggers tab
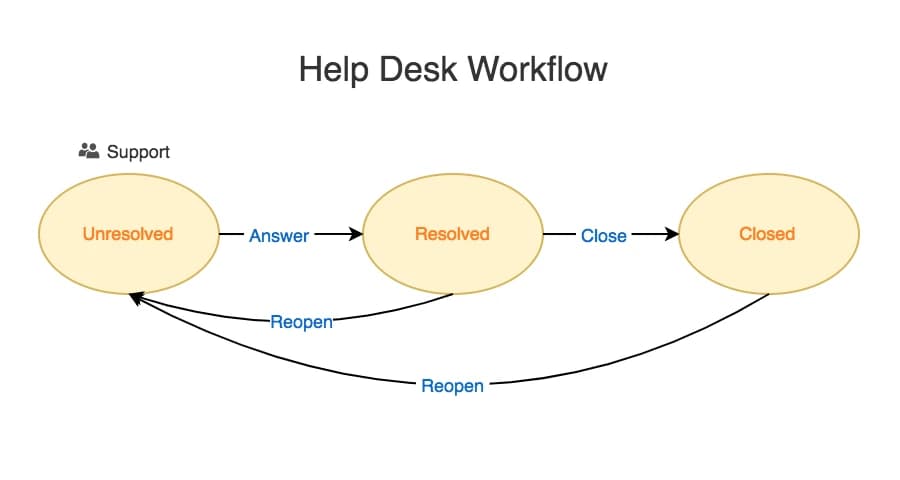
.
In our bug tracking app, we don't need any triggers. However, let's take this help desk workflow for example. In case of the help desk app, the requestor will be the person who asked a question. When that person replies via email, we would want the ticket to be automatically moved to the Unresolved state as then it would be brought to the attention of the support team. In other words, we would want the Reopen transitions to happen. In this case, we would be defining our triggers like this:
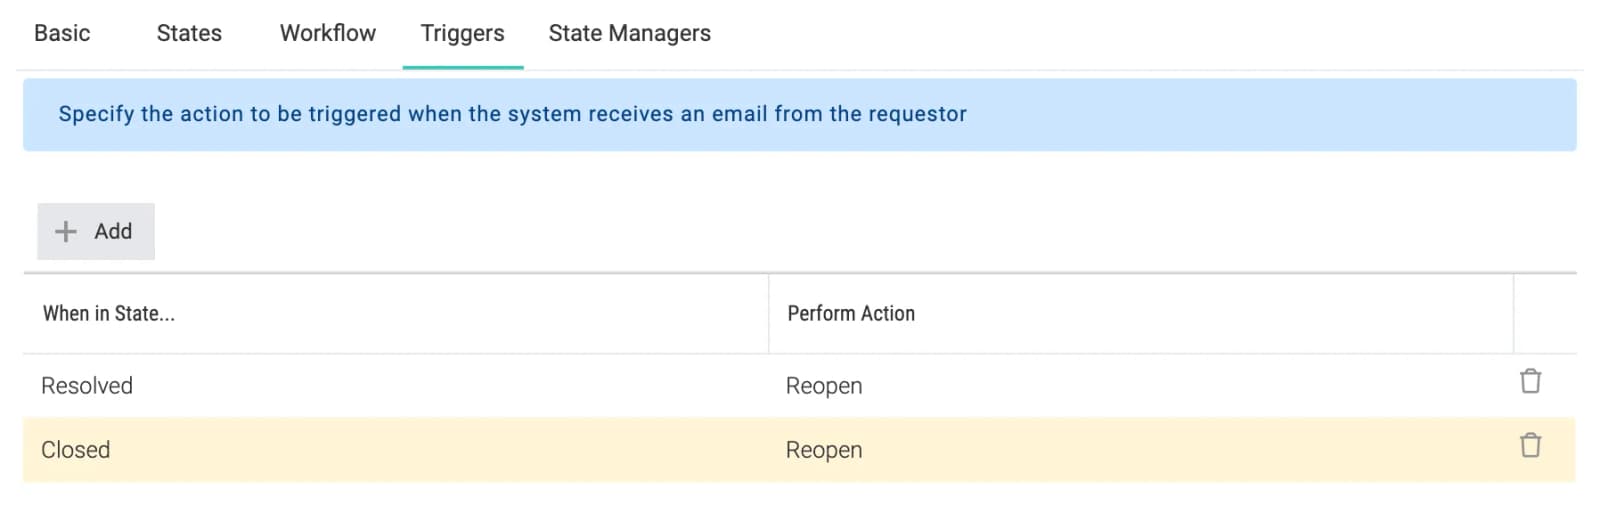
The State Managers tab
A state managers is a user who is treated as a Manager when an app is in a particular state. They are notified when things happen to an item in this state. In our example below, Mark is the QA manager, so he is responsible for the New and Fixed states where the QA team is supposed to do work. You can override state managers at a project level if the person managing that state is different.
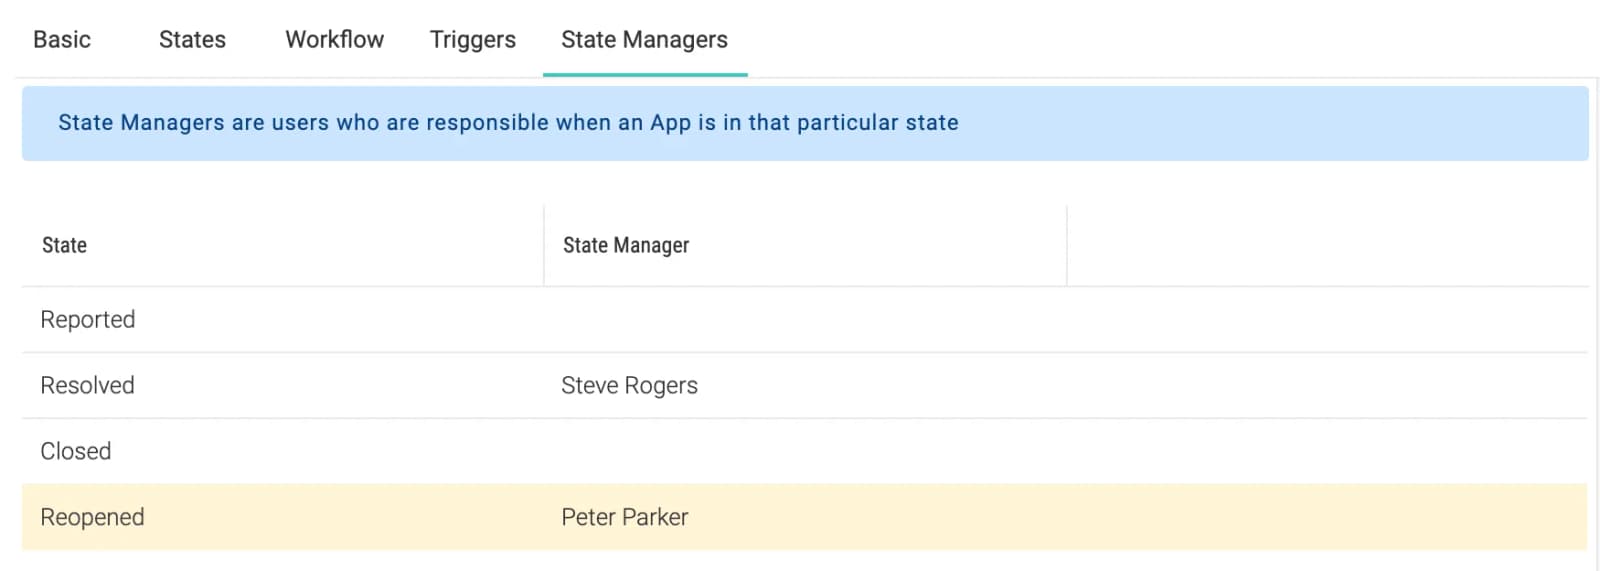
What's Next?
We have created a custom app for our bug workflow. In the next chapter we will be adding some custom fields to the bug.
Custom AppsConcepts
Custom Fields
In the previous chapter, we created the workflow, here we create custom fields for our bug. By default, all workflows have the following fields:
- Name
- Priority
- Assigned To
- Requestor
- Due Date - an optional date indicating when the estimated completion date of this item
- Description
Let's add a few fields to our
:
- Affected Versions - a list of all versions affected by this bug
- Fixed Versions - a list of all versions in which this bug fix has been uploaded
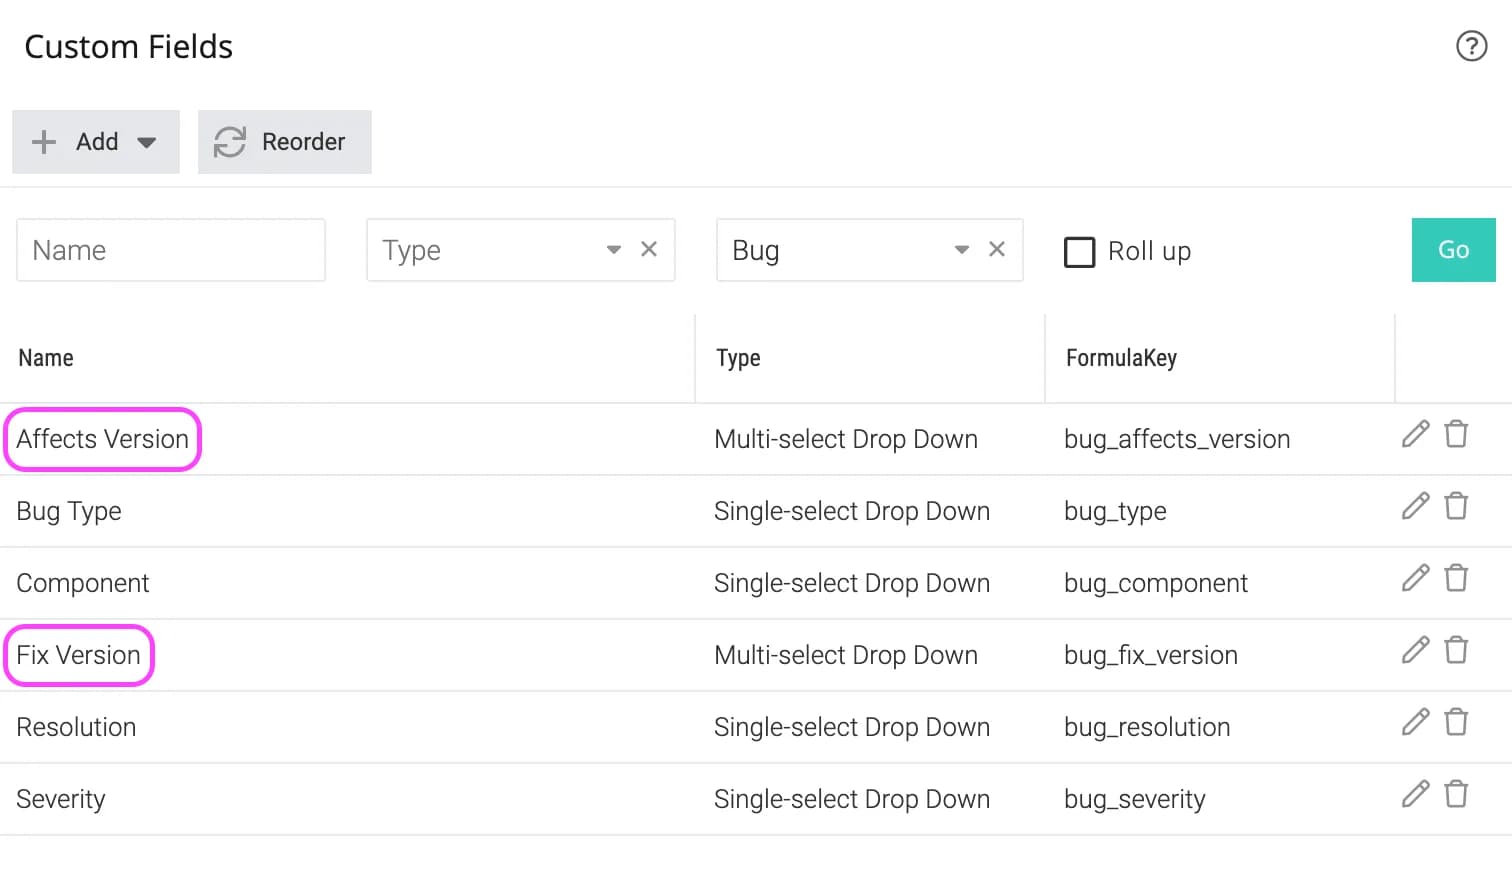
Since we want the
field to be available while creating a bug, we attach it our
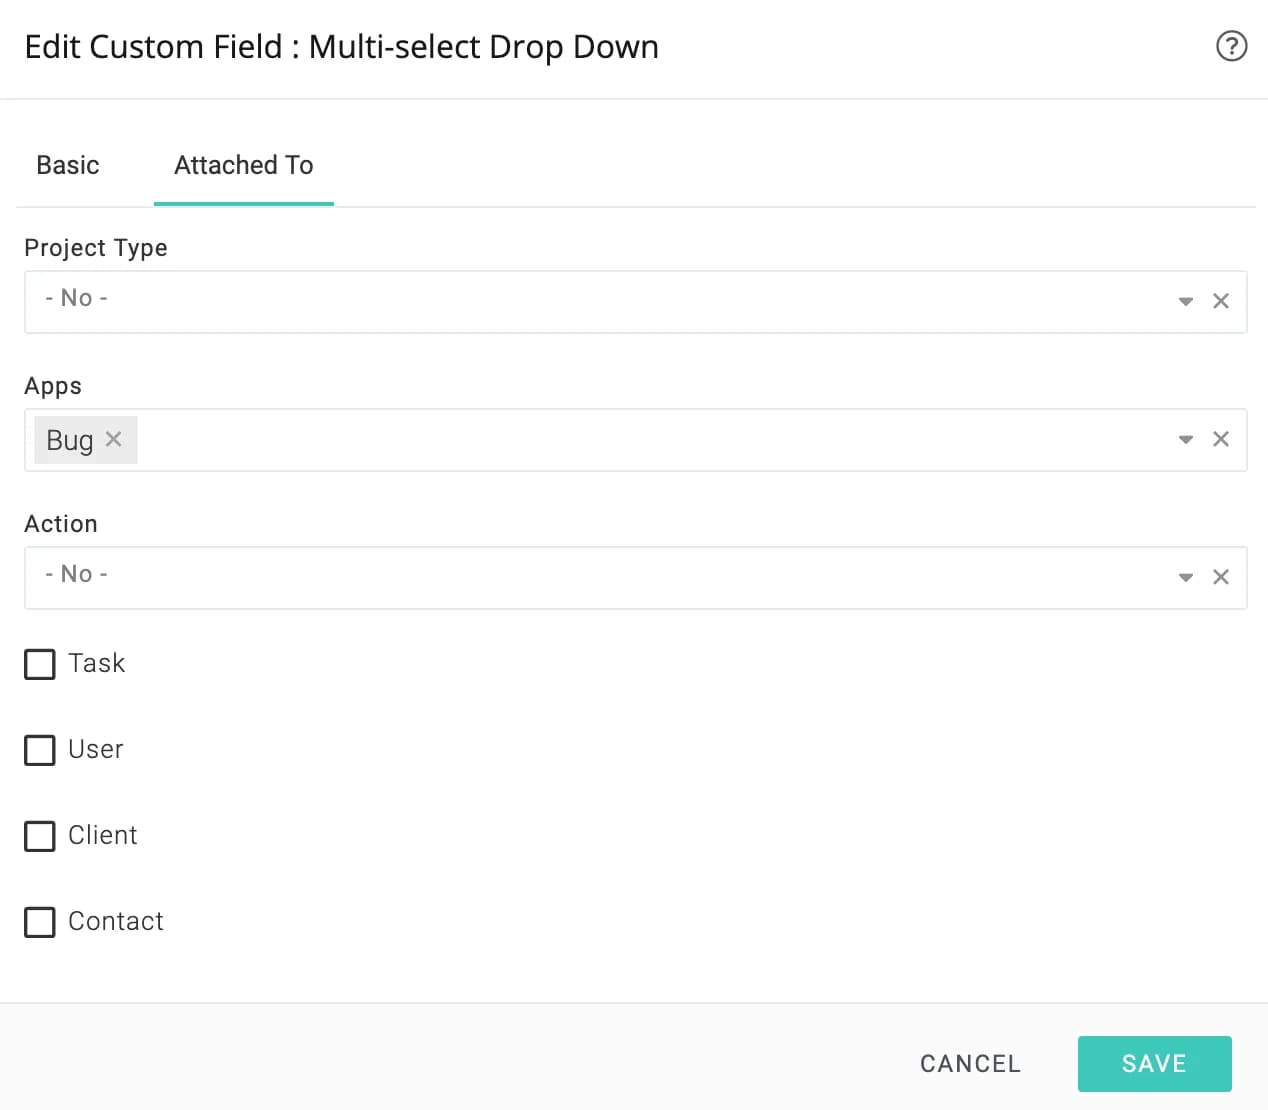
app. Since we want the developer to enter the
field
when he is marking the bugs as fixed i.e. Verified → Fixed and Reopened → Fixed, we attach it to the
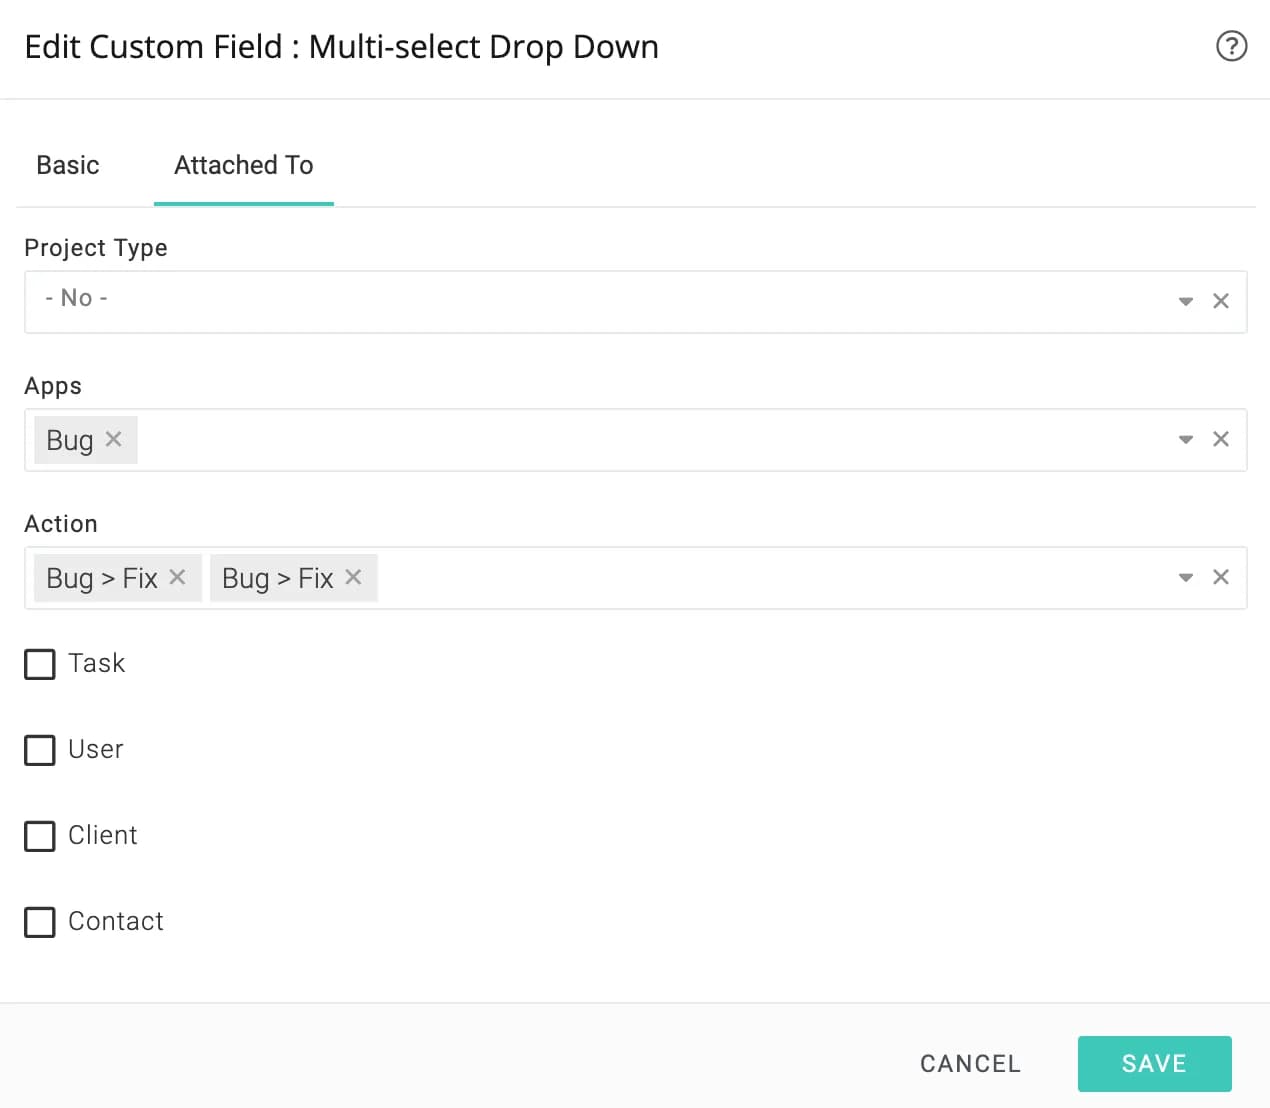
actions as shown below:
What's Next?
We have created our application and also defined custom fields for it. In the next chapter, we will see our bug tracker in action.
Custom AppsConcepts
App in Action
Till now, we have been configuring our application. It's time we understand how your users will use the app. We will see how our app has affected the user interface and also walk you through a real-world scenario.
Bug app and the user interface
Add menu
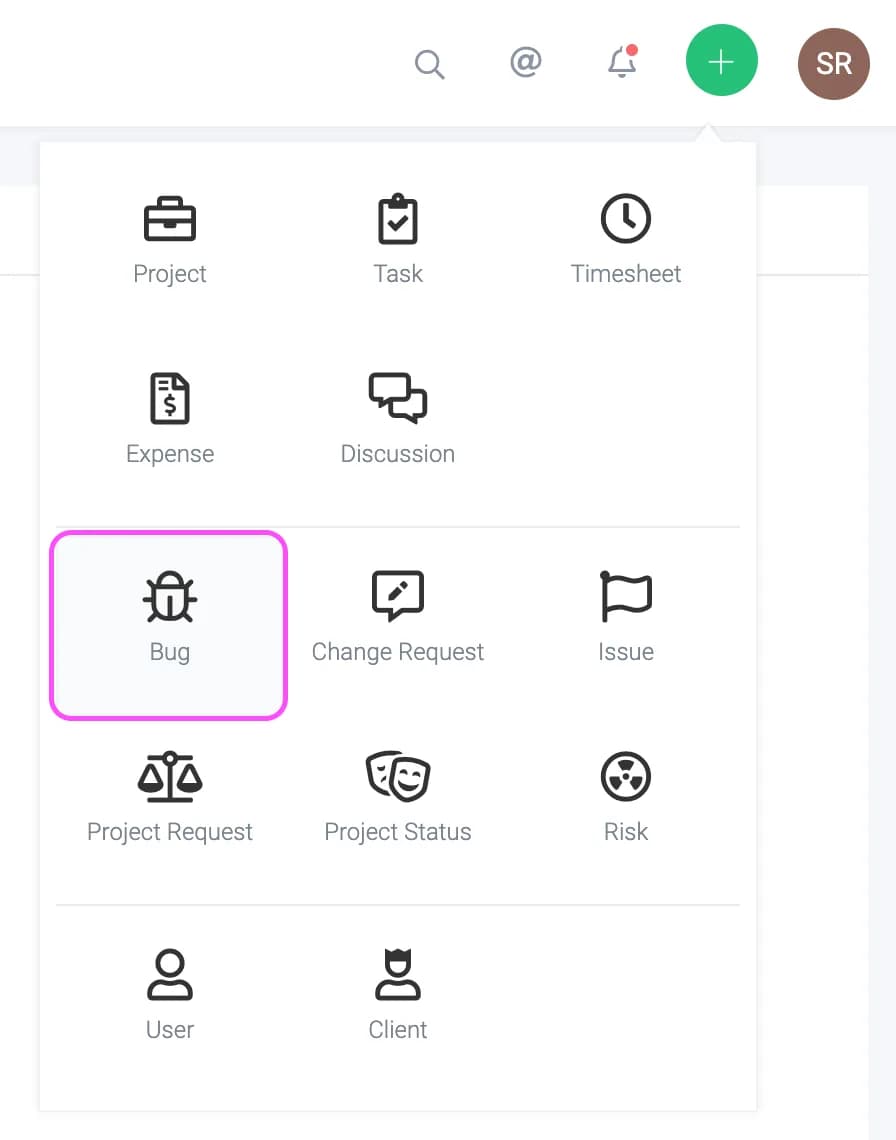
appears as an option in the Main Menu menu.
View menu
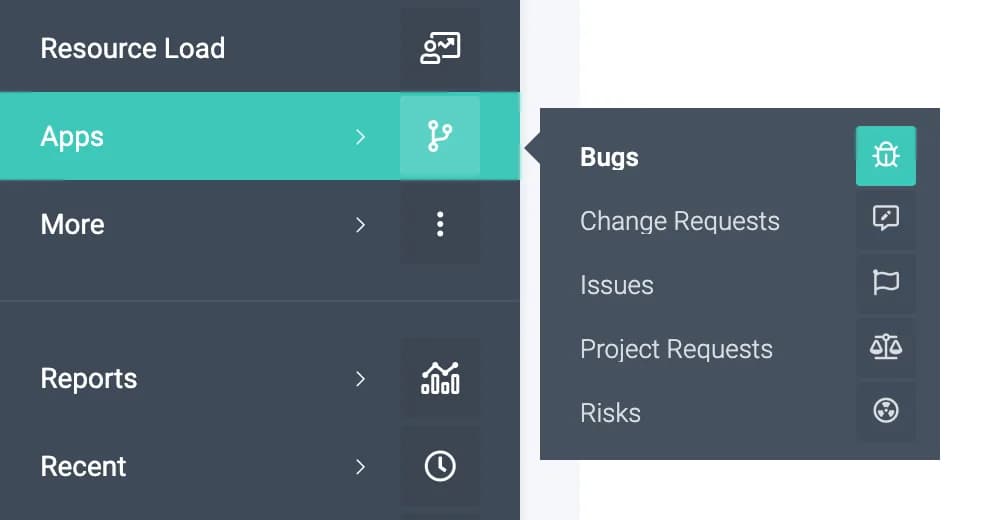
also appears as an option on the Main MenuAppsBugs menu.
New Report menu
You will also be able to create a report for the
app. The entire arsenal of filters, groups, charts, etc. is available at your disposal.
Adding Bug
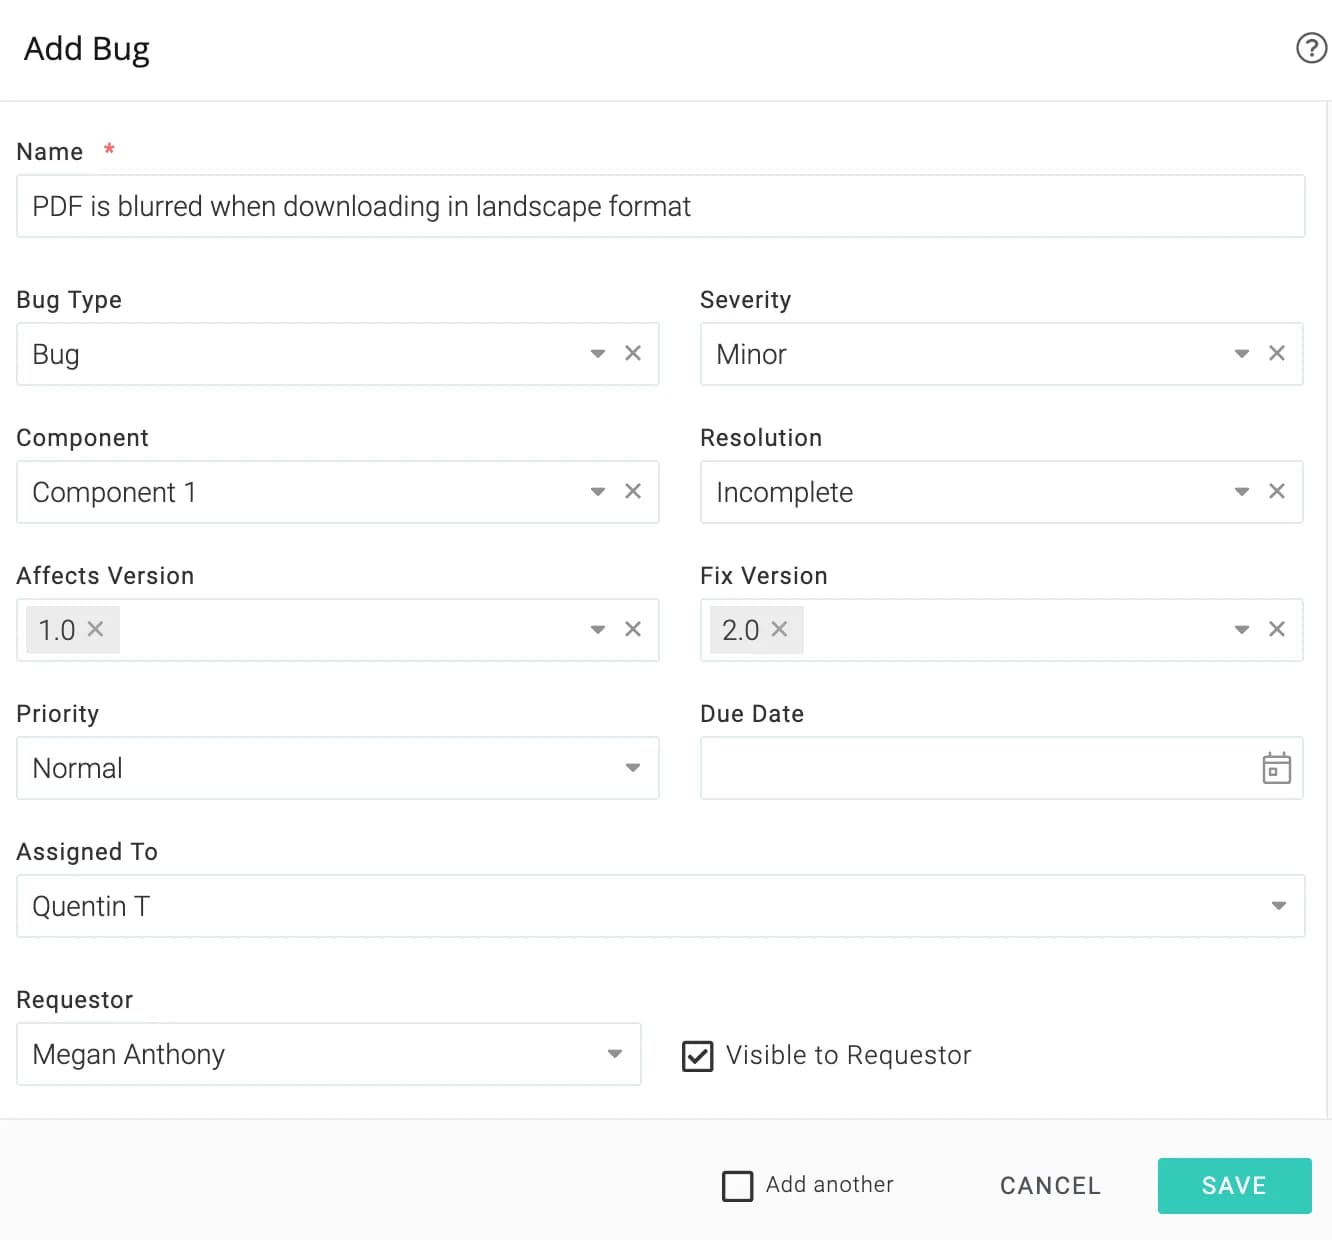
Megan wants to report a bug. She clicks on Main MenuBug and she sees the form: In addition to the regular fields, you can see the custom fields we added earlier.
Bug in state: New
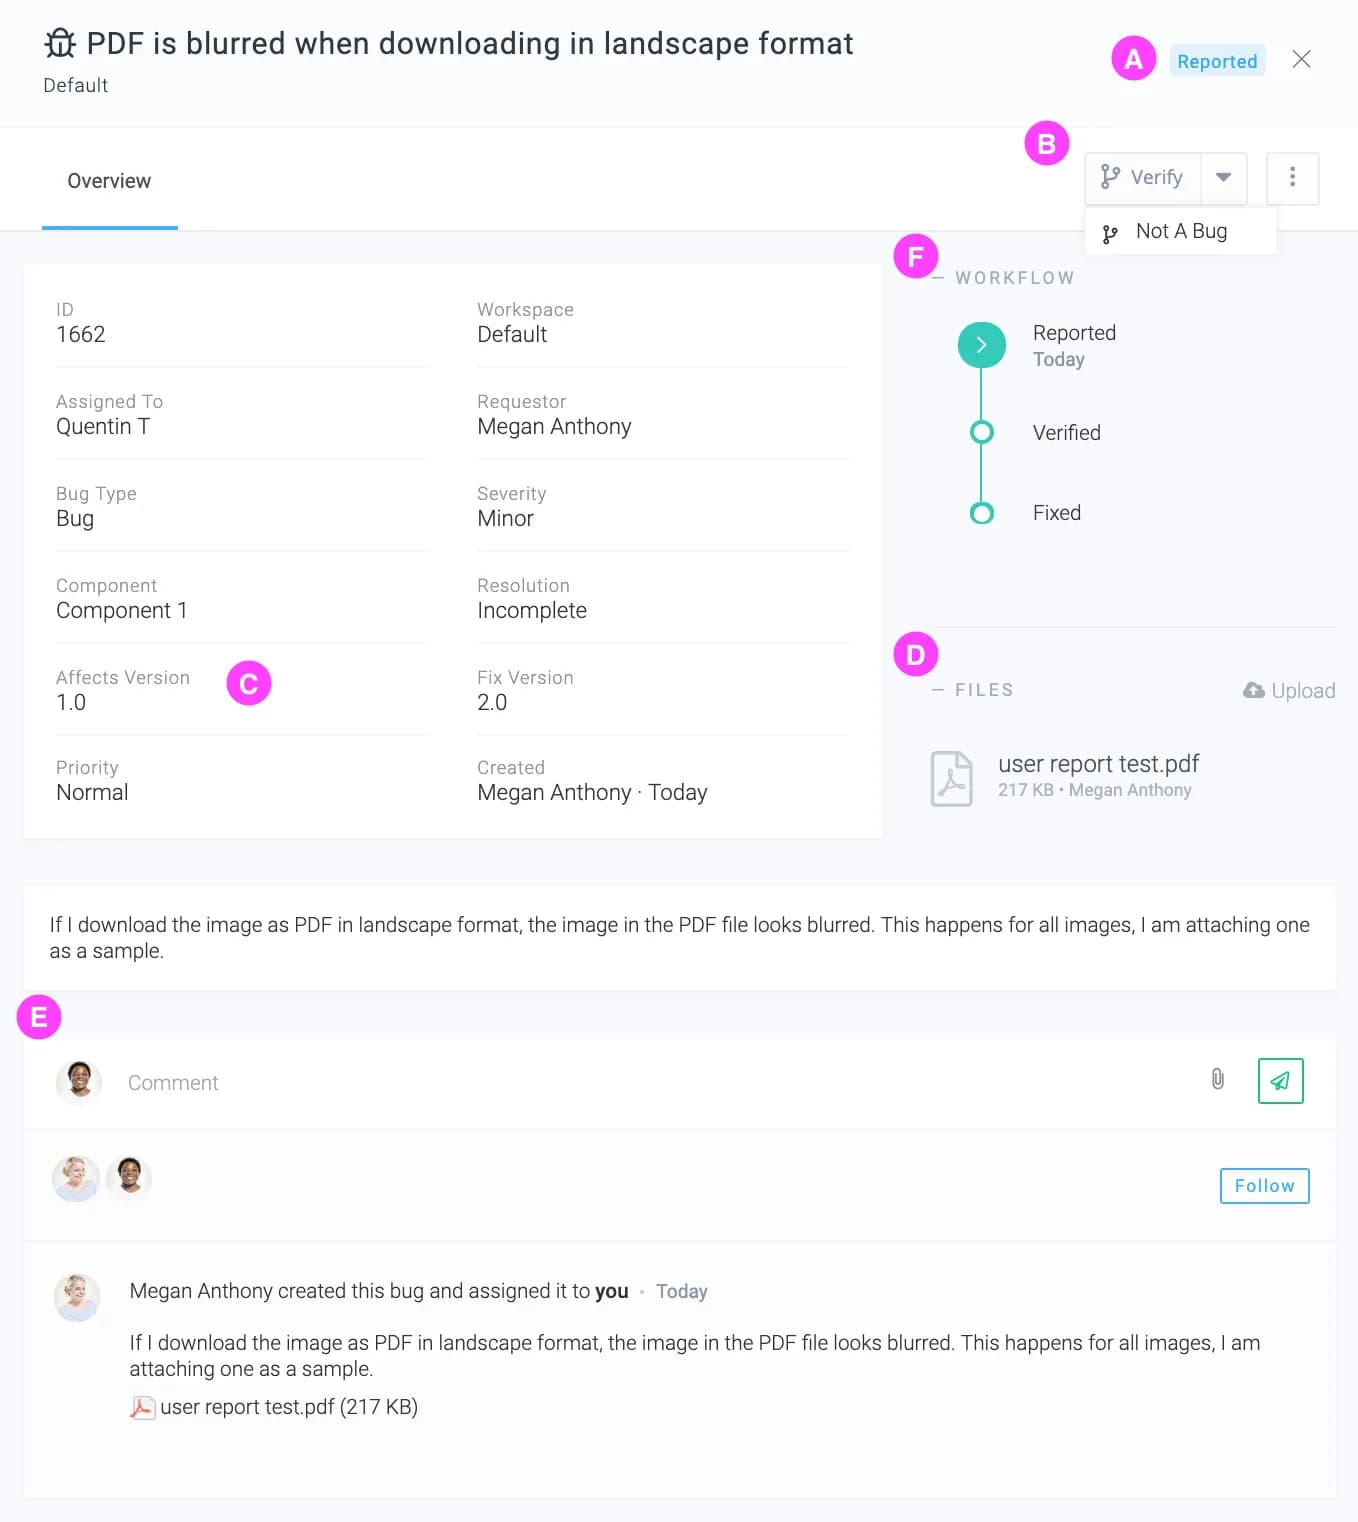
The bug has been assigned to Quentin, our QA guy. He clicks on the bug link and sees:
| A | The bug is in New state. |
| B | He is show the Verify and Not a Bug actions in addition to the other actions. |
| C | He sees that the problem is supposed to happen in version 1.0 |
| D | He downloads the attached file to see what the problem is. |
| E | He can look at the history of the bug and also add his comments. |
Performing the Verify action
Quentin verifies the bug indeed exists and clicks on
. He is presented a form like this:
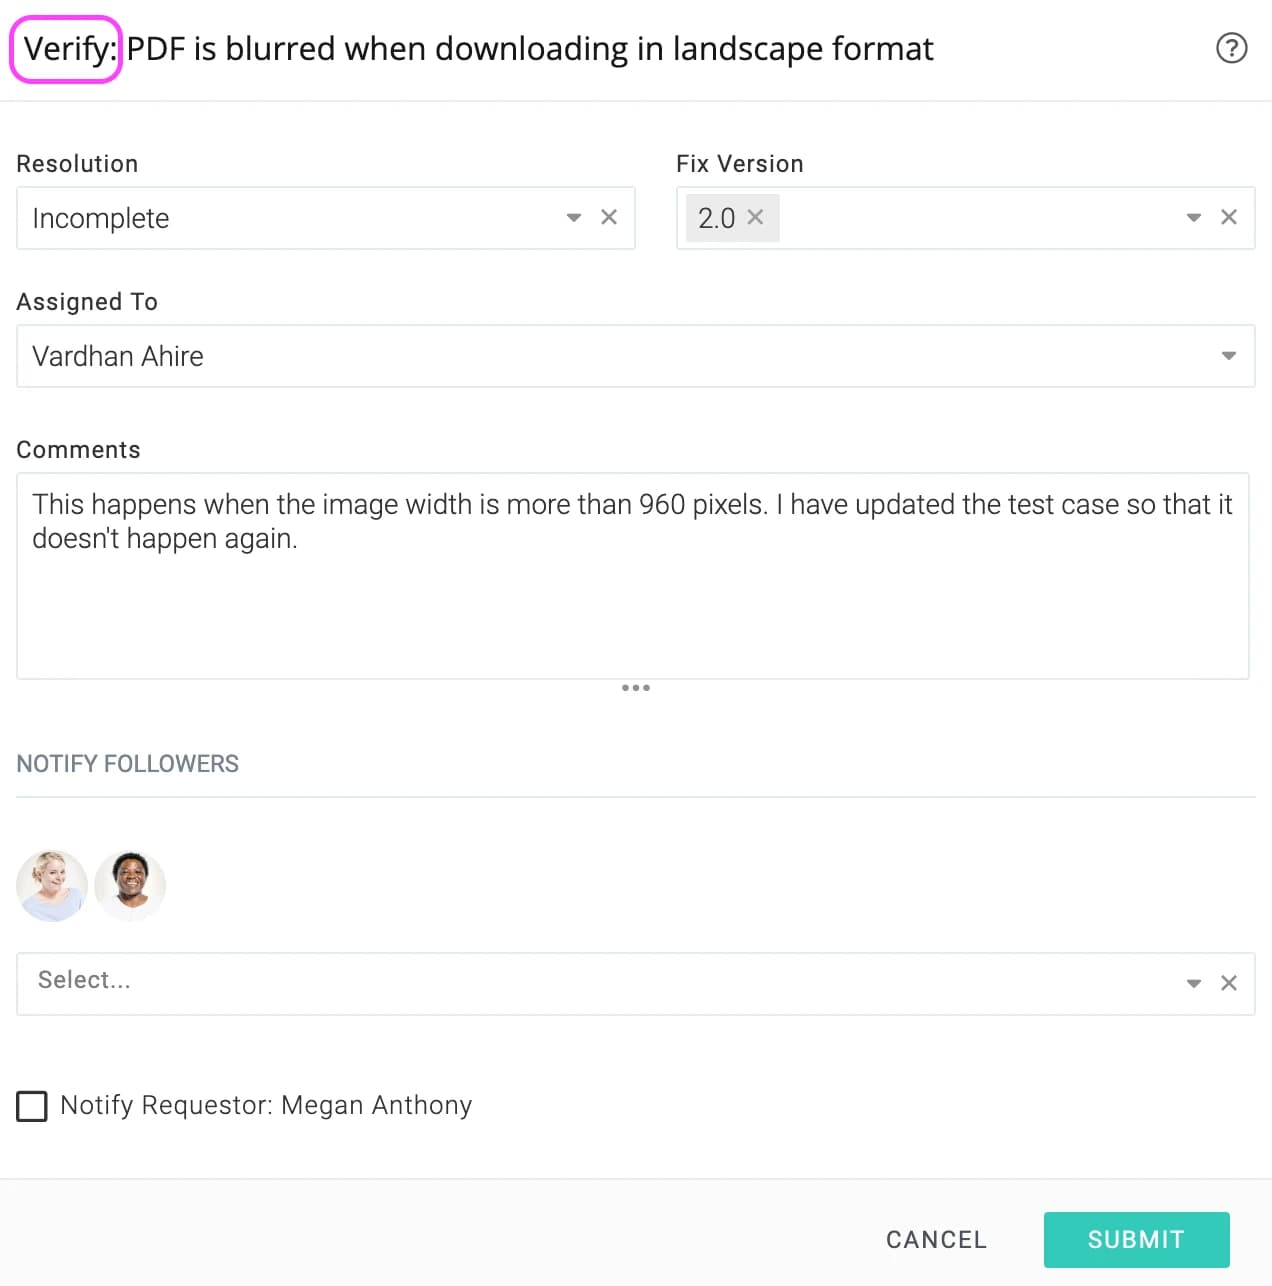
He assigns it to Vardhan, a developer. He also has the choice of notifying Megan, who has opened the bug. But since there is nothing noteworthy to report, he decides against it. After he submits the form the Bug moves to the Verified state.
Bug in state: Verified
Vardhan receives an email notification about his being assigned to this verified bug. He clicks on the link and sees the following:
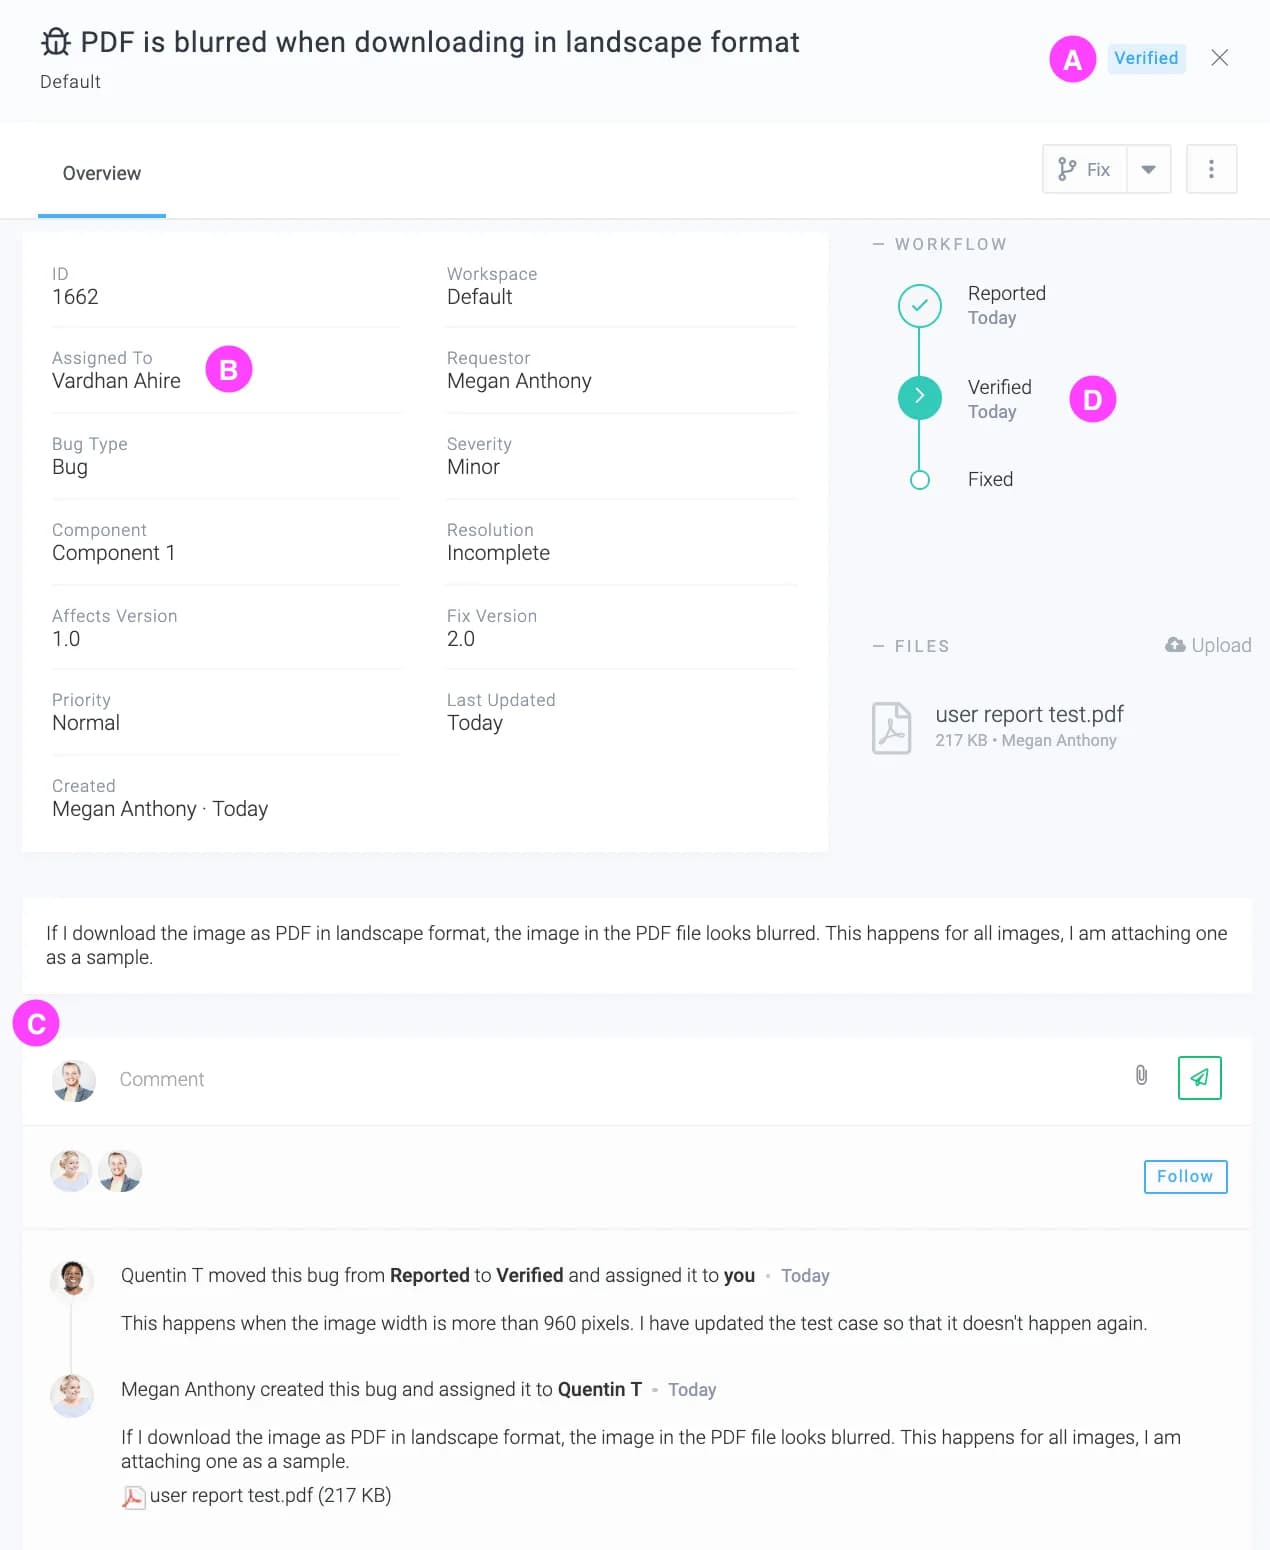
| A | The bug is in Verified state. |
| B | He is show the Fix action in addition to the other actions. |
| C | He looks at the history and noticies Quentin's helpful comment. |
Performing the Verify action
Vardhan fixes the bug and clicks on the
button. He is presented a form like this:
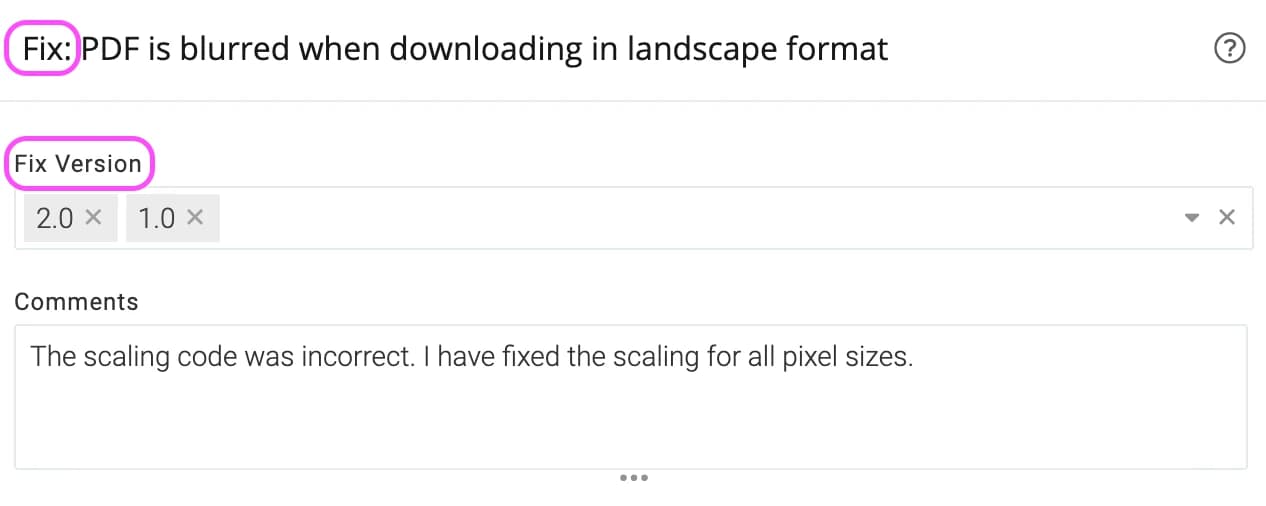
Notice how he is presented with the Fixed Versions custom field.
What's Next?
The example above demonstrates how the bug moves across states, how the right fields are captured at the right time and when notifications are sent. It should give you a good idea about the capabilities and advantages offered by Celoxis custom apps. We have also seen that there is an option to send emails to requestors. Celoxis allows customizations of these emails and that is the topic of the next chapter.
Custom AppsConcepts
Requestor Templates
In the last chapter, we have seen that you can notify the requestor while performing actions. In this chapter, we will understand how to control the email format using simple templates. It is important to understand that these templates only control the emails sent to requestors not the other notification emails that are sent to users.
Customizing the email template
Open Main MenuAdminCustom AppsRequestor Email Template. You can customize the global template or customize the template per workspace. Click on the icon next to
workspace to edit the global template.
.
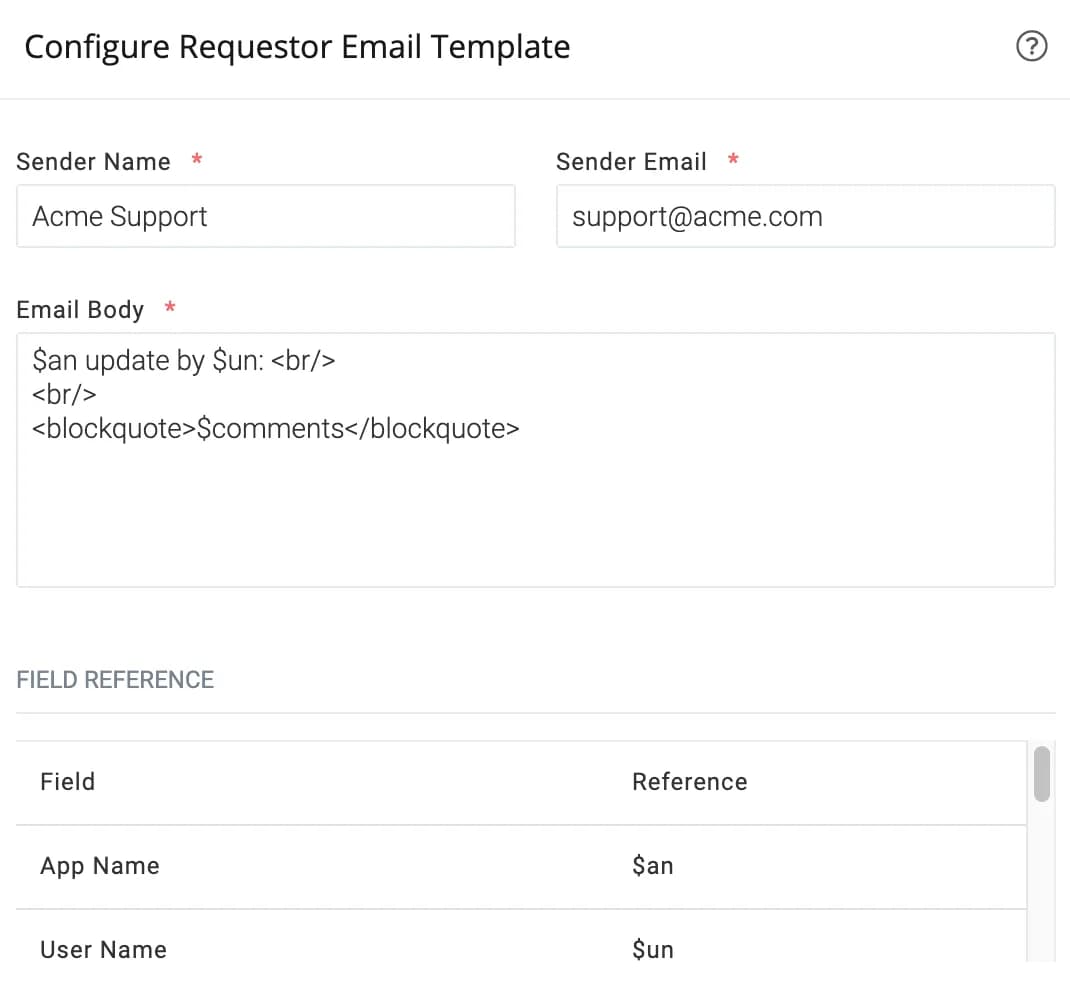
| Sender Email | The name of the email sender. We want people to see Acme Support so we enter that here. |
| Sender Email | The email address of the email sender. This is not the Reply-To address. That will be generated by Celoxis so that any replies by the requestor are automatically logged against the app. |
| Email Body | The body of the email. This is in HTML format. In our example, $an will be replaced by Bug while $un will be replace by Quentin T if Quentin was the person performing the update. More such placeholders are available in the Field Reference section. |
What's Next?
In this chapter we have seen how to configure the emails that are sent out to requestors. In the next chapter, we will see how to add time-based rules to our app.
Custom AppsConcepts
Timeout Policies
Timeout policy is a set of rules that define what should happen when an app item exceeds its stay in a particular state for more then the specified hours.
In the earlier chapters, we created the workflow and also defined our custom fields. Now, we will add in some timeout rules.
Continuing with our Bug app, let's assume that our company is a strict on QA and mandates the following:
- Rule #1 A new bug should be verified within 48 hours. If it is a high priority bug, then it should be verified within 24 hours instead.
- Rule #2 A bug that has been marked fixed should be tested within 72 hours after the bug is marked fixed. If it is a high priority bug, then it should be tested within 48 hours instead.
Adding a Timeout Policy
Open the app list screen by going to Main MenuAdminCustom AppsApps and clicking on the icon for our Bug app. Then click on the Add button.
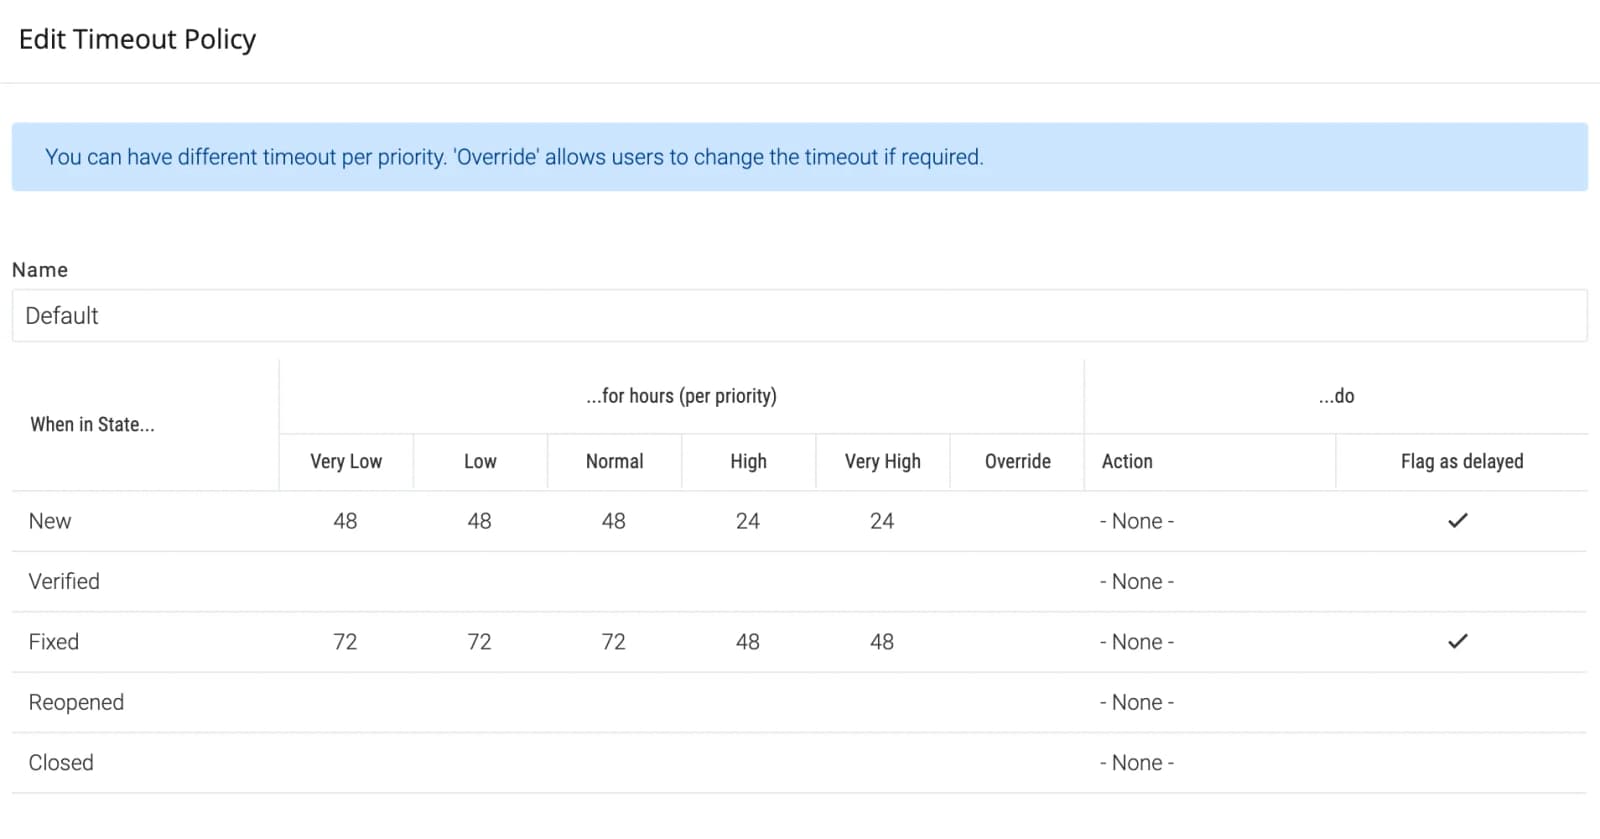
| When in State | The state of the bug in which the rule applies. In our case, we have defined the rules for states New and Verified because the QA team is responsible in these states. |
| Timeout | You can set the hours per priority. In our case, we have set the hours as per our rules #1 and #2. The Override option, if checked, means that the end-user performing the transition can specify when the timeout will happen. Let's take an example of a CRM system. The sales executive, follows up with the prospect every 5 days. However, in some cases, the prospect may be on vacation ask you to follow-up after say 2 weeks. In that case, the sales executive, at the time of marking the inquiry as "Followed-Up" can specify the next date of follow-up. |
| Action | The state transition to perform after the time expires. We don't require this in our bug tracking example but let's take the example of this help-desk workflow. In this example, it may be desired that all ticket's in Resolved state be moved to the Closed state if we do not hear back from the customer in 5 days. In that case we would put 5x24 i.e. 120 for all priorities and choose the action as Close. |
| Mark as Delayed | This option will mark the Bug as Delayed and notify the assignee and state manager. |
What's Next?
In this chapter we have seen how to define timeout policies and what they are used for. In the next chapter, we will see how to initiate workflows from emails.
Custom AppsConcepts
ManageEmailIntegration
Custom Apps can be initiated by emails. Emails can either be free form (sent by people) or structured (generated by filling a web form).
Direct Interface
This is used when we want to start workflows when people send an email to a particular address. For example, we may want to create bugs when our cutomers send an email to bugs@acme.com.
| Sender | Becomes the item's requestor |
| Subject | Becomes the item's summary |
| Body | Becomes the item's description |
| Attachments | Are added as file attachments to the item |
For more information visit the Main MenuAdminCustom AppsEmail Integration page.
Indirect Interface
This helps you integrate an existing system with one of your custom apps. For example you have a web based form on your web site that users fill and submit to initiate an workflow in Celoxis.
In this model, your program will send a plaintext email to an email address with a well formatted body as described in Main MenuAdminCustom AppsEmail Integration page.
Email Aliases
When you want to use the direct email interface, you would want to expose nice and simple email addresses to your users. For example, bugs@acme.com or support@weyland-yutani.com. However, addresses generated by Celoxis are like abracadbra+NEI-4.g0.1b.2m8.0.0-eqro@celoxis.com. The way to bridge the two is through email aliases.
Let's say that Acme wants create bugs in Celoxis when people send emails to bugs@acme.com. Acme would:
- Generate the email address for the bug by going to: Main MenuAdminCustom AppsEmail Integration. Let's say that this email address is
gobbledygook@celoxis.com - Acme in it's email server would create an alias that would redirect
bugs@acme.comtogobbledygook@celoxis.com - If Acme is a SaaS customer, they would notify us of this mapping and we would update our servers. This typically would take one business day.
If Acme is an On-Premise customer, they can open SiteAdminSite SettingsEmail Aliases and enterbugs@acme.com:gobbledygook@celoxis.comin the text area, save and restart the server.
Custom AppsConcepts
Related Items
You can use this functionality to link related items. For example, if a task was created in response to an issue then you can link the two by adding this relation. Once related, you can quickly access the issue from the task and vice-versa.
Once you add A as related to B, then B automatically becomes related to A which means you can access B from A and vice-versa.
Adding Related Items
Click on Add as shown below to add a related item. You can add up to 10 relations for an item.
Custom AppsConcepts
Client App Visibility
A client can see issues, change requests, and any app items either created by them or assigned to them. This gave the client limited visibility, especially when the team needed to share the list of all issues raised in a project, etc. The highlighted option below allows you to pick app items you need the client to see, even if they play no role.
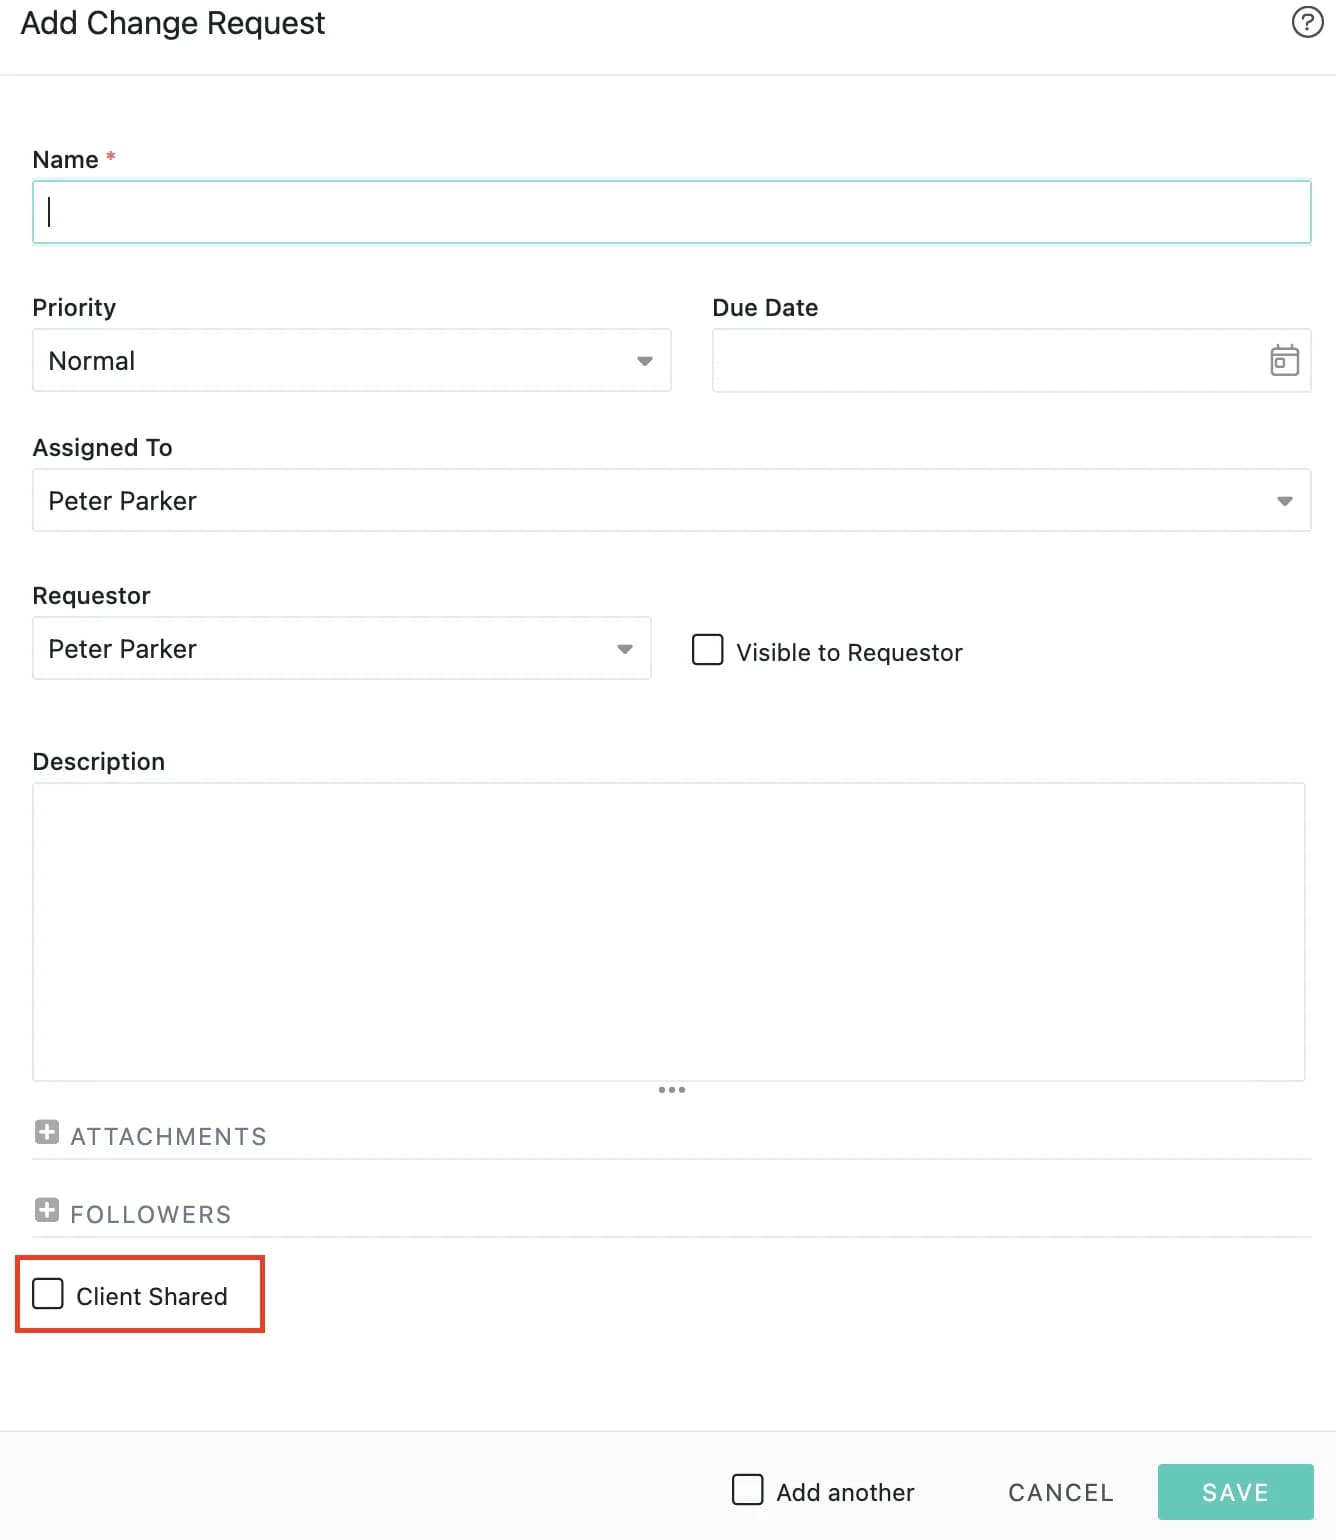
Custom AppsConcepts
App Glossary
| Attribute | Read/Write | Description |
|---|---|---|
| Name | RW | A short description. |
| Project | RW | The project in which this item exists. |
| Requestor | RW | The user who requested this item. This could be a user, client or even an external user. |
| State | RW | The state this item is currently in. |
| Assigned To | RW | The current assignee of this item. |
| Due | RW | A date when this item was supposed to finish. |
| Last Updated | R | Last comments made against this item. |
| Age | R | Number of days since the app item is created. |
| Creator | R | The user who created this item. |
| Created | R | The timestamp when this item was created. |
| Completed | R | If this item is in an end state, then the timestamp when that happened. |
| Delayed | RW | A flag indicating if this item was delayed. This is marked by the system if this item exceeds the due date or crosses the time threshold as per its timeout policy. |
| Description | RW | A long description of this item. |
| ID | R | The database primary key of this item's record. |
| Last Updated On | R | Date on which the last update was done. |
| Open | R | If the item is in an end state, then no, else yes. |
| Priority | RW | This item's priority. |
| State Manager | R | The user responsible for the item's state as configured. If this item belongs to a project and no state manager has been configured, then the state manager is the primary project manager. Read More. |
| Time Out | RW | A timestamp indicating the time before which this item should transition out of the current state. If configured, the item will be marked as delayed. |
| Visible to Requestor | RW | Check to allow visibility of this item to its requestor. |
| Workspace | RW | This item's workspace. If it belongs to a project, then the project's workspace. |
| Actual Cost | R | The total cost incurred on the item so far based on the time logged on this item. |
| Actual Billable Hours | R | The total hours of approved and billable time logged on this item. |
| Actual Non-billable Hours | R | The total hours of approved and non-billable time logged on this item. This amount can be used to identify the "missed" billing opportunities for this item. |
| Invoiced Hours | R | The total time for all its invoiced time entries. |
| Invoiced Revenue | R | The sum of the bill amounts for all its invoiced time entries. |
| Actual Effort | R | The sum of approved hours logged for this item. |
| Actual Revenue | R | The sum of the bill amounts for all approved billable time entries. |
Actions
Custom AppsActions
Adding Comments
When working on an app item, the assignee or the manager at times might need to record comments on it.
To add comments, click on the app item for e.g your bug, risk, etc. On the panel of the item, click on MoreComment. You can check the Notify Requestor checkbox if you wish to notify the requestor of the app item about this comment.
Once the comment is added, all the followers receive an email notification with the new comments.
Custom AppsActions
Attaching Files
To attach files to a custom app item, click on the item and on its panel click Attach Files as shown below.
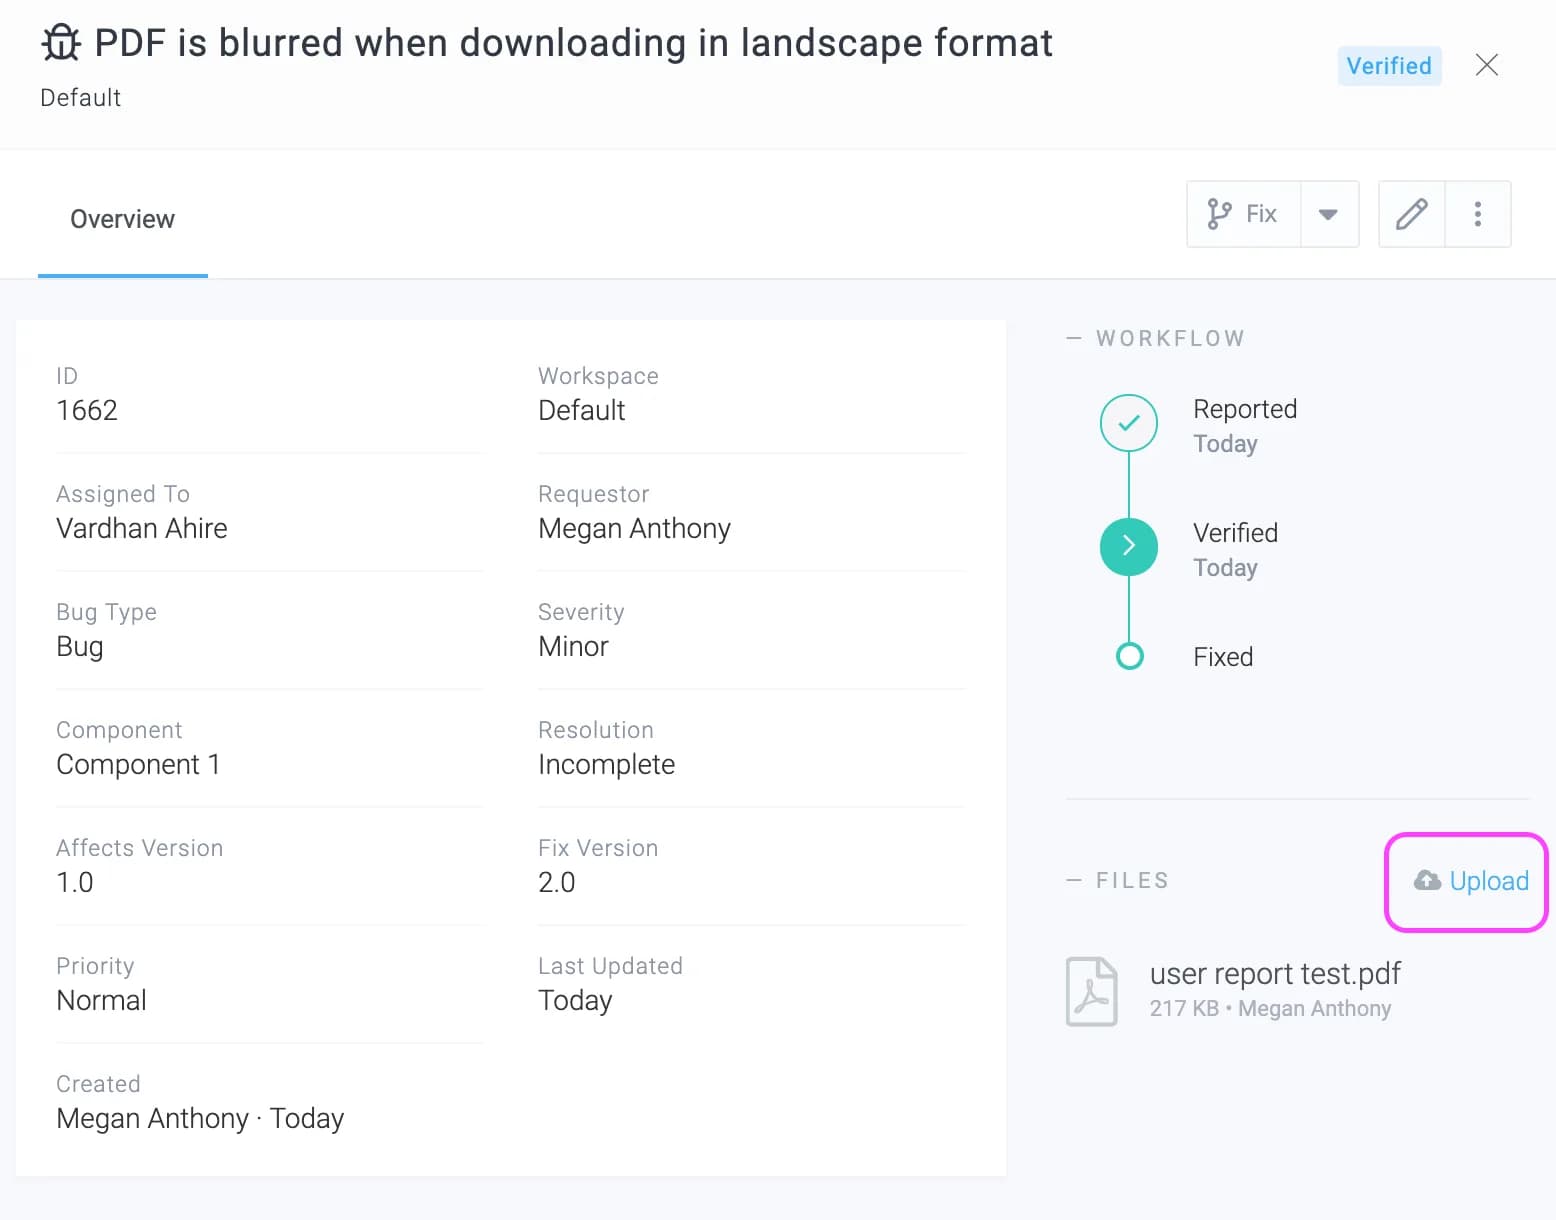
Custom AppsActions
Following Items
If you follow an app item (e.g. a bug), you will be notified about activities happening on it e.g. when someone adds a comment or when someone attaches a file. The notifications will be through email as well as through the notificiation center. If you are an assignee, project manager, or a state manager, then you are automatically notified and there is no need to explicitly follow the task.
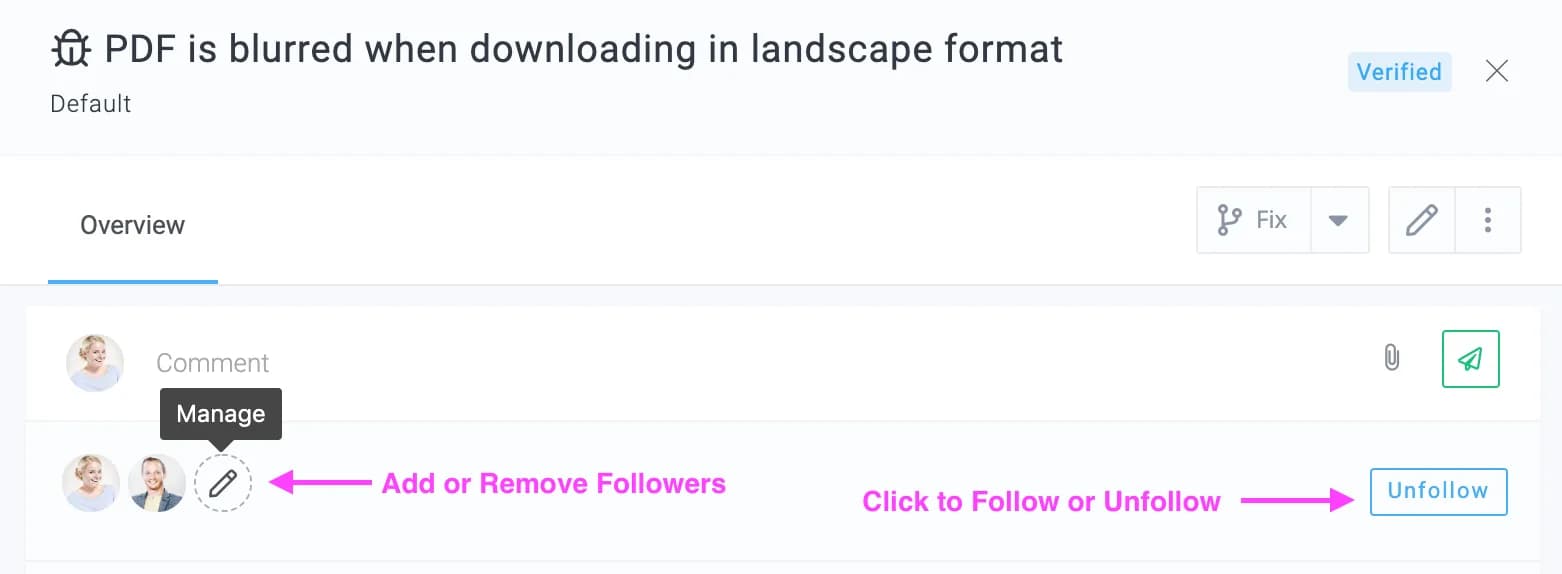
Unfollowing
To unfollow, simply click on the Unfollow link on the item's Overview tab on in the footer of the email notification.
Custom AppsActions
Reassigning to another user
At times, you may want to re-assign the bug, issue to another user due to several reasons like the assigned user is on leave or is busy with other activities.
To reassign an app item, click on the app item for e.g your bug, risk, etc. On the panel of the item, click on Reassign. The new user will get an email notification about the new assignment.
Custom AppsActions
Moving to another project
You can move an app item to another project or workspace. To do so, click on the app item for e.g your bug, risk, etc. On the panel of the item, click on Move. You will be prompted to select the project or Workspace to which you wish to move the app item.
Custom AppsActions
Importing via CSV
Celoxis provides you with the ability to import app items (your bugs, risks, etc) in a project from CSV. If you have a Microsoft Excel file, then you can export it in CSV (comma separated values) format and then import it in Celoxis.
To import app items in a project, first click on the project and then click Project ActionsImport Apps (CSV). For simplicity, we strongly recommend that you import one custom app at a time. So instead of having one file items.csv, you should split that into multiple files like bugs.csv, risks.csv, issues.csv and import them one at a time.
Fields supported:
- App – Mandatory field. The app name (e.g. Bug, Risk).
- Name – Mandatory field. A short description.
- Description
- State – This should be one of the states you defined for your app. If not present will be defaulted to the first state in the app definition.
- Due Date – YYYY-MM-DD format
- Assigned To – The name, username or email address of the user to whom the item is to be assigned.
- Requestor – The name, username or email address of the requestor whose account is in Celoxis.
- Requestor Email (External) – The email address of the requestor who does not have an account in Celoxis.
- Requestor Name (External) – The name of the requestor who does not have an account in Celoxis.
- Custom Fields – one column per custom field of the app
Custom AppsActions
Bulk Actions
Allows multiple attributes to be modified at once, including custom fields as shown below:
How-To
Custom AppsHow-To
Automatic Recurring Workflows
Some business processes are periodic and need to be started at regular intervals. Some examples:
- Your sysadmins are required to apply security patches on your servers every week.
- Your accountants are required to complete cash settlements every month.
- Your HR department is required to collect feedback from your employees every quarter.
- Your marketing team is supposed to report on social media metrics every fortnight.
This integration will show you how you can initiate the workflows you have created in Celoxis on a regular basis. We will set up a workflow to start on a weekly basis. You can also set the cycle as daily or monthly.
Zapier
Celoxis integrates with many apps using Zapier. Zapier is a cloud-based service that allows you to build powerful integrations between different systems without writing code. For more information, visit their website: zapier.com.
Zap
An automation in Zapier is called a zap. A zap connections two apps - a trigger app and an action app. The trigger app notifies the zap about an event and the zap then performs an action in the action app. In our case, the trigger app is Schedule By Zapier because it will schedule our zap. The action app, in our case, is Email By Zapier because it will send the scheduled email. In this guide, we will be building a zap to automatically create apps in Celoxis via Email:
Initiate an App in Celoxis automatically on a Weekly basis
- Make a Zap

- Choose Schedule by Zapier as the Trigger App
- Select the "Every Week" trigger
- Click on "Continue" button to proceed
- Select the Day and Hour for the event to be triggered
- Click the "Test & Continue" button to save this step.
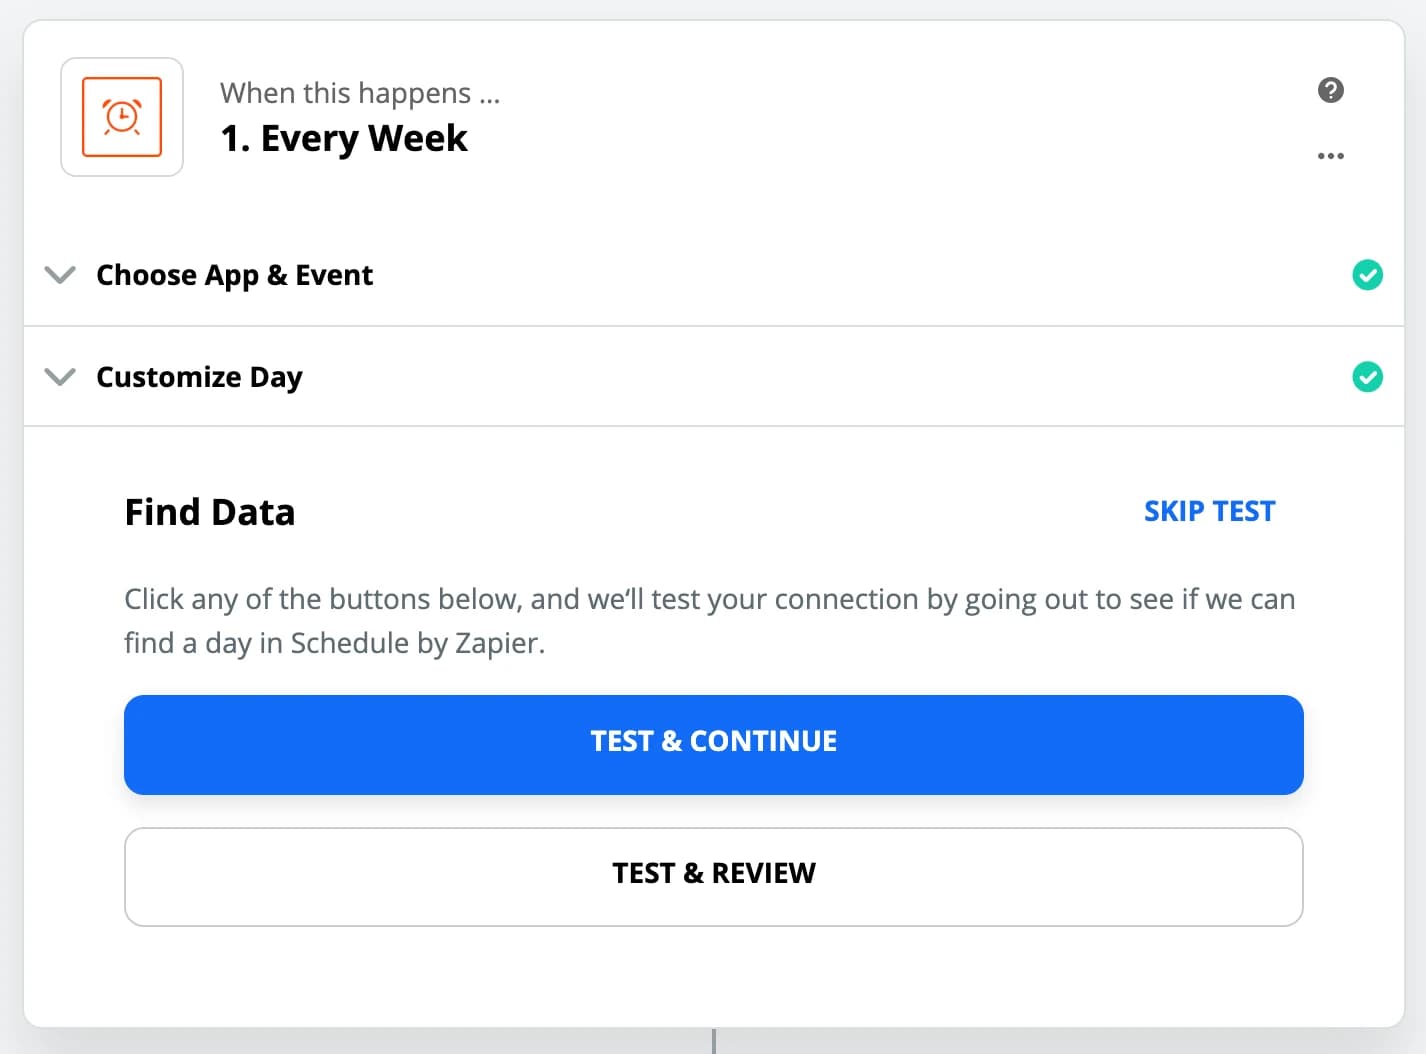
- Choose Email by Zapier as the action app
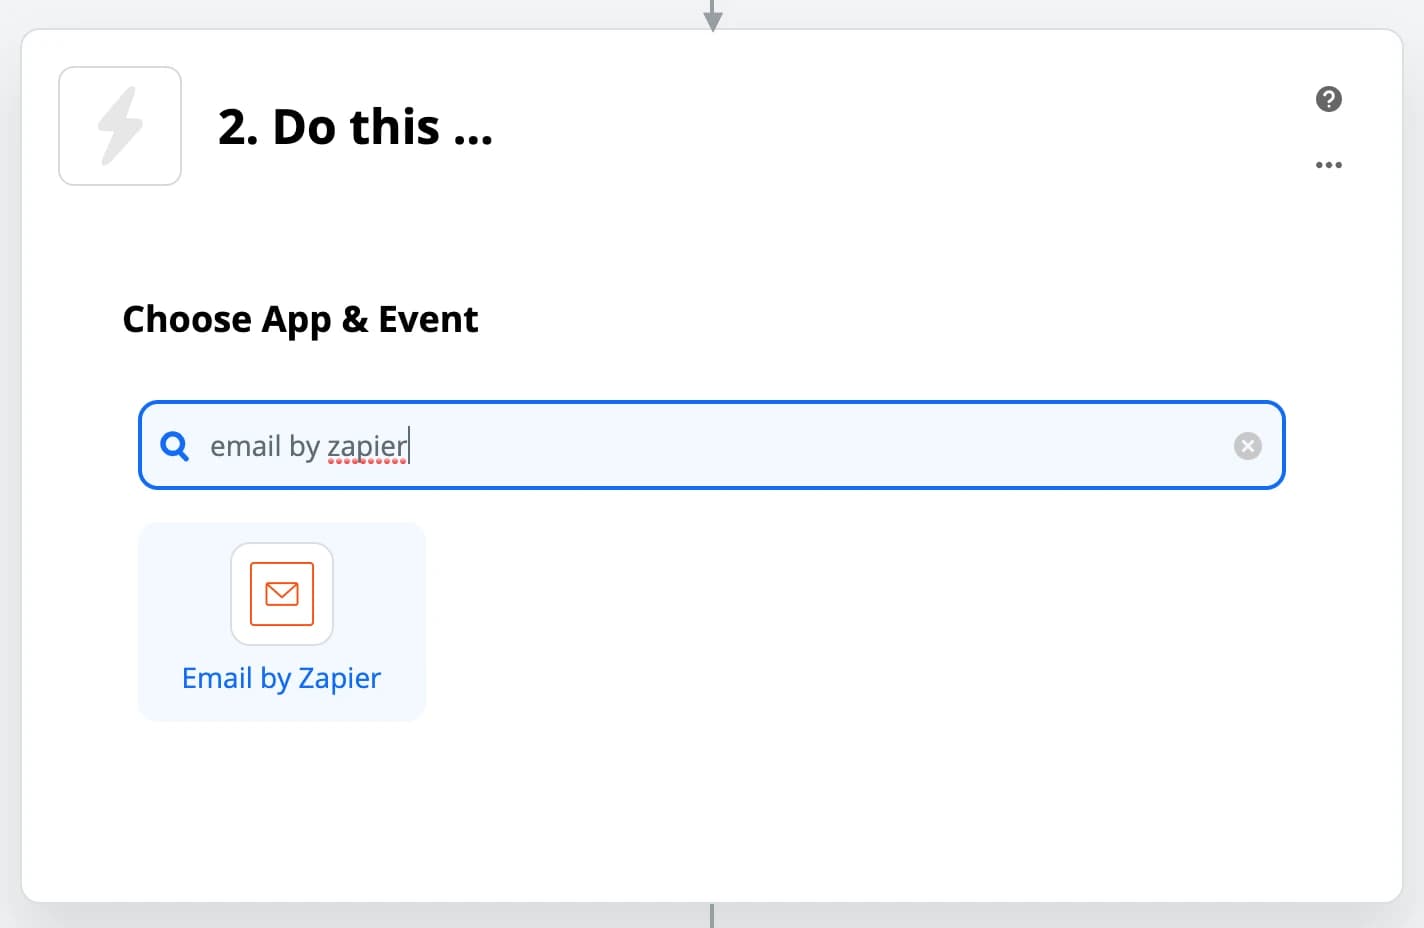
- Select the "Send Outbound Email" action and click the Continue button
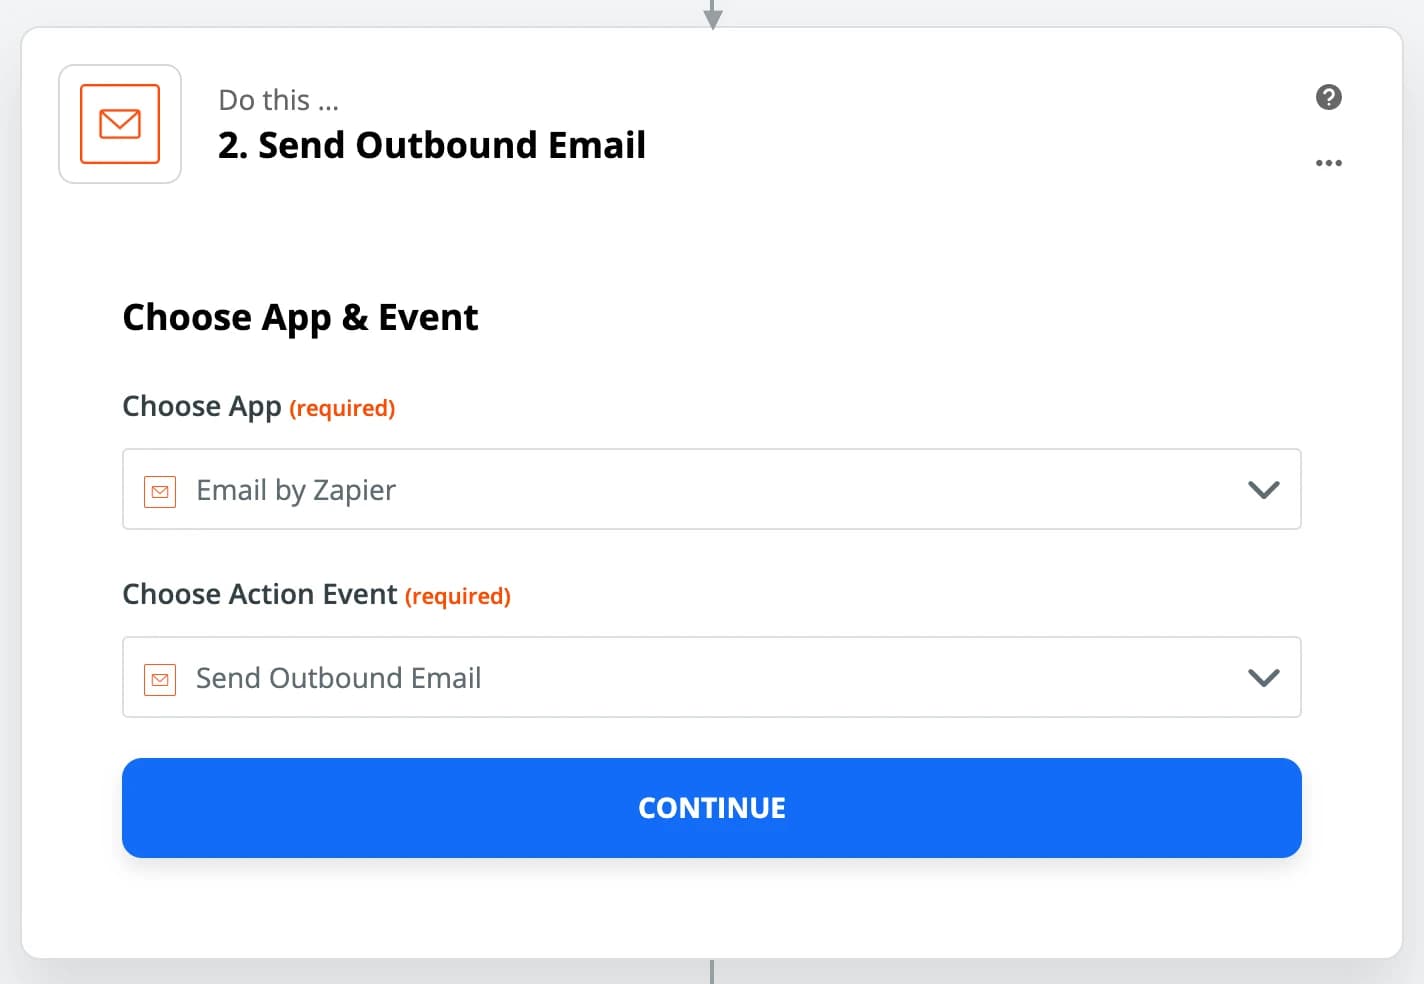
- Now customize the outbound email
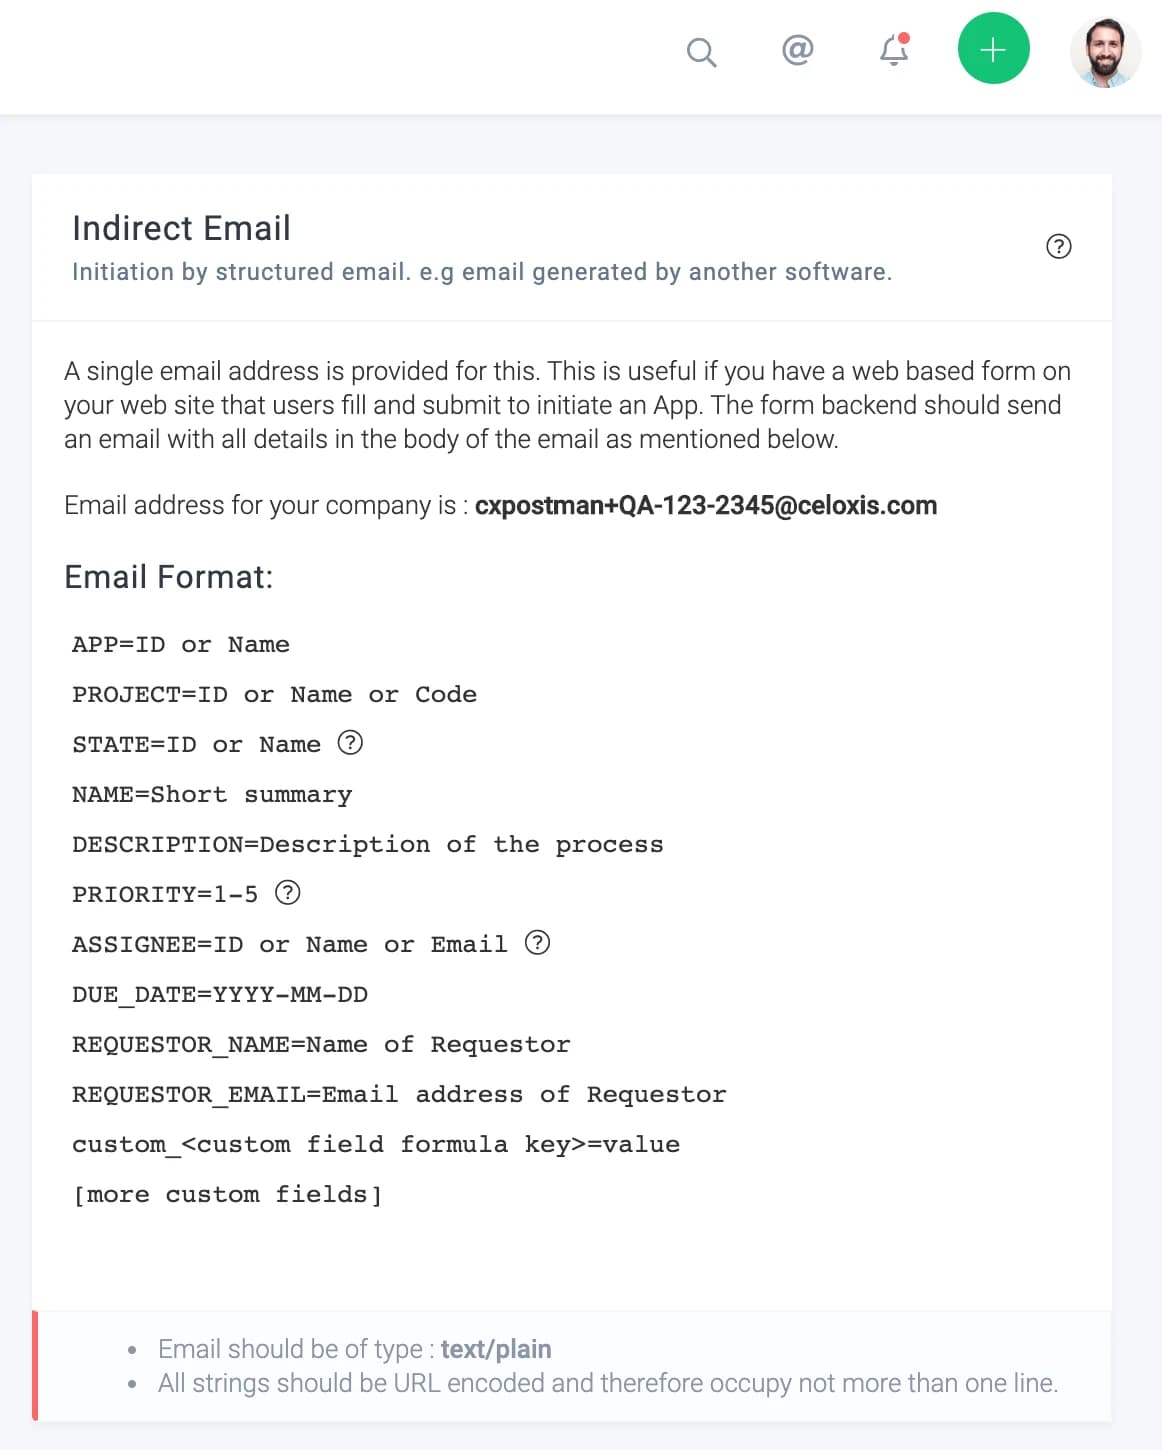
Go to Main MenuAdminCustom AppsEmail IntegrationIndirect Email, here you will find your company email address to which the email will be sent. In the body of email use the format provided here.
Paste your company email address in the "To" field, paste the email body format from Celoxis and edit as per your requirement. In the example our app is Security Update Request. Note that we have put the due date as +2d which means 2 days from the date the app will be initiated. We also have a custom field Hostname in the body of the email as an example.
Once you have composed the email then click on "Continue" button to proceed.
- Test the email action by clicking on "Test & Continue"
- After the test is successful click on Done Editing
- Your Zap is ready to use
After you turn the Zap on,
app will be created in Celoxis on a weekly basis in the project you selected.
Custom AppsHow-To
Connect two Apps
In this article, we will learn to create a process in which when the state of an app is updated it results in creation of a new app in Celoxis. To do this we will be using Zapier, if you are not familiar with Zapier then first read this article.
Create an Issue app when a Risk app is Mitigated in Celoxis
- Make a Zap
- Choose Celoxis as the Trigger app
- Select the Issue Status Updated as the trigger
- Add your Celoxis account
If you have already added your Celoxis account then select it from the list of accounts.
- Test the Trigger
- Select a Sample
The data from sample will be used in other steps to set up the Zap.
- Choose Filter By Zapier app

- Apply the Filter condition
In our case, we are checking for the State of Risk app in Mitigated state.

- Test your Filter

- Choose Celoxis as the Action app
- Select the Create Issue as the action
- Select your Celoxis account
- Customize the App
Fill the data in the fields. You can also use the sample data from the trigger step.
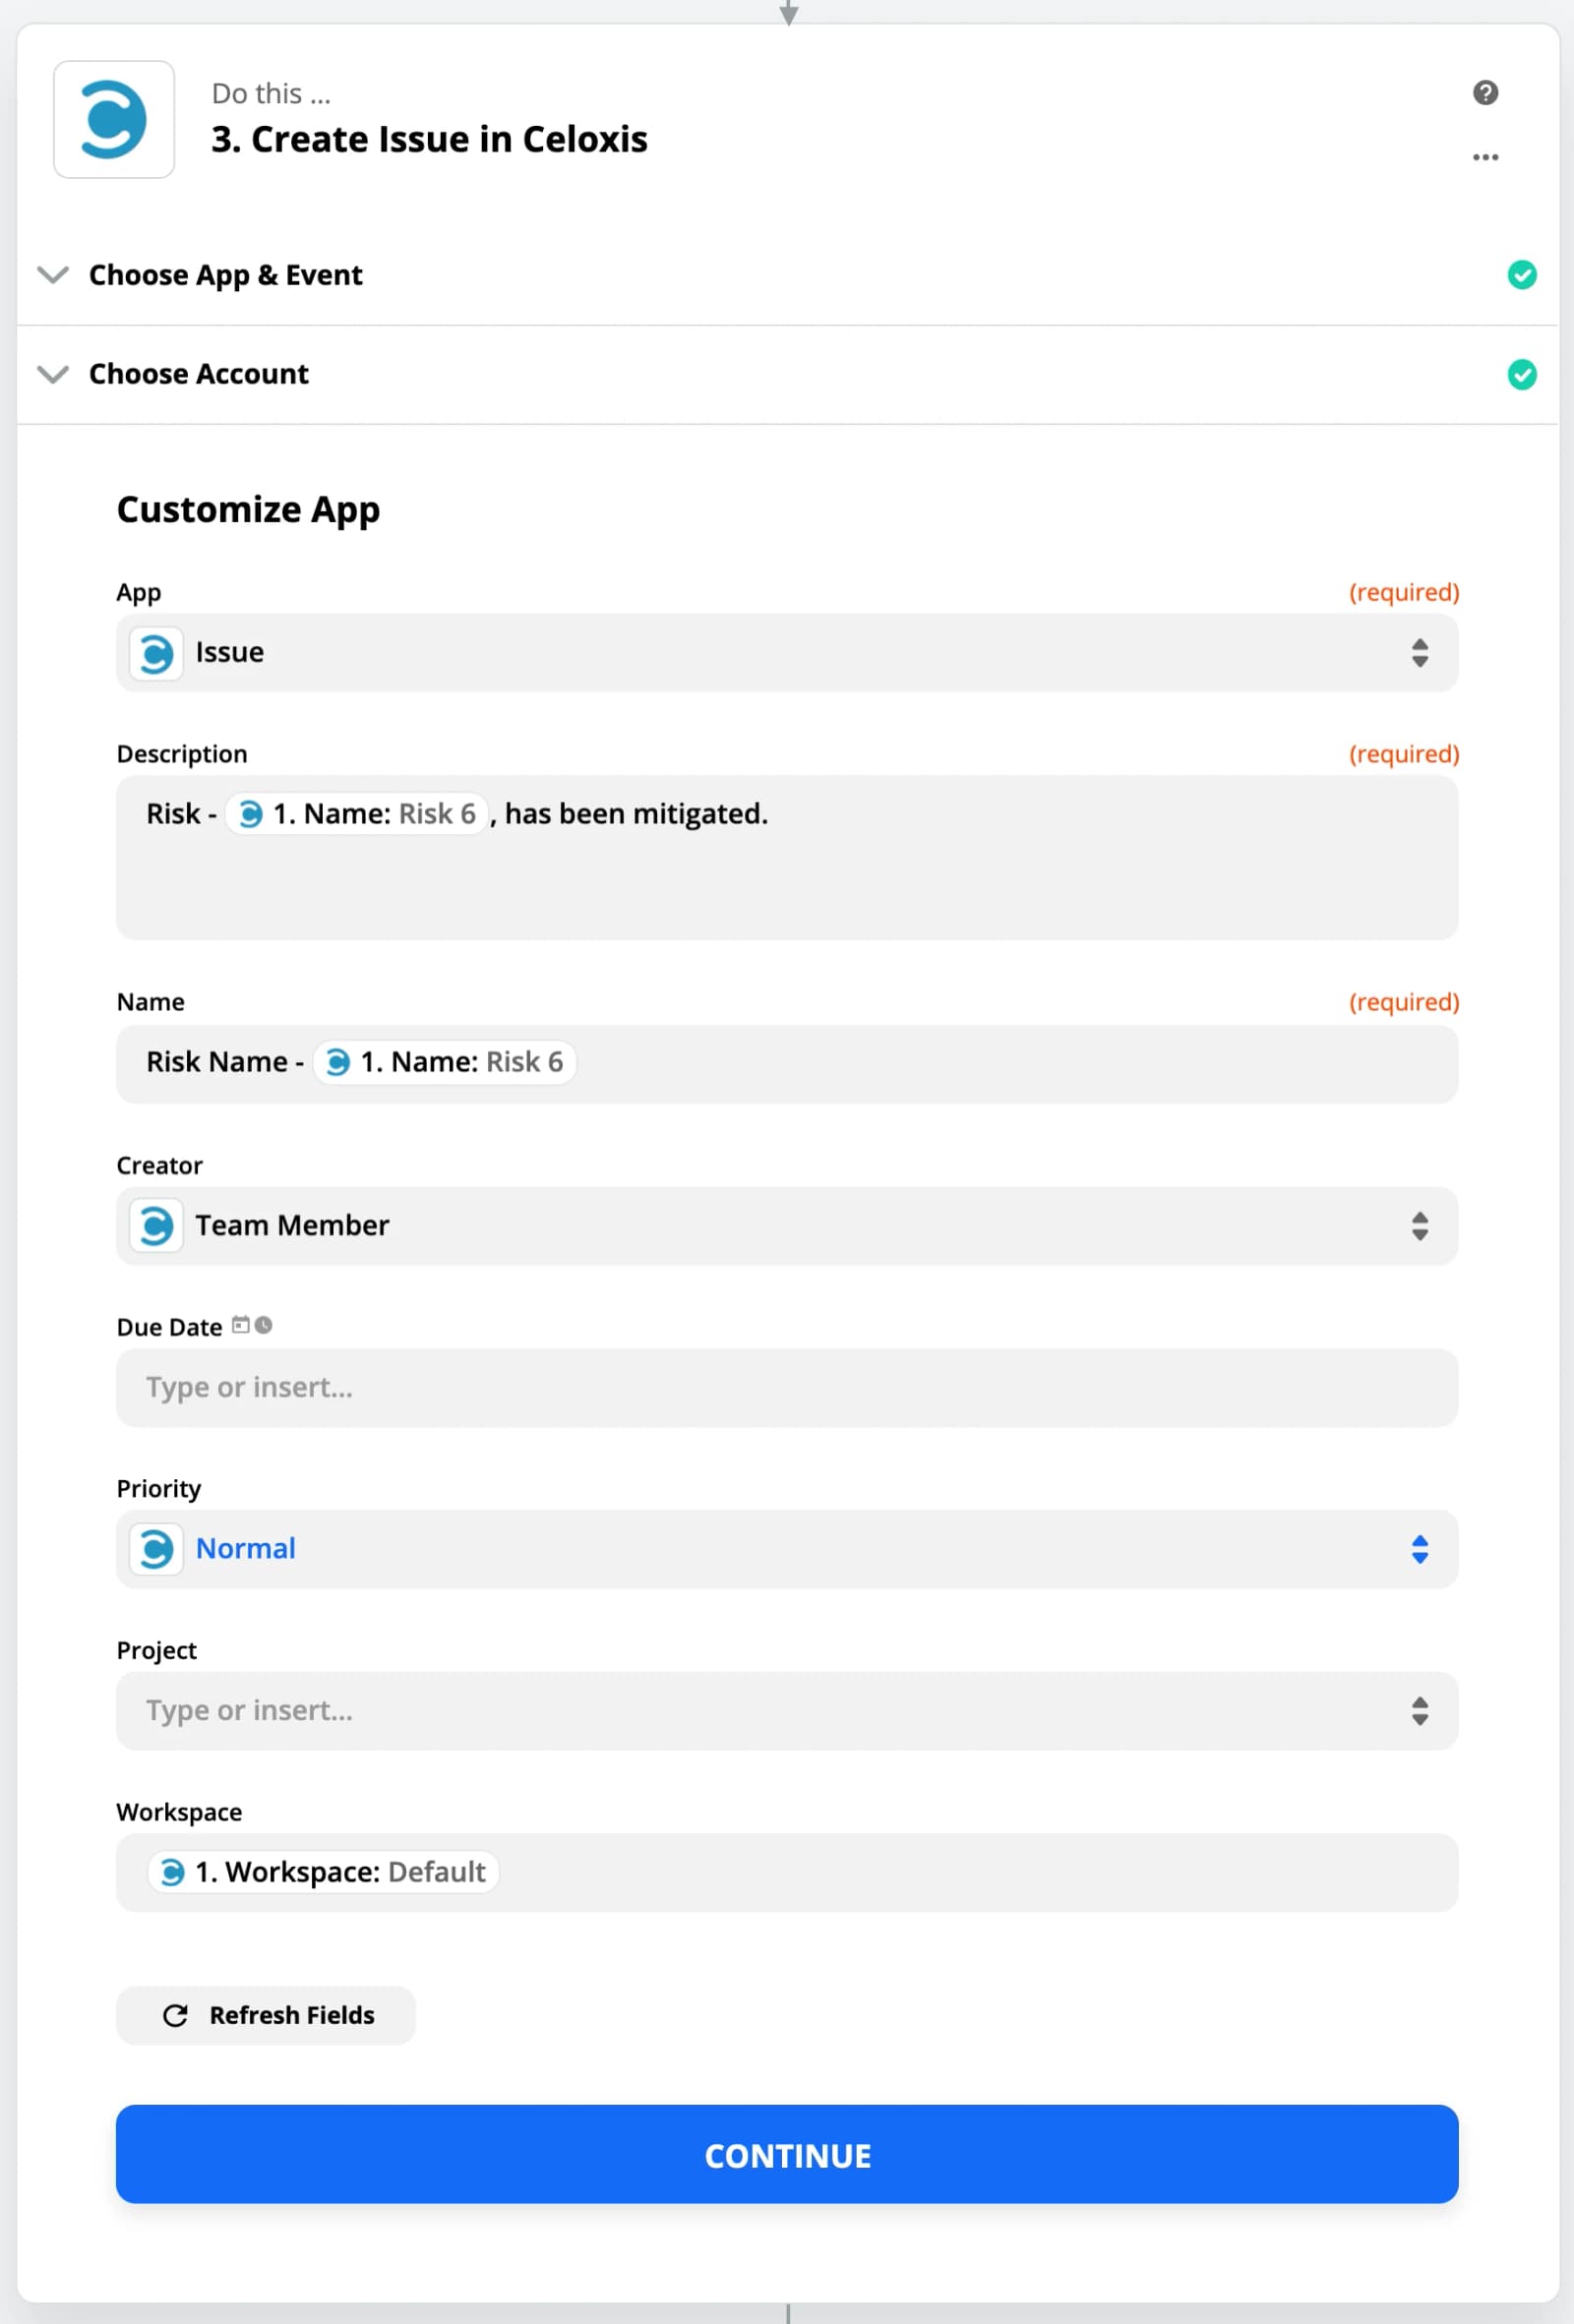
- Test the Action
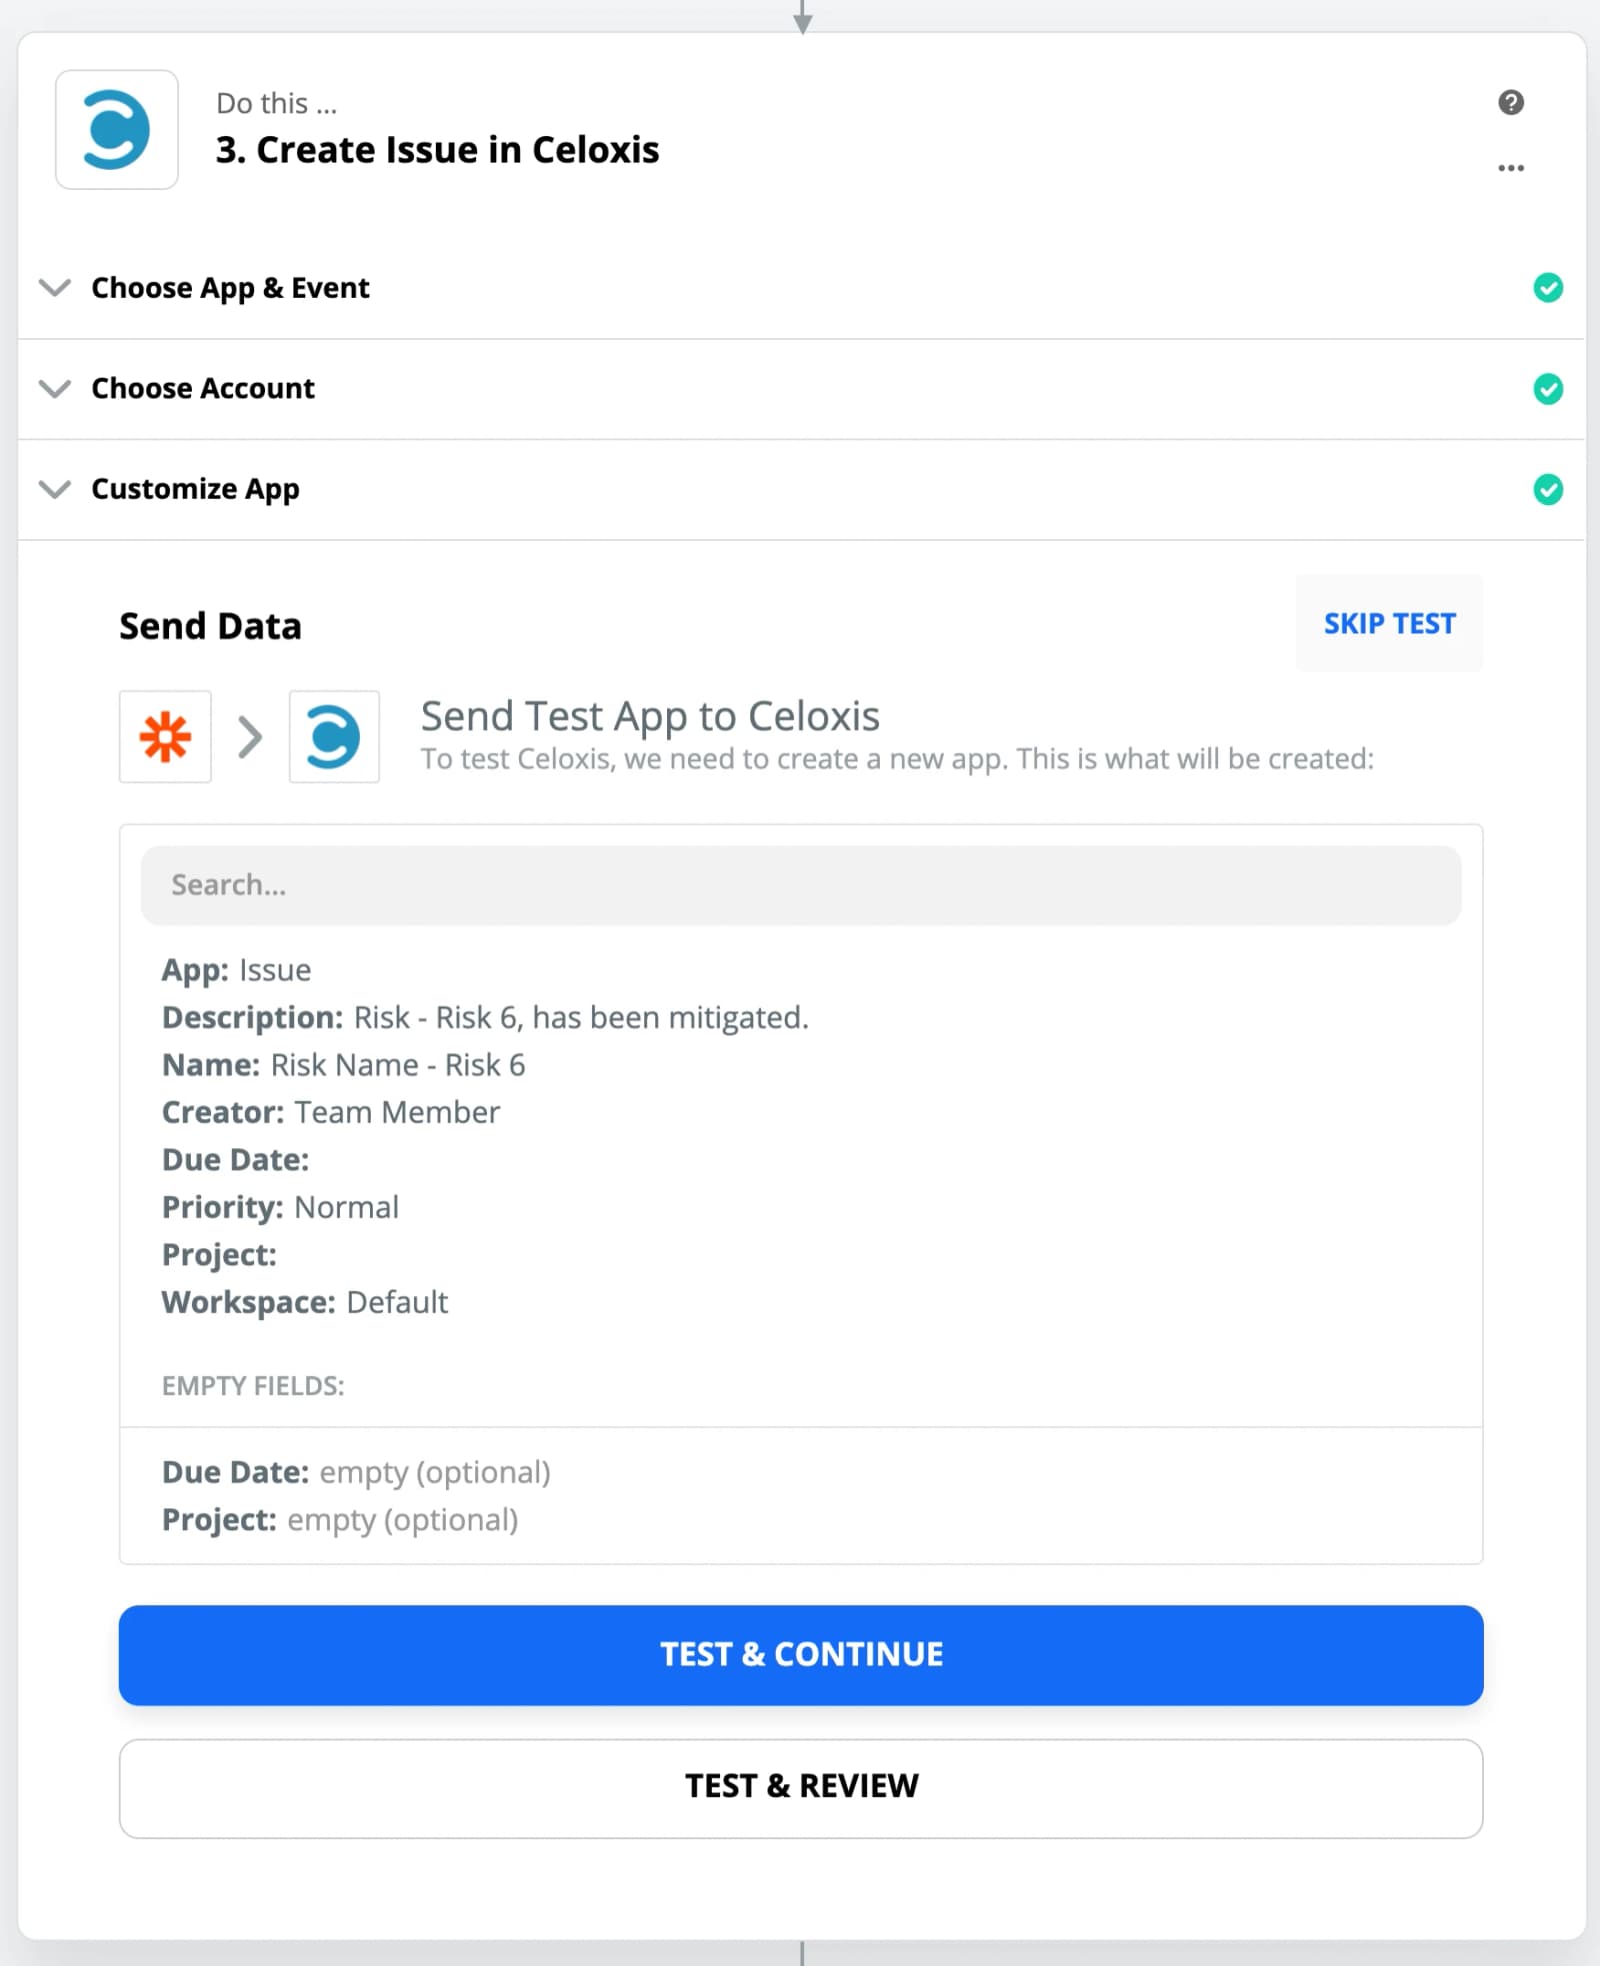
- Turn ON the Zap
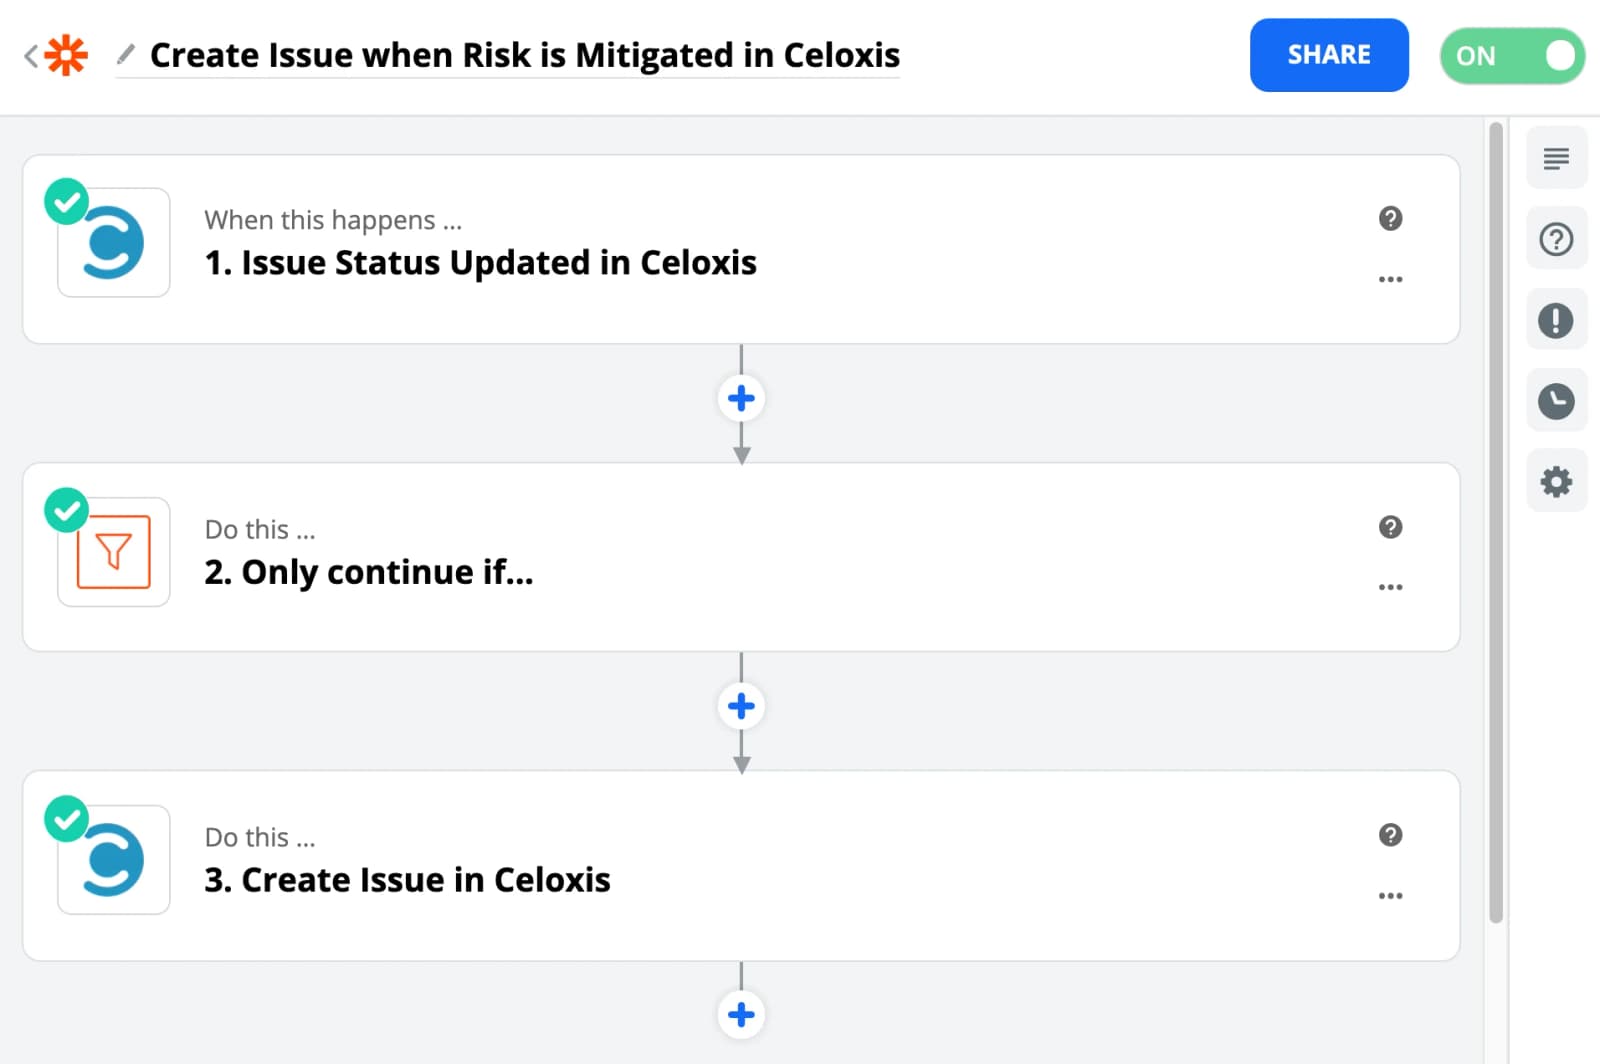
Your Zap is now ready. So when ever a Risk is moved to Mitigated state then a new Issue app will be created with the data provided.
FAQ
Custom AppsFAQ
Can my client create issues via email?
Yes, using the Direct or Indirect email integration, your clients can initiate app items via email.
For more details, refer
.
Custom AppsFAQ
How do I setup so that my client do not create issues?
When defining your custom app, there is a check box Clients can initiate this app which you can uncheck so that your clients do not initiate this.
Reports
12 articlesConcepts
ReportsConcepts
Report Types
There are many entities in Celoxis like projects, tasks and time logs. Some entities are also created by you using custom apps like bugs, risks, and issues. Each entity has its own attributes as well as attributes aggregated from other entities contained in it. For example, the project entity has its own attributes like name, priority, manager as well as attributes approved hours, invoiced revenue, planned labor cost, actual labor cost, etc. that are calculated from other entities like tasks, time logs and expenses.
When you create a report on Celoxis you have to first pick an entity on which to report. You can choose from:
| Type | What you get |
|---|---|
| Project | Project attributes including data aggregated at the project level from timesheets, expenses and tasks like hours, cost, revenue, profit, margin, etc. |
| Task | Task attributes including data aggregated at the task level from timesheets and expenses like hours, costs, revenue, etc. |
| Time Entry | Time entry attributes like hours, submitter, cost, bill amount, etc. You can use these individual time entries to aggregate data the way you want. For example, using this report, you can understand how time was distributed across activities per client. |
| Expense | Expense line item data like amount, expense code, etc. You can use these individual expense line items to analyze your non-labor spends in a flexible way. For example, you can understand how expenses are distributed by expense codes per client. |
| File | File information like check-outs, total size, path, etc. |
| Discussion | Discussion information. E.g. you can create a report that lists all active discussions where you are participating. |
| Apps (e.g. Bug) | App information or data aggregated for each workflow instance from timesheets like hours, costs, etc. |
| Task Status Update | Progress update attributes of your tasks. For example, you can report on all the updates made in this week. |
| Assignment | Task assignment information like task, resource, planned vs actual hours, etc. An assignment refers to the allocation of one resource to one task. |
| User | User attributes. Read More. |
| Dashboard | A dashboard report. Read More. |
| Activity Log | Activities happening on different entities - who did what and when. Read More. |
| Trend | Time phased data of hours, cost, revenue, utilization, etc. Time phased data is the distribution of data in time. You can read more about it later in this chapter. |
Trend
Time phased reports show how a quantity is distributed over time. For example, when you run a project report, you can see the total estimated cost of the project but if you want to understand the planned spend per week or month, then you will need to run a time phased report. Many quantities have time phased nature. E.g. budget, effort, cost, and revenue.
You can view time phased data in a tabular format as shown below or in the form of charts. Currently, unlike other entities, charts are not drill-down capable.
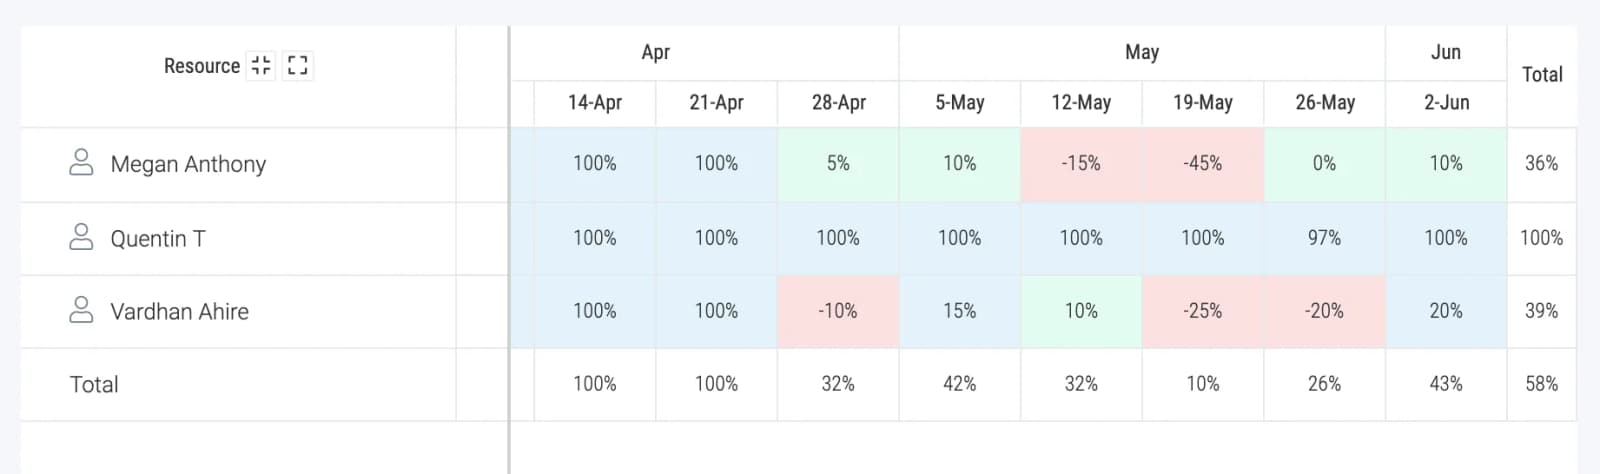
| Available Hours | The working hours of a resource depending on the work calendar timings and exceptions. |
| Actual Capacity | 1 - (Actual Effort ÷ Available Hours) as a percentage |
| Actual Effort | Approved hours in time logs |
| Actual Utilization | Actual Effort ÷ Available Hours as a percentage |
| Planned Capacity | 1 - (Planned Effort ÷ Available Hours) as a percentage |
| Planned Effort | The number of hours a resource is allocated on a task |
| Planned Utilization | Planned Effort ÷ Available Hours as a percentage |
| Actual Non-billable Hours | Approved non-billable hours from time logs |
| Efficiency | Resource efficiency is calculated as Planned Effort ÷ Actual Effort as a percentage. A value of 100% means the resource is performing exactly as expected. Less than 100% means worse than expected while more than 100% means better than expected. |
| Free Hours | The number of unallocated time for a resource i.e. Available Hours - Planned Effort. |
| Free Hours (Realtime) | Shows free hours assuming remaining hours for a task is distributed as per allocation from the present date. Remaining hours for a resource is Planned Effort - Actual Effort |
| Invoiced Hours | Hours from invoiced time logs. |
| Actual Billable Hours | Hours from approved time logs marked as billable |
| Actual Cost | Total of labor, expense and fixed cost. |
| Actual Labor Cost | Sum of cost from time logs |
| Actual Margin | Actual Profit ÷ Actual Revenue |
| Actual Profit | Actual Revenue - Actual Cost |
| Actual Revenue | Sum of bill amounts of approved time logs and expenses |
| Invoiced Revenue | Sum of bill amounts of invoiced time logs and expenses |
| Planned Cost | Sum of planned labor cost, planned non-labor cost and fixed cost |
| Planned Labor Cost | The estimated cost of a resource working on a task. Total amount is distributed uniformly over the task duration. |
| Planned Margin | Planned Profit ÷ Planned Revenue |
| Planned Profit | Planned Revenue - Planned Cost |
| Planned Revenue | Planned Effort × Resource Bill Rate. Available only when company's billing model is user-based not activity-based. |
| Revenue Potential | Available Hours × Bill Rate. Available only when company's billing model is user-based not activity-based. |
Hide Total Columns
This option will hide the total columns from time-phased reports to help you easily focus on specific data.
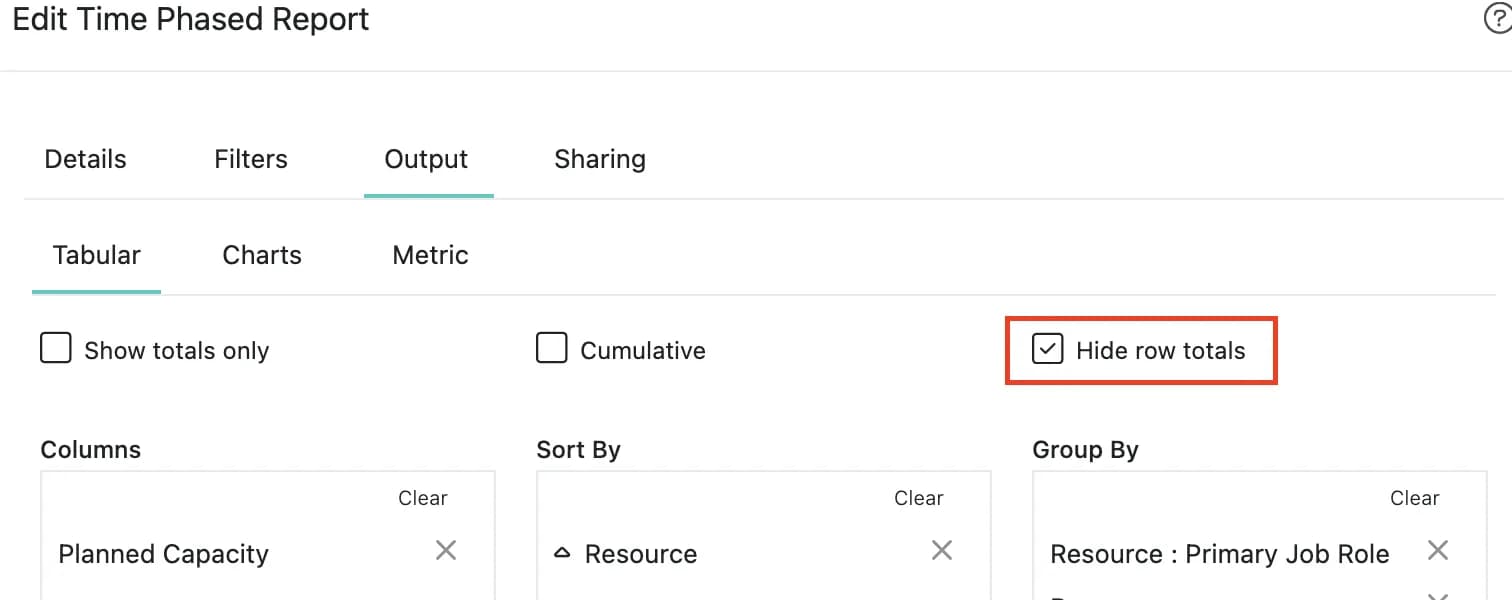
ReportsConcepts
Cumulative & Burndown
Celoxis enables you to create your own S-curves and Burndown charts. This is possible by using the Cumulative and Burndown options in the Line on Secondary Y-Axis section in a bar chart as shown below.
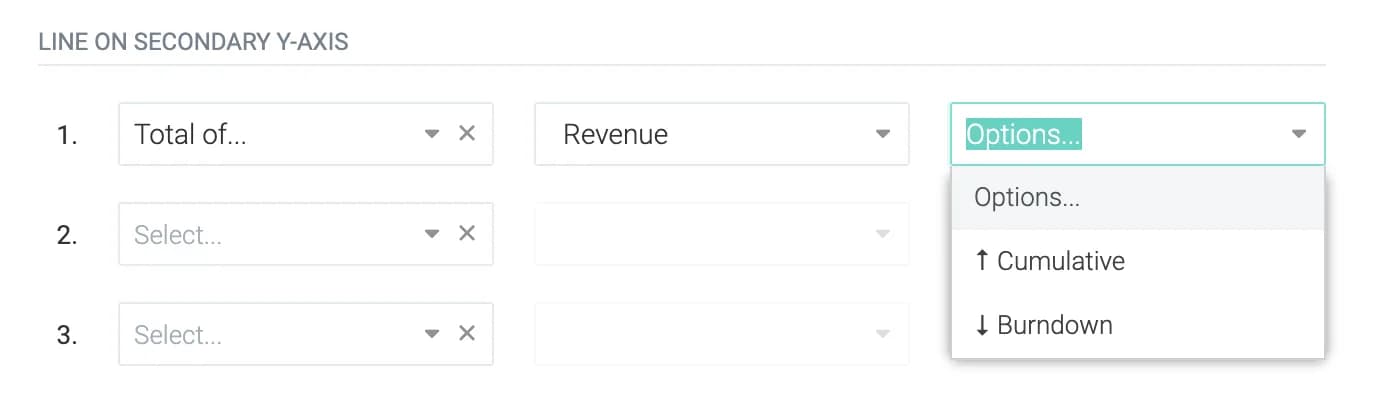
We shall understand these options using a simple example.
Let's say that we have the following data set and we are drawing a bar chart with Revenue on the Y-axis and a line, also of revenue, on the secondary Y-axis
| Month | Revenue |
|---|---|
| Jan | 20K |
| Feb | 40K |
| Mar | 30K |
The chart would look like ⟶
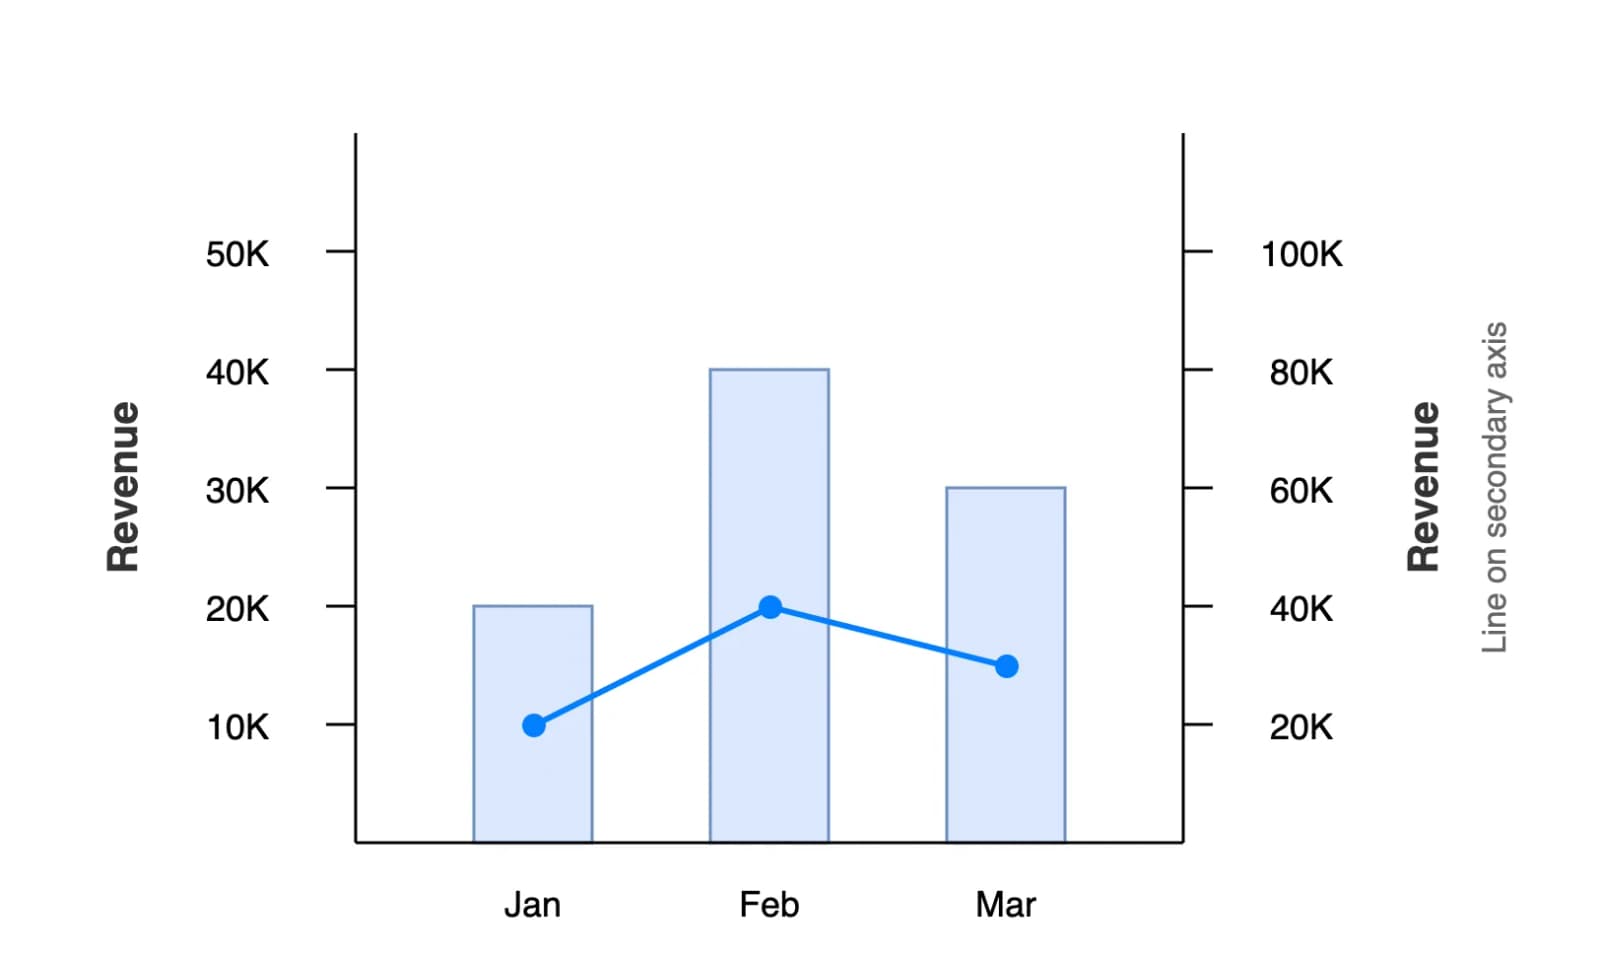
Cumulative
This means that each value of the line is the sum of the current value plus the sum of all previous values. The cumulative values would be:
| Month | Revenue | Cumulative |
|---|---|---|
| Jan | 20K | 20K |
| Feb | 40K | 40K |
| Mar | 30K | 70K |
The chart would look like ⟶
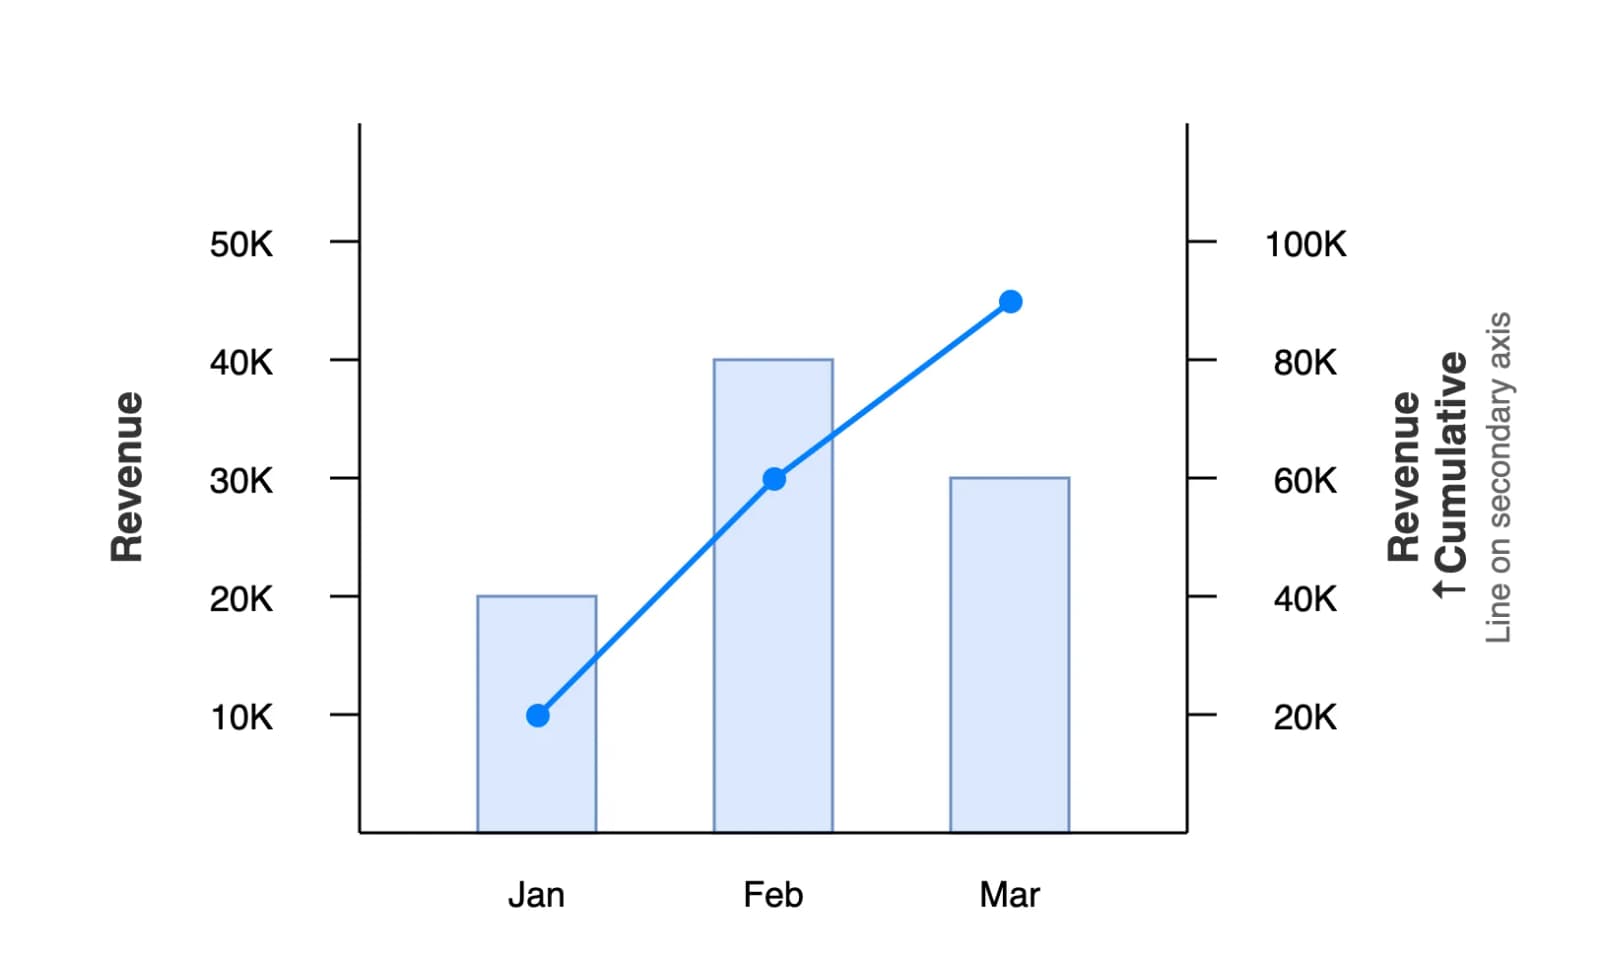
Burndown
This means that each value of the line is the sum of all values in the data set - the sum of all values till the current data point. The values would be:
Sum of all values = 90K
| Month | Revenue | Burndown |
|---|---|---|
| Jan | 20K | 70K |
| Feb | 40K | 30K |
| Mar | 30K | 0K |
The chart would look like ⟶
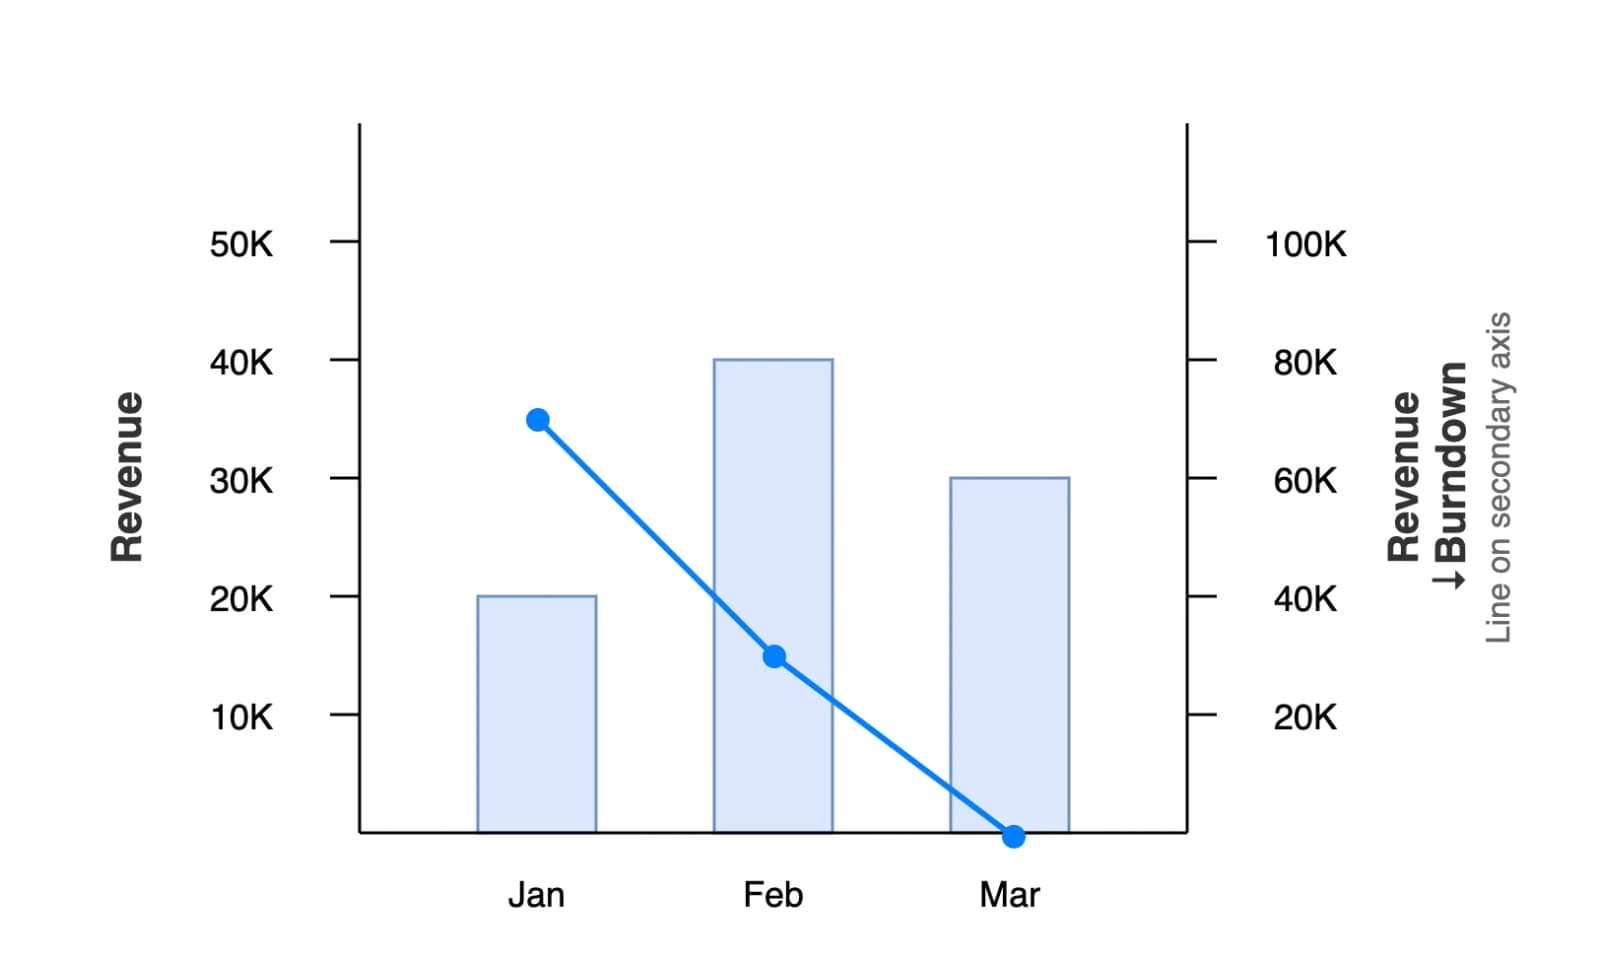
ReportsConcepts
Filtering
Filtering allows you to exclude unwanted data in your reports. Celoxis provides comprehensive and powerful filters for a large number of attributes including your custom fields.
Setting filters
A report's filters can be changed from the add/edit report screen. A sample screen with multiple filters including a custom field (Module) is shown below.

When multiple filters are selected, row have to match all filters. If a filter has multiple values (e.g. Module), then the row has to match at least one of those values. If you create a report with the above filters, then only those rows will be returned where (Display Tasks is in In Progress) AND (Module is one of UI or Middleware) AND (Planned Finish is in This Month) etc.
Running User filter
In the above example, you can see the the assignee is set to the special value of - Running User -. This indicates that the assignee must be filtered based on the person who is running the report. E.g. when Joe runs this report, he will only see his tasks while when Mary runs the same report, she will see her tasks.
Running User's Subordinates filter
This option is available in most user filters. The user should be a subordinate, directly or indirectly, of the person running the report. This option is useful when a manager wants to keep track of activities of his/her reportees. For example, if Joe wants to monitor all the high priority tasks assigned to his team, he should create a report, set the priority filter to High and Very High, and set the resources filter to - Running User's Subordinates -.
Prompt filters
In many cases, you would want the end-user to change the values of some of the filters. In the above example, the report allows the end-user to change the values of Display Tasks, Module and Planned Finish at the time the report is run. The below diagram shows how a user running the above report can modify the filters:

In the above example, the user has changed the Planned Finish filter from This Month to Last Month and also cleared the Module filter.
ReportsConcepts
Output
The kind of display you want can be selected from the Output tab on the add/edit report screen.
Tabular
This is the default output type and presents the data in a tabular output.
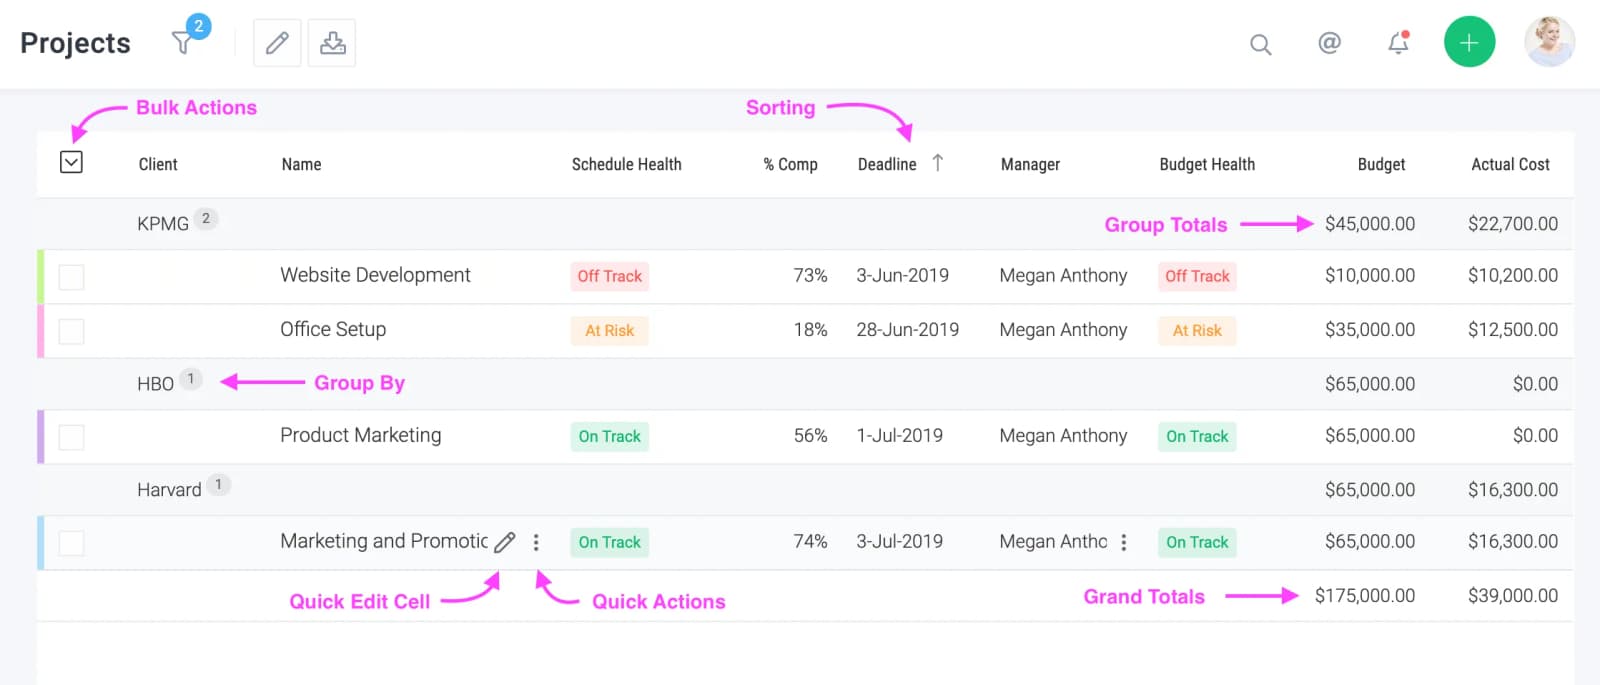
The view is quite dynamic with multi-level grouping and sorting, group totals, grand totals, etc.
This view is highly personalizable - you can change columns, grouping and sorting to suit your needs. See the top right hand side of the image above.
This view also has great productivity boosters. You can do bulk actions, perform an action on a line item by clicking the icon and even edit an attribute right there by clicking on the icon.
Show totals only
Show the total rows only. If the option was checked in the above report. You would only see the group and grant total rows and not the individual project rows.
Show hierarchy
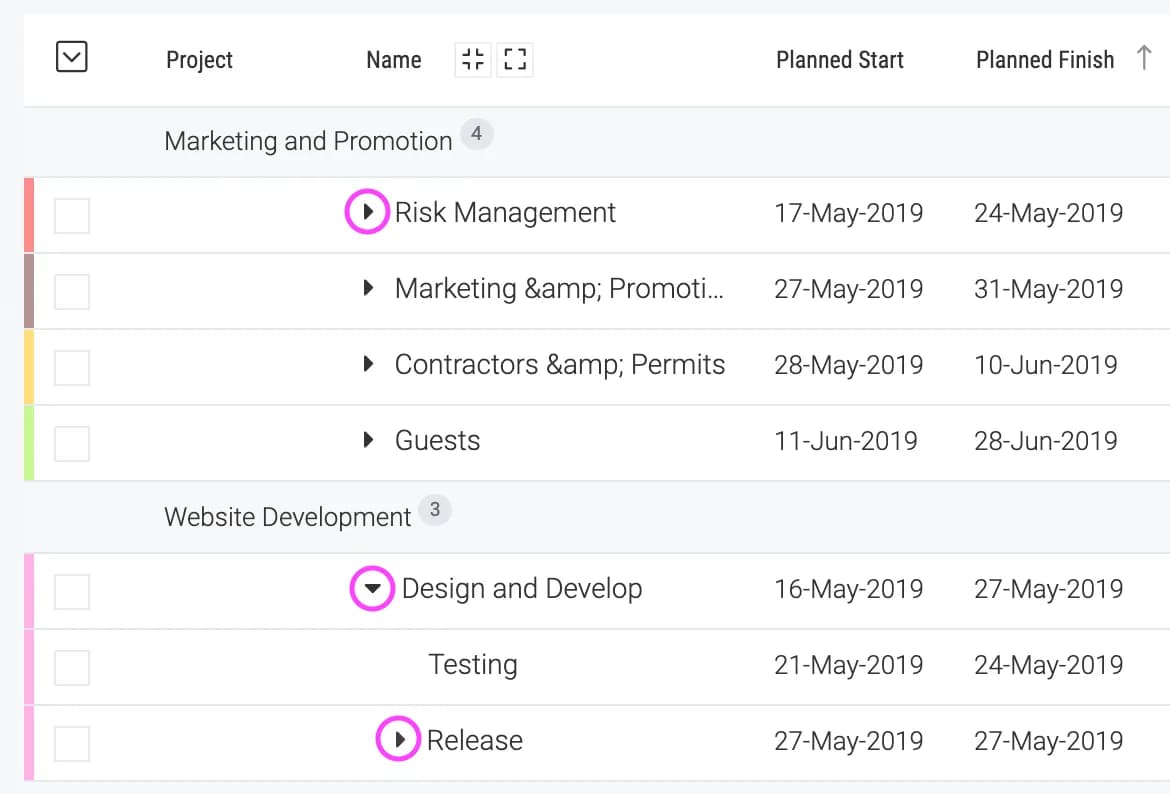
This organizes the row as per the parent-child relationship. It is only available for task, file and client reports. View this example that shows tasks grouped by project with the hierarchical option checked.
When this option is checked, the resulting totals only include those objects that result from the filters not the objects included (even if they don't match the filters) to show the hierarchy.
Hide Header Row
This option will hide the row showing the column names. It is handy when data is displayed on Status dashboards, and the column names do not really add value.
Gantt
The Gantt output is available only for project and task reports. In case of tasks, the output is a cross-project gantt chart as shown below.
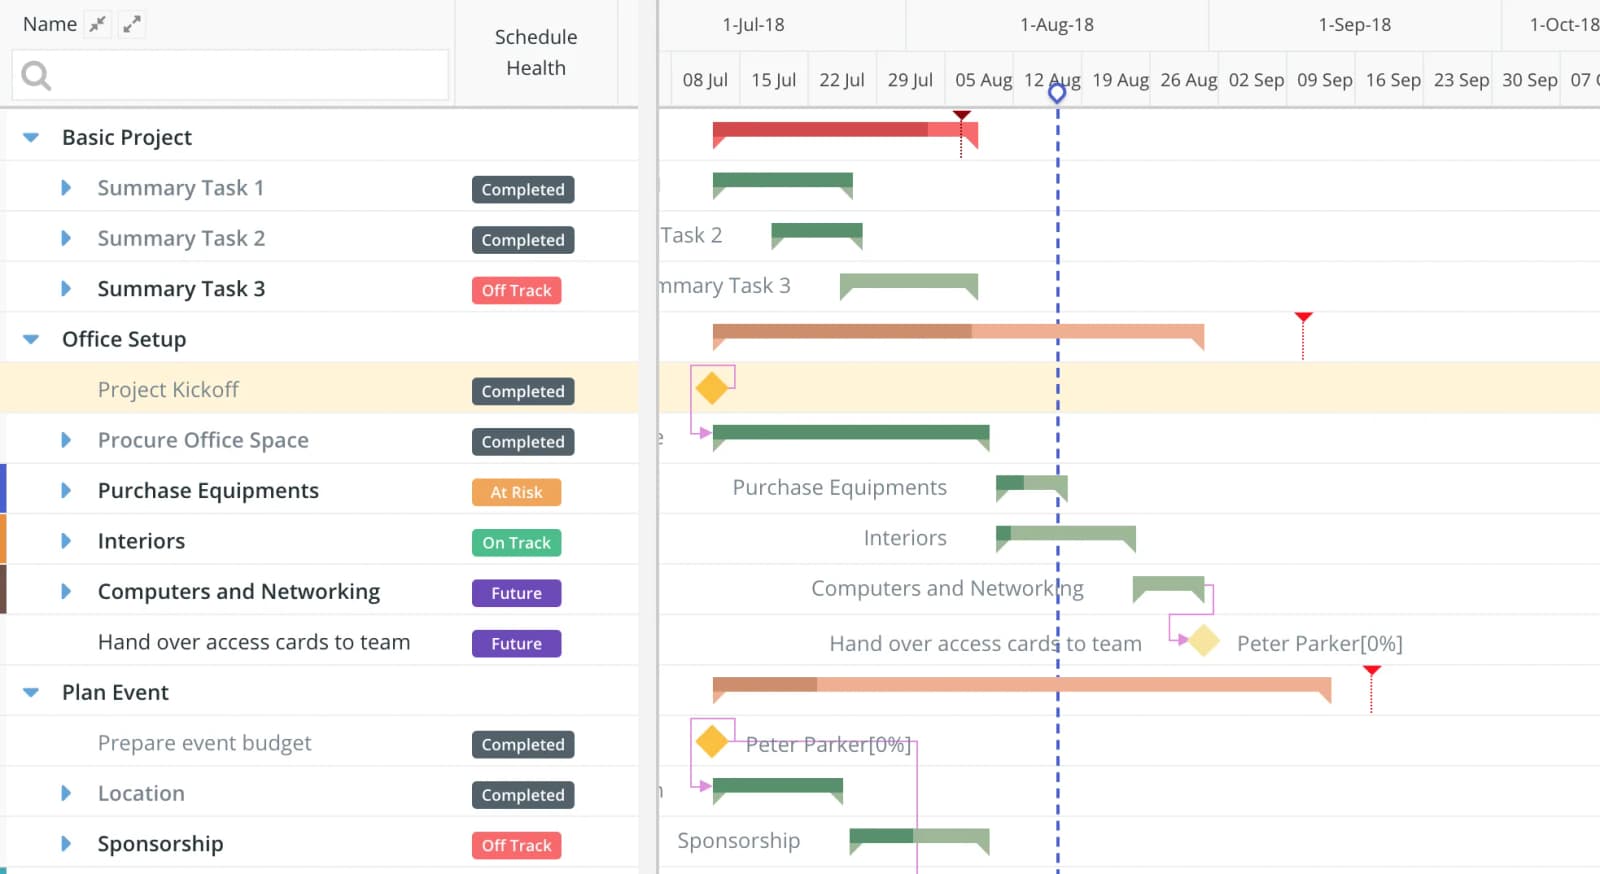
Calendar
The Calendar output generates a calendar view for projects and tasks as shown below. The bar is colored as per the color of the project or task. You also have the option of turning off the bars in which case the start and finish event for the task and project will be separately generated.
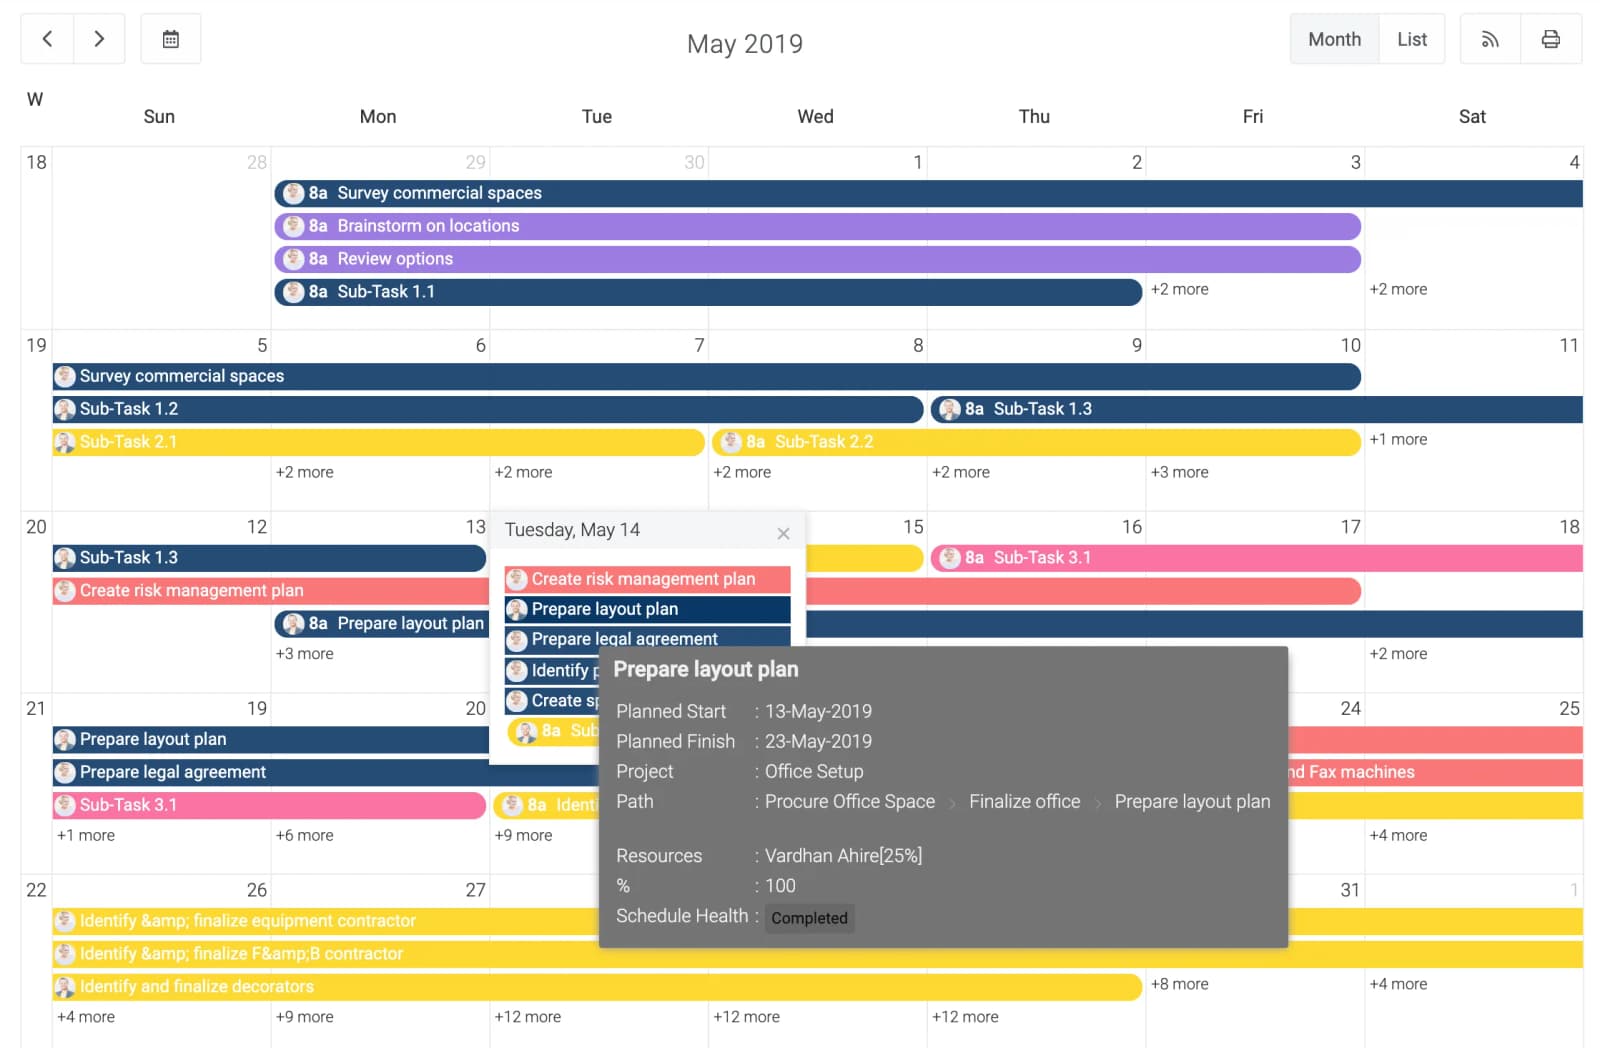
Pie
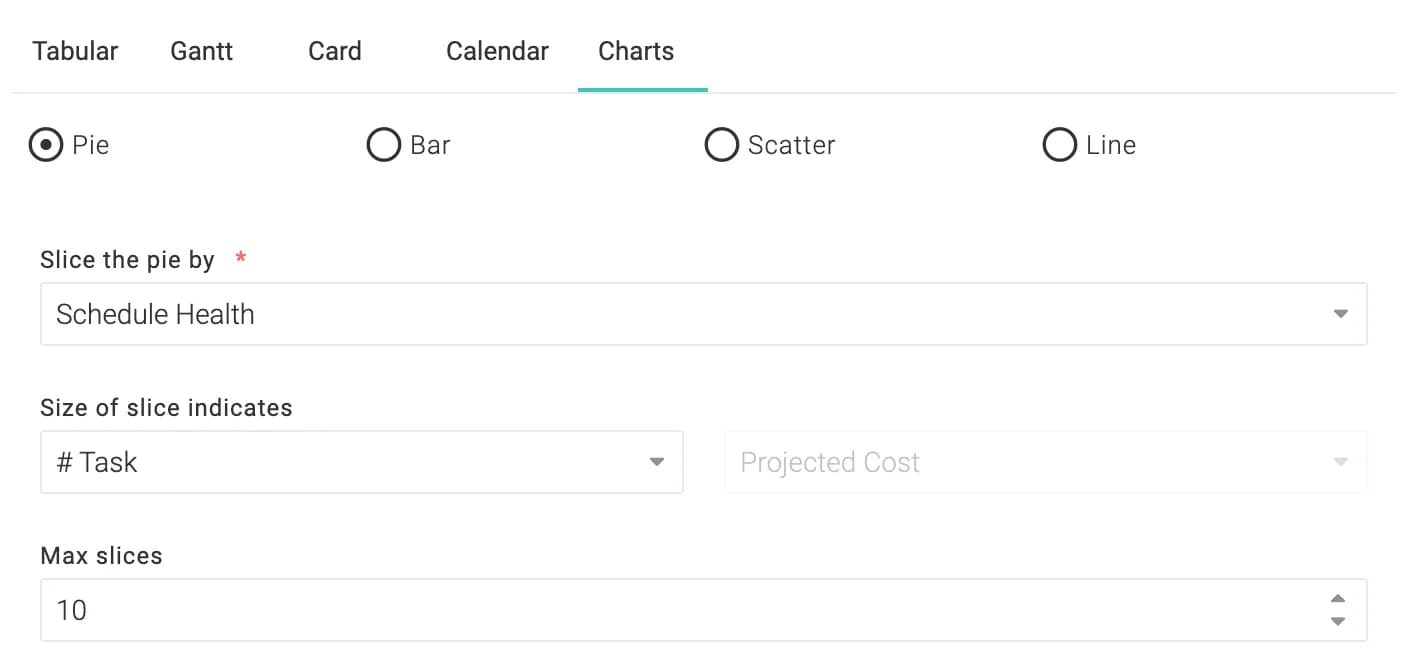
It is easy to create pie charts in Celoxis. These settings were used to create the Pie chart below.
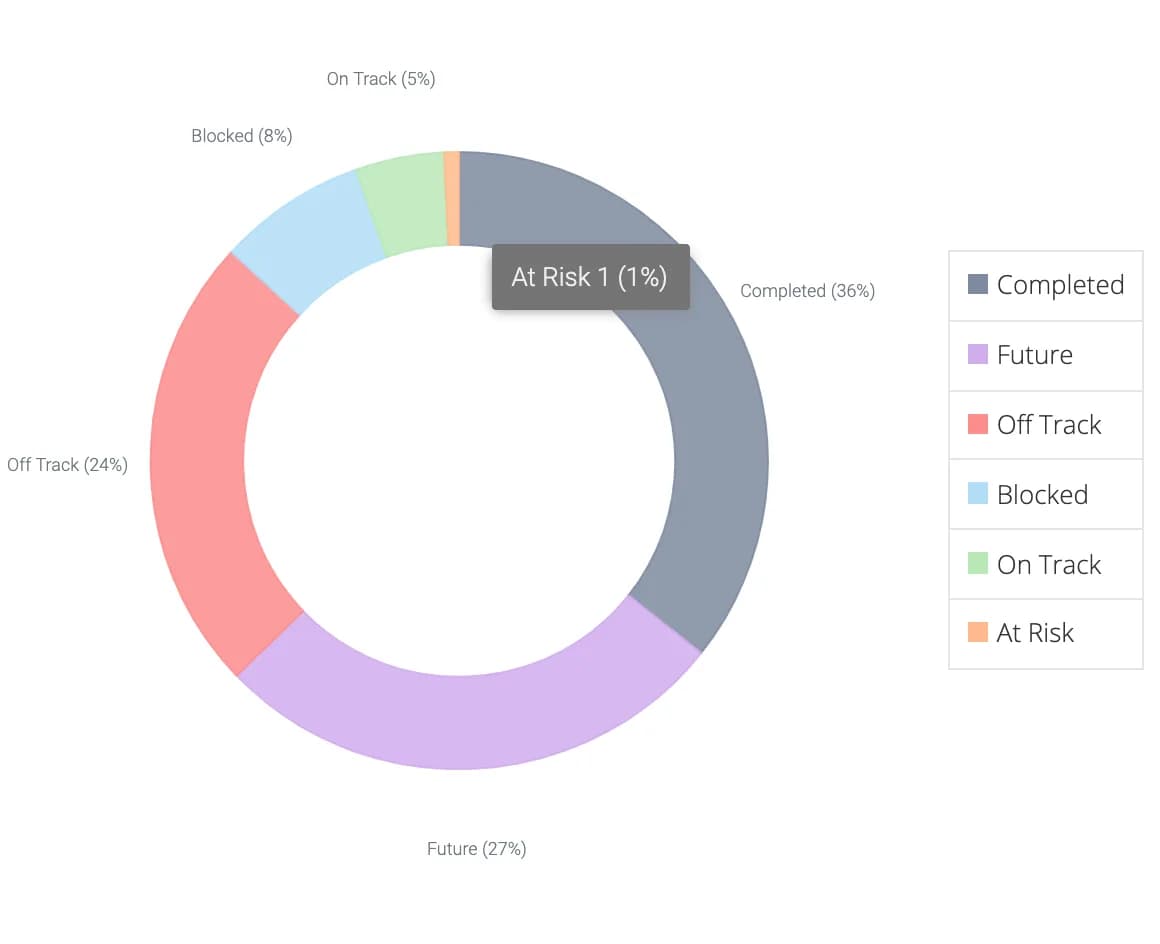
Bar
Celoxis supports a number of popular bar chart formats. Each of the bar chart type has been explained below and the form settings used to generate the chart has also been provided.
Simple Bar
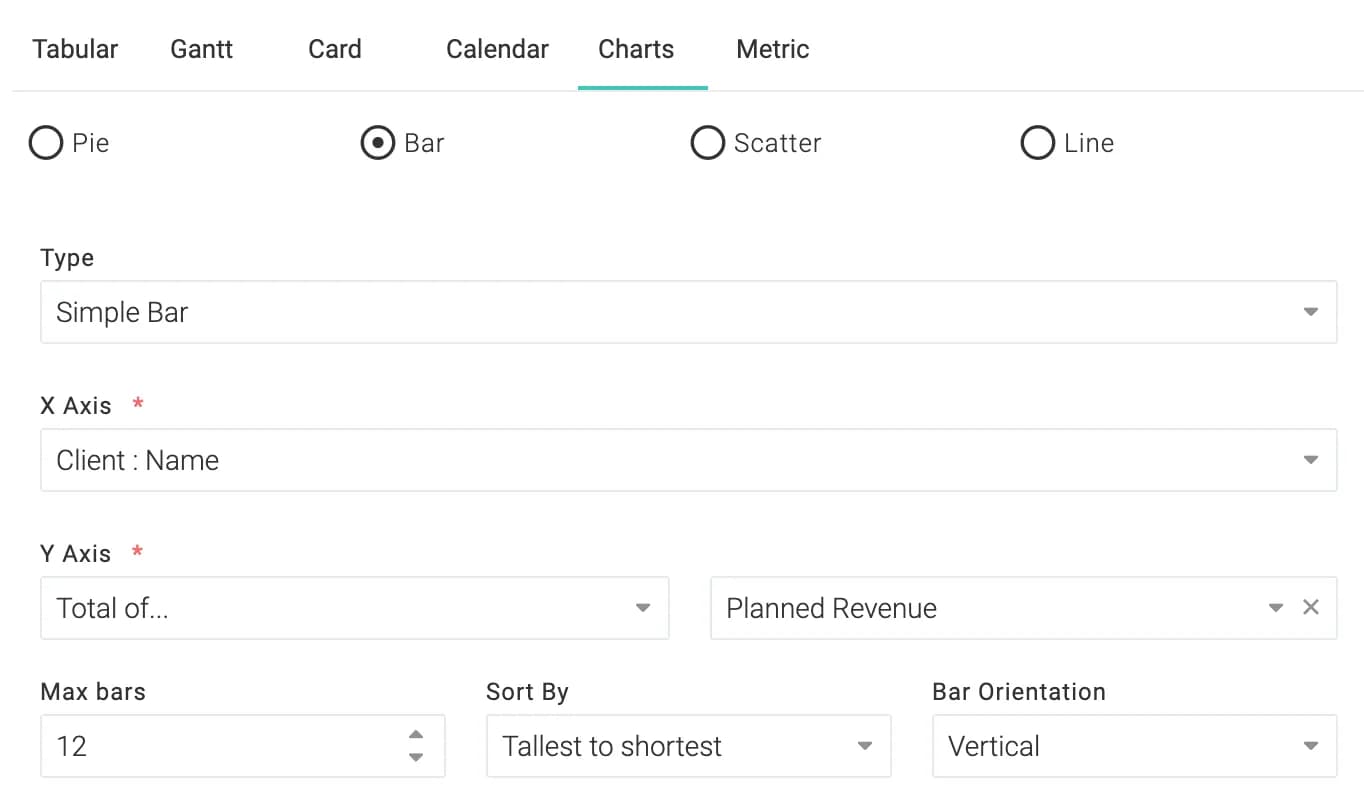
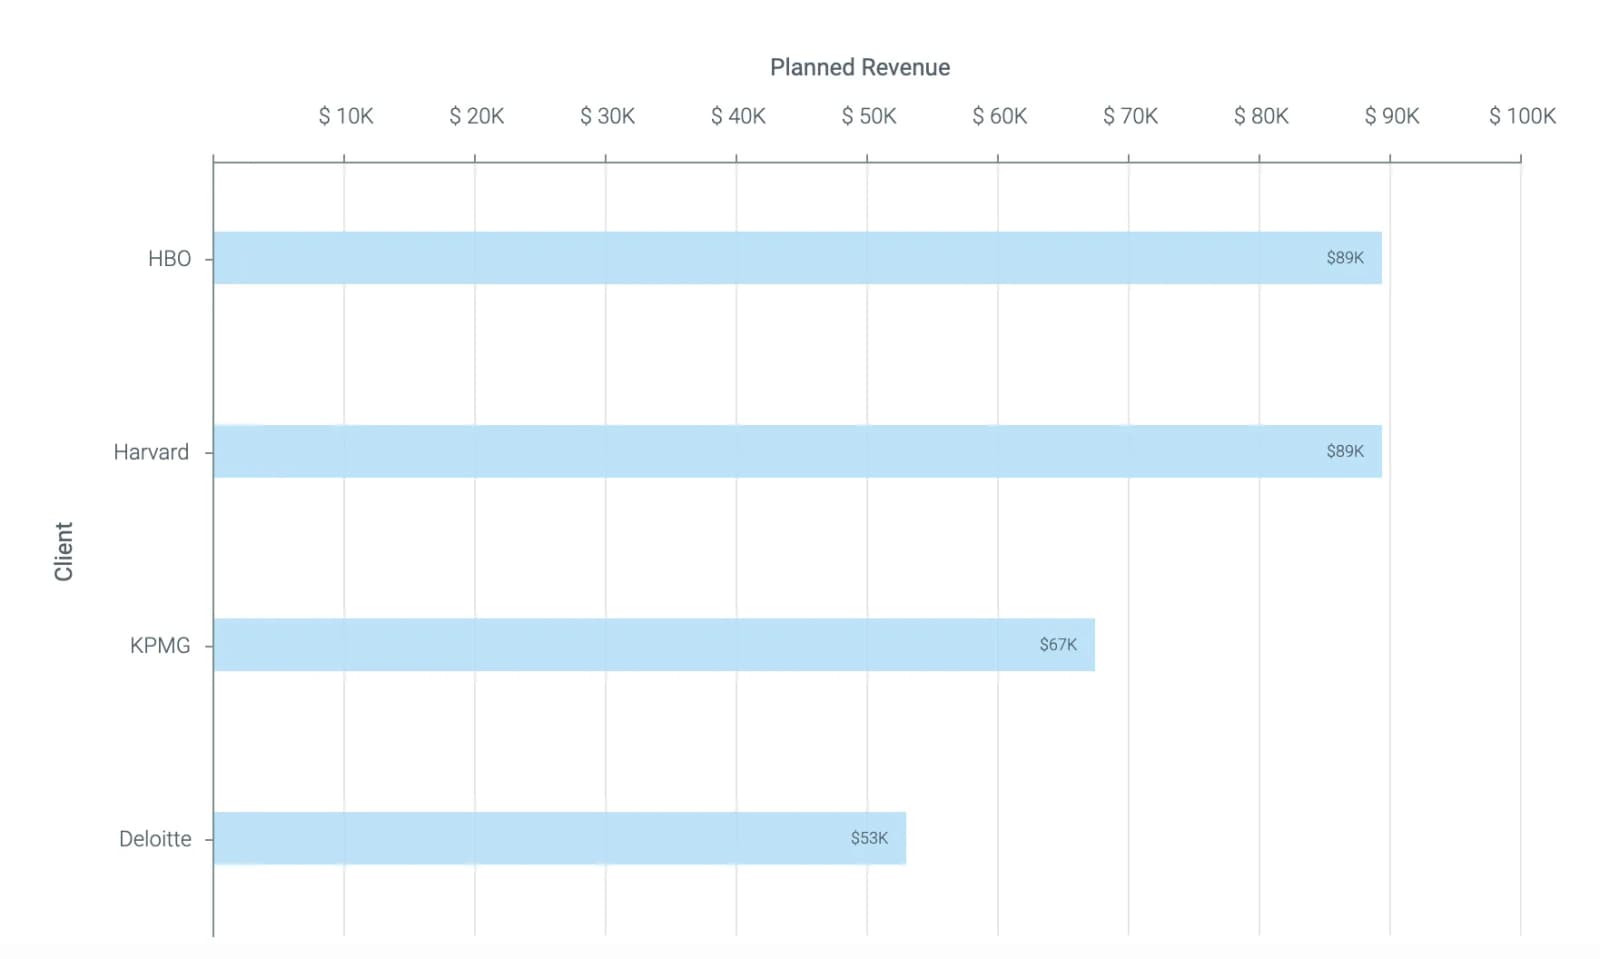
The following bar chart was generated using these settings. Note how the Sort By setting sorts the bars in decreasing order. If you set the Bar Orientation as horizontal, it would result in this chart.
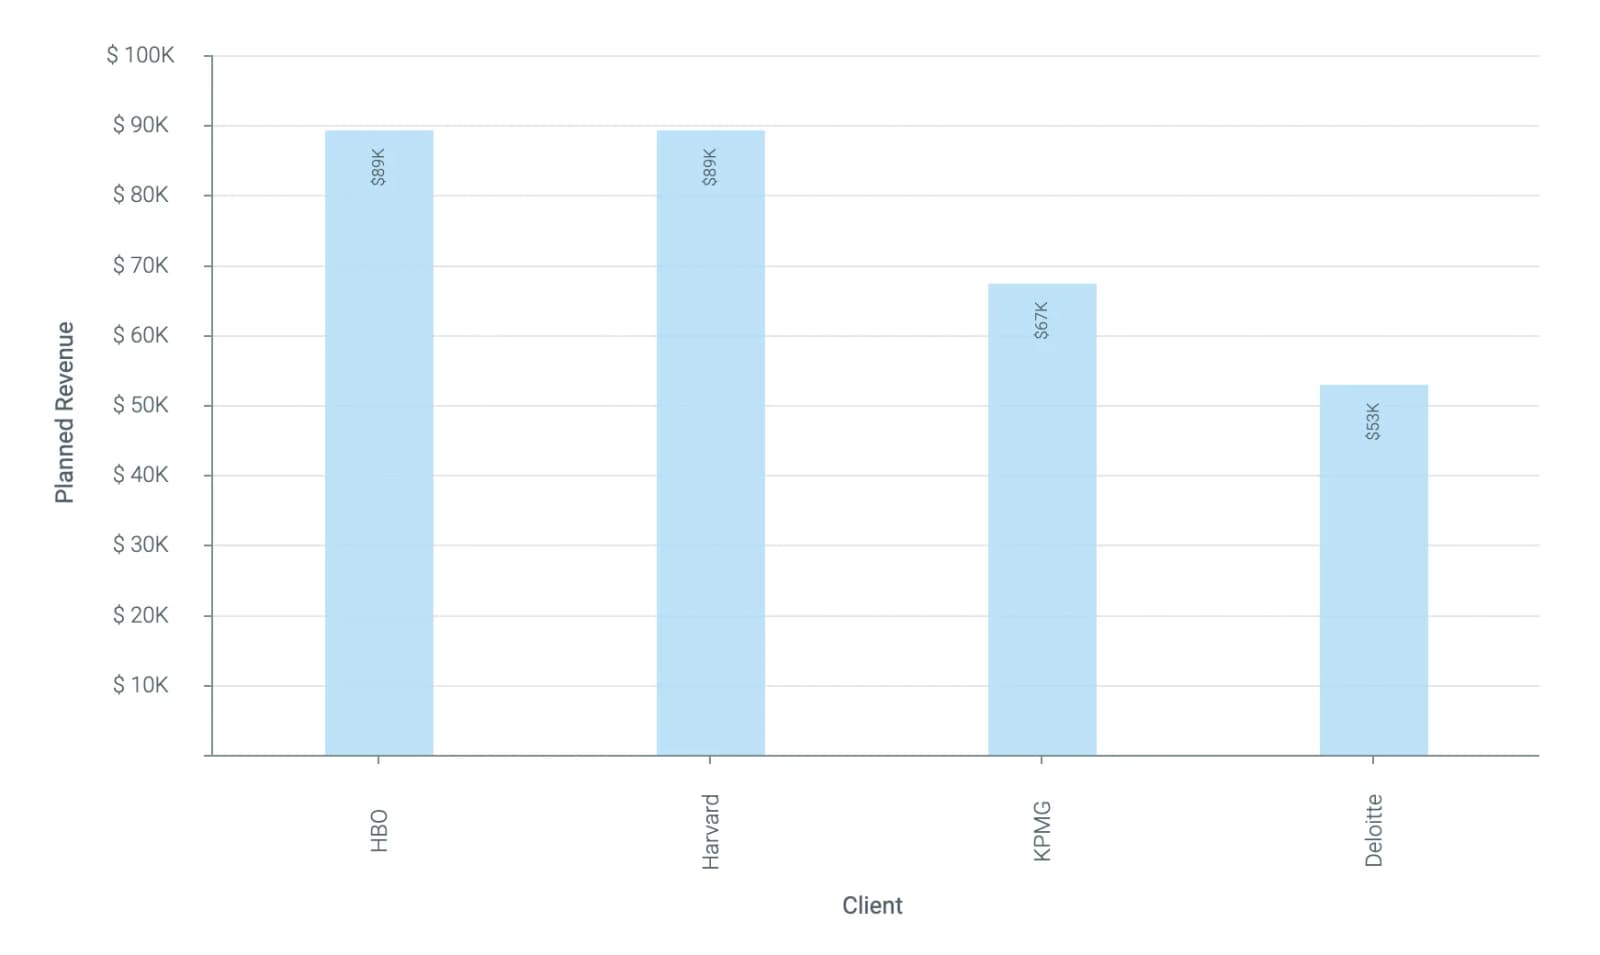
Comparison Bar
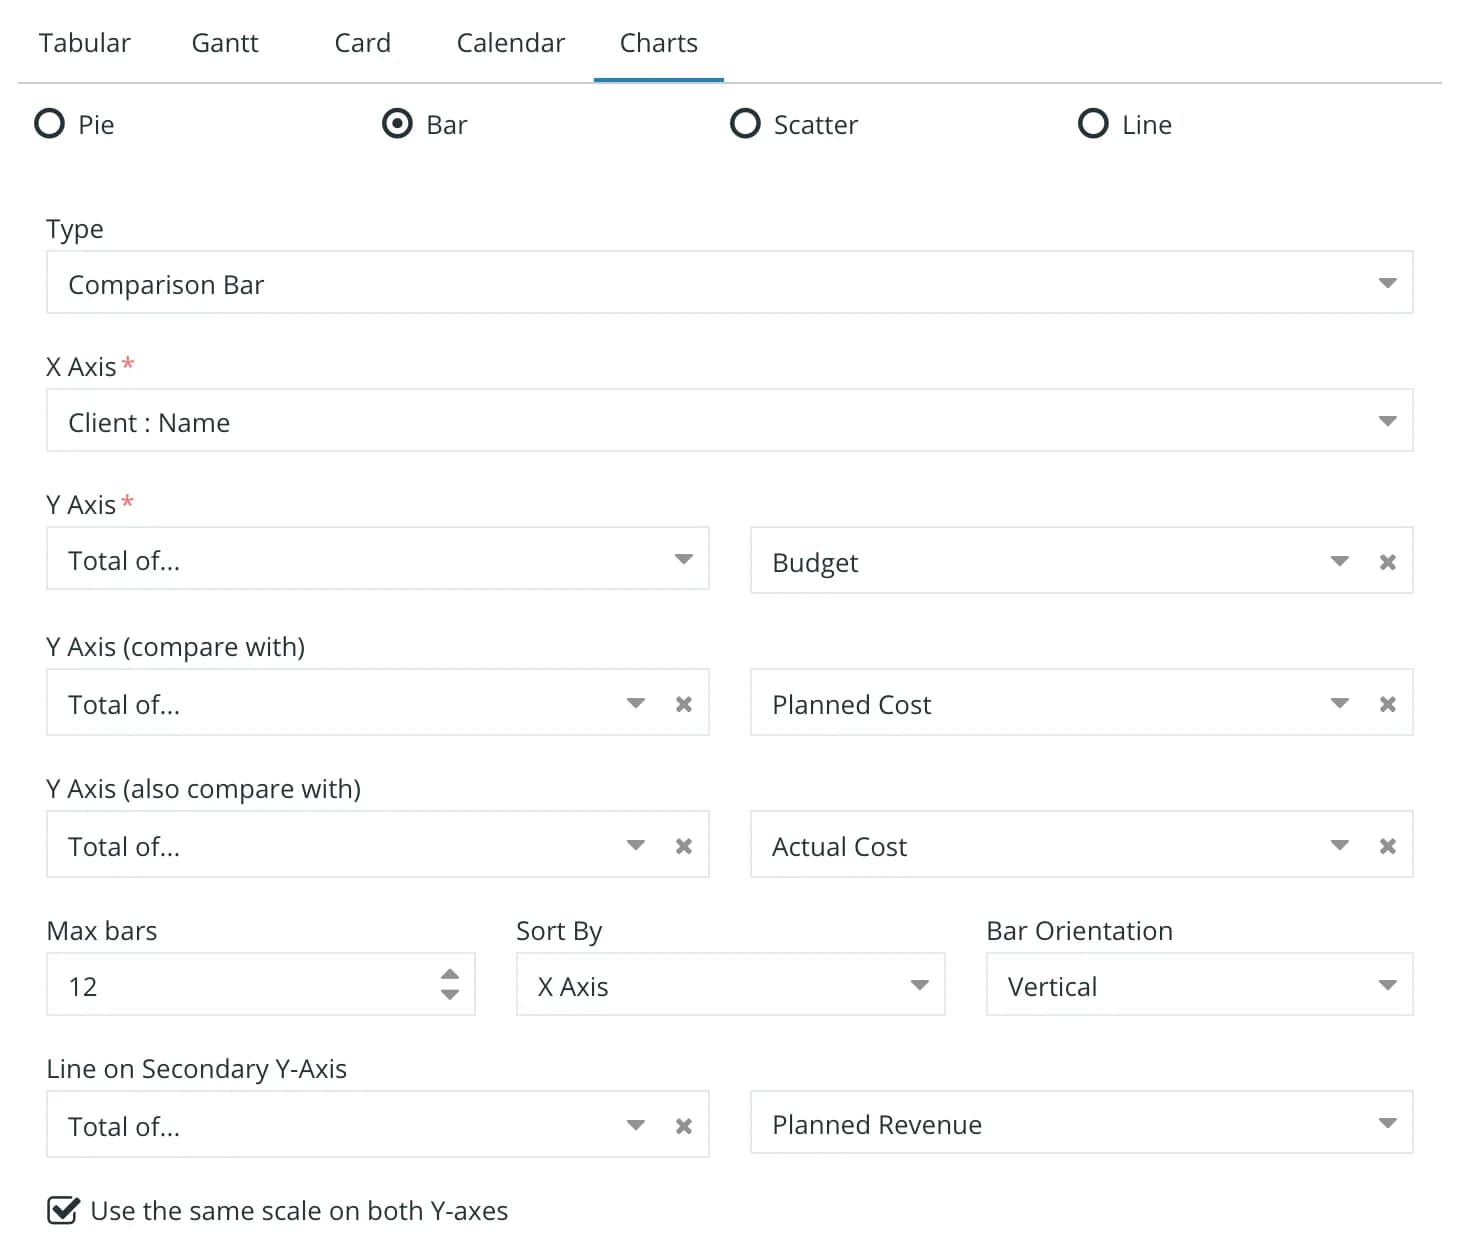
The following comparison bar chart was generated using these settings.
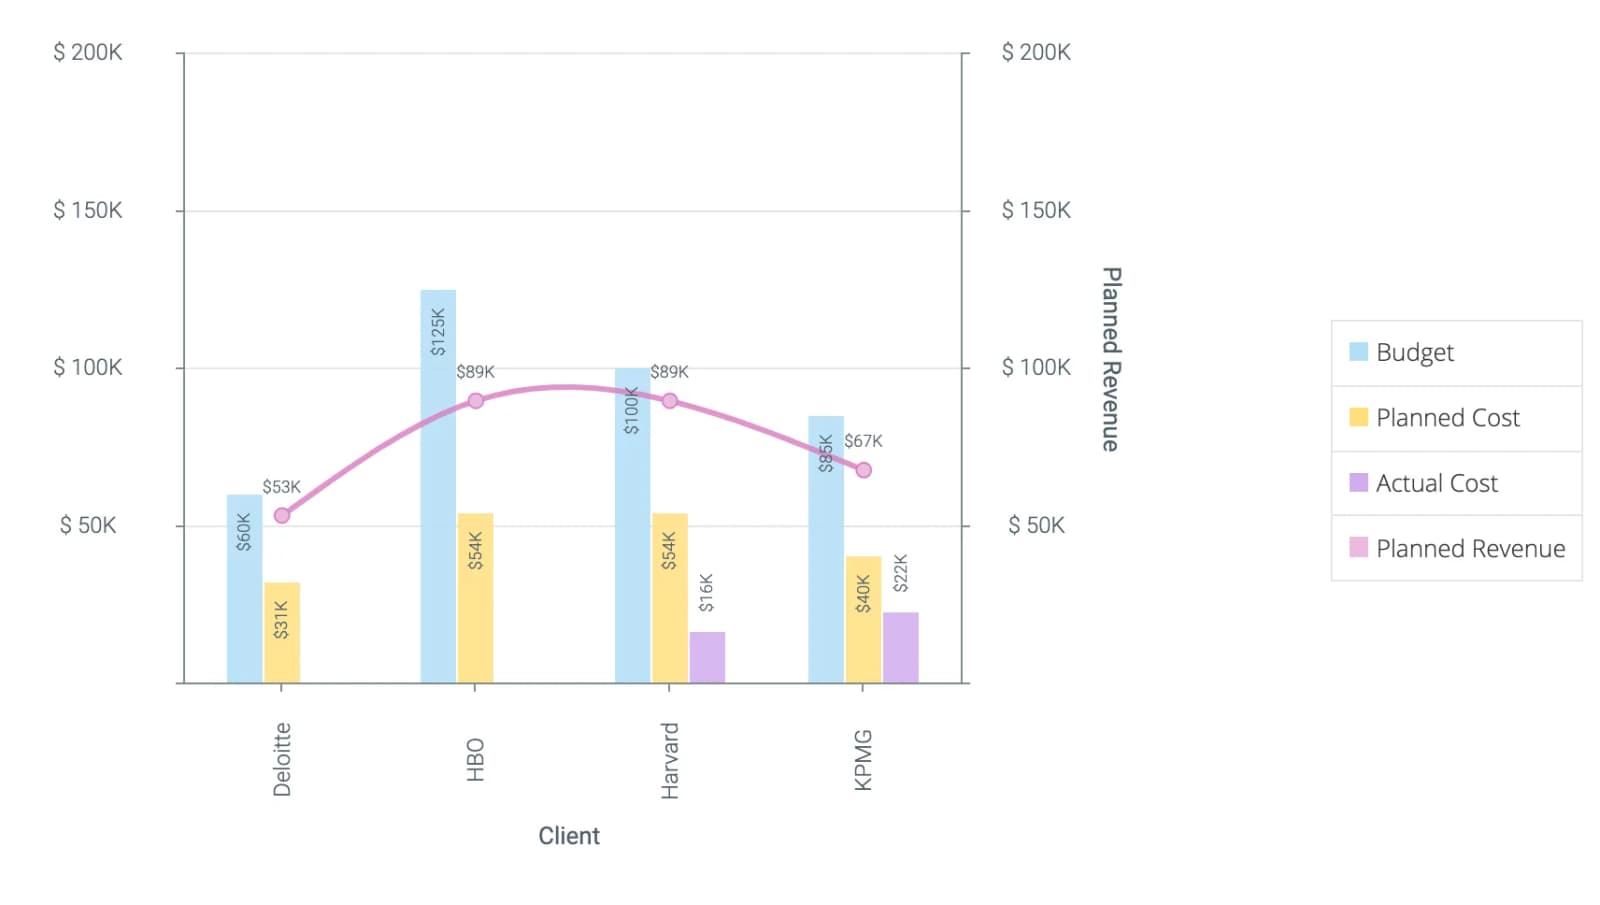
Stacked Bar
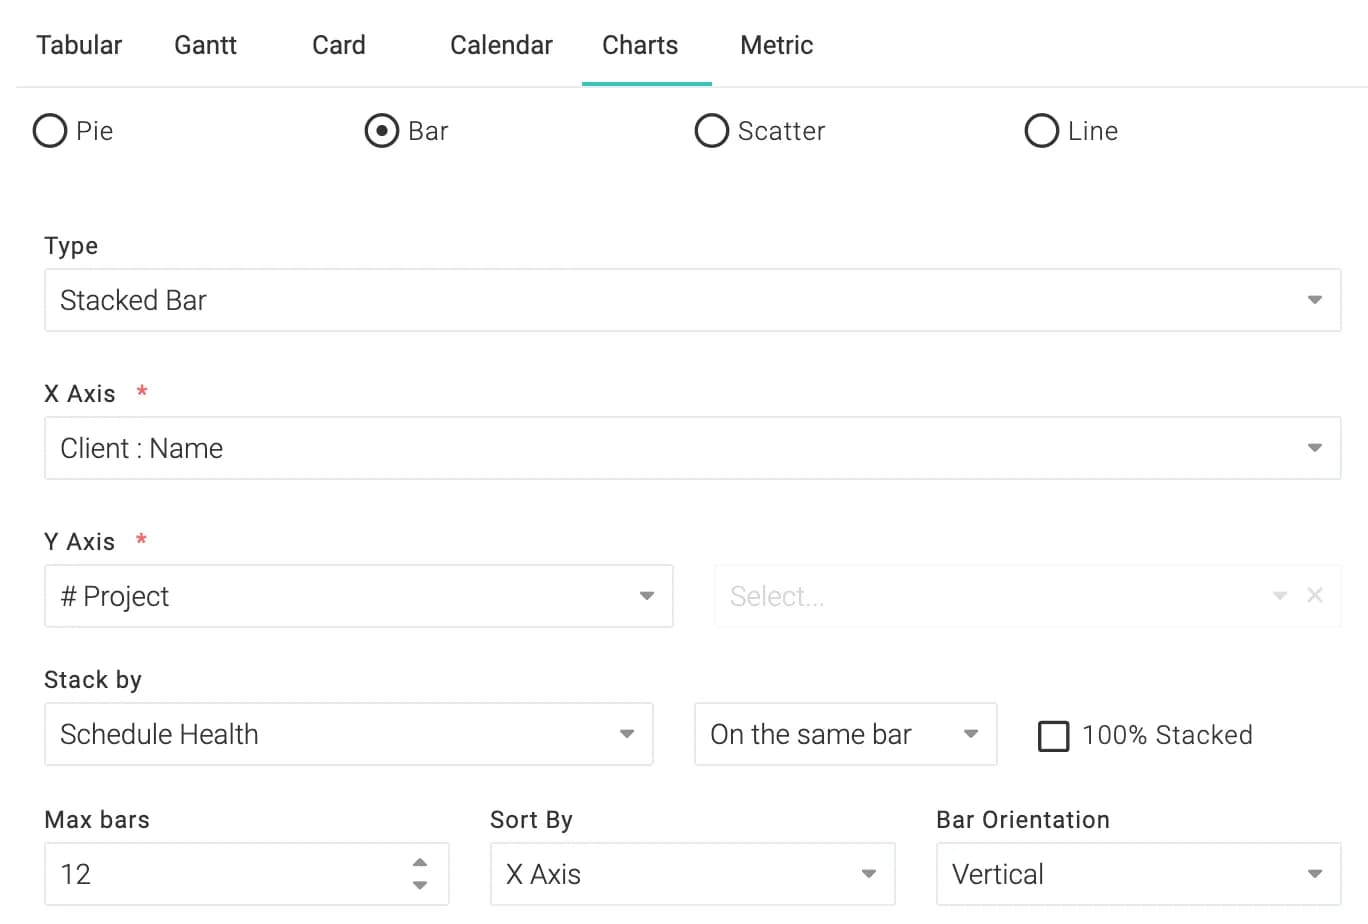
The following stacked bar chart was generated using these settings. Notice how the colors correspond to the color of the health indicator.
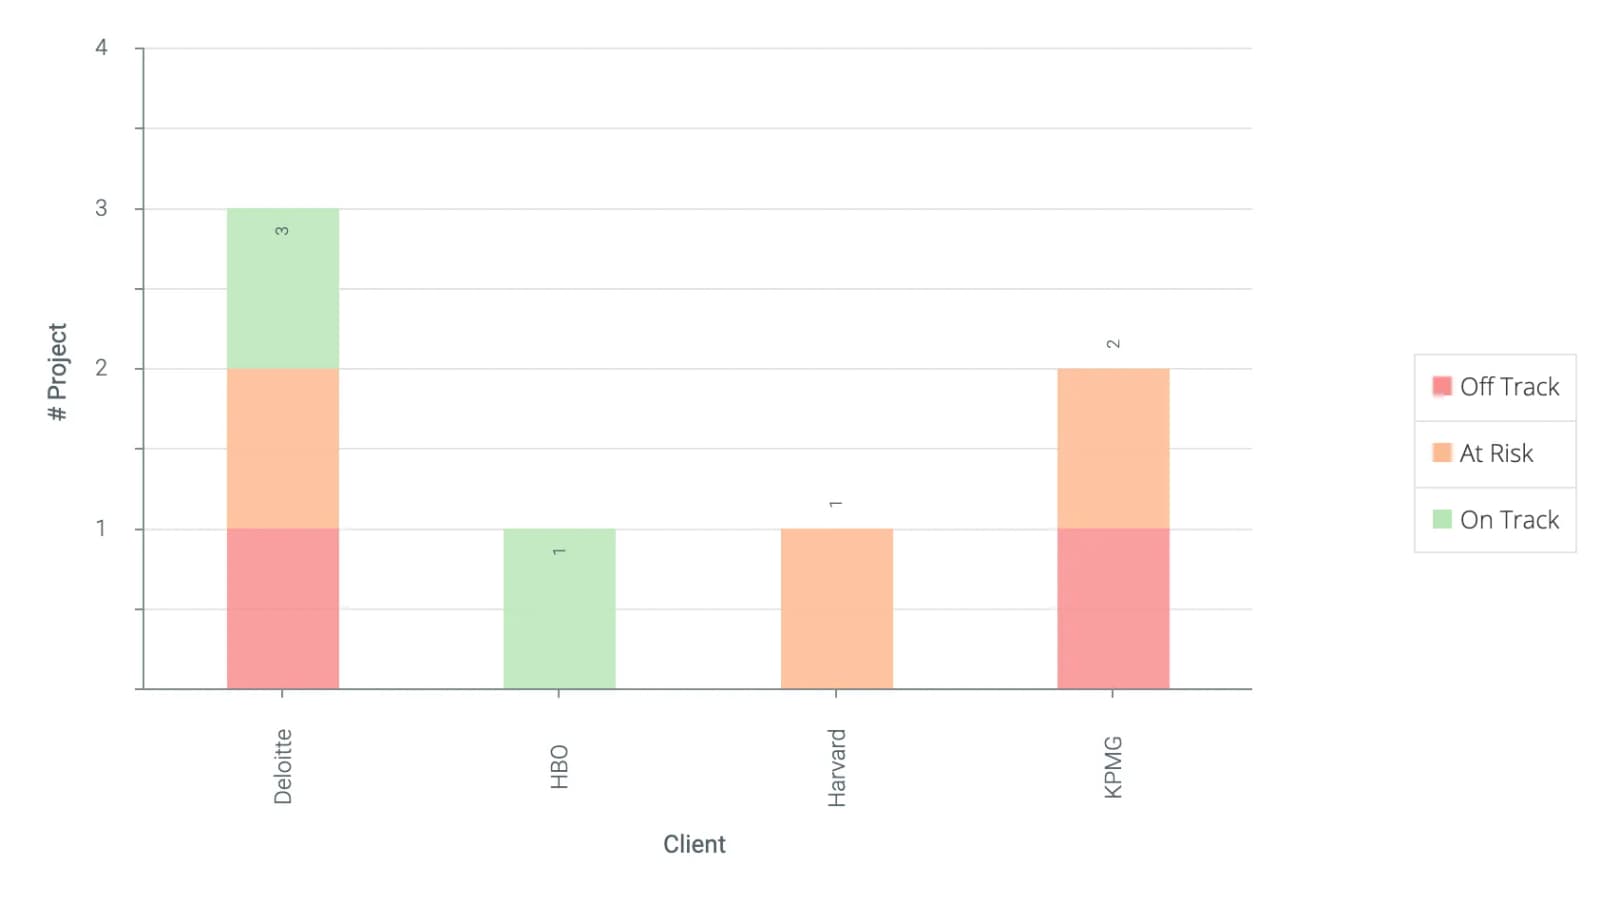
You also have the option of stacking it side-by-side.
Scatter
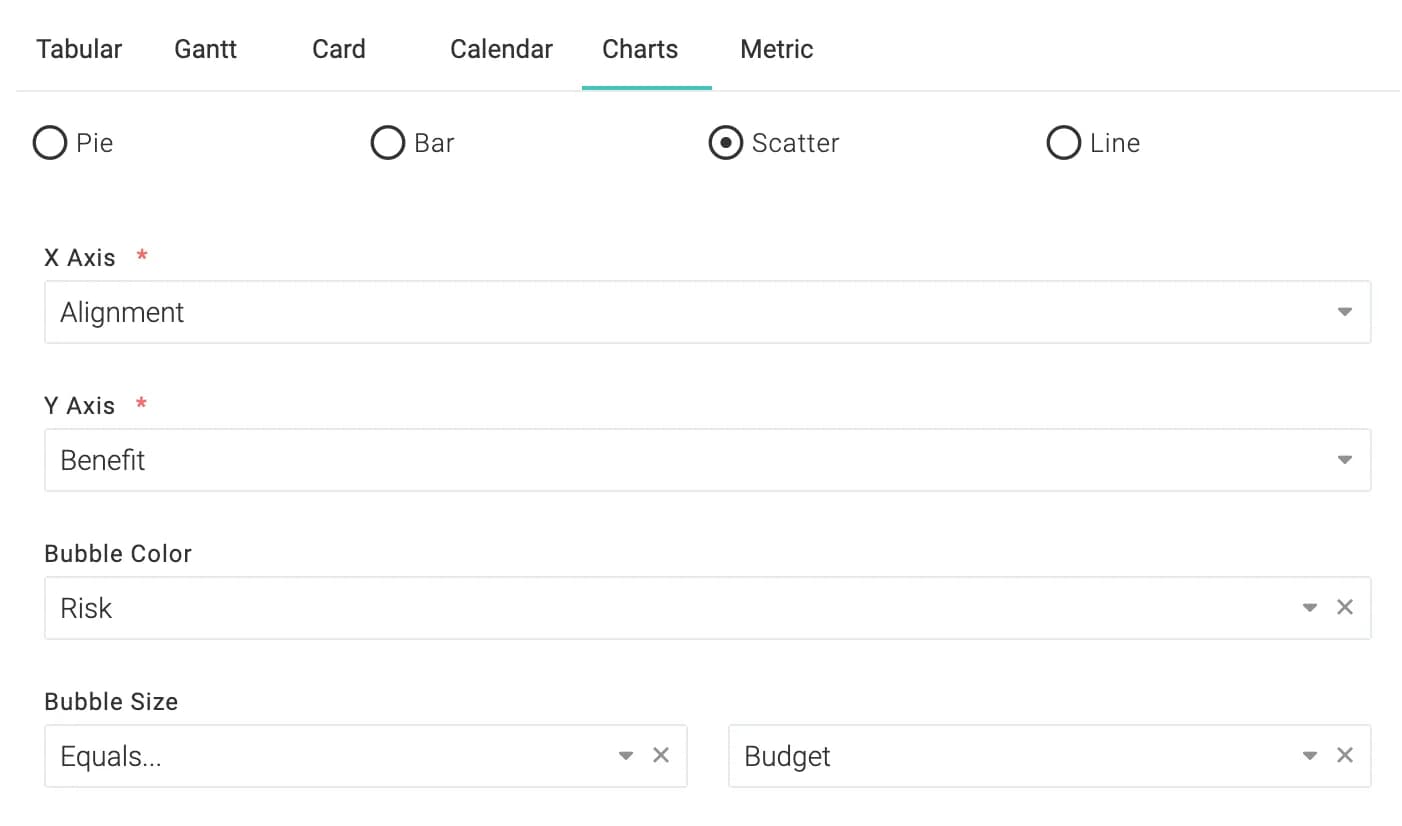
The following bubble chart was generated using these settings.
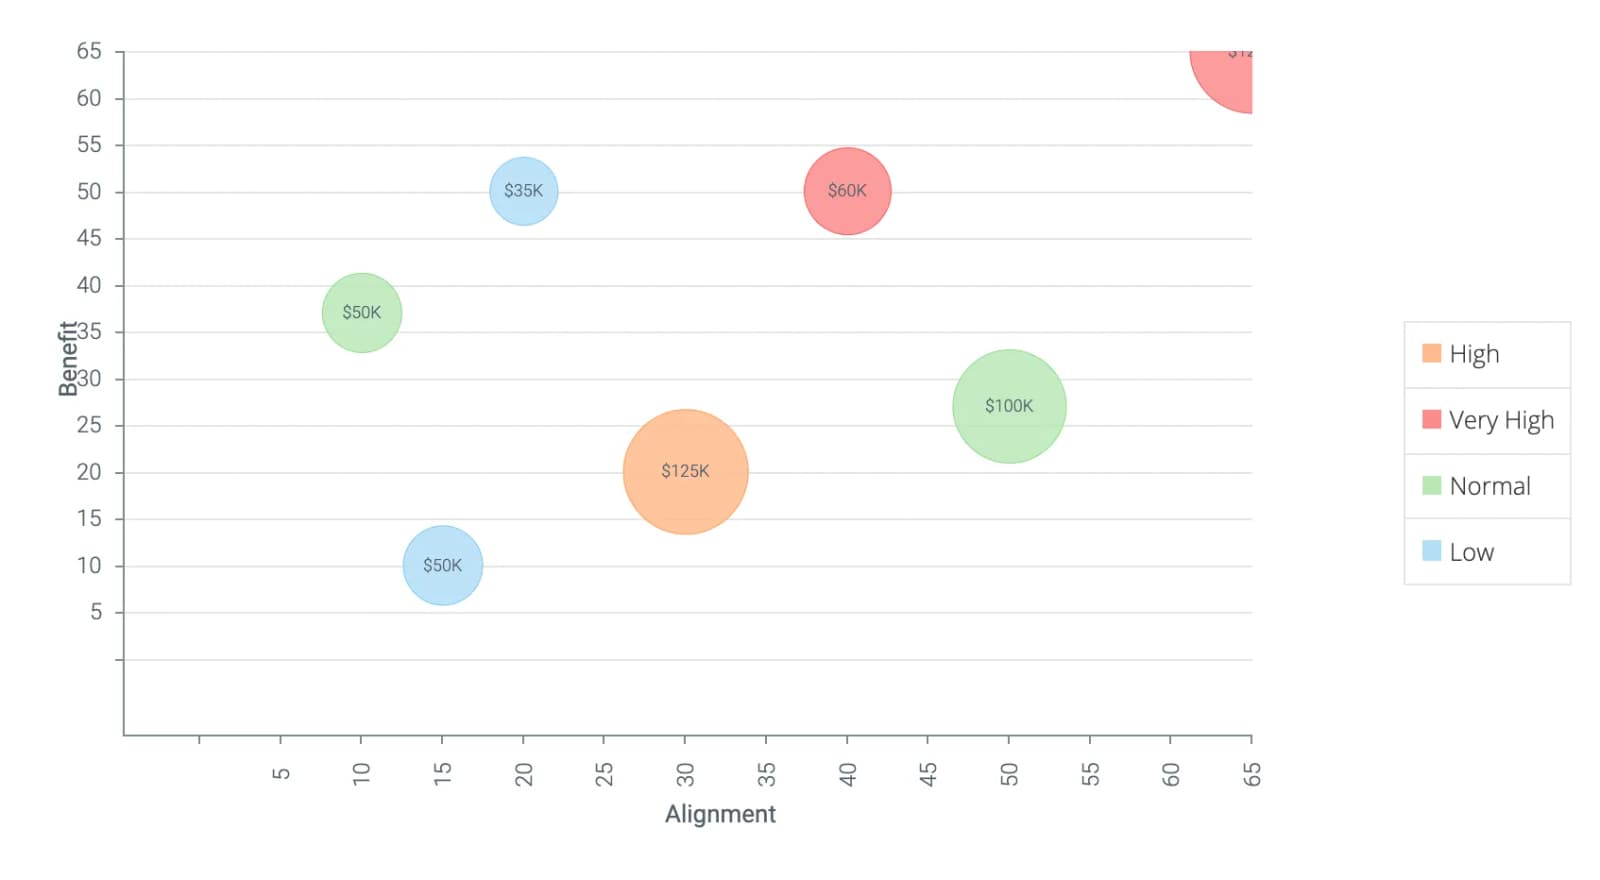
If you do not select the bubble size, then this will become a scatter chart and all bubbles will be of the same size.
Card
Card view is available as an output type for projects, tasks and apps. You can also drag and drop card across lanes if the lane's attribute is user-editable. For example, you can drag and drop if the lane was a custom field like Kanban State but not if the lane was system calculated field like Schedule Health.
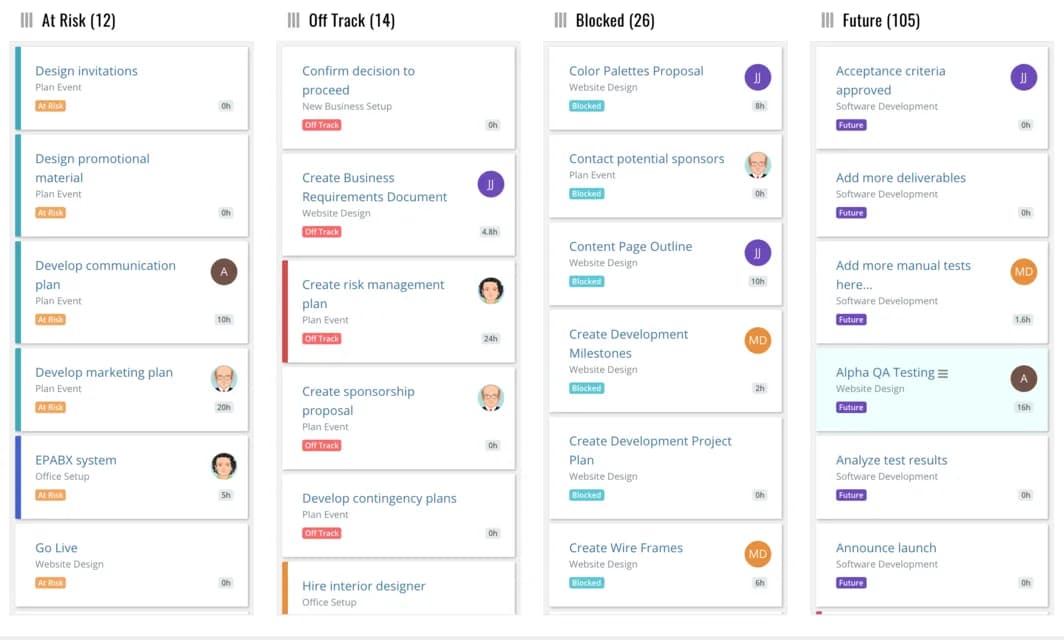
Marking tasks as 100% complete
When a task is dragged to a certain column in the card view it is often desired that it should be automatically marked as 100% complete.
To set this up, log in as a user with administrator privilege and go to Main MenuAdminProject ManagementProject Options. You should see a field called Final State in Kanban. Select the column in which you want the task to be marked as 100% complete and save.
In the following example, we have selected Kanban State > Done. You can select any other custom field that you use for your card view. This means that when the Kanban State custom field of a task is set to Done, the task will automatically be marked as 100% complete. This can be achieved by the end-user either by drag-n-drop in the card view or by editing the task and setting the Kanban State field to Done.
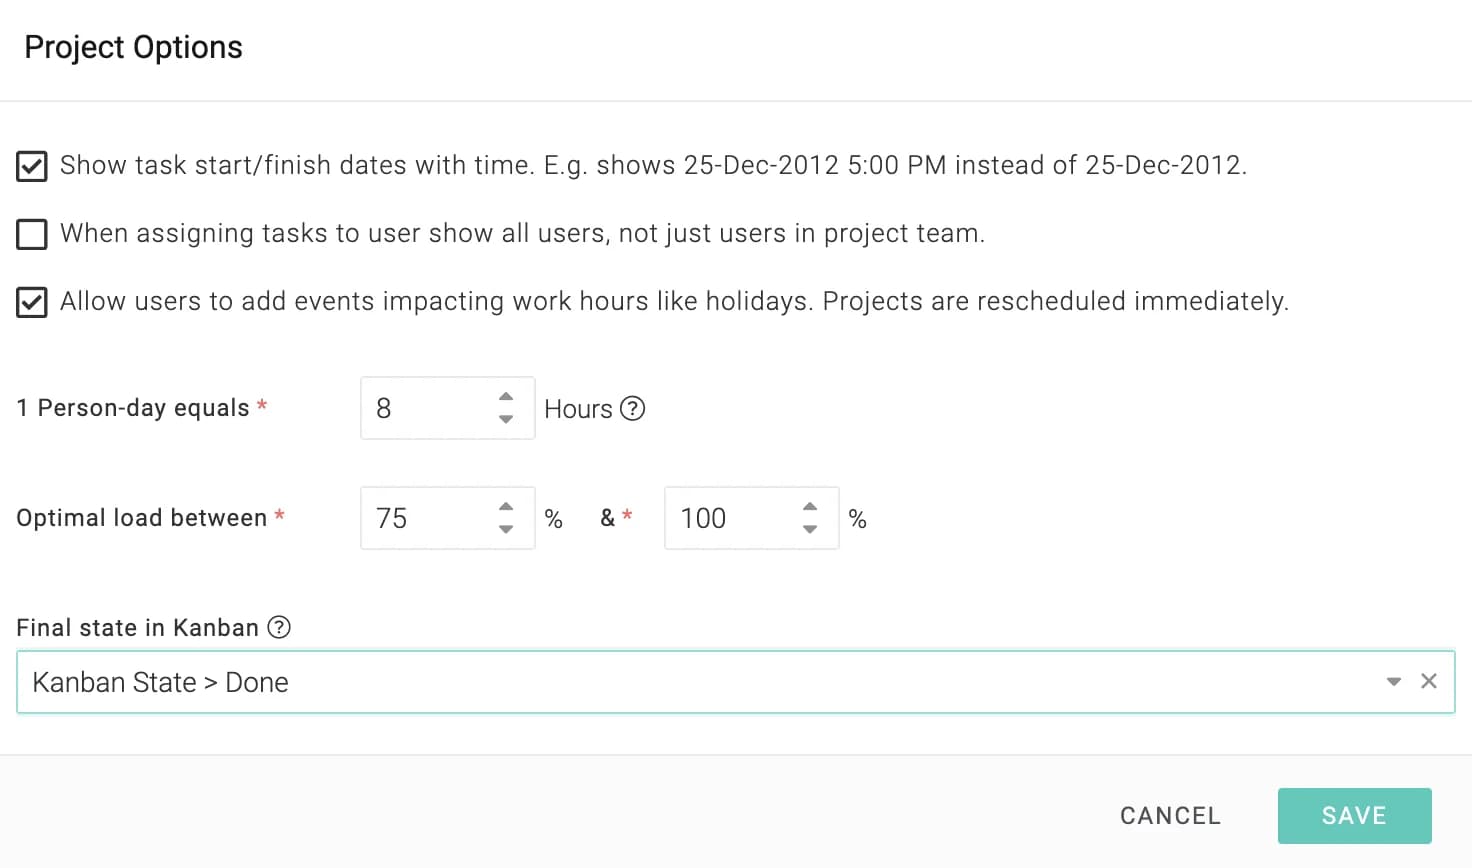
Naturally, if a task is marked 100% complete, its Kanban State will be automatically set to Done.
Also, if the custom field of a completed task is modified to anything other than Done, its percent complete will be reverted to the previous value. Similarly, if the percent complete of a completed task is set to anything other than 100%, its Kanban State field will be set to the previous value.
ReportsConcepts
Scheduling
Administrators can schedule reports to be emailed to specific users at regular intervals. To schedule a report, open the edit report screen and then click on the Schedule tab. You will see something like:
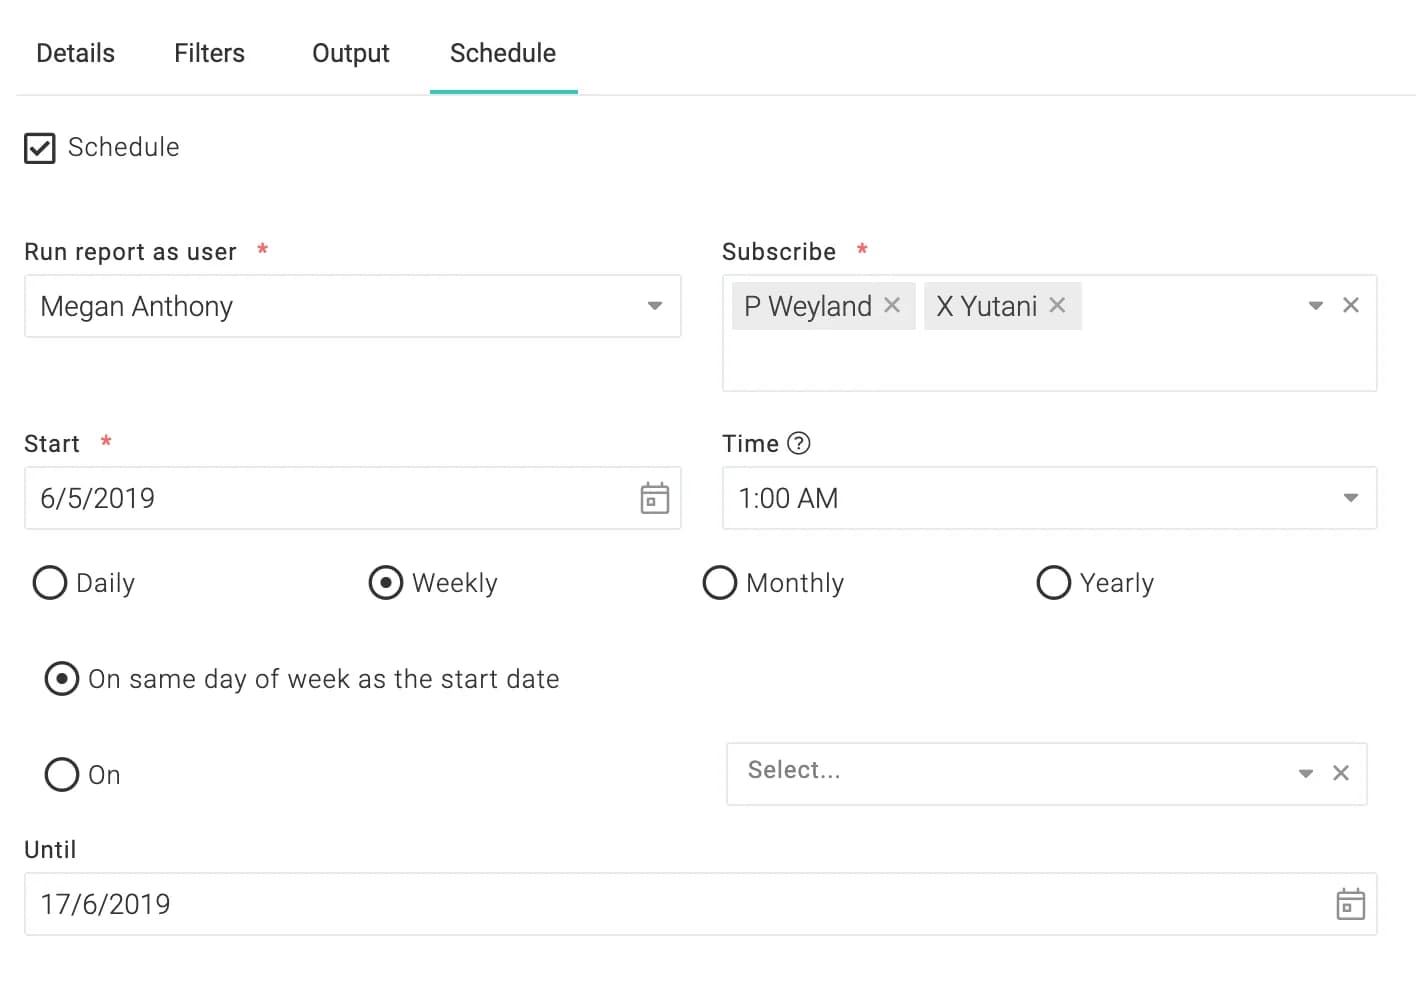
In the above example, the report will be run with the running user as Megan every Monday (since 06th May 2019 is a Monday) at 1:00 AM and the resulting PDF will be emailed to Weyland and Yutani.
Only non-virtual users can be selected as the report subscribers
ReportsConcepts
Sharing
Reports can be shared with your team or with clients.
Sharing with users
Sharing with users is determined by the Visible to Users section in the Sharing tab on the add/edit report screen.
- To keep a report private, do not share it with anyone.
- To share it with everyone in your company, choose -All-
- To share it with specified workspaces, select those workspaces.
- To share it with specific job roles, select those job roles.
Adding reports to user's main menu
Administrators can, for convenience, make reports part of the main menu. To do this, edit the report and choose the main menu item from the Menu Shortcut field.
Sharing with clients
Sharing with clients is determined by the Visible to Clients section in the Sharing tab on the add/edit report screen.
- To keep a report hidden from clients, do not share it with anyone.
- To share it with specified clients, select those clients.
- To share it with all clients, choose -All-
.
ReportsConcepts
Project Tabs
The tabs that you see on the project screen are also reports.

Your account comes with some default tabs but your administrator can customize them to suit your organization. Open Main MenuAdminProject ManagementProject Tabs and you can add, edit, delete, and reorder the reports. A sample of the project views management screen is show below. Note now the order of the reports corresponds to the order of the project tabs.
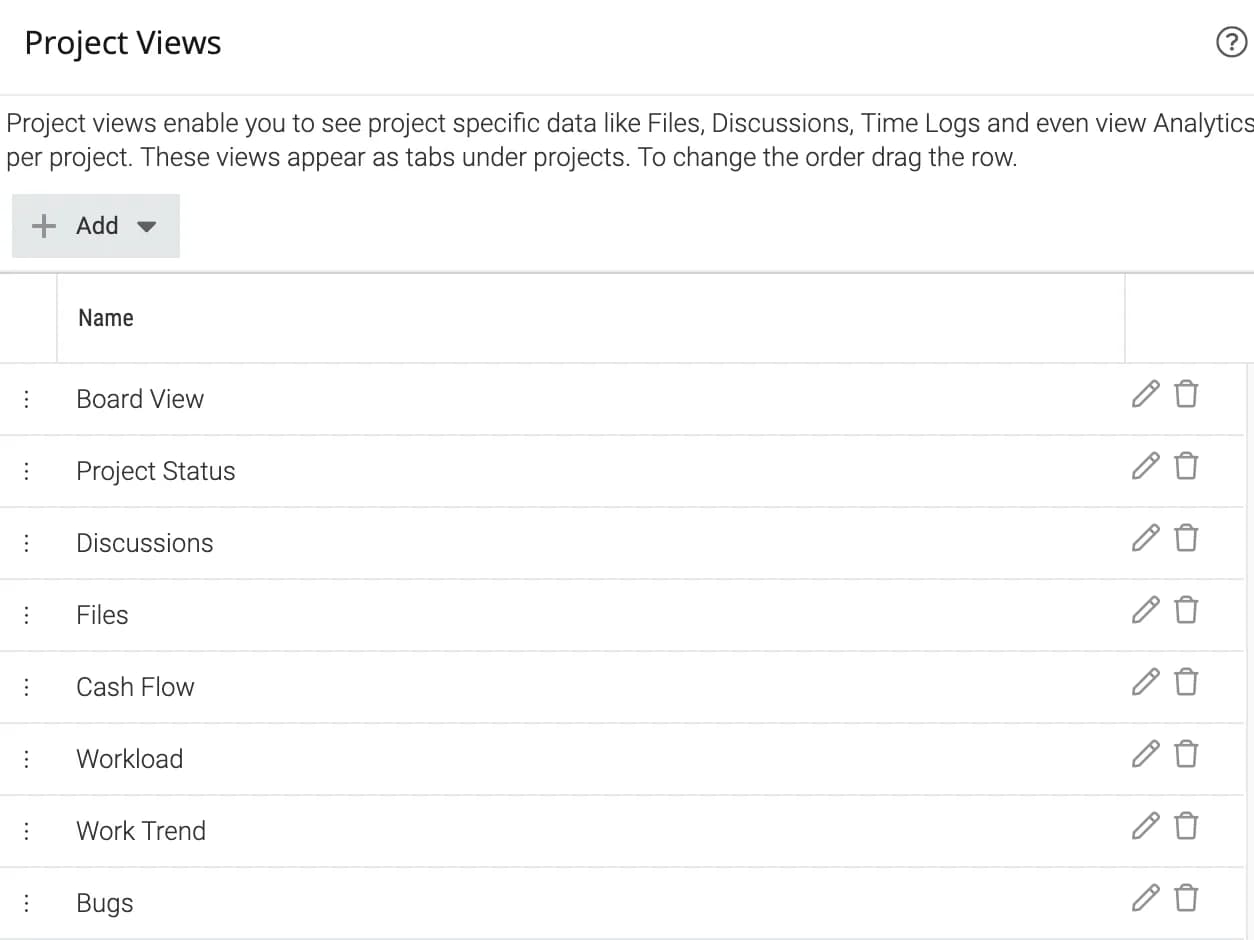
ReportsConcepts
Dashboards
Dashboards are one of the most important screens in Celoxis. Not just for the information they can convey but also for the amount of things you can get done right from your dashboard.
A dashboard is a collection of reports. You can create different dashboards for different roles and functions. For example, you can create a task and project monitoring dashboard as well as the popular RAID logs dashboard for your project managers.
You can also create dashboards for clients. Client can get a nice overview of their projects, track their change requests, approvals, etc., and keep tabs on their online discussions.
An example:
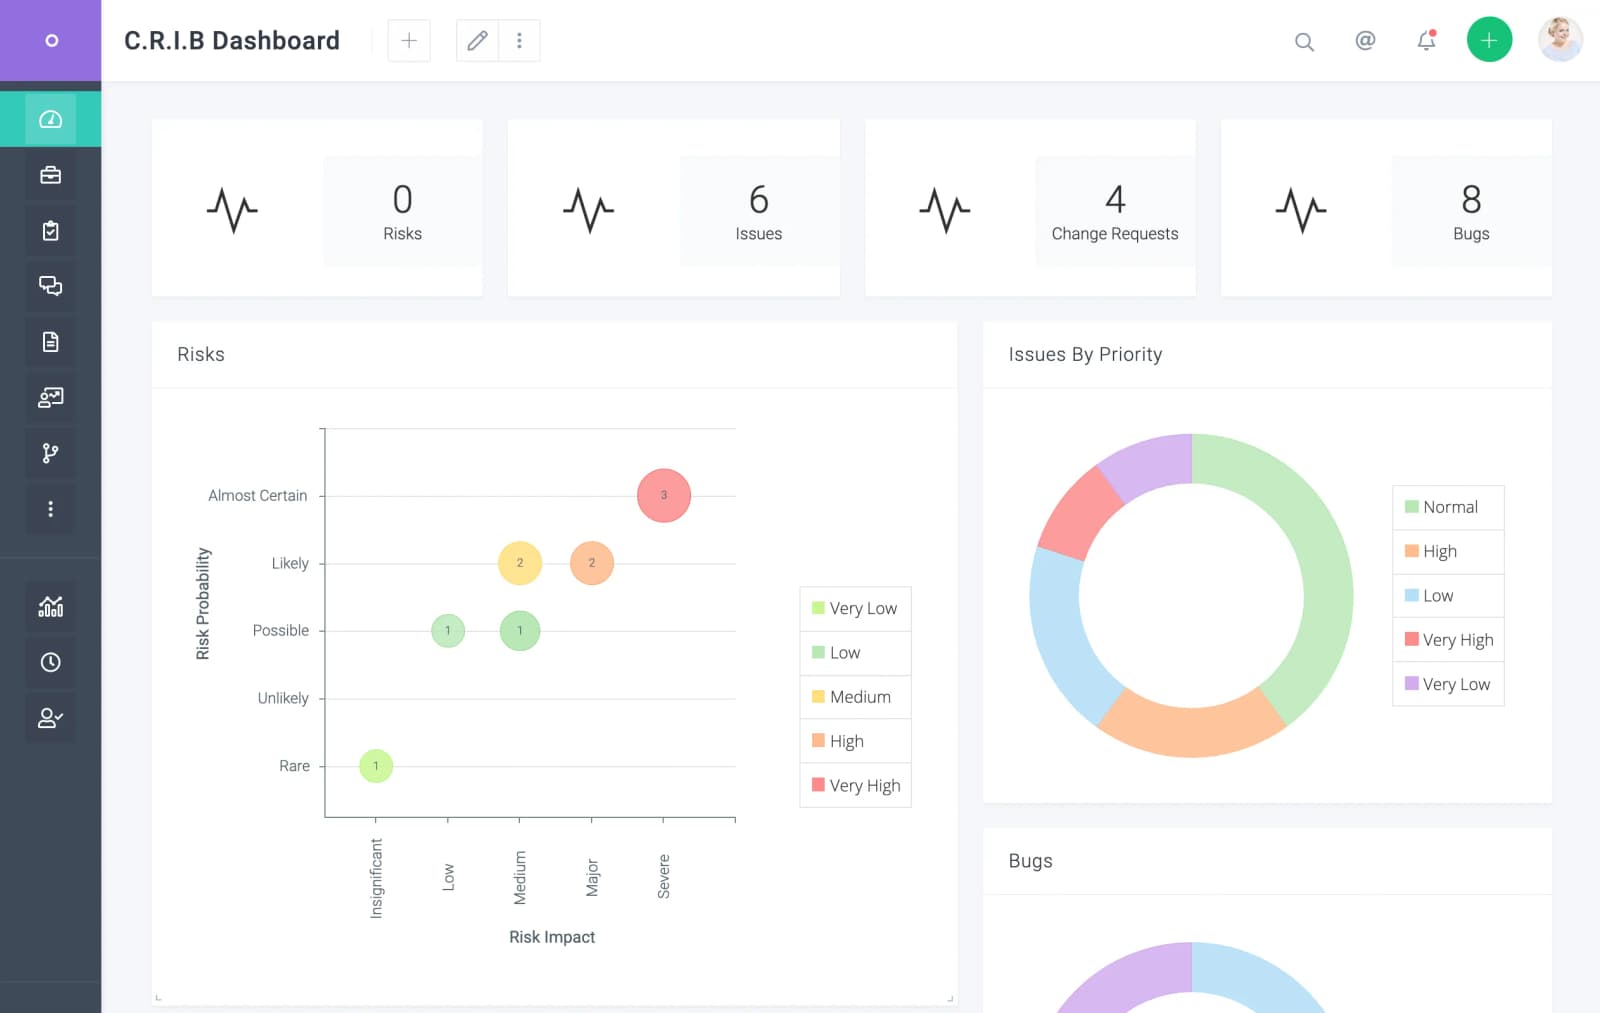
Creating Dashboards
Celoxis allows shared dashboards as well as private dashboards. To create a dashboard choose Dashboard from the Main MenuReportsAll ReportsPlus menu. An example: In the above example, we are creating a dashboard that is:
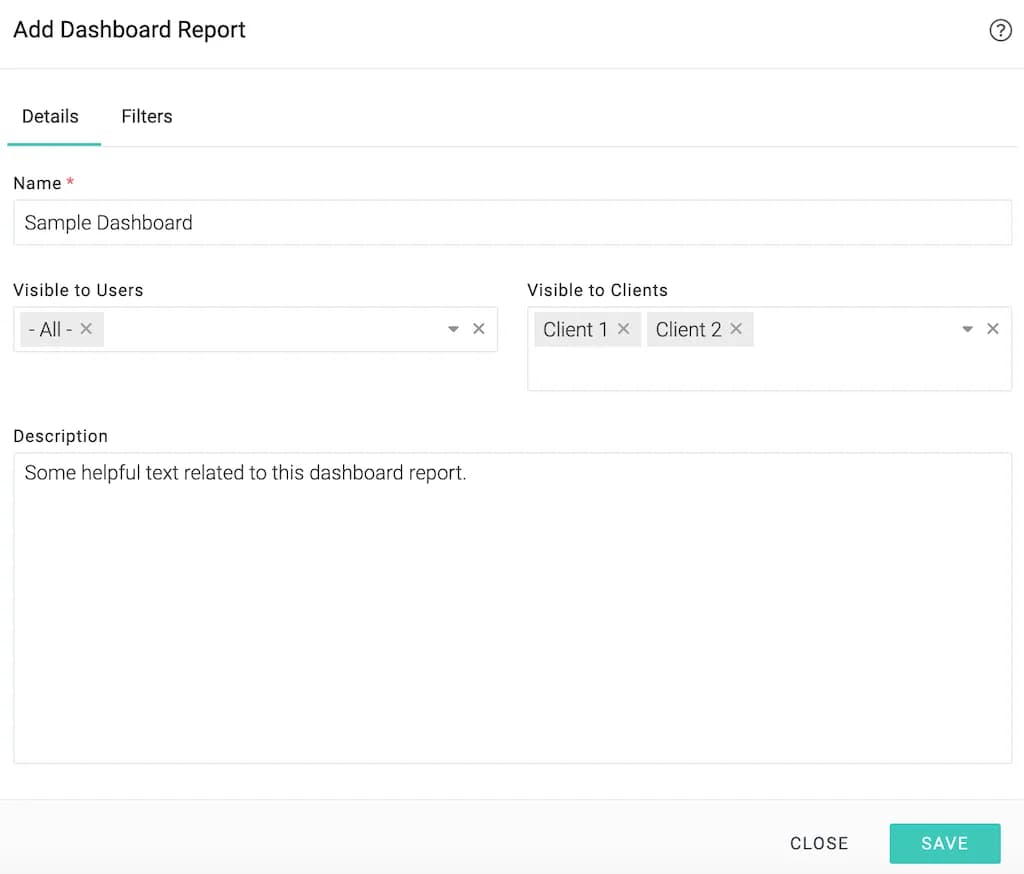
- Named: Sample Dashboard
- Shared with all users
- Shared with clients: Client1 and Client 2
Filters
The dashboard filters allow data of only those projects that match the filter criteria. Marking filters as Prompt enable the person running the report to change its values.
Shared Dashboards
To create shared dashboards you will need the Add ReportGranted privilege. This can be set from the Main MenuAdminAccount ManagementAccess Control screen. To maintain control, we recommend that you give this privilege only to responsible users.
Personal Dashboards
Personal dashboards are dashboards that are only visible to their creators. Personal dashboards can be created by users who have the privilege. To allow creation of personal dashboards, check the Allow Personal Dashboards option from Main MenuAdminAccess ControlCompany Information screen.
Assigning Dashboards to Users & Clients
Dashboards can be assigned to users and clients from their add/edit screen's Preferences tab. You can assign multiple dashboards and reorder them too. The first dashboard becomes the default dashboard for that user. Let's see the dashboard selection for Joe: From the above image we can see that Joe has been assigned three dashboards: Tracking Board - that lists out status of projects and tasks, RAID log - that tracks Risks, Issues, etc. and Weekly Status - that allows him to track the weekly updates.
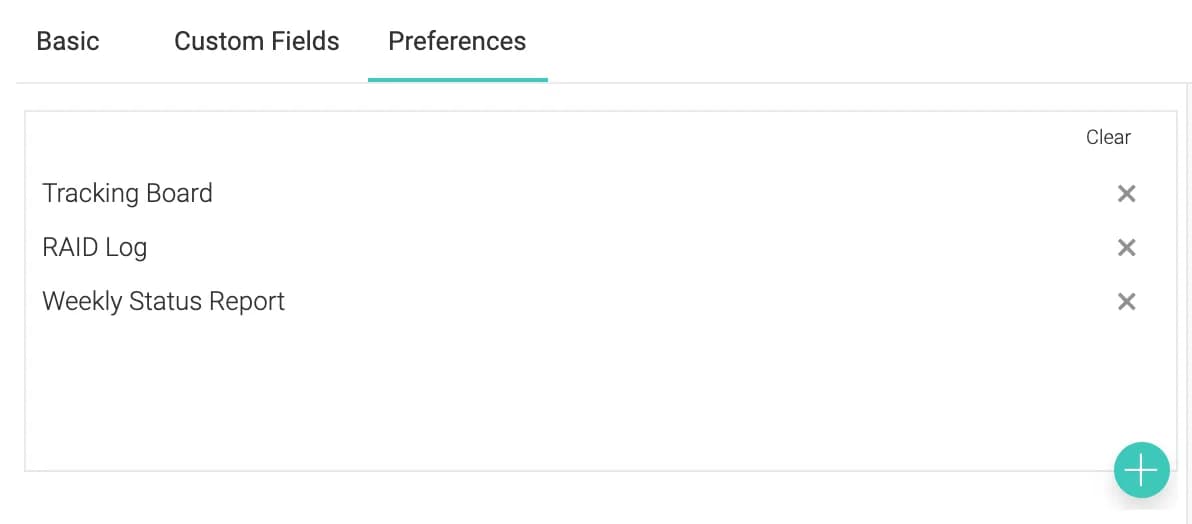
If Joe, after logging in, clicks on Dashboard in the main menu, he would see something like:
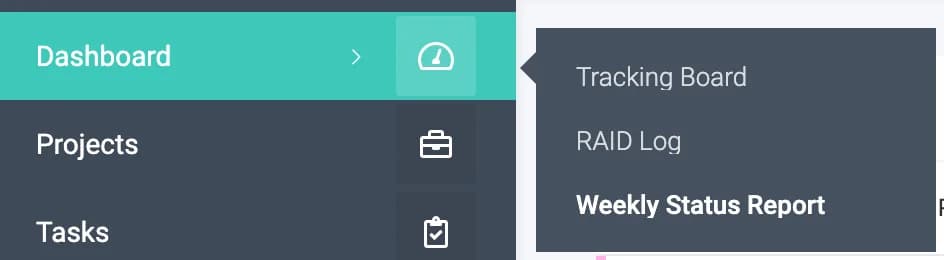
Assigning dashboards similar to another user or client
Using the bulk edit screen's Dashboard Like... field, you can set the dashboard of multiple people to be like a particular person. For example, you can select Mark, Peter and Luke and make their dashboards exactly like Xavier.
Printing dashboards to PDF
You can export a dashboard to PDF or even an image. To print, consult the following image:
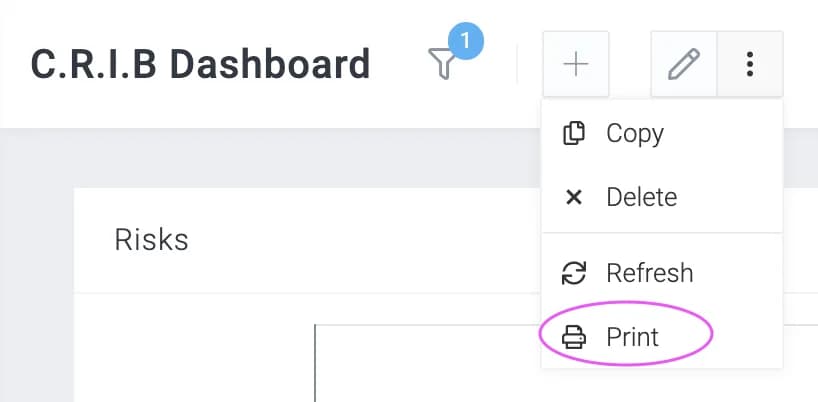
Limits
Please read the Limits chapter for more information.
ReportsConcepts
Limits
Fetching and processing large amount of data not only slows down your response times but also for other users. We have put reasonable limits on the amount of data required to generate reports. If you are an On-Premise customer, you can change these limits but we strongly recommend that you do it after much deliberation.
Report Limits
15,000 records
For any report to run, it performs database queries. If a query returns more than 15,000 rows, the report does not run and an error message is shown to the user.
To remedy this problem, you should add more filters, especially those filters that can be performed in the database query itself. The most common filters are date filters since most likely you are interested in recent data. Project state filter, task completed filter and time entry state filter are also some useful filters that you should consider in limiting data.
Duration in Time Phased reports
Time phased reports are resource intensive as they perform a lot of dynamic calculations. The Period filter selects the duration of the report and is limited as follows:
- If zoom level is Day the period cannot exceed 3 months.
- If zoom level is Week or Month the period cannot exceed 12 months.
Dashboard Limits
A dashboard is a collection of reports. It is equivalent to running all the reports at once. Naturally, to control performance, we have to put some additional limitations on dashboards.
A dashboard has the following limits:
- Incomplete timesheet reports are not allowed on dashboards. You can star them for quick access.
- A dashboard can have a maximum of 10 reports.
- The number of shared dashboards per account depends on the number of purchases users.
Shared dashboards = min(max(20, users × 2), 100)This means that every account will have a minimum of 20 and a maximum of 100 shared dashboards.
Actions
ReportsActions
Managing Reports
To create reports, you must have the Reports > AddGranted privilege. To add a report, open the reports' panel by clicking Main MenuReportsAll Reports and then click the New Report button. Then pick an appropriate report type. This will open a form, details of which are explained below:
Details
Menu Shortcut - The main menu item under which this report should appear for quick access.
Filters
The filters to limit the data for this report. Read More.
Output
The display you would like for this report - pie chart, bar chart, tabular, etc. Read More.
Sharing
Reports can be shared with your team or with clients. Read More.
Schedule
Whether you would like Celoxis to email this report at regular intervals. Read More.
ReportsActions
Starring Reports
To get quick access to reports, you must star it. Starred reports appear in the Main MenuReports menu. Some reports, because of performance reasons, cannot be put on dashboards. If you use them regularly, then it will be a good idea to star them so that you can access them in a couple of clicks.
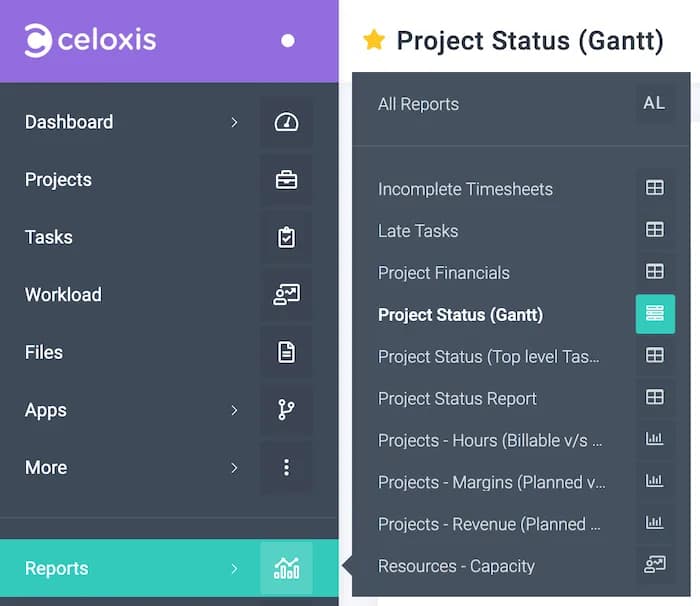
To star or unstar a report, first run that report and then click on the or icon in the report title. In the above example, the report is already starred as indicated by the filled star prefixed in the report title.
ReportsActions
Downloading Reports
PDF & Image
Click on or in the page title followed by Print. This will open up a popup like the one one shown below.
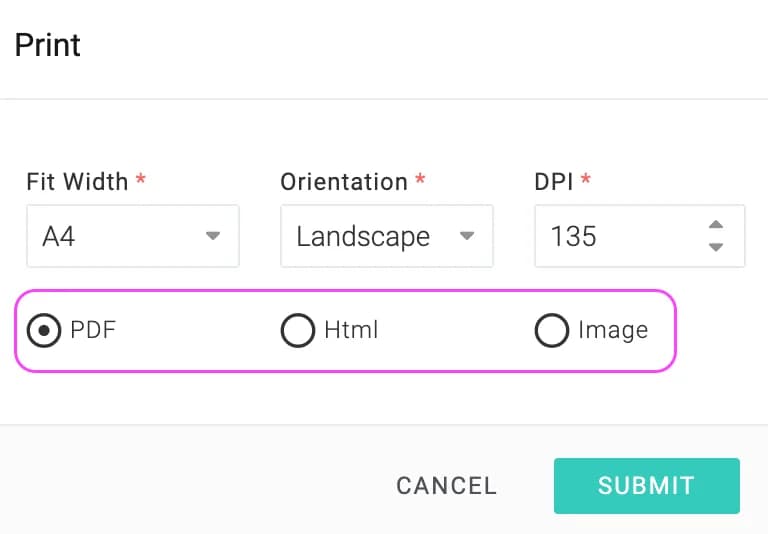
CSV
Click on in the page title followed by one of the following options:
- CSV – all records in the report are exported but there is no grouping of data
- CSV (Grouped) – all records in the report are exported and grouped as you see in your browser
Users
11 articlesConcepts
UsersConcepts
Access Type
The main purpose of access types is to reduce license costs for end-users. By selecting the appropriate access types for users, you can ensure that you pay only for what you use.
There are the following access types:
- Full Access
- Team Member
- Timesheet-only
- App-only
- Passive
Full Access
Users who are of this type can do everything in the system (if granted access). This type is meant for project managers, resource managers, portfolio managers and CXOs. Admin users must also be of this type.
Team Member
This type is meant for your team members who work on their own items and not manage other people's work.
They have access to limited functionality - they do not have access to gantt charts but can view and update tasks, log time and expense, engage in discussions and participate in issue tracking, change requests, risks, and other custom apps.
They can view dashboards and reports but do not have access to certain report types like trend reports. Also, they can only view data in tabular format.
Utilization analysis and capacity planning can be performed by managers on these users.
Timesheet-only
Timesheet-only users can only fill time sheets. They can also update % and enter comments for tasks but only from their timesheets.
These users are not considered in utilization analysis and capacity planning.
App-only
App-only users can only participate in apps - in predefined like issue tracking, risk management etc. and your custom apps as well. They cannot log time.
These users are not considered in utilization analysis and capacity planning.
Passive
Passive users do not have a login in Celoxis. This type is meant for those users for whom you wish to track tasks, utilization and capacity.
You can assign tasks, holidays, work exceptions to these users. You can also import their time logs via CSV or API however time cannot filled for them from the weekly timesheet screen.
UsersConcepts
Virtual Users
Virtual users are like regular users except they don't have logins and hence cannot login to Celoxis. Virtual users are free but limited. Some use-cases are non-human resources like machinery, conference rooms and computers. Virtual users can also be used in instances where you want to assign tasks to that person but do not want to give access to the system. E.g. consultants.
Using Virtual Users
Virtual users:
- can be assigned to tasks
- receive related email notifications - task, discussions, etc if their account has an email address is specified.
- can themselves update progress and log time on their tasks via email. Read more.
- can participate in discussions via email
- can add comments to app items via email
Creating Virtual Users
A virtual user is created in the same way as a regular user except that the Virtual User option is turned on.
Virtual Users Limit
The maximum number of virtual users you can create depends on the number of licenses users you have. It is determined by the following formula:
Virtual Users = 10 + 5 × Licensed UsersSo if you have a 12 user license, you can create a maximum of 10 + 5 × 12 = 70 virtual users.
UsersConcepts
Supervisor
You can create your organizational chart in Celoxis using Reporting Managers. The main advantages of creating your organizational structure are:
- Reporting managers have automatic visibility into their reportee's work.
- Reporting managers can be used in the time approval workflow.
Setting Reporting Managers
Since Reporting Manager is an attribute of the user, only administrators can change it. The field can be changed from the add/edit user screen in the Basic tab.
UsersConcepts
User Glossary
| Attribute | Read/Write | Description |
|---|---|---|
| Name | RW | Full name of the user. |
| RW | Email address of the user. The email notifications will be sent to this address. | |
| Phone | RW | Phone number of the user. |
| Last Accessed | R | Date and time when the user last accessed Celoxis. |
| Admin | RW | Whether the user has been granted admin privileges. |
| User Cost Rates | RW | The default per hour cost rate of the user. This can be overriden for a project if required. |
| Bill Rate | RW | The default per hour billing rate of the user. This can be overriden for a project if required. |
| ID | R | The database primary key of the user record. |
| Login | RW | Username with which the user will login to Celoxis. |
| JobRolePrimary | RW | The primary job role of the user. Read More. |
| Supervisor | RW | The reporting manager of the user. Read More. |
| Roles | RW | Security roles played by the user. Read More. |
| Virtual | RW | Virtual users cannot logon to Celoxis and is not counted towards license count.. Read More. |
| Work Calendar | RW | The calendar that defines the user's work timings. Read More. |
| Workspaces | R | The workspaces in which this user plays a role. Read More. |
Actions
UsersActions
Creating Users
Administrators can add users. If you have a large number of users, you should consider importing users from CSV.
To add one user at a time:
- Click on Main MenuUser
- Select an appropriate user and click Next
- Select the appropriate access type
- In the Basic tab:
- Fill in Name, Email, Work Calendar, and Reporting Manager.
- If you wish the user to have a login, enter login and password, else click on Virtual checkbox
- Assign appropriate roles
- In the Custom Fields tab, fill in the appropriate custom fields.
- The Preferences tab will be prefilled based on the user we selected in the 2nd step. Read more about this tab.
- Check the Add Another check box if you wish to add more users like this one
- Submit
If the user was created with a login, an email with login information will be sent to that person.
User Availability
You will now be able to add a Start and End date when adding or editing users. Once you do this, the Time Phased reports showing the availability and capacity will reflect correctly.
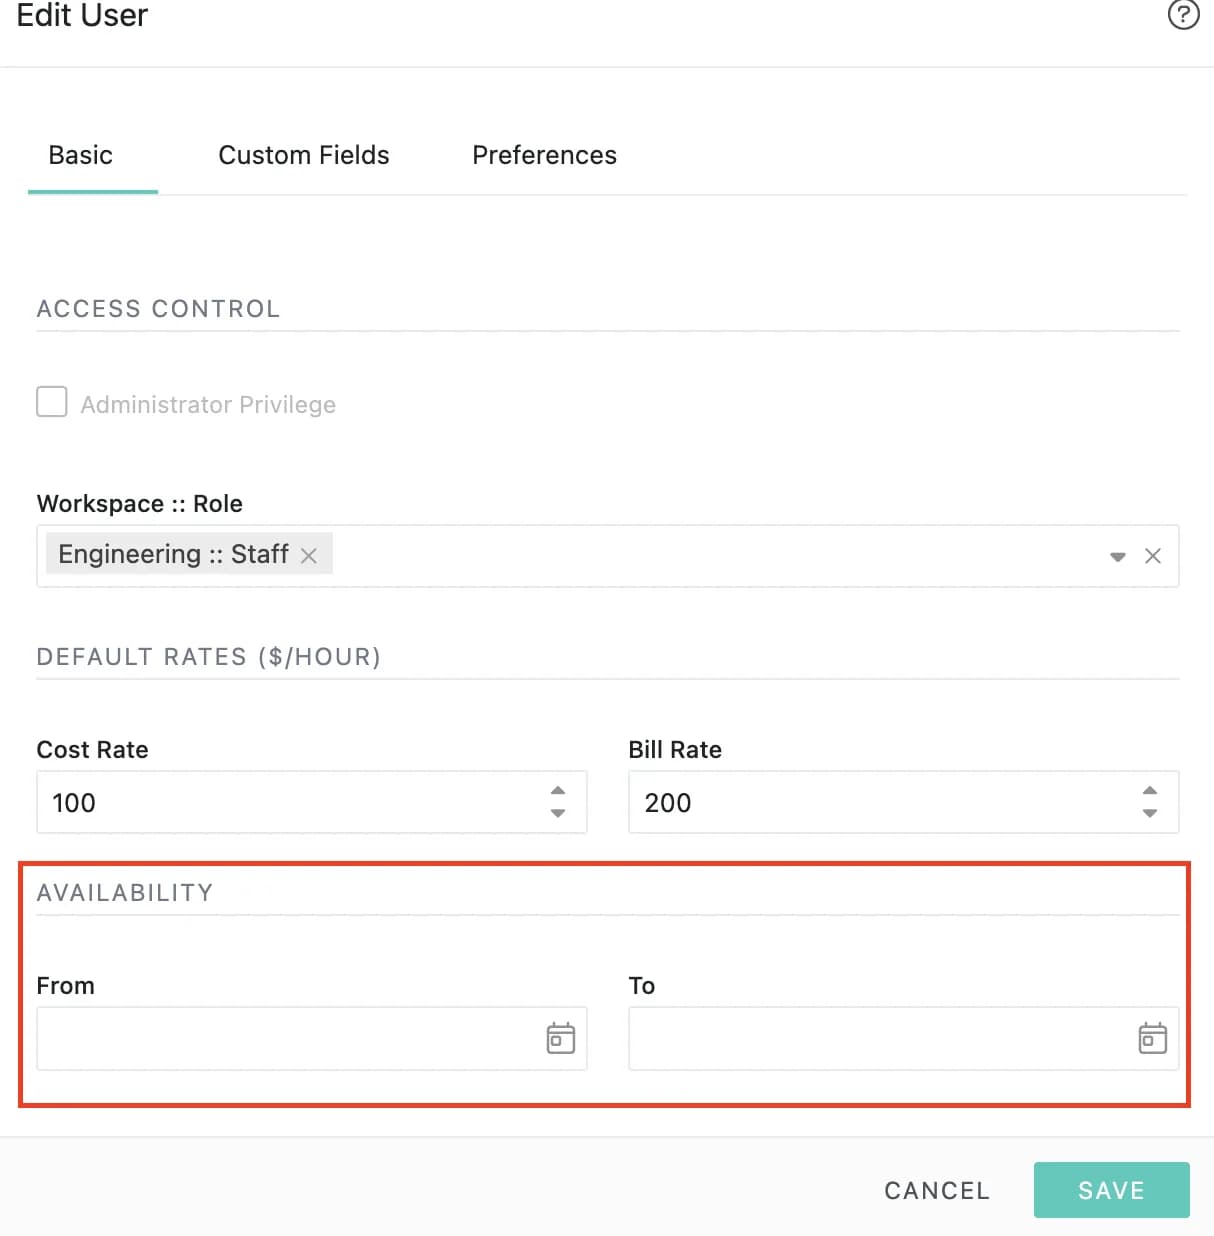
UsersActions
Managing Your Preferences
You can change your language, formats, dashboards and customize email notifications from your preferences screen.
Changing Photo and Preferences
Clicking on the user icon in the main menu as show below: To change your photo, click Change below the photo.
To change your preferences, click Profile
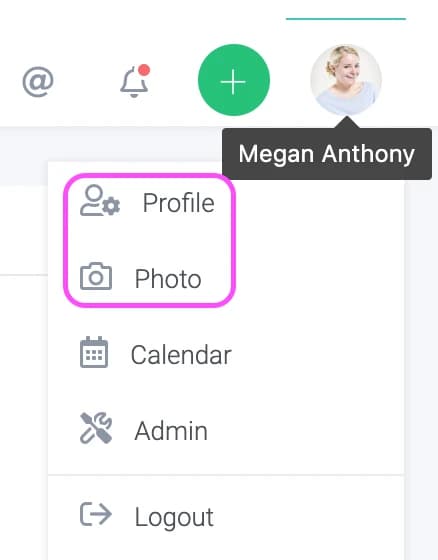
Preferences
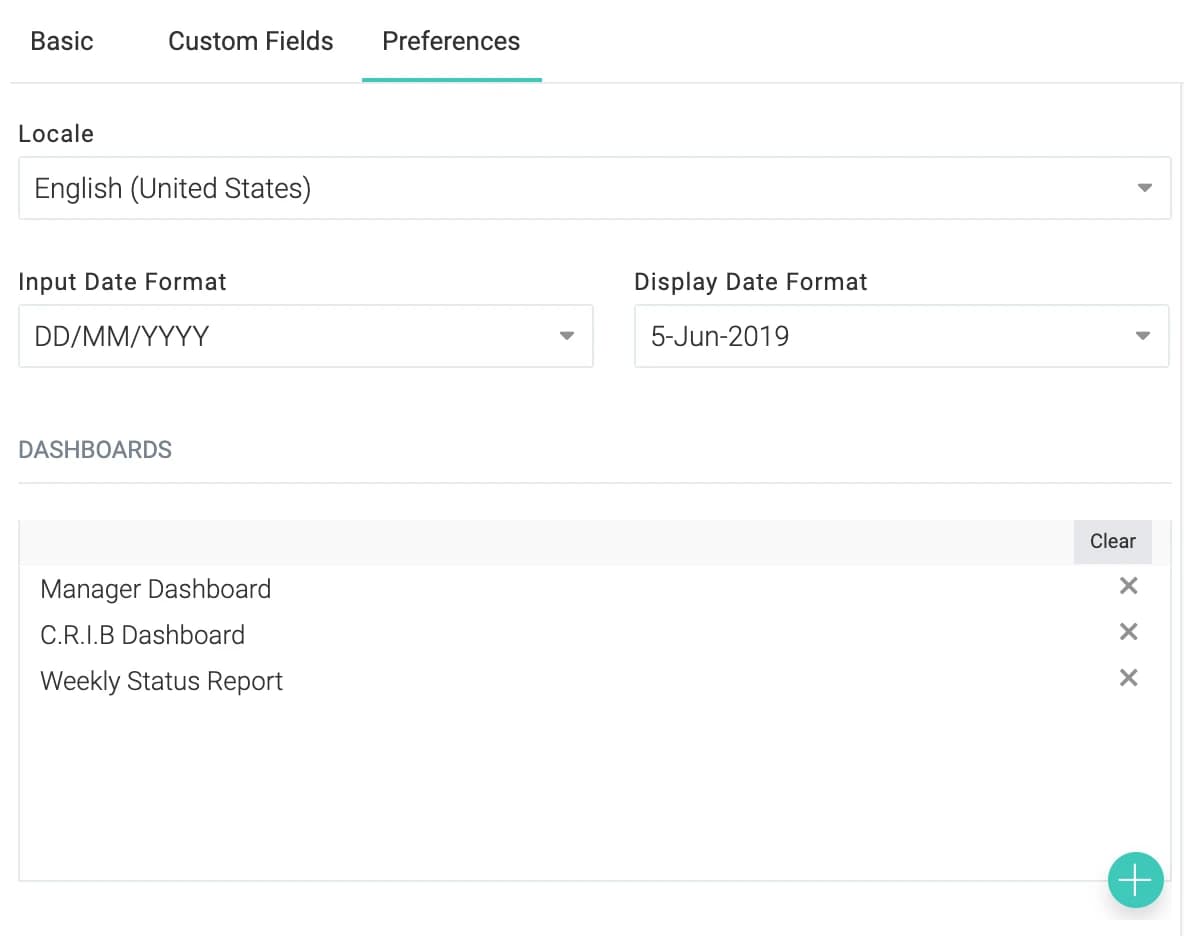
Language & Region
Language & Region is a combination of language and country and determines the application interface language and number format settings. For example, choosing French (France), will not only change your application interface labels to French but the decimal point would become the comma symbol as expected in France.
Date Formats
The input date format is the format in which you will input dates in Celoxis. E.g. In the U.S., people prefer MM/DD/YYYY while in India, the preference is for DD/MM/YYYY.
The display date format is the format you wish to view dates when they are displayed.
Dashboards
You can choose the dashboards that appear in the main menu. The first one becomes your default dashboard. Read the chapter on dashboards for more information on dashboards.
Email Notifications
| Projects managed by me | |
|---|---|
| Task is off track. | If any task's schedule in a project you manage becomes off-track, you will receive an email notification. |
| Task did not start because of incomplete predecessors | If any task in a project you manage becomes blocked, you will receive an email notification. |
| Work item progress is updated | If any task or custom app is updated in a project managed by you, you will receive an email notification. |
| Tasks assigned to me Note: Notifications are sent only if the task's project is in the Execution stage | |
| Task is modified. | If any task assigned to you is modified, you will receive an email notification. |
| Task is assigned to you. | If a task is assigned to you, you will receive an email notification. |
| Task starts in the next 24 hours | If you are assigned to a task and its planned start date lies in the next 24 hours, you will receive an email notification. |
| Task is off track. | If you are assigned to a task that becomes overdue, you will get an email notification. |
| Task progress is updated. | If a task assigned to you gets any progress updates, you will be notified. |
| Time | |
| Time is submitted on your behalf. | If time is submitted by someone else on your behalf, you will receive an email notification. |
| Time submitted by you is rejected. | If time submitted by you is rejected by anybody in the approval workflow, you will be notified. |
| Daily Incomplete Timesheet reminder | You will receive an email if your timesheet for the day is deemed incomplete based on the rule set in the company's incomplete timesheet setting. |
| Expense | |
| Expense is submitted to you for approval. | If an expense is submitted in a task in a project you manage, you will receive an email notification. |
| Expense submitted by you is approved. | If any expense submitted by you is approved, you will be notified via email. |
| Expense submitted by you is rejected. | If any expense submitted by you is rejected, you will be notified via email. |
| Files | |
| New version of your favorite or checked-out document is available. | You will receive this notification when a new version of the document marked as favorite by you, or checked out by you, is available. |
| New documents or versions are available in your favorite folders. | You will receive this notification when a new document or a new version of the document is available in folder marked as favorite by you. |
| Custom Apps Read about state managers referenced below. | |
| Item is assigned to you. | You will receive an email when an item is assigned to you. |
| Item assigned to you is updated. | If a comment is added to an item, or its attributes changed, or a state transition performed, you will be notified if you are assigned to the item. |
| Item assigned to you is delayed. | You will receive this email when an item assigned to you is marked as delayed or when it goes past its due date without finishing. |
| Item for which you are the state manager is delayed. | You will receive this email when an item for which you are the state manager, is marked as delayed or when it goes past its due date without finishing. |
| Item for which you are the state manager is unassigned | You will receive this email when an item for which you are the state manager, becomes unassigned. |
| Item is assigned to a state for which you are the manager | You will receive this email when an item moves to a state in which you are the state manager. |
UsersActions
Importing Users from CSV
Celoxis provides you with the ability to import users from CSV. If you have a Microsoft Excel file, then you can export it in CSV (comma separated values) format and then import it in Celoxis.
To import users, go to the users page – Main MenuMoreUsers and then click on the Import button. Upload the users in the format described below and in the Create users whose dashboard, preferences and security is like... choose the appropriate user. It may be required that you split your CSV file into different files so that you can import users with similar behaviours together.
Fields supported:
- Name - mandatory
- Phone
- Manager - the name or email of the reporting manager. This user must already exist in Celoxis.
- Username - the login name. Not applicable when SSO is in live mode.
- Password - the plain text password. Not applicable when SSO is in live mode.
- Virtual -
trueorfalseto indicate whether the user is virtual or not. If you specify this value asfalseor blank, then you must provide a username and a password for this user. - Administrator -
trueorfalseto indicate whether to give this user admin privileges. - JobRolePrimary - the name of the job role.
- Custom Fields - you will have to create the fields in Celoxis first
- ID - mandatory, only when you are updating users using a CSV file
Updating Users
Celoxis also provides the ability to update the existing Users by importing a CSV file. To update, you must include the ID of the Users in the CSV file.
To find the ID of the Users, add ID column in the Users report(Main MenuUsers).
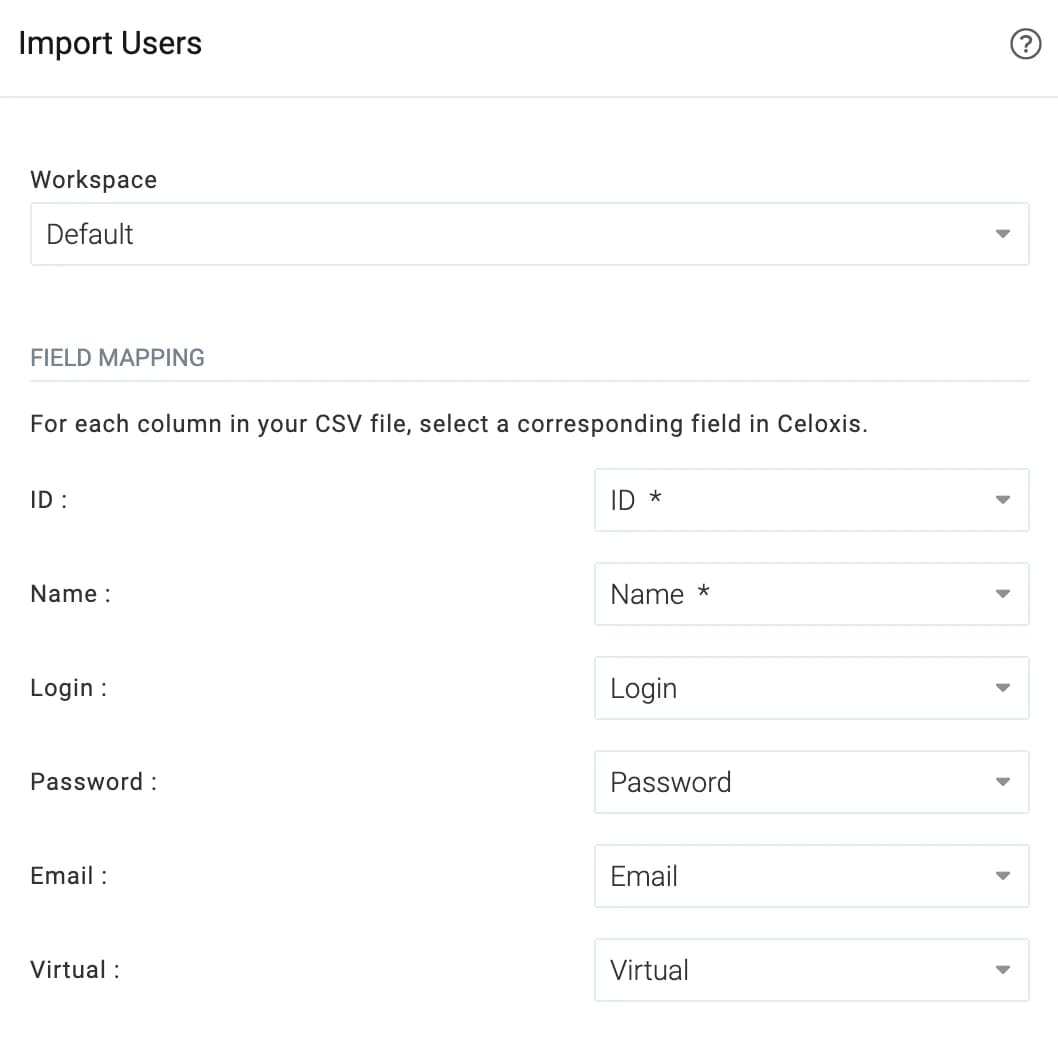
On a successful import, all non-virtual users i.e users who can login are sent a welcome email with their login information.
UsersActions
Deleting Users
When you no longer want a user to appear in pick lists, e.g. when a user leaves the organization, you should delete that user. After deletion, that user will not be able to login and will stop appearing in any user pickers. If the user had a login, then it frees up a license that can be used for another user.
Only administrators can delete users. To delete:
- Click Main MenuMoreUsers
- Click on that user
- From the user's actions, click Delete
- If you wish to reassign the user's current responsibilities to someone else, select that user. If you select a user, then the following responsibilities will be reassigned to that user:
- Open projects where the user is the project manager
- Incomplete tasks assigned to the user
- State Manager in various custom apps
- Open app items
- Delete
.
Undeleting a user
When a user is deleted it is moved to the People Bin. If you want to restore that user, you can do so by visiting Main MenuAdminPeople Bin. Private data that was deleted is not restored.
UsersActions
Logging in as another user
Celoxis lets you login as another user if you have administrator privileges. Logging in as another user is useful in many scenarios – to check if the dashboard is looking as expected, to change a setting that the user is having difficulty with, or to see what the user at the end of the telephone is looking at while he/she is describing the problem to you.
To login
Navigate to Main MenuMoreUsers and click on for the user you wish to login as. Then click Log In As from the menu.
To logout
Once you are done, you can click on the option you see below on the LHS menu to logout as that user and automatically login as yourself.
UsersActions
Bulk Actions
Bulk actions allow you to select one or more users from a list view and perform actions on them.
Resend Login Info
Emails login information to the selected users. Emails are sent only to non-virtual users since only they have login access. Also, since Celoxis doesn't store the pasword, no password is sent; but a convenient link to reset the password will be sent in the email instead.
Bulk Edit
You can select one or more fields, including custom fields, of the selected users. Some interesting fields are:
- Dashboard like – sets the dashboards of the selected users to be like this one.
- Change Roles – replaces all existing roles of selected users with the ones chosen here.
- Bill & Cost Rates – sets the default rates for the selected users. Note that no time logs are updated. Task estimated costs are recalculated.
FAQ
UsersFAQ
Can I enter a different rate for a user on a project?
Yes, you can override the rates at project level. For details, refer:
and
.
Access Control
9 articlesConcepts
Access ControlConcepts
Workspaces
The primary purpose of workspaces is to achieve flexible isolation of projects. Teams should be able to work independently without the possibility of stepping on each other but can work together if required. Consider the following real-world scenario:
Acme wants its engineering and marketing teams to work in isolation but for some marketing projects the marketing team should be able to bring in a few engineers on their project team. Acme also want a few people from the finance team access financials of projects from all departments. Plus, CXOs should have access to all projects in all departments.
Celoxis handles the above and many other real-world scenarios.
You can think of workspace as a department. In some cases, you can even map workspaces to geographical branches. It all depends on how you want to segregate your projects and teams.
Managing Workspaces
Only administrators can manage workspaces. To manage workspaces, go to Main MenuAdminAccount ManagementWorkspaces.
Access ControlConcepts
Privileges
A privilege is like a permission. In Celoxis, if you want to view an item like project or task or perform any action on it like edit or delete, you will need the corresponding privilege. E.g. to view a task, you will need the Task > ViewGranted privilege, to delete a project, you will need the Project > DeleteGranted, while for logging time for another user you will need the Time ProxyGranted privilege. If you do not have the privilege, you will not be allowed to perform the action.
Celoxis has a very granular privilege structure — with over 50 privileges, you get fine-grained control over user actions.
Some actions like creating users, require administrative privileges. Any user can be given admin privileges. To do that, login as admin, edit the user and check the Administrator Privilege under Access Control. Users with the administrator privilege can perform any action even if they have not been granted privileges explicitly.
Privileges are assigned to roles. Read the next chapter to understand the interplay between privileges, roles and users.
Access ControlConcepts
Roles
Not to be confused with a job role, a security role is a collection of privileges. For example, we can create a Project Viewer role having the privileges: View ProjectGranted, View TaskGranted, and View FinancialsDenied. We can also create another role Project Collaborator with New DiscussionGranted and Add DocumentGranted privileges.
Role Based Access Control (RBAC)
Role based access control is an approach where access to an object for a user is controlled based on the roles the users is playing in that object. In this approach instead of directly assigning privileges to users, privileges are assigned to roles and roles, in turn, are assigned to users.
Why RBAC?
Why not just assign privileges to users? Wouldn’t that be easier? For teams with less than 10 users, the way of assigning privileges indirectly through security roles (RBAC) is probably an overkill. But as the number of permissions increase (Celoxis has around 60) and team sizes increase, managing privileges becomes difficult, error-prone and time consuming. When new employees are added to the team, the administrator will have to spend a lot of time giving them privileges and at the same time ensuring none of them are accidentally given (or denied) a privilege not intended for them.
With roles based security, admins would simply assign the new employee the right roles in the right workspaces. E.g. when Mark Marketer joins the company, all the admin would have to do is assign him the Junior Marketing Executive security role in the Marketing workspace. Mark is just another junior marketing executive whose security role has been carefully populated with the right access control privileges.
Managing Roles
Only administrators can manage roles in Celoxis. To manage, click Main MenuAdminAccount ManagementAccess Control.
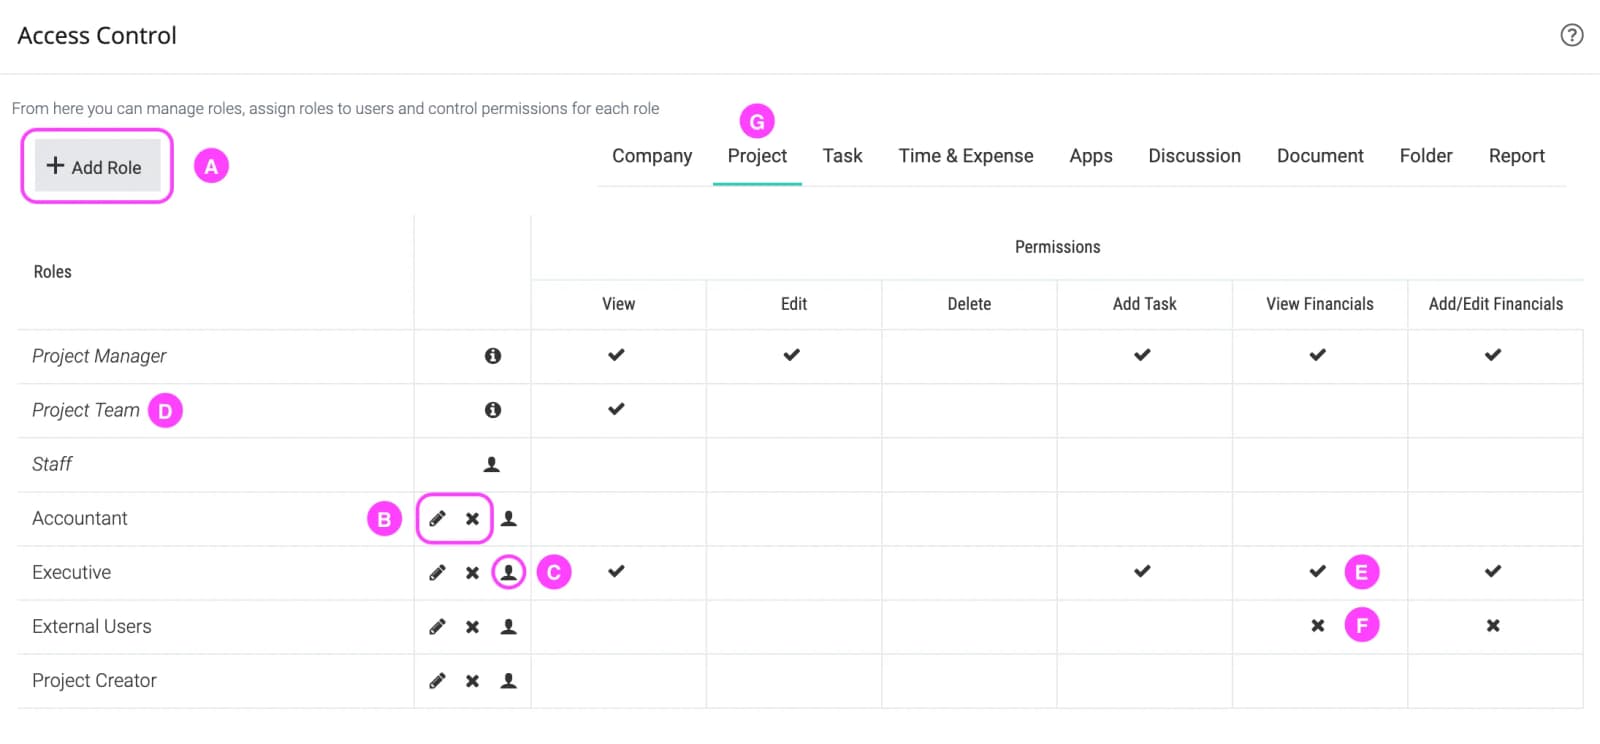
| A | Click to add a security role |
| B | Click to edit or delete a security role |
| C | Click to view and modify users playing this role |
| D | Auto-assigned roles. Note how you cannot assign it to members. |
| E | Role Executive has been granted the View Financials privilege. Click to change it. |
| F | Role External Users has been denied the View Financials privilege. Click to change it. |
| G | Click a tab to set privileges associated with it. |
Access ControlConcepts
Assigning Roles to Users
Users can play different roles in different workspaces. They can also play different roles in different projects.
Assigning Roles in Workspaces
Security roles can be assigned to users per workspace.
For example, Joe Doe, Vice President (Engineering), may be assigned the Project Supervisor role in Engineering so that he can perform any of the project actions in Engineering, assigned the Project Viewer role in Marketing so that he can view any project in Marketing, but play no role in Sales.
In Celoxis, you can assign security roles to users on the add/edit user screen or using the bulk user edit screen.
Assigning Roles in Projects
Users can be assigned roles in specific projects.
Users who play roles in a workspace, play those roles in all projects in that workspace. However, in some instances, you may want to give some additional privileges to a user in a specific project.
For example, Earl Engineer plays the role Project Viewer in the Engineering workspace. However, he is playing a lead part in one of the projects, so the project manager could give him the Project Supervisor role for that specific project. This would mean that Earl gets all the privileges associated with Project Viewer as well as Project Supervisor in that project.
Auto-Assigned Roles
Some security roles are automatically assigned to user, by the system, depending on the object on which the user is trying to perform the action on.
For example, if Mark, a project manager of a project, is trying to view a task in that project, the system will automatically assign him the role Project Manager only for that action. If Mark tries to view a task in another project of which he is not the project manager, he will not be assigned that role.
The following roles are automatically assigned to a user:
- Project Manager — when the user is a project manager of the object's project.
- Project Team — when the user is a project team member of the object's project.
- Task Team — when the user is trying to perform an action on a task assigned to him/her.
Auto-assigned roles make it convenient to define polices like "All project team members can view and comment on any tasks in their projects" and "Project managers should be able to modify any task in their projects" easier.
The Staff Role
If the user is performing any role in a workspace, then that user also plays the Staff role in that workspace.
The Staff role is a convenience that allows definiting policies for All members of a workspace. E.g. if you want all users in Marketing workspace to be able to view its projects, you would give the View ProjectGranted privilege to the Staff role.
Access ControlConcepts
How it Works
How access control is checked is best explained through an example. Let's assume that Joe is attempting to edit the task T. The steps Celoxis would follow to determine if Joe can do this are:
Check for the administrative privilege
If
Joehas administrative privilege, then he will be granted the privilege. No other check is required.Determine the privilege required
Joewould require the Edit TaskGranted privilege onTCheck if the project can be viewed
Since
Tbelongs to a project, the system will check ifJoehas the View ProjectGranted onT's project. If no,Joewill be denied the Edit Task privilege.Gather all security roles played by the user
The system will build a set of all roles that
Joeplays inT. This would include :- All roles assigned to
Joein the project's workspace. - All roles assigned to
Joein the project. - Auto-assigned roles to
Joefor the project andT.
- All roles assigned to
Build the set of all privileges
Since a security role is a collection of privileges, based on all the roles played by
Joe, the system would build a set of all the privileges for all the roles played byJoecollected in the previous step.Check if the privilege has been unanimously granted
If the collection of privileges includes Edit TaskGranted and does not include Edit TaskDenied, then
Joewill be granted the permission to edit the taskT; else the permission will be denied.
Actions
Access ControlActions
Assigning Roles to Users
You can assign roles to users in workspaces if you have administrative privileges. To assign roles, open the add/edit user form and select all the workspace::role combinations. In the following example, Janet is playing the role Developer in the Engr workspace. - All - :: <Role> is a shortcut to specify the same role in all workspaces. In this case, the CEO will most likely be assigned the role - All :: Executive. You can read more about this topic in this chapter.
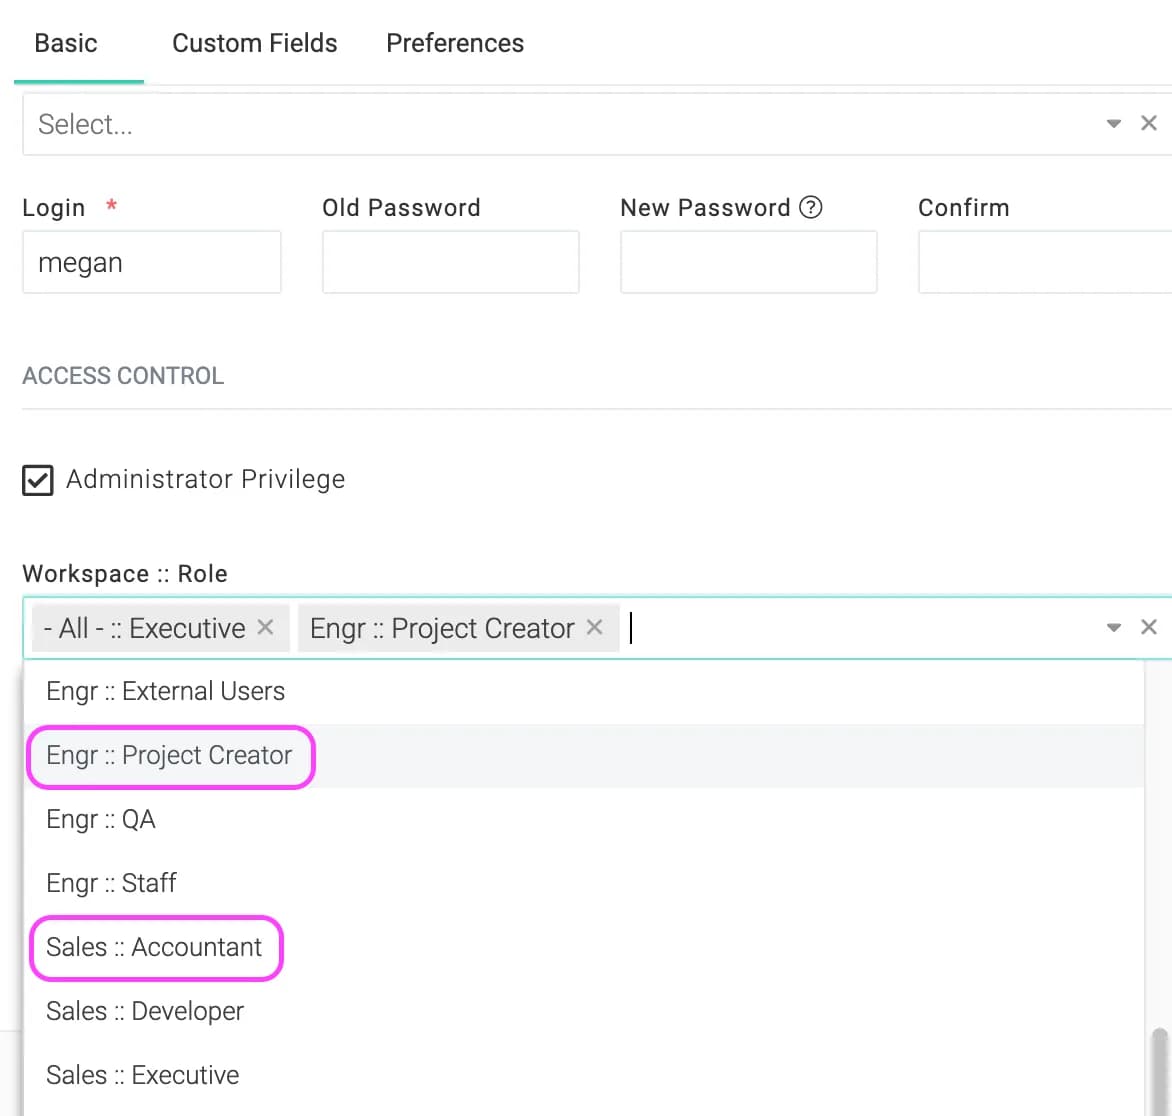
Access ControlActions
Assigning Roles to Users in a project
You can make a user play some more roles in a project. Click on the project and click Project ActionsAccess Control. This will open a screen like this:
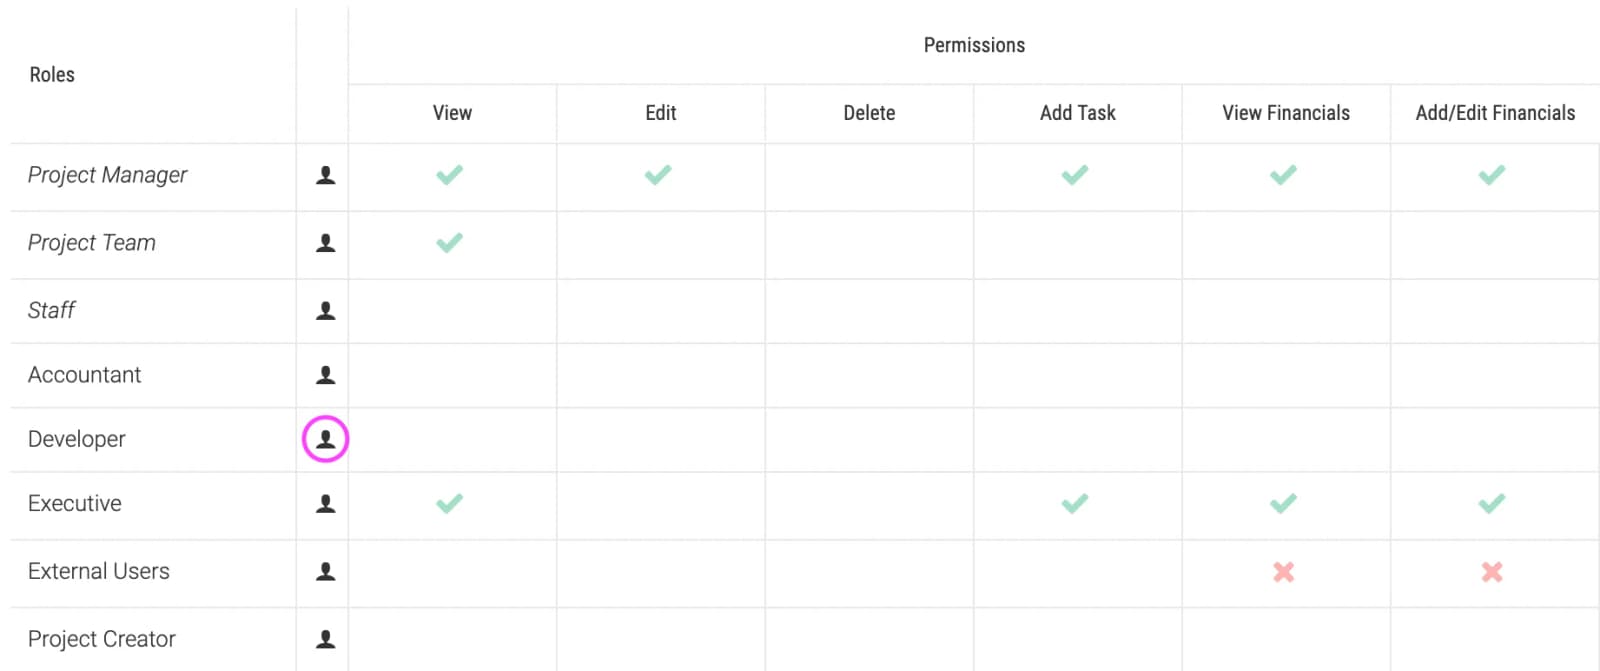
Click on the icon next to the role and select the users who will play that role in the project. You can read more about this topic in this chapter
Access ControlActions
Overriding the Access Control for a project
It is sometimes desirable to grant (or deny) additional privileges to roles for a specific project. To do this, click on the project and then click Project ActionsAccess Control. This will open a screen like the one below.
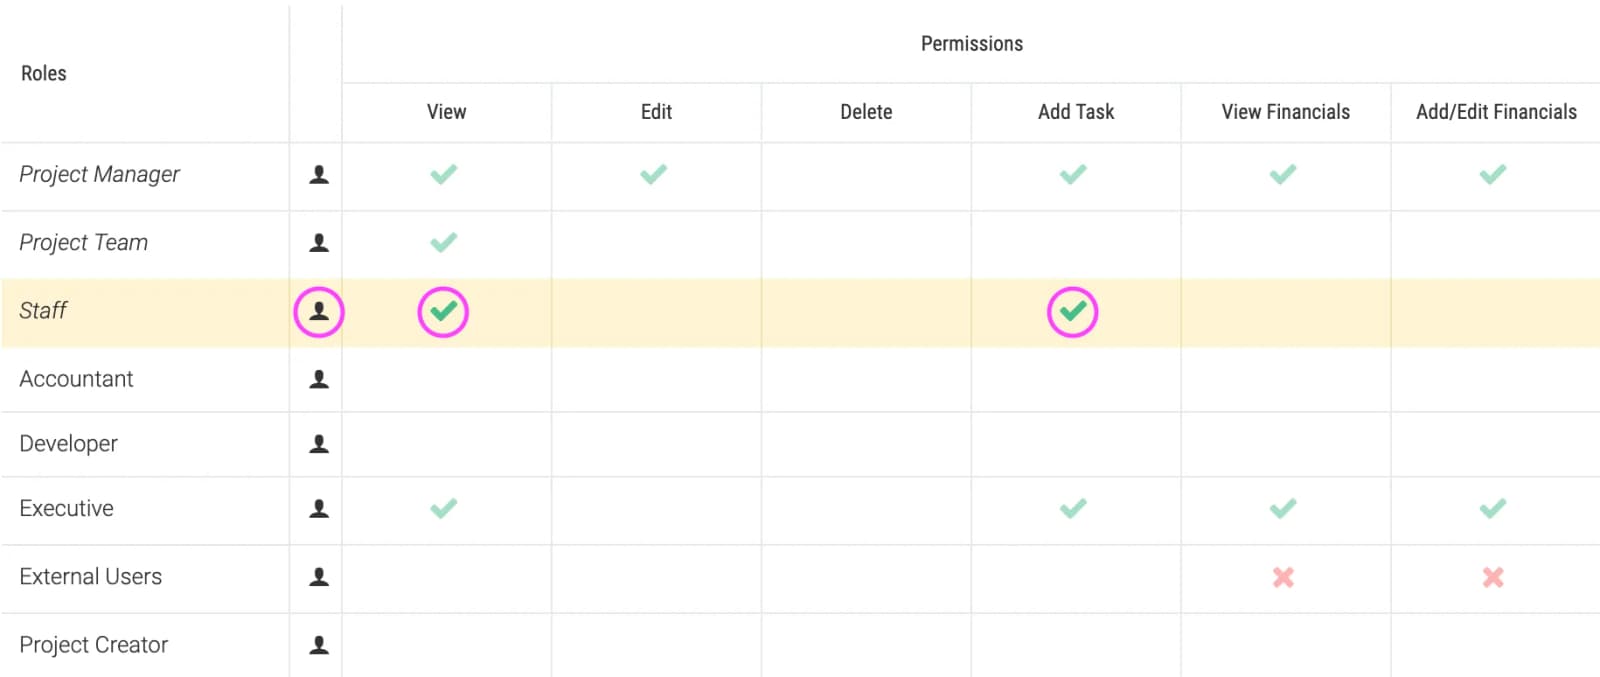
The faded check marks indicate that those privileges have been assigned to roles at a global level. These cannot be changed. However, we can assign additional privileges to roles for which the privilege was left unspecified. We have done this for the Staff role for this project. We have allowed everyone playing the Staff role to view the project as well as to add tasks to this project.
FAQ
Access ControlFAQ
How do I restrict certain users from viewing any financial information?
Remember that in Celoxis, users can see or do things only if they have the privilege required to perform the action. Celoxis provides the View Financials and Edit Financials privileges to control view and edit access to financial information. Users can view financial information only if they have the View FinancialsGranted. E.g. if Joe is assigned a role that has been granted this privilege, only then Joe will be able to view the financial information.
If certain roles have been granted the View Financials privilege and you wish to revoke it, then you can do so from the access control screen.
In the unlikely scenario that you do not wish to show a user the financials for a specific project, then:
- Create a role say Financials Denied
- Assign it View FinancialsDenied.
- Assign the user this role for that project.
Miscellaneous
19 articlesConcepts
MiscellaneousConcepts
Job Roles
When a project is being planned, more often than not, we do not know the exact resource who will be working on a task. However, we know the job role or job function for that task. For example, we may know that to complete a task we need a Java developer but we do not know, or care, at that point who out of our hundred Java developers is going to work on that task.
Celoxis allows you to create job roles and assign them to tasks.
Using job roles has the following benefits:
- They act as a placeholder for a real resource — You can use the replace multiple resources functionality later to replace them with a real resource. Read more.
- They help in determining budget — When you assign a cost rate for a job role, it is used in calculating the estimated cost of a project
- They help in determining potential revenue — When you assign a bill rate for a job role, it is used in calculating the estimated revenue of the project.
- They help in understanding the demand and capacity gap — Their availability in Time Phased reports is always considered zero. Hence if you group by Job Roles, you can easily see the demand-capacity gap. This helps PMOs in determining which projects to accept and also make hiring decisions.
Using Job Roles
Job roles can be assigned to tasks. They are also available in columns and filters. You can aggregate information on job roles in reports and charts.
Capacity Planning
Job Roles play an important role in capacity planning and demand management. We have already bundled a capacity reports, that shows the net resource capacity in the future. You can customize this report to suit your needs.
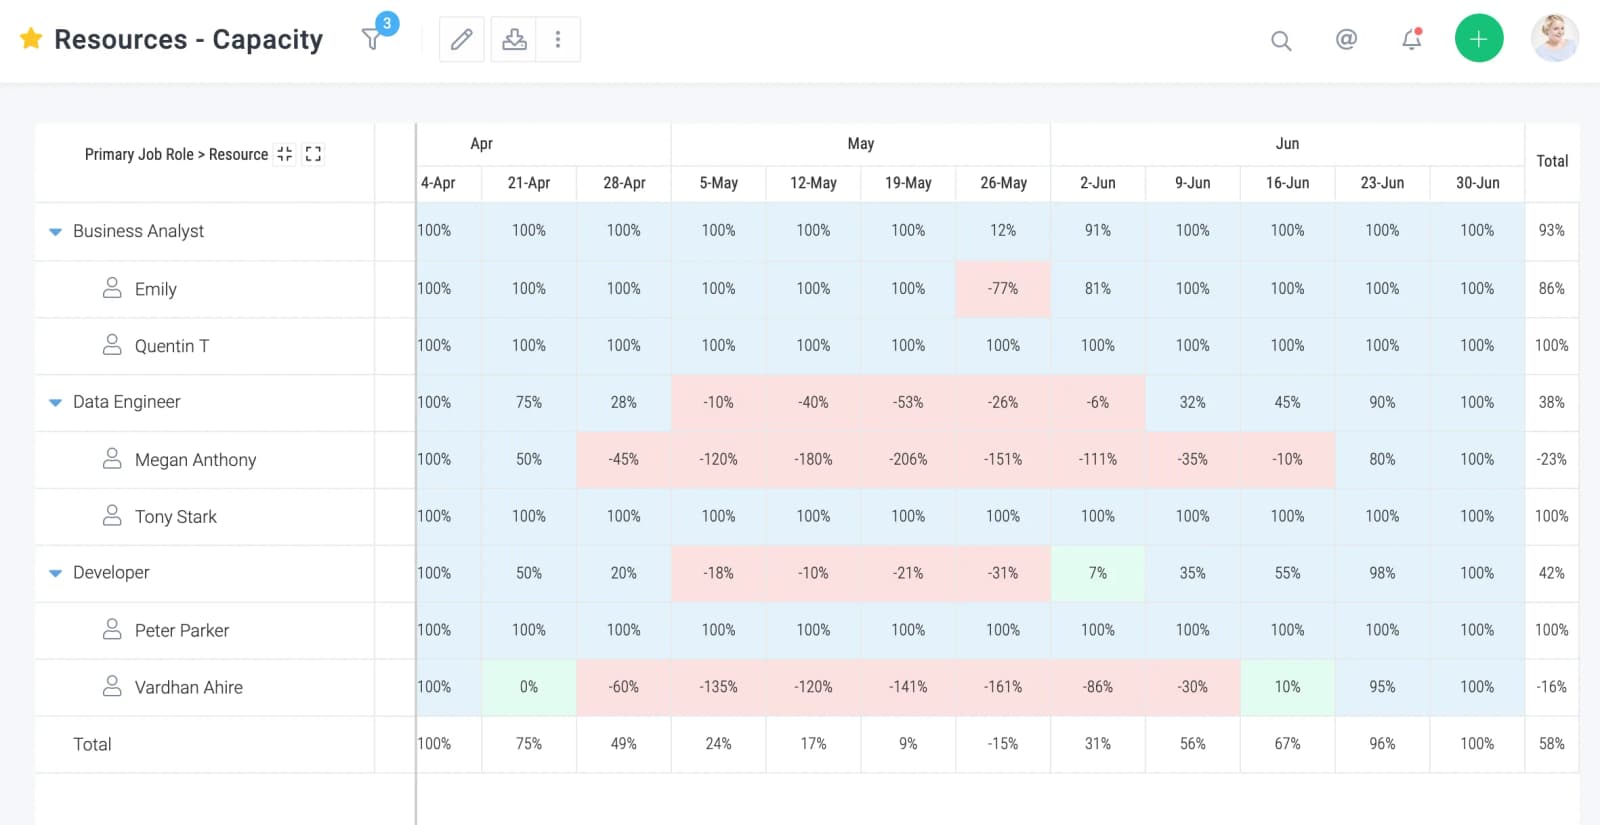
Managing Job Roles
Job Roles can be managed only by administrators. To manage go to Main MenuAdminAccount ManagementJob Roles.
MiscellaneousConcepts
Custom Fields
Custom fields allow capture of business specific information on projects, tasks, users, clients and custom apps.
You can create custom fields of the following type:
| Type | Description |
|---|---|
| Currency | A numeric field with decimals which when displayed will be prefixed with the currency symbol. |
| Date | A date field. Includes a convenient calendar picker for the user. |
| File | A file attachment field. |
| Formula | A field whose value can be computed based on that of other attributes. |
| Text (multi-line) | A field which allows you to enter rich text. |
| Multi Select | A pick list that allows multiple options to be picked. |
| Number | A numeric field without decimals. |
| Number (Decimals) | A numeric field with decimals. |
| Text | A textual field allowing you to enter text data. |
| Single Select | A pick list that allows only one option to be picked. |
Managing custom fields
Only administrators can manage custom fields. To manage, go to Main MenuAdminAccount ManagementCustom Fields.
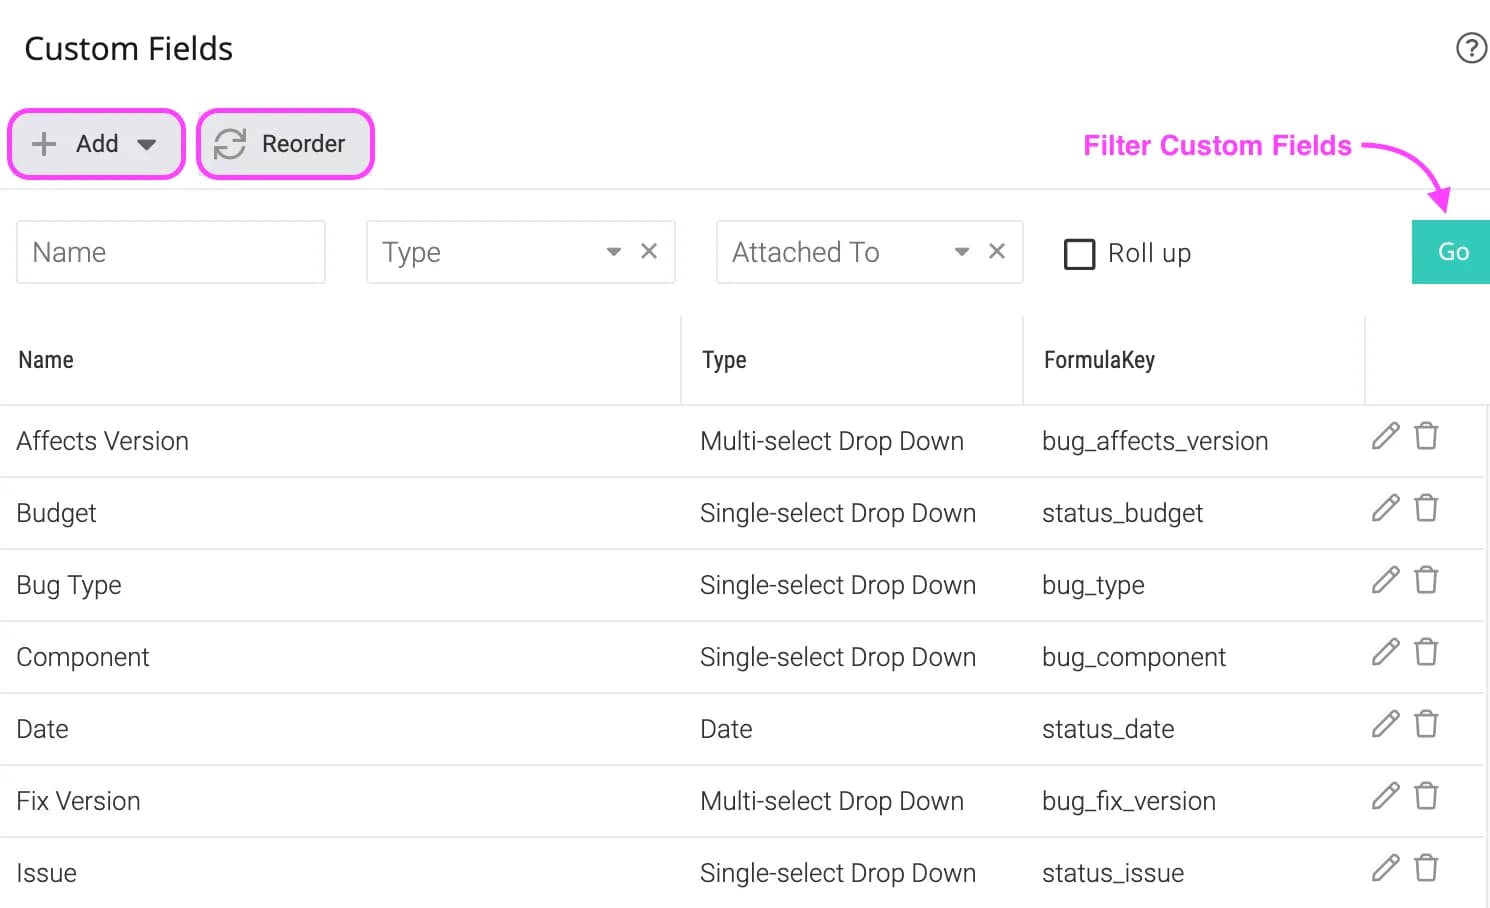
Reordering custom fields
You can control the order of custom fields in forms and overview screens. To reorder, open the custom fields screen as indicated above and click on the Reorder button. You can reorder the fields using -drag-n-drop.
Attaching custom fields to entities
Celoxis allows a custom field to be attached to various entities. For example, you can create a custom field Country and attach it to projects, users and clients without having to create a new field for each of them.
Customizing fields based on project types
If you want to capture different fields for different project types, select the appropriate project types for each field in the Attached To tab on the add/edit custom field screen.
Financial fields
If your intend to put sensitive financial information in your custom field, e.g. Target Profit Margin, check the Requires financial privilege option on the custom field add/edit screen. Users will require the View Financials privilege to view and Edit Financials privilege to edit the field.
Rollup fields
Sometimes it is required for task fields to be rolled-up to the summary task or project level. E.g. if you capture cable length used field for a task, then you would probably want to see the total cable length used at a project level. Marking a field a as a roll-up field allows this capability. You can roll-up the sum, average, min or max of a field.
To make a field rollup its value, choose the Rollup Method option to one of sum, average, min or max, on the add/edit custom field screen.
Colors
You can define colors for single-select and formula fields. If those fields have colors, the resulting value is formatted to show color. The color is also used in charts.
To define colors for a single-select field, define a color for each option. To define colors for a formula field, define a color for each possible output. To see the allowed values, click on the icon.

Formula fields
This topic has been covered in-depth its own chapter.
MiscellaneousConcepts
Formula Fields
A formula custom field's value is automatically calculated by Celoxis based on its formula. The value is calculated every time the field is rendered. The formula expression language is sophisticated so you can perform complex data manipulations including arithmetic, string and date transformations.
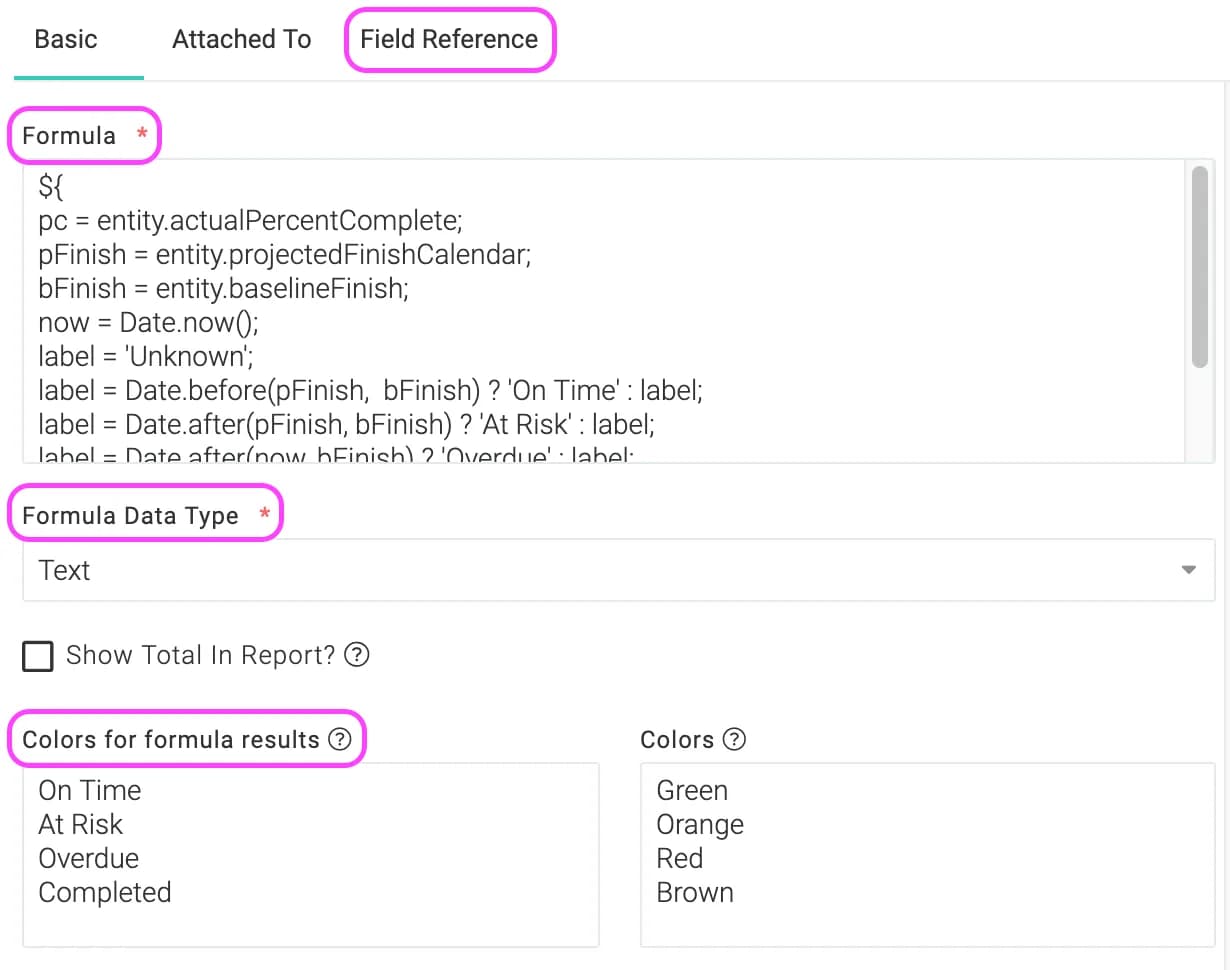
Syntax
Celoxis treats anything between
and
as expressions. Formulas can be either defined as pure expressions e.g.
, or contain a mix of text and expressions as
when anything enclosed in
and
is treated as an expression and evaluated, while everything outside it is copied to the output verbatim as is. For the curious, if the formulae were attached to a project whose name was
and budget was
the output would be
and
respectively.
The dot operator
The dot operator is used to reference a property of an object. In the example
, the
refers to the project's budget if the custom field is attached to a project. The dot operator can also be used to call a function (a.k.a. method) of an object. In the example
, the
is a function call that would transform the project's name to upper case characters.
Operators
- Arithmetic:
+,-(binary),*,/anddiv,%andmod,-(unary) - String Concatenation:
+= - Logical:
and,&&,or,||,not,! - Relational:
==,eq,!=,ne,<,lt,>,gt,<=,ge,>=,le. Comparisons can be made against other values or against Boolean, string, integer, or floating-point literals. - Empty: The
emptyoperator is a prefix operation that can be used to determine whether a value isnullor empty. - Conditional:
A ? B : C. EvaluateBorC, depending on the result of the evaluation ofA. - Assignment:
= - Semicolon:
;
The precedence of operators highest to lowest, left to right is as follows:
[] .()(used to change the precedence of operators)-(unary)not ! empty* / div % mod+ -(binary)+=< > <= >= lt gt le ge== != eq ne&& and|| or? :=;
Reserved Words
The following words are reserved for the EL and should not be used as identifiers:
and | or | not | eq |
ne | lt | gt | le |
ge | true | false | null |
instanceof | empty | div | mod |
Basic Examples
| Formula | Result |
|---|---|
${1 > (4/2)} | false |
${4.0 >= 3} | true |
${100.0 == 100} | true |
${(10*10) ne 100} | false |
${'a' < 'b'} | true |
${'hip' gt 'hit'} | false |
${4 > 3} | true |
${1.2E4 + 1.4} | 12001.4 |
${3 div 4} | 0.75 |
${10 mod 4} | 2 |
${!empty me.code} | False if the object's code is null or an empty string. |
Utility Functions
The following set of helper functions have been provided:
Format
formatDate(date) | The formatted value of date (without the time) as per viewer's preferences. |
formatDateTime(datetime) | The formatted value of date and time as per viewer's preferences. |
formatNumber(number) | The formatted value of the number as per the viewer's locale. |
formatCurrency(number) | The formatted value of currency as per the currency specified in the company's preferences and number format as per the viewer's locale. E.g. $25,000 |
hoursToHHMM(number) | Formats the hours in the form HH:MM. For example, 2.5 will result in 2:30 |
Math
ceil(number) | The nearest integer larger than the input. For example ${ceil(5.3)} will return 6 |
floor(number) | The nearest integer smaller than the input. For example ${floor(4.8)} will return 4 |
abs(number) | The absolute value of a number. For example ${abs(-3.2)} will return 3.2 |
round(number) | The rounded value of input. For example ${round(3.6)} will return 4 |
roundTo(digits, number) | The rounded value of input number to the number of digits specified. For example ${roundTo(2, 3.667)} will return 3.67; while ${roundTo(0, 3.667)} will return 4. |
String
String.contains(haystack, needle) | Check if needle exists in haystack |
String.endsWith(string, suffix) | Check if string ends with suffix |
String.replace(txt, search, replace) | Replaces all occurences of search in txt with replace |
String.startsWith(string, prefix) | Check if string starts with prefix |
String.trim(string) | Trims whitespace and control characters from the ends of the string |
String.blankIfNull(str) | If str is null, returns a blank string else returns the str itself. |
Date
Date.before(date1, date2) | Returns true if date1 is before date2. |
Date.equal(date1, date2) | Returns true if date1 equals date2. |
Date.after(date1, date2) | Returns true if date1 is after date2. |
Date.format(date, format) | The formatted value of the date as per the format. For supported formats see this. |
Date.hoursBetween(from, to) | Return the number of elapsed hours between from and to. |
Date.workingHoursBetween(from, to) | Return the number of working hours between from and to based on the company's default work calendar. If the elapsed days between from and to is more than 30, the elapsed hours is returned. |
Date.plusHours(date, hours) | Adds hours to date and returns that date. |
Date.isoToDate(string) | Converts string in ISO format to a date. |
Date.now() | Returns a date representing the current date and time |
Collection
Collection.size(v) | Returns size of v. |
Collection.contains(haystack, needle) | Check if needle exists in haystack |
Collection.containsAny(haystack, needles) | Check if at least one needle exists in the haystack |
Collection.containsAll(haystack, needles) | Check if all needles exists in the haystack |
Writing multi-line formulas
To write the formula code on multiple line, use the = and ; operators. The return value is the last statement of the formula. For example:
${
apc = me.actualPercentComplete;
ppc = me.plannedPercentComplete;
(apc - ppc)/ppc
}The formula return data type
While defining a formula, you have to select a Formula Data Type. This tells the system what it should expect the formula to return. Celoxis formats the return value automatically based on the data type. For example, if you indicate the return type to be a currency, then if your formula returns a number 10000, the output would be $10,000 i.e. Celoxis automatically formats the number and prefixed it with the company's currency symbol.
The me object
The me object in formula represents the object for which the formula is being evaluated. E.g. let's say that our formula field Client Advance is defined as ${me.budget * 0.1} i.e it represents 10% of the budget. If we have attached this field to both projects and tasks, then while evaluating the formula for a project, the me object would be a project while for a task it would be a task object.
Field reference
To view the list of available fields, click on the Field Reference tab on the add/edit custom field screen. Click on the plus icon to expand the list of available variables for the various entities.
Error handling
When there is an error evaluating a formula, e.g. you passed a number where a string was expected, the output would show ERR!. Move your mouse over it to get a better description of the problem.
Examples
Assume that we have a project with the following data.
| Label | Field | Value |
|---|---|---|
| ID | id | 1234 |
| Name | name | Setting up office space |
| Start | startCalendar | 10 January, 2011 |
| Budget | budget | 5000 |
| Estimated Cost | estimatedCost | 4000 |
| Actual Cost | actualCost | 3800 |
We'll now look at a few simple examples. We shall assume that the formula is attached to projects and the sample output is for the project described above.
| Formula | Output | Comments |
|---|---|---|
${me.id * 10} | 12340 | id is multiplied by 10 |
me.id * 10 | me.id * 10 | Not enclosed in ${} and hence copied to the output verbatim. |
ID:${me.id} | ID:1234 | Text mixed with an expression |
${me.name + 100} | ERR! | Cannot perform arithmetic on String type. |
${me.abcd} | ERR! | me does not have a property named abcd. |
${formatDate(me.startCalendar)} | Jan 10, 2011 | Formats the start date as per the user's date format style. |
${me.actualCost gt (me.budget*.9) ? 'ALERT' : 'OK'} | ALERT | An example on how to write if/then/else |
${formatCurrency(me.budget)} | $ 5,000 | Assuming your currency symbol is $ |
${round(((me.budget - me.actualCost)*100)/me.budget)}% | 24% | Calculates the % of budget remaining |
Advanced Example: Your own schedule health indicator
Let's say that you want to have a schedule health indicator that is based on baselines i.e. the date you actually promised to the customer rather than on the current plan's finish date.
You will create a formula field, attach it to projects, set it's output data type to Text and enter the formula as:
${
pc = me.actualPercentComplete;
pFinish = me.projectedFinishCalendar;
bFinish = me.baselineFinish;
now = Date.now();
label = 'Unknown';
label = Date.before(pFinish,  bFinish) ? 'On Time' : label;
label = Date.after(pFinish, bFinish) ? 'At Risk' : label;
label = Date.after(now, bFinish) ? 'Overdue' : label;
label = pc == 100 ? 'Completed' : label;
label
}
In the Color part of the formula put the mappings as:
| Result | Color |
|---|---|
On Time | Green |
At Risk | Orange |
Overdue | Red |
Completed | Brown |
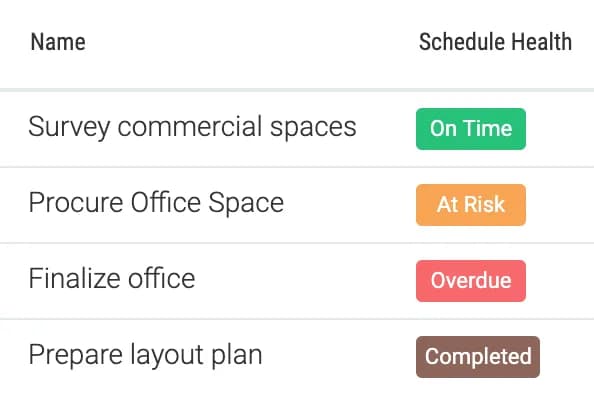
MiscellaneousConcepts
Search
You can search for objects based on keywords using the search box on the top right side of the main toolbar. The following table describes what is searched:
| Entity | Fields searched |
|---|---|
| Project | Name, description, code, and custom fields. |
| Task | Name, description, custom fields, and comments. |
| File | Name, description, and content. |
| Discussion | Name, description, and posts. |
| App Item (e.g. Risk, Bug, Issue, etc.) | Name, description, custom fields, and comments. |
| User, Client or Contact | Name, email address, keywords, and custom fields. |
Search Options
- To search for a phrase, enclose it in
"e.g."sales tax" - To exclude a term, prefix it with
-e.g.-Microsoft - To make a term mandatory, prefix it with
+e.g.+penguin - To search for a prefix, suffix it with a
*e.g.docu*will search for all words starting withdocu
MiscellaneousConcepts
Mobile Interface
Celoxis provides a feature-rich mobile optimized interface that can be accessed from any iOS, Android, Windows Mobile, Tizen, or any other mobile device with a modern web browser. There is no need to download or install any application. You will be taken to the mobile interface automatically upon accessing the application from your browser.
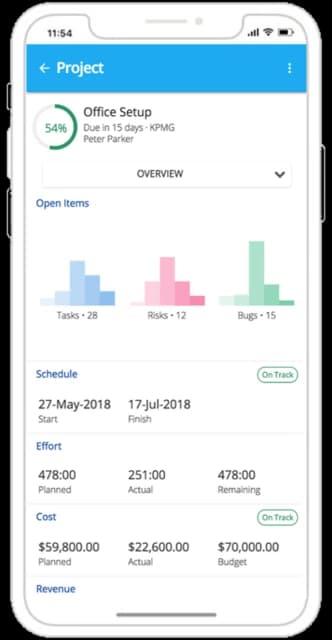
MiscellaneousConcepts
Zapier Integration
Celoxis integrates with many apps using Zapier. Zapier is a cloud-based service that allows you to build powerful integrations between different systems without writing code. For more information, visit their website: zapier.com.
Zap
An automation in Zapier is called a zap. A zap connects two apps - a trigger app and an action app. The trigger app notifies the zap about an event and the zap then performs an action in the action app.
Triggers
A trigger is an event in an app that starts the Zap. Once you set up a Zap, Zapier will monitor the app for that event. For example, if we use the New Project trigger then every time a new project is created in Celoxis the Zap will be started in Zapier.
Following are the Triggers available for Celoxis:
- New Project - Triggers when a New Project is created in Celoxis.
- New Task - Triggers when a New Task is created in Celoxis.
- New Issue - Triggers when a New App is created in Celoxis.
- Updated Task - Triggers when a Task is updated in Celoxis.
- Issue Status Updated - Triggers when the status of an App is updated in Celoxis
- New Task Update - Triggers when the status of a Task is updated in Celoxis
Actions
An action is an event that completes the Zap. For example, we have created a Zap which sends an email every time a new project is created in Celoxis. So here, Send Email is the Action event in the Zap.
Following are the Actions available for Celoxis:
- Create Project - Creates a new Project in Celoxis.
- Create Task - Creates a new Task in Celoxis.
- Create Issue - Creates a new App in Celoxis.
- Create Time - Creates a new Time Log in Celoxis.
- Create User - Creates a new User in Celoxis.
We can also check if a Project, Task or Issue is available in Celxis by using the following search Actions:
- Find Project - Finds an existing Project in Celoxis.
- Find Task - Finds an existing Task in Celoxis.
- Find Issue - Finds an existing Issue in Celoxis.
Below is an example of what a Zap looks like:
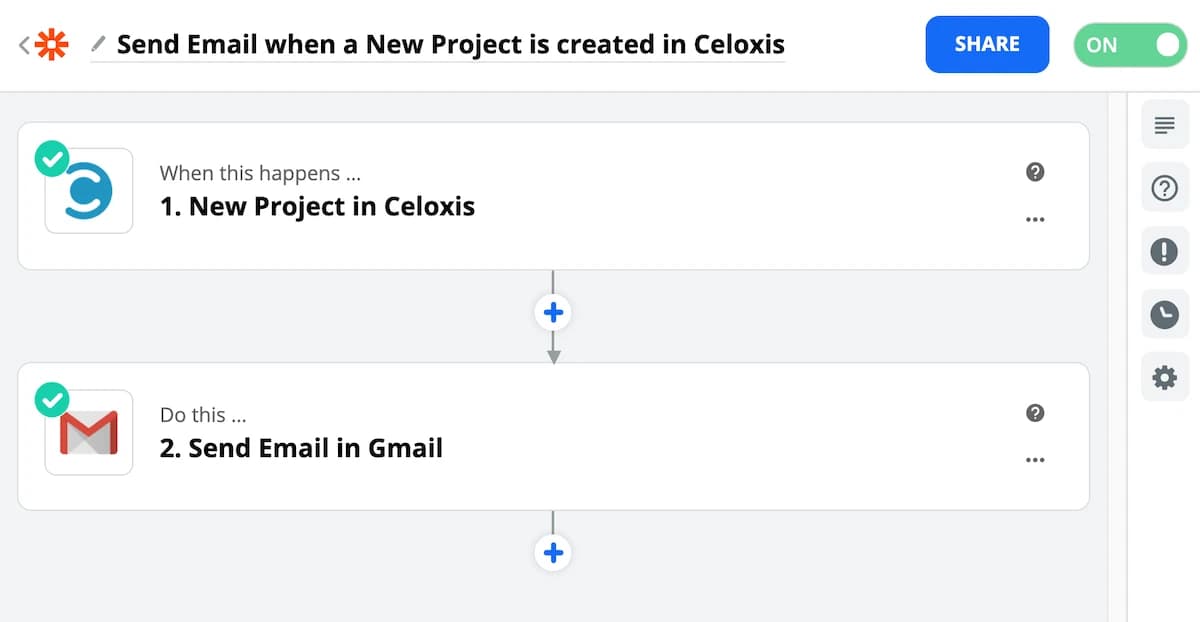
Multi-Step Zaps
We can add multiple steps to make even more automation in a single Zap. For example, we would like to create an Issue app when a Risk app is closed in Celoxis. This can be set up in three steps:
- Issue Status Updated -Use the Issue Status Updated trigger which will check for status updates of Apps.
- Filter By Zapier -Use the Filter By Zapier app in which we can set logical rules which checks if the State of the Risk app is in Closed state i.e.,
state == 'closed'. If the condition is met then the Zap moves to Step 3 else it is stopped. - Create Issue -Use the Create Issue action which will create a new Issue app in Celoxis.
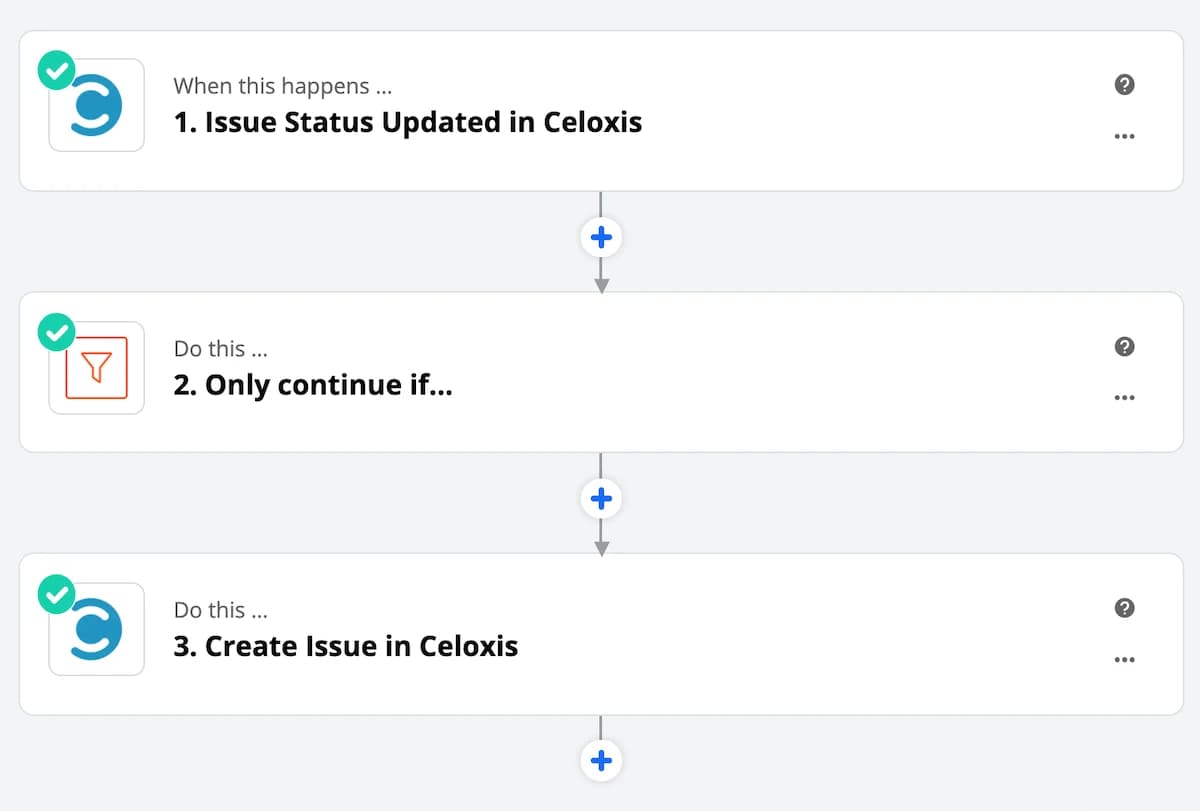
Authentication
While adding your Celoxis account in Zapier it needs to be authenticated for which you will require your account's API key. To generate your API key go to Main MenuAdminAPI. You will be required to enter the API key as shown in the image below.
Actions
MiscellaneousActions
Enabling or Disabling Features
Celoxis gives you the ability to turn some features and capabilities off. Once you turn them off, all fields, actions and menus associated with that module are no longer shown thus simplifying the user interface. You can turn them back on anytime. For example, if you turn off the Expense module, you will see all expense related menus from the main menus, report columns & filters, and task actions disappear.
To enable or disable features, go to the Main MenuAdmin page and turn features on or off as indicated below:
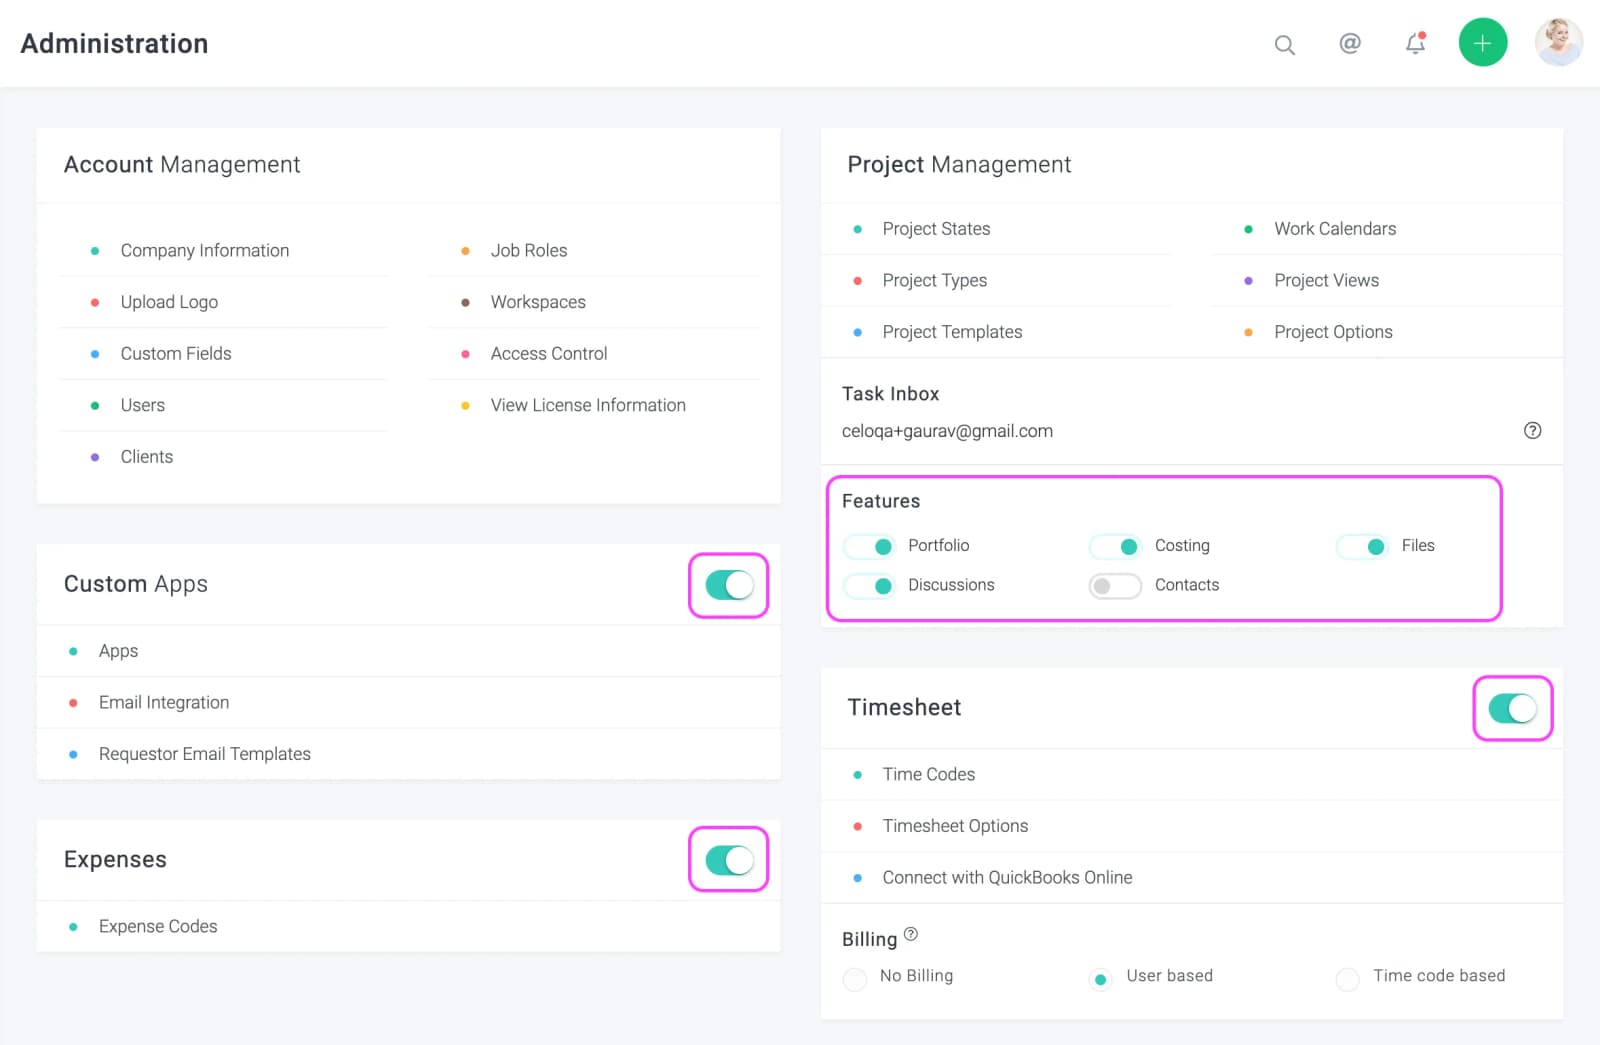
MiscellaneousActions
Uploading Logo
To upload your logo, click Main MenuAdminAccount ManagementUpload Logo. The restrictions on the image dimensions and size will be indicated on the form.
MiscellaneousActions
Configuring Company Settings
The company settings form allows you to configure behaviour and defaults for your users. It also allows for entering your Single Sign-On settings.
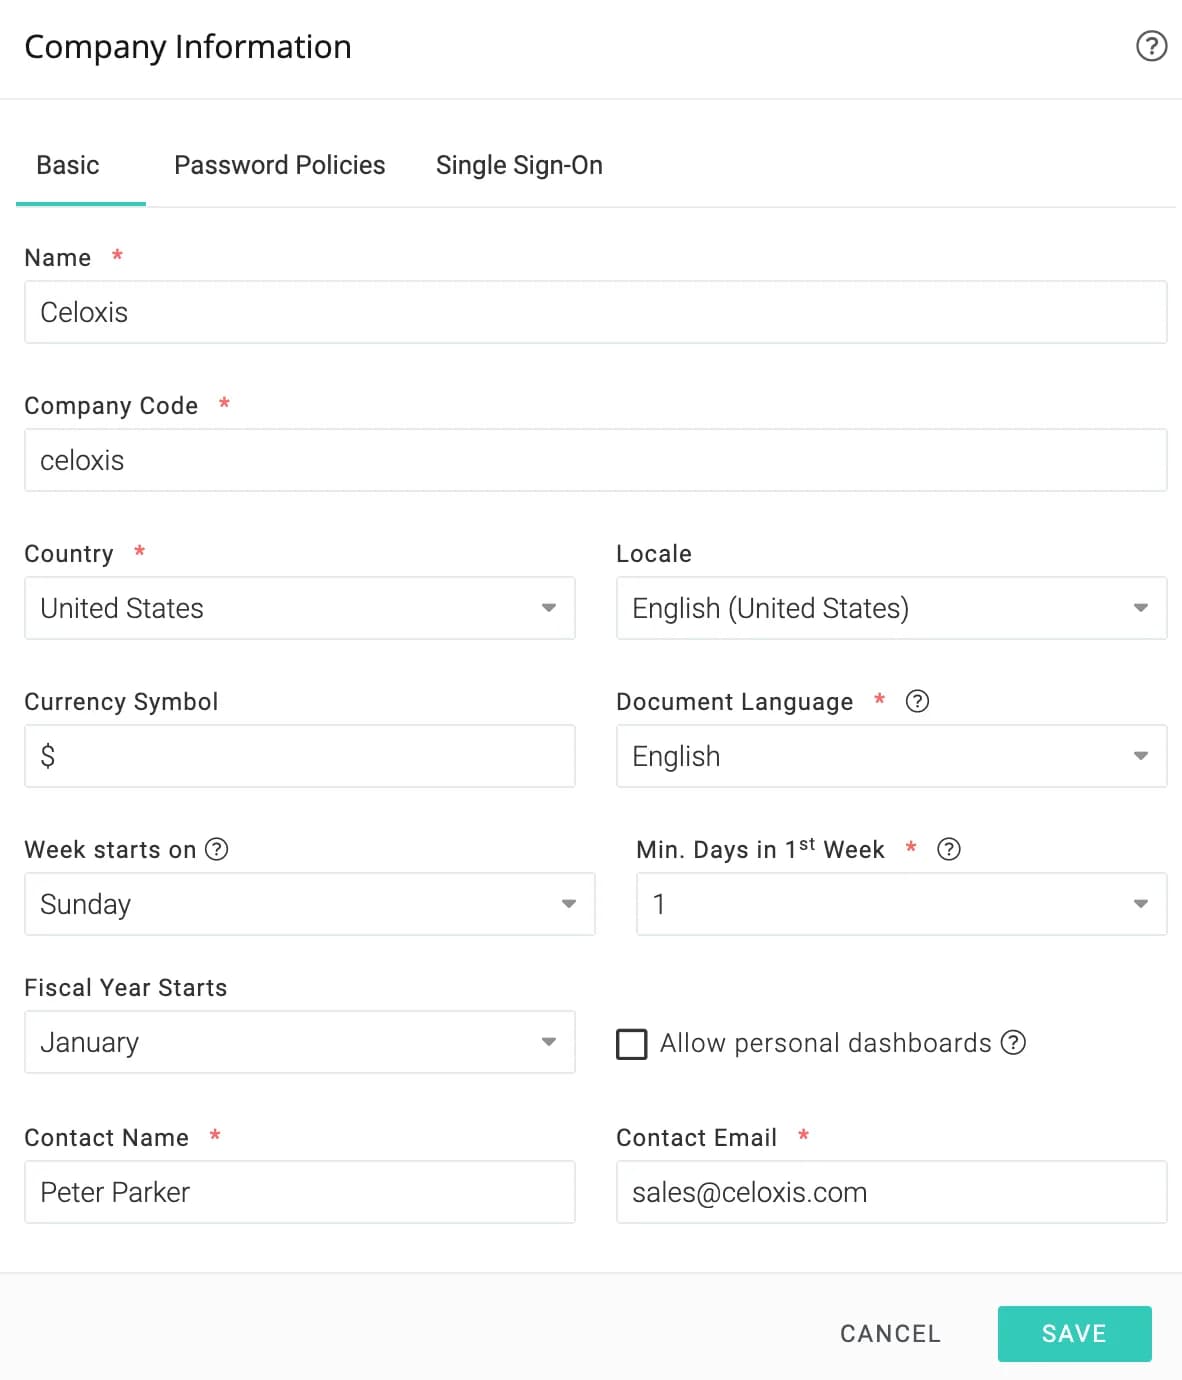
Some of the non-trivial settings are:
- Company Code – A business ID. We recommend that you enter the second level of your domain name here. E.g. acme.com should enter acme here.
- Document Language – Celoxis uses a search engine library that will behave differently when you are mostly going to enter CJK text
- Week starts on – This determines the first day of the week shown in calendars
- Min. Days in Week 1 – This determines whether the week of 1st January lies in the 53rd Week of the previous year or 1st week of the current year.
- Fiscal Year Starts – This determines where a date lies in Q1, Q2, Q3 or Q4.
- Allow personal dashboards – This is covered in the chapter on dashboards
Single Sign-On
This topic has been covered in depth in this chapter.
MiscellaneousActions
Configuring Single Sign-On (SSO)
You can access Celoxis with corporate credentials if SAML-based SSO is enabled for your account. Celoxis works with Google, Salesforce, Okta, OneLogin, Microsoft Azure and Microsoft ADFS. Although, we have not tested, any SAML 2.0 based IDP should work.
For SSO to work, ensure the following:
- Your SSO Identity Provider (IDP) is SAML 2.0 based.
- All your users, clients have unique email addresses.
- The email address of a user in Celoxis matches the email address for that user in your IDP.
To setup SSO, open Main MenuAdminAccount ManagementCompany Information and click on Single Sign-On. You will see the form like this:
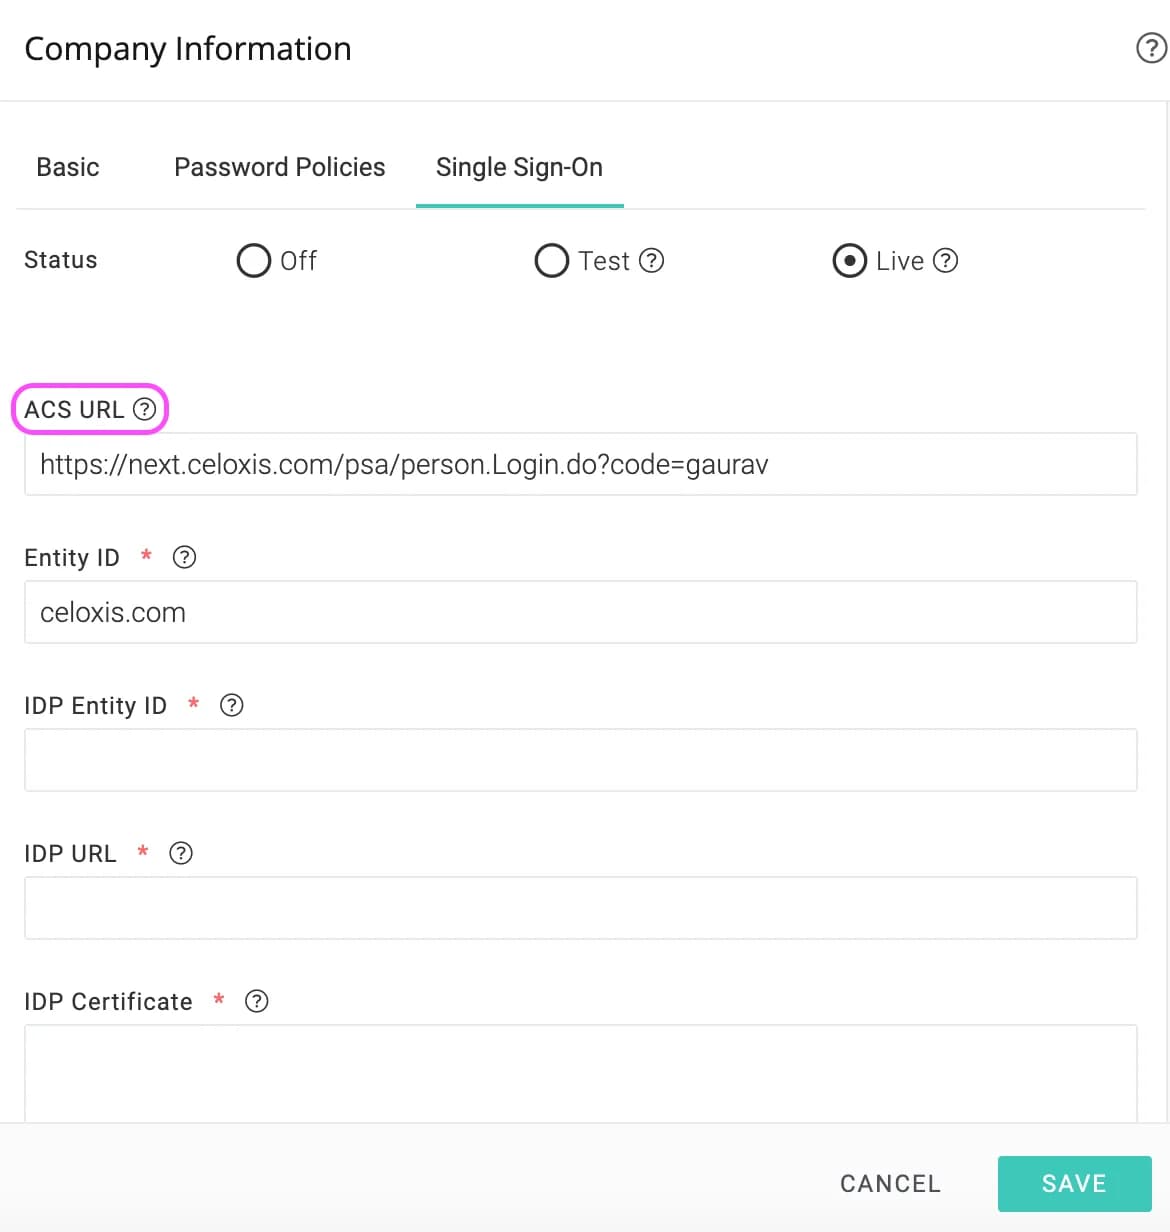
SSO Modes
In all modes, client accounts will continue to be authenticated using Celoxis credentials.
- None – SSO is off. Only Celoxis credentials can be used to log in.
- Test – SSO is on. SSO and Celoxis credentials can both be used to log in.
- Live – SSO is on. Only SSO can be used to log in.
- Your users will not be able to Forgot Password link in Celoxis since we will not store user passwords.
- You will not see the Login and Password fields on the add/edit user forms.
- If you are locked-out for any reason, contact us and we shall reset your SSO details.
Steps in setting up SSO
1: Enable SSO in Test mode
Open Main MenuAdminAccount ManagementCompany Information and go to the Single Sign-On tab
- From the Status row, click on the Test radio button.
- From the options below, copy the ACS URL. This will be required to setup your IDP.
- Setup your IDP. The IDP will give you a set of settings to enter into Celoxis.
- Come back to this screen with the settings collected in the previous step.
- Enter the IDP Entity ID. This is provided by the IDP.
- Enter the IDP URL. This is the address of your IDP which will be contacted for authenticating users.
- Copy - Paste the IDP Certificate. This information is available in the certificate provided by your IDP.
- Click Save
2: Test your setup
- After your step 1 is complete, you should try login to Celoxis by clicking on the Connect via Single Sign-On link on the Login page.
- After you click on the above link, you will be prompted to enter the email address.
- After entering this, you are directed to your IDP login screen; if not already logged in, where you are prompted you to enter the Email and password.
- After successful authentication, you are directed to Celoxis Dashboard. If something goes wrong, have a look at the Common Errors section under your IDP.
3: Go Live with your SSO
- After you have successfully completed step 2, review your SSO details again.
- Then, click on Live.
- Click on Save.
Setting up your IDP
Before you set up Celoxis, you will first need to tell your IDP about Celoxis. The following are the instructions for some of the popular IDPs. If your IDP is not listed here, please consult its documentation.
All IDPs will require an ACS URL for Celoxis. You can find this for your organization by clicking on Test or Live radio buttons as shown above.
Create a SAML App in Google
- Sign in to your Google Admin console using an administrator account.
- Click Apps > SAML apps.
- Click the plus icon in the bottom corner.
- Click on SETUP MY OWN CUSTOM APP.
- The Google IDP Information window opens and the SSO URL and the Entity ID fields are automatically populated. You need to copy the Entity ID and the SSO field values and download the IDP metadata (Option 2) to paste them into the appropriate fields in Celoxis.
- After you have entered this information in Celoxis, come back to the admin console and click Next.
- In the Basic window, enter an Application name and Description.
- Click Next.
- In the Service Provider Details window, enter:
- ACS URL: Enter the value copied from the SSO tab.
- Entity ID: Enter
celoxis.com - Start URL: For SaaS, enter
https://app.celoxis.com/psa/person.Login.do, for On-Premise,https://your_URL/person.Login.do
- Leave Signed Response unchecked.
- Under the Name ID, for Basic Information, select Primary Email.
- UnderName ID Format drop-down, pick EMAIL.
- Click on Next.
- Click Finish.
Enable the SAML App for users
- Go to Apps > SAML apps.
- Select the SAML app your created above.
- At the top of the gray box, click on Settings and choose On for everyone and confirm the settings.
Common Errors
Error: app_not_enabled_for_user
Solution: You have not enabled the SAML app for your users. Follow the steps mentioned above to enable the app for everyone. The same error will be shown if you are logged in to Google account using a different user than the one setup for IDP.
Server Error : No company found with company code: XXXX
Solution: The ACS URL you have entered in Google configuration is incorrect. Copy the correct URL from the ACS URL field under Single Sign-On tab in Celoxis.
Invalid Request, no idpId in request URL or Destination param of the SAML request.
Solution: The IDP URL you entered in Celoxis is incorrect. You need to copy this from your IDP and paste it in Celoxis.
Salesforce
- Enable My Domain from Setup > Administer > Domain Management > My Domain. Deploy it to all users. This will automatically create Salesforce Identity Provider.
- Navigate to Administer > Security Controls > Identity Provider. You will see Identity Provider setup details which needs to be entered in Celoxis.
- C$lick on theDownload Metadata button to download the certificate. The contents of this certificate is to be entered in the IDP Certficate field in Celoxis as described earlier in the document.
- Now, on the same page below, click on Service Providers are now created via Connected Apps. Click here.
- On the New Connected App page, enter the following details:
- Connected App Name
- Start URL
- Check the Enable SAML checkbox.
- Entity ID
- ACS URL
- Subject Type: Select Custom Attribute
- Name ID Format: Select
urn:oasis:names:tc:SAML:1.1:nameid-format:emailAddress - IdP Certificate: Select the appropriate certificate you have entered in Celoxis (Step 3)
- Click on Save.
- After the App is created, you now have to associate User profiles to this so that users belonging to these profiles can login via SSO.
Navigate toManage Apps > Connected Apps. Click on the app your just created. - Scroll down and click on Manage Profiles.
- Select the required profiles and click on Save.
Common Errors
Server Error Not authenticated
Solution: The IDP certificate you have entered in Celoxis is incorrect. Enter the correct certificate you have created for this (Step 3 above) You will face the same error if you have not associated the logging in user's profile with the Connected app as explained in step 7 to 9 above.
Okta
- Log in to your Okta organization as a user with administrative privileges.
- Click on the Admin button on top-right.
- Click on the Add Apps label.
- Click on the Create New App button.
- In the dialog that opens, select the SAML 2.0 option, then click the Create button.
- On the General Settings page, enter the application name, for e.g. Celoxis in the App name field, then click the Next button.
- For Configure SAML step, enter the following details:
- Single sign on URL: This is the ACS URL you will get from Celoxis
- Audience URI (SP Entity ID): For SaaS users, enter:
https://app.celoxis.com; for On-Premise users, enter the URL of your application. - Name ID format:
EmailAddress
- Click Next.
- In Feedback, select “I’m an Okta customer adding an internal app”, and “This is an internal app that we have created,” then click Finish.
- In the People section of the application, click on the Assign to People button. Select the required users and click on Done.
- In the Sign On section of your newly created application click on View Setup Instructions. A new tab opens with the details you need to enter in Celoxis. Fill the Single Sign-On tab in Celoxis as mentioned earlier in this document.
Common Errors
If you are still prompted for credentials after clicking on Connect via SSO and entering SSO credentials, it means that you have entered the ACS URL /Single sign on URL in Okta incorrectly. Please correct and try again.
Sorry, you can't access <app name> because you are not assigned this app in Okta.
The user who is trying to login via SSO is not assigned to the app created in Okta. Redo the step Assign to People mentioned above.
OneLogin
- Login to your OneLogin account with administrator privileges.
- Click on Applications > Applications from the main menu.
- Click the Add App button.
- Search for SAML Test Connector (IdP w/ attr w/ sign response) and click on it.
- Enter Celoxis as the Display Name and click on Save.
- Click on the Configuration tab.
- Copy the ACL URL from Celoxis to the Recipient and ACS (Consumer) URL tab.
- In the ACS (Consumer) URL Validator field, escape the ACS URL as mentioned in the OneLogin documentation. In short, you have to prefix the url with
^put the backslash character (\) before each forward-slash character. e.g.^https:\/\/app.celoxis.com\/psa\/person.Login.do?code=abc - Your OneLogin screen should look something like this: Click the Save button.
- Click on the SSO tab.
- Copy the SAML 2.0 Endpoint (HTTP) URL and set it as the IDP URL in Celoxis.
Common Errors
The response was received at <Celoxis URL> instead of <URL>
The ACS (Consumer) URL Validator is not URL escaped as shown in screenshot above.
ADFS
- Log in to ADFS Server.
- Launch the ADFS Management Console.
- Open the AD FS > Trust Relationships folder from the LHS menu.
- Right-click on Replying Party Trusts and choose Add Relying Party Trust... menu item.
- This will open a Wizard. Click on the Start button.
- In the Select Data Source step, select the Enter data about the relying party manually option. Click Next.
- In the Specify Display Name step, enter Celoxis. Click Next.
- In the Choose Profile step, select AD FS profile. Click Next.
- In the Configure Certificate step, we shall use the defaults. Click Next.
- In the Configure URL step, check the Enable support for the SAML 2.0 WebSSO protocol option. Under the Relaying party SAML 2.0 SSO service URL, enter the ACS URL copied from Celoxis. Click Next.
- In the Configure Identifiers step, enter the ACS URL as the Relaying party trust identifier and click Add. Click Next.
- In the Configure Multi-factor... step, we shall use the defaults. Click Next.
- In the Choose Issuance Authorization... step, choose Permit all users to access this relying party. Click Next.
- In the Ready to Add Trust step, you will be shown an overview of your settings. Click Next.
- In the Finish step, select the Open the Edit Claims... option. Click Close.
- You should now be shown the Claims Editor window.
- Click Add Rule... under the Issuance Transform Rules tab.
- In the Choose Rule Type step, select Send LDAP Attributes as Claims as the Claim Rule Template . Click Next.
- On the next screen, using Active Directory as your attribute store, do the following:
- From the LDAP Attribute column, select E-Mail Addresses.
- From the Outgoing Claim Type, select E-Mail Address.
- Click OK to save this rule.
- Click Add Rule... under the Issuance Transform Rules tab to add a new rule.
- In the Choose Rule Type step, select Transform an Incoming Claim as the Claim Rule Template . Click Next.
- On the next screen:
- Select E-Mail Addresses as the Incoming claim type.
- Select Name ID as the Outgoing claim type.
- Select EMail as the Outgoing name ID format.
- Select Pass through all claim values option.
- Click OK to save this rule.
- Click OK to finish creating rules.
We shall now export the certificate that needs to be copied over to Celoxis
- Open the AD FS > Settings > Certficates folder from the LHS menu. The Certificates pane showing all available certificates appears.
- Select the certificate under Token-Signing in the Certificates pane.
- Click the Copy to File option in the Details tab of the Certificate window. This starts the Certificate Export wizard.
- In the Welcome step, click Next.
- Choose Base64 encoded X.509 (.CER) as the file format in which the certificate is to be exported. Click Next.
- Save the file to an appropriate location and complete the wizard.
- Ensure that the saved file has the
.CERextension. - You will need to copy paste the contents of this file in the IDP Certficate field in Celoxis as described earlier in this document.
Azure
- Log in to the Azure portal.
- In the LHS menu, click Azure Active Directory.
- In the Azure Active Directory menu click Enterprise applications.
- Click New application at the top of the screen.
- In the Add an application section, choose Non-gallery application.
- Give the new application a name (e.g. Celoxis SSO) and then click Add at the bottom of the screen. This will add a custom application to your Azure Active Directory. Note: If you do not have Azure AD Premium activated, you will not be able to enter the name of the application.
- On the application page, click Users and groups in the LHS menu.
- At the top page the right pane, click Add user to assign users or groups to this application.
- Click Single sign-on in the LHS menu and then choose SAML as the single sign-on method.
- Click on the icon next to the title of the Basic SAML Configuration panel and enter details as follows:
- Identifier (Entity ID): Enter the value from the Single Sign-On tab (refer the image included above).
- Reply URL (Assertion Consumer Service URL): Copy the details from under the ACS URL field (Admin > Company Settings)
- Sign on URL: For SaaS enter
https://app.celoxis.com. For On-Premise enter your URL. - Relay State: Skip this field
- Logout URL: For SaaS enter
https://app.celoxis.com/psa/logout.do. For On-Premise enter[your-url]/psa/logout.do
- Return to the setup screen.
- Click on the icon next to the title of the User Attributes & Claims panel.
- Click on the icon next to Name identifier value. A Manage user claims sidebar will appear.
- Enter a name and select
user.mailin the Source attribute drop-down. Click Save. - Return to the setup screen.
- Click on the icon next to the title of the SAML Signing Certificate panel.
- Enter a notification email for the certificate expiry reminders. Click Save.
- Return to the setup screen.
- Click on Download next to the Certificate (Base64) option to save the certificate file on your computer. You should copy paste this in Celoxis as described earlier in this document.
- Return to the setup screen.
- Click on Validate to validate single sign-on with Celoxis.
MiscellaneousActions
Two-Factor Authentication (BETA)
Celoxis Admins can enforce two-factor authentication (2FA) for all users and clients, thereby adding an additional level of authentication & boosting security. With 2FA enabled, all users logging in to Celoxis will be requested for an extra 6-digit code, in addition to the user's email and password.
To use 2-step verification, Celoxis users will require an authentication app either on your mobile phone or tablet that can generate a time-based, one-time password.
We have tested the authentication with Google and Microsoft authenticators, and it works as expected. Although we haven't tested with other apps, any authenticator app should work in a similar manner.
Enabling 2FA for Your Company
To enable 2FA for your company, follow the below steps:
- From the Top-Right Menu, select the Profile Icon.
- Click on Admin.
- Under Account Management, select Company Information.
- Click on Password Policies.
- Check the box labeled Enable Two-Factor Authentication. (as shown in the screenshot below).
As soon as the checkbox is clicked, the following message will be displayed:
Enabling this will force all users including you to set up two-factor authentication via their mobile device before continuing to use Celoxis. We recommend you to inform all your users and schedule this before enabling this option.
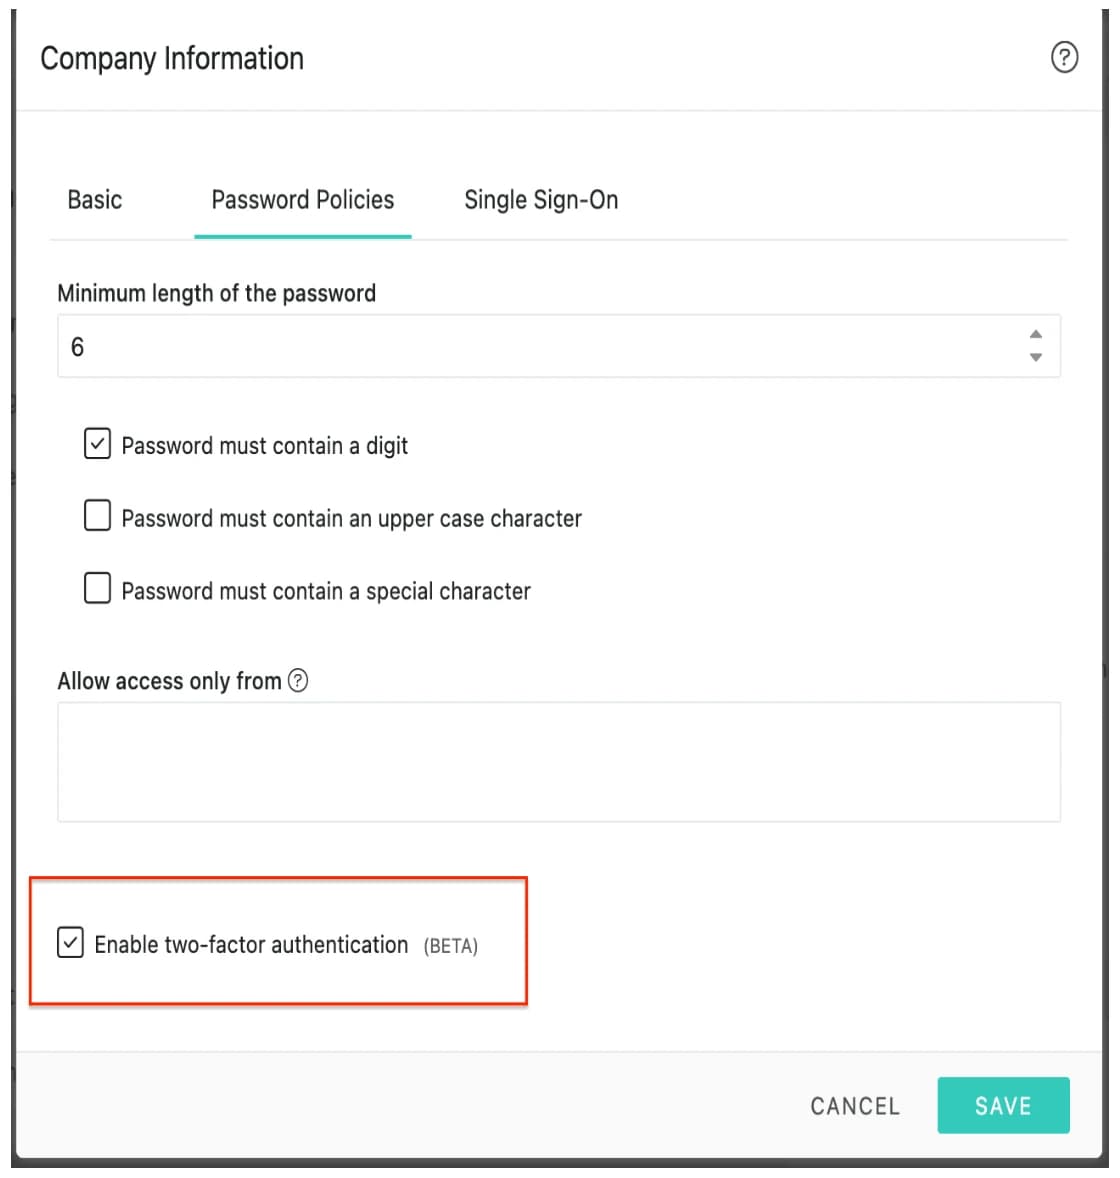
How does it work for an existing user?
Once 2FA is enabled for your company:
- If the user is currently logged-in, then that user will get automatically redirected to the configuration page (as shown in the screenshot below).
- If a user tries to login for the first time after 2FA is enabled, then the user will be redirected to the configuration page (as shown in the screenshot below) as soon as the user enters the username and password.
- Scan the QR code or enter the Secret Key into your Authenticator app. Once completed, click on Confirm.
Note: The configuration will not be complete until you click Confirm.
Once completed, the user will be redirected to the login page. Enter your username and password and the 6-digit verification code generated by your authenticator app > Login.
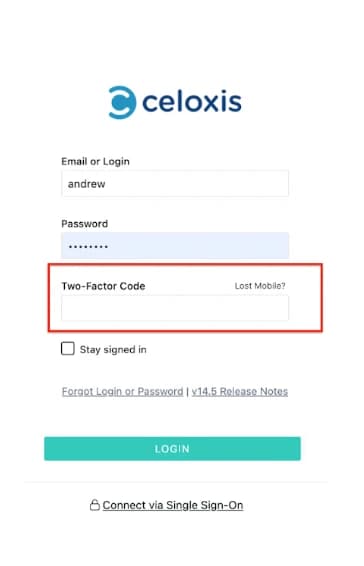
Reconfigure 2-Step verification
If you want to use 2-step verification on a different device, you can reconfigure your settings. We suggest installing an authenticator app on your new phone before adjusting your 2-step verification settings.
- From the Top Menu, select the People Icon > Profile. The My Settings page will open.
- Scroll down to the Login Details section, check the box labeled “Reset Two-Factor Authentication Setup,” and then click Save.
The remaining steps remain the same as described in "How does it work for an existing user?"
In case of a Lost Mobile?
Contact one of your account admins so that they can enable Reset Two-Factor Authentication Setup for you. You can then login and reconfigure your 2-step verification settings.
Steps to be followed by an Admin user:
- From the LHS main menu > Hover on More > Users.
- Click on the user name > Edit.
- On the Edit users page > Scroll below to the Login details section and Check the check box Reset two-factor authentication setup.
- You can then inform the user to reconfigure 2-step verification.
How-To
MiscellaneousHow-To
Jira / Azure DevOps Integration
The Celoxis - JIRA or Celoxis - Azure DevOps integration allows you to seamlessly sync data between Celoxis and your work management tool, ensuring that your project management and issue-tracking workflows are in sync.
The different Issue types in JIRA/DevOps will be created as Tasks in Celoxis.
This integration enables you to leverage the strengths of both platforms, enhancing collaboration and productivity within your team.
Prerequisites
Before you begin the integration process, ensure that you have the following prerequisites:
- Administrative privileges in Celoxis to configure the integration.
- Understanding of your project KEY that needs to be synced into Celoxis.
Integration Steps
Follow these steps to integrate Celoxis with JIRA:
- Setup the Integration
- Log in to your Celoxis account.
- Navigate to Admin > Integrations.
- Click on the JIRA or DevOps tab as you need and check the Enable box. Jira Azure Devops Under the URL: Enter the URL of your JIRA instance. Under Username, enter the username of email address of the user who has access to the projects to be synced. Under API Token, paste the token that you generated in JIRA. For details on API Token, refer here. Under REST API EndPoint Base URL: Enter the URL of your DevOps instance. Under PAT, paste the token you generated in DevOps. For steps, refer here.
- If you use Story Points in JIRA for estimation, you need to enter the equivalent hour's conversion under 1 Story Point = ? Effort Hours. Celoxis will then populate the Planned Effort field against the task.
- However, if you use the Original Estimate field in JIRA/DevOps, you can check the Prefer original estimate over the story points checkbox so that the Planned Effort = Original Estimate.
- Under the Timecode drop-down, select the Activity Code that will be used to submit the Worklog time entries against the task.
- Once done, click on Save.
- Steps in JIRA / Azure DevOps:
You only need to know the project key for JIRA or the Project Name for DevOps, which will be mapped to the respective projects in Celoxis.
- Mapping your project in Celoxis:
- When creating or editing the project, navigate to the Advanced tab.
- Scroll down till you see the INTEGRATION section.
- Select Jira/Devops under the first dropdown and then proceed to enter the project key from JIRA here. If you have integrated with DevOps, the project name needs to be entered here.
- Click on Save.
- Now, navigate to the Gantt of the project, where you will see the Sync with Jira or Sync with DevOps button on the toolbar depending on the integration setup.
- Click this to fetch all the issues in Celoxis.
- Whenever changes are made in Jira/DevOps, and you need to see the latest updates, click this button.
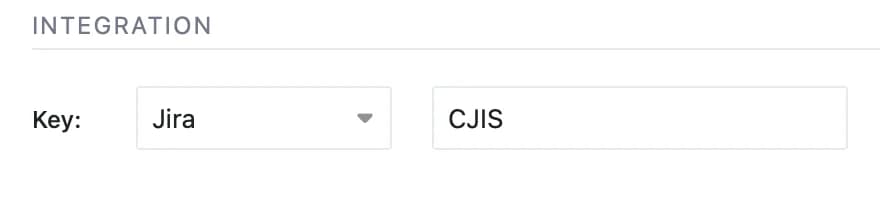
How It Works
The integration works by establishing a connection between the two platforms and automatically syncing data based on the mapping configuration.
Jira
| Field name in JIRA | Field in Celoxis |
|---|---|
| Summary | Name |
| Original Estimate | Planned Effort |
| Time Spent | Time Entries in Celoxis (only for JIRA) |
| Story Points | Converted to Planned Effort |
| Assignee | Resources |
| Key | Issue Key |
| Issue Type | Issue Type |
| Issue Status | Issue Status |
| Sprint Name | Sprint Name |
| Sprint Start | Sprint Start |
| Sprint Finish | Sprint Finish |
| Link | Predecessors |
Azure Devops
| Field name in DevOps | Field in Celoxis |
|---|---|
| Title | Name |
| Original Estimate | Planned Effort |
| Story Points | Converted to Planned Effort |
| Assignee | Resources |
| ID | Issue Key |
| Work Item Type | Issue Type |
| State | Issue Status |
| Iteration Name | Sprint Name |
| Iteration Start | Sprint Start |
| Iteration Finish | Sprint Finish |
| Link / Related Work | Predecessors |
When an addition/change is made in JIRA/DevOps against any of the fields mentioned above, the integration automatically updates the corresponding fields in Celoxis only after you click on the Sync..button.
Benefits of Integration
- Reduced Manual Work: Automatically create Celoxis tasks for new Jira issues, eliminating duplicate data entry.
- Improved Resource Management: Visualize team workload across Celoxis and Jira for better resource allocation. This helps with project prioritization and managing a balanced workload.
- Streamlined Release Management: Visualize your sprint delivery to track deliverables and get clarity of the delivery process.
- Track Plan vs. Actual: With Worklogs data synced in, you get transparency between the Plan and Actual Effort to track efficiency.
- Enhanced Visibility: Maintain a single source of truth for your leadership to track status and understand the overall progress across sprints.
MiscellaneousHow-To
Jira Integration using Zapier
In many organizations, Jira is still the key software for developers, while project managers and PMO want to use a project management software and still have visibility into resource workloads.
With this integration, you will be able to automatically create tasks in Celoxis when issues are created in Jira. Also, when issues are updated in Jira, the corresponding tasks in Celoxis will be automatically updated.
Zapier
Celoxis integrates with Jira and many other apps using Zapier. Zapier is a cloud-based service that allows you to build powerful integrations between different systems without writing code. For more information, visit their website: zapier.com.
Zap
An automation in Zapier is called a zap. A zap connections two apps - a trigger app and an action app. The trigger app notifies the zap about an event and the zap then performs an action in the action app. In our case, the trigger app is Jira because it will notify our zap when an issue is created or updated. The action app, in our case, is Celoxis because that is where our zap will create and update tasks. In this guide, we will be building two zaps:
- Zap #1 — when an issue is created in Jira, create a task in Celoxis.
- Zap #2 — when an issue is updated in jira, update the corresponding task in Celoxis.
Let's see how Jira, Zapier and Celoxis all fit together:
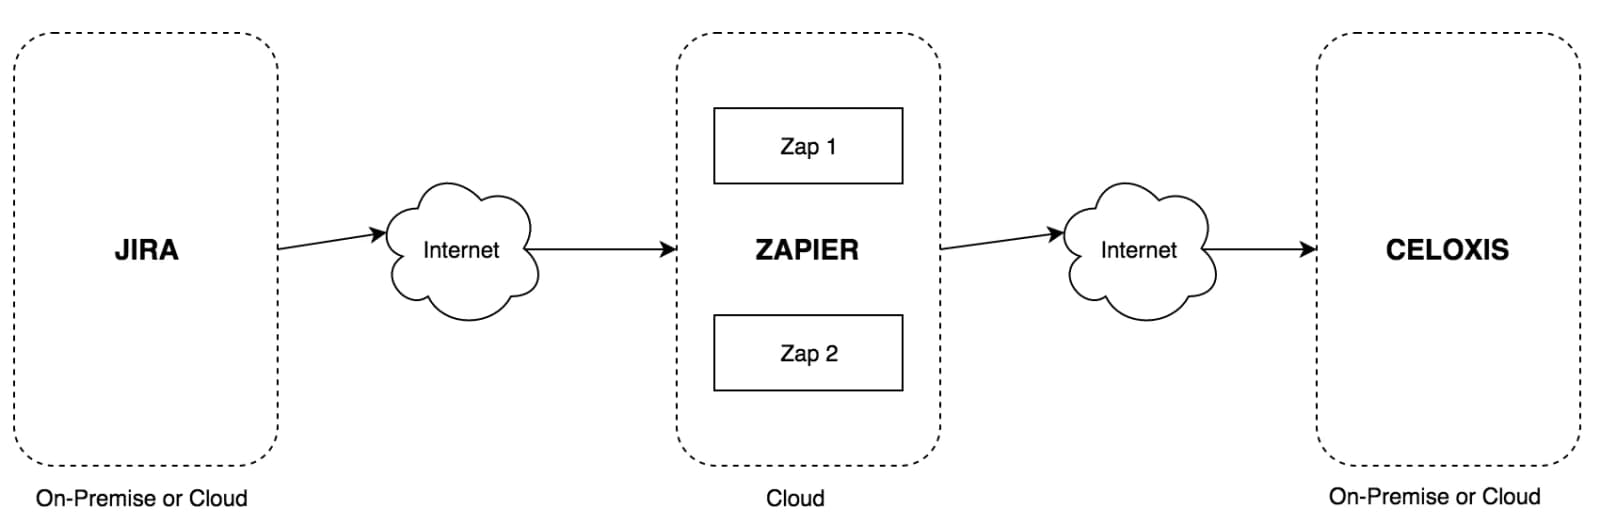
From the above diagram, you can see that Jira and Celoxis can even be on our intranet provided they have access from the internet. It may be possible to configure internet access only from Zapier.
Zap #1 – New issue in Jira → Create task in Celoxis
- Make a Zap
- Choose Jira as the Trigger App
- Select the "New Issue" jira trigger

- Connect with Jira

- Enter Jira credentials
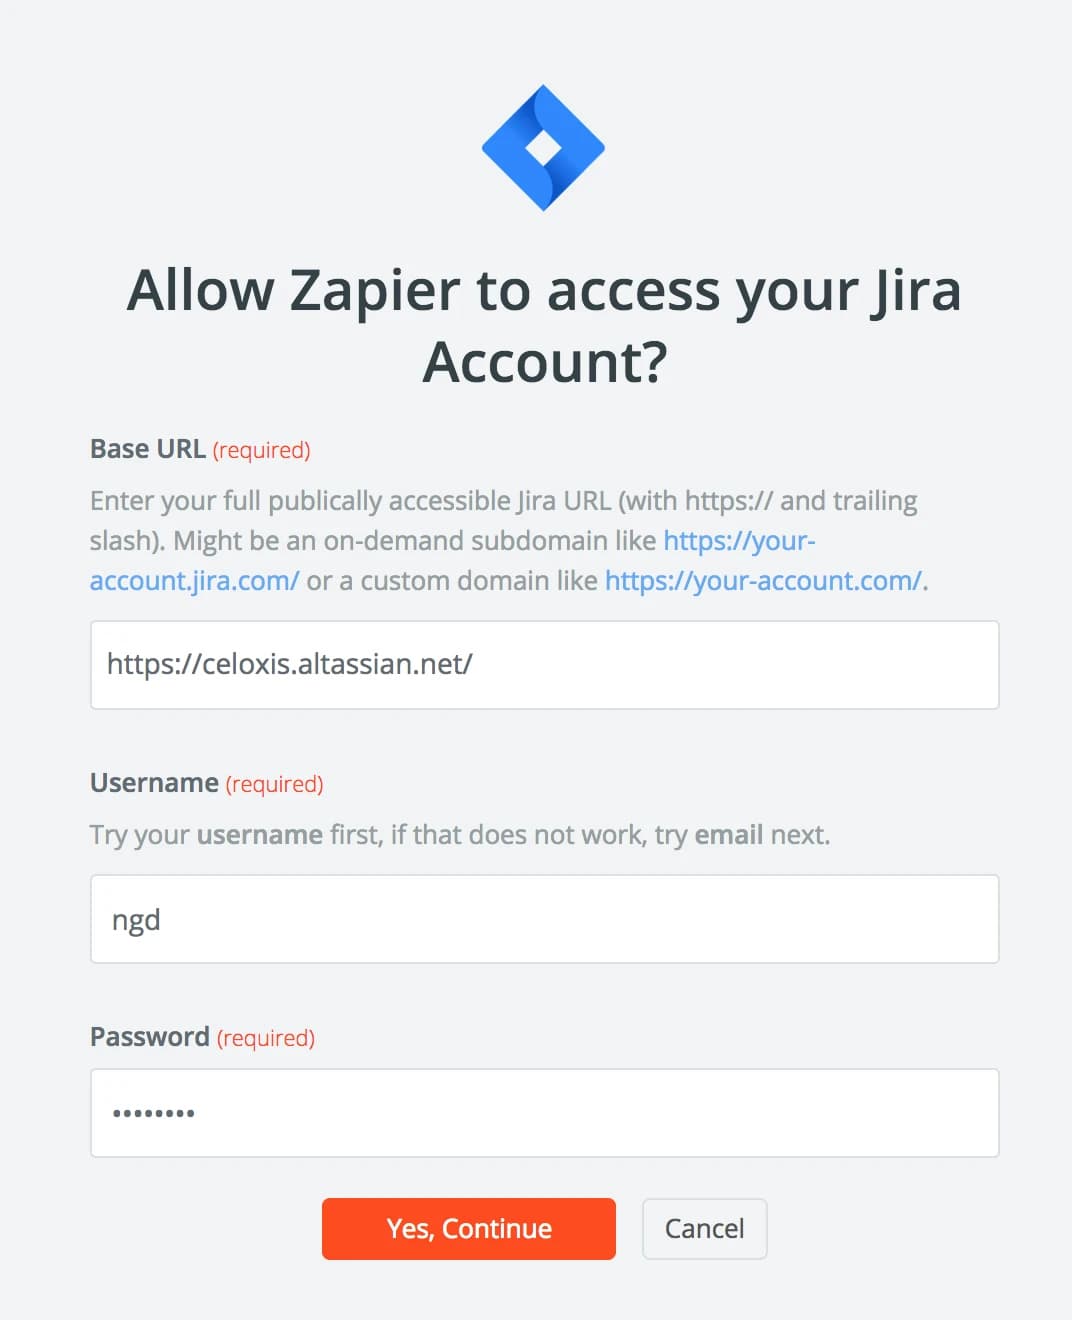
- Test your newly added connection
- You connection is valid
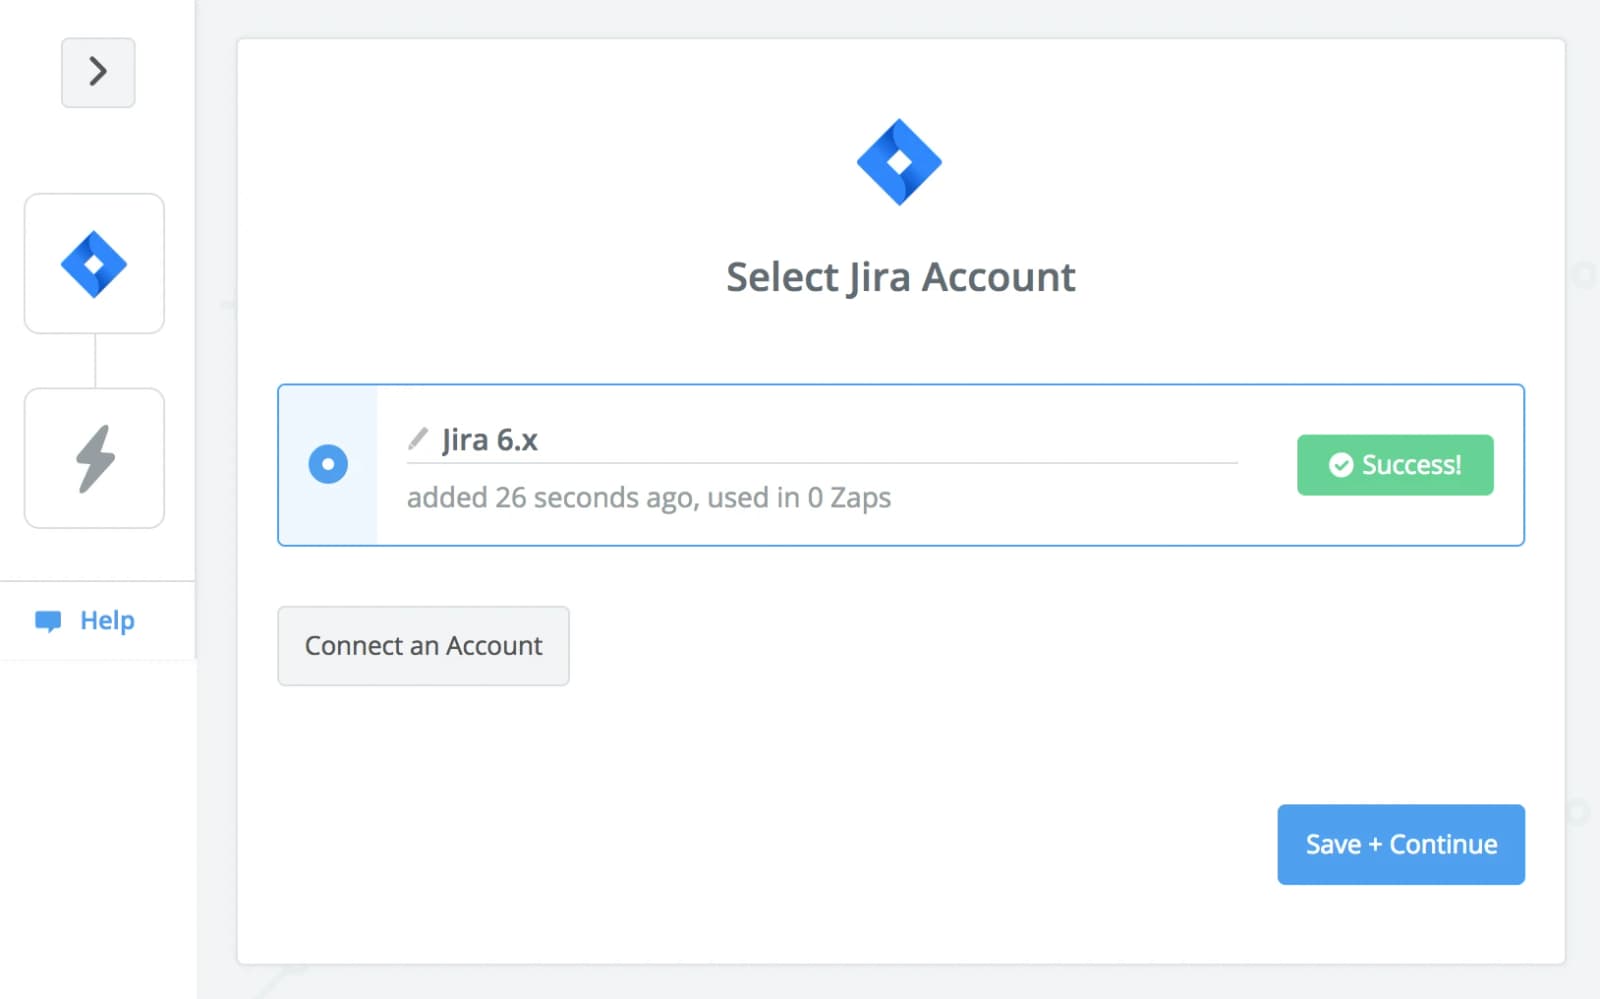
- Select a Jira project
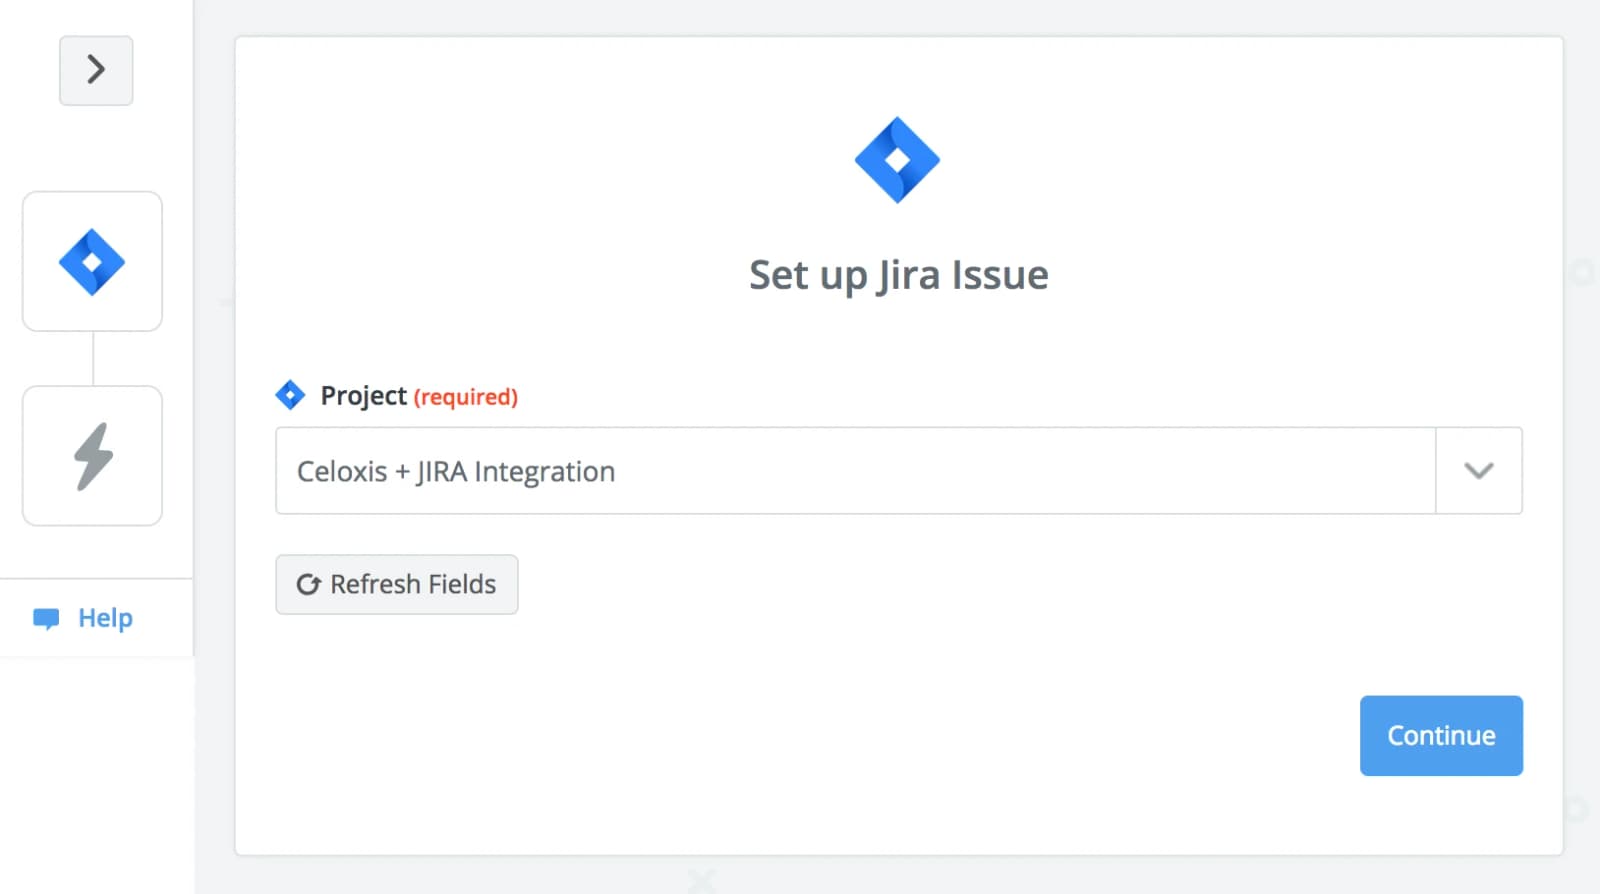
- Pick a Jira sample
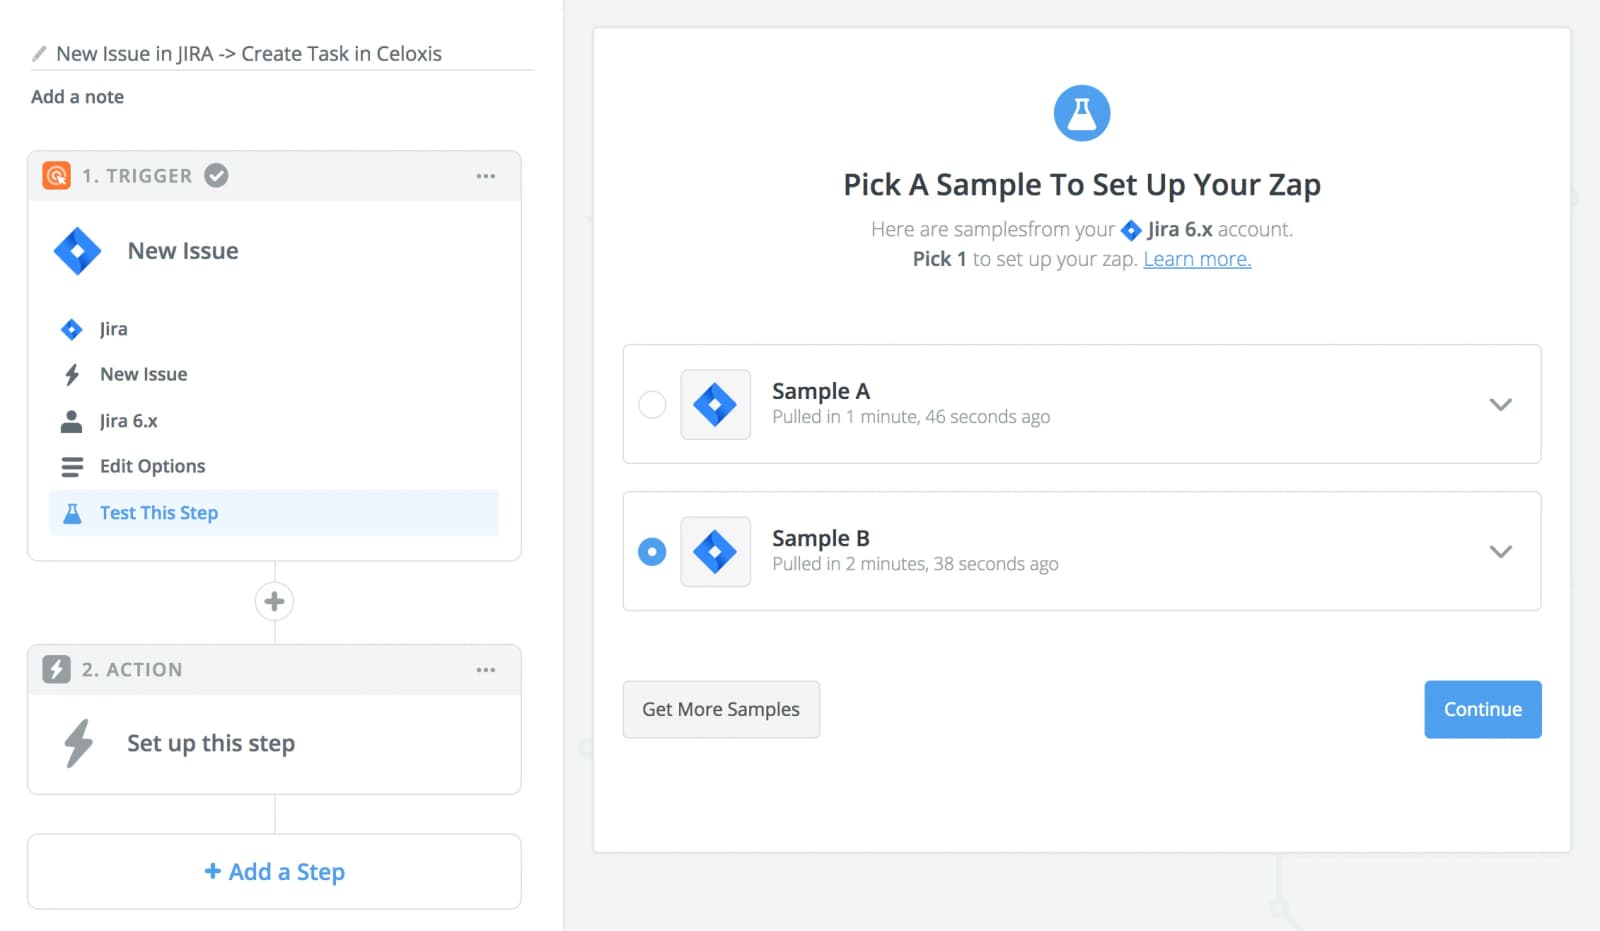
- Choose Celoxis as the action app
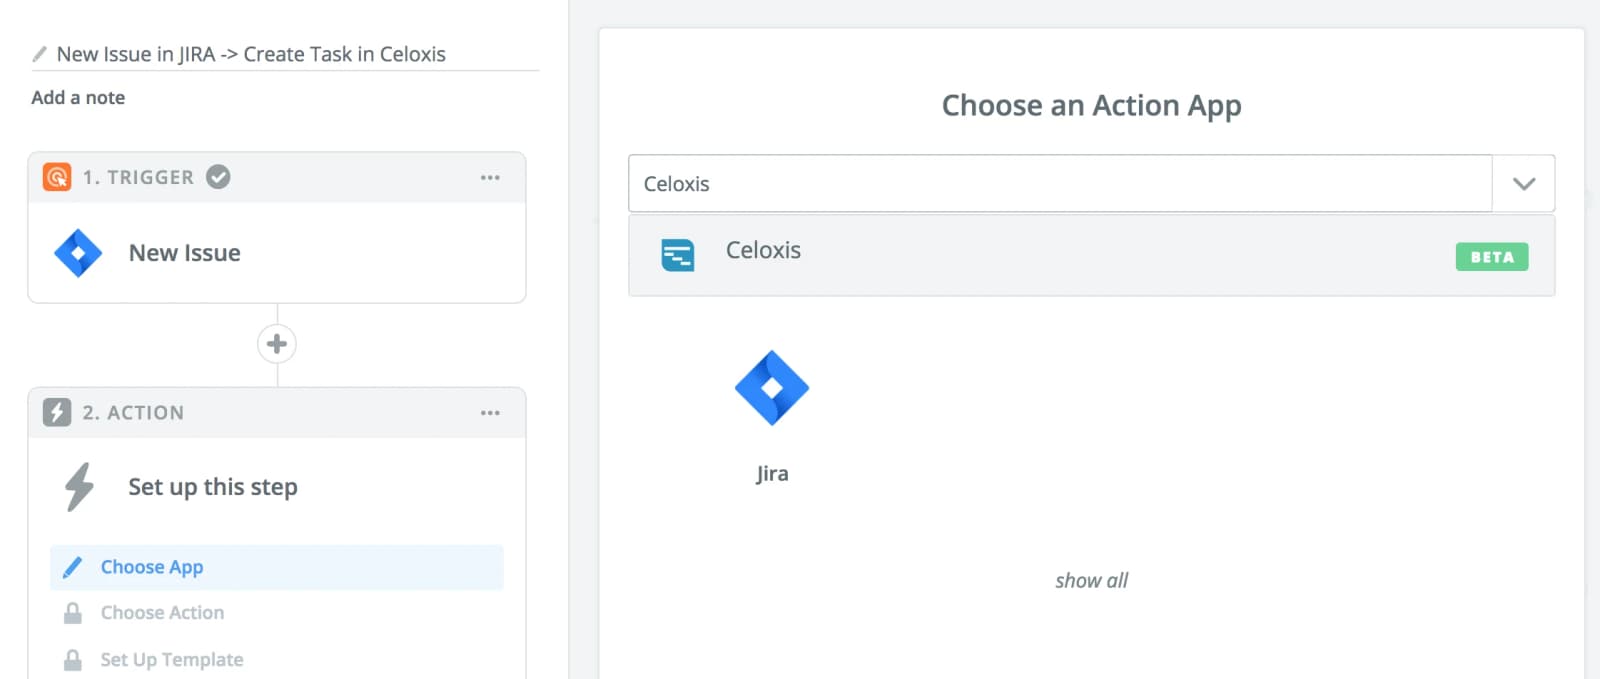
- Select the "Create Task" action

- Connect with Celoxis

- Enter your connection details
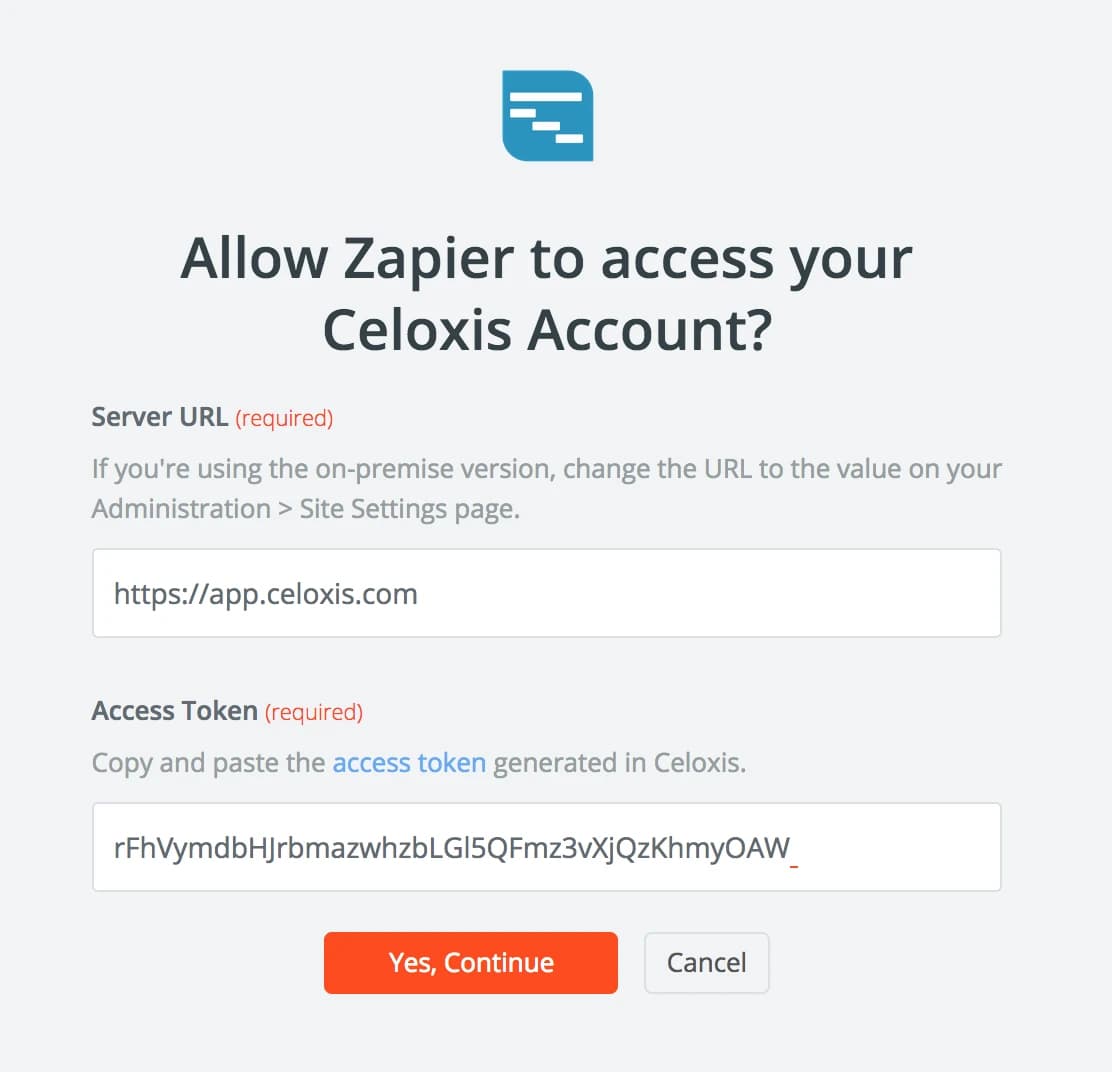
- Test the newly added connection
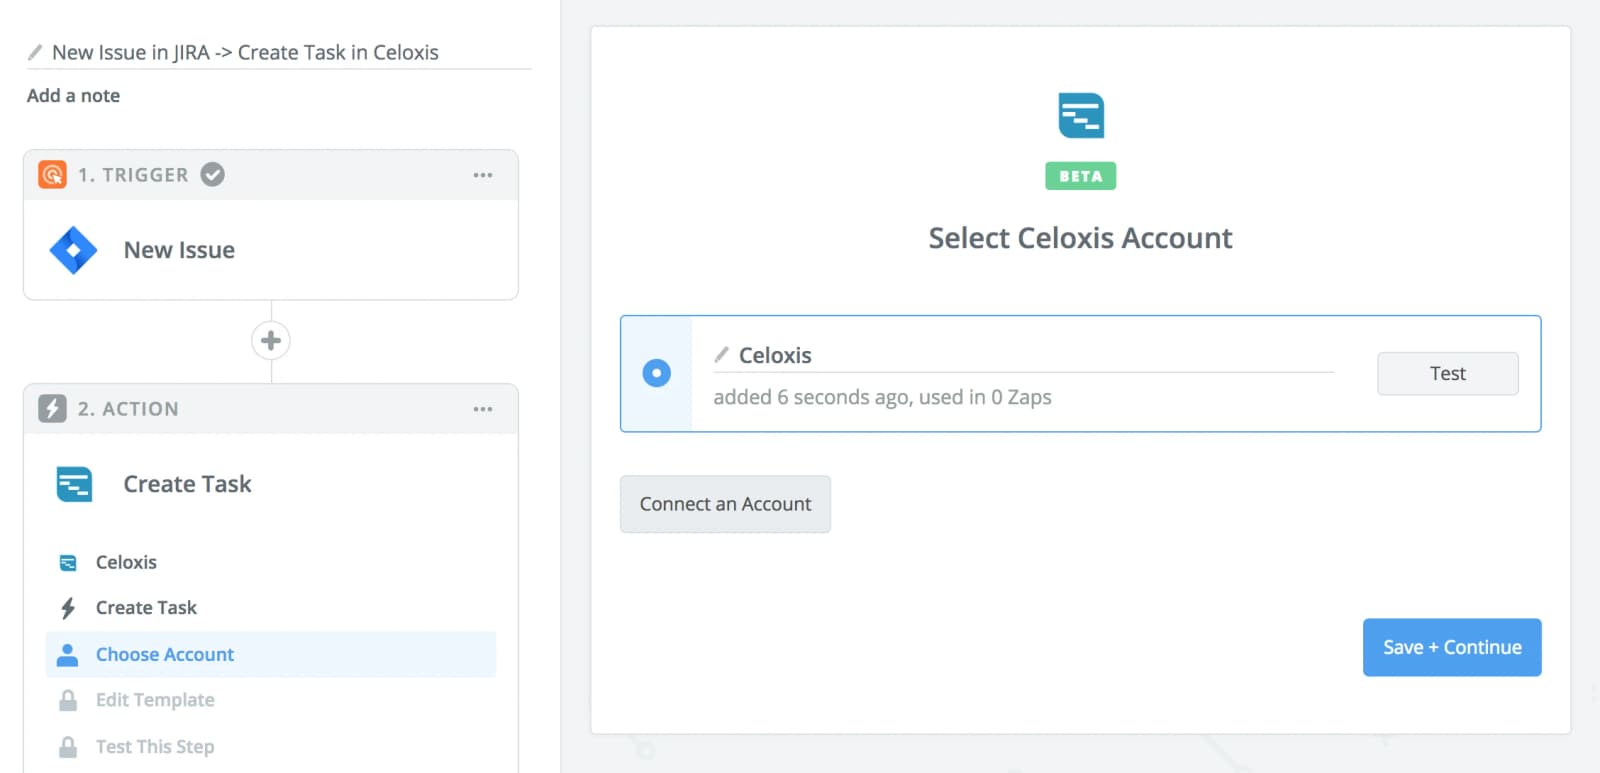
- Your connection is valid
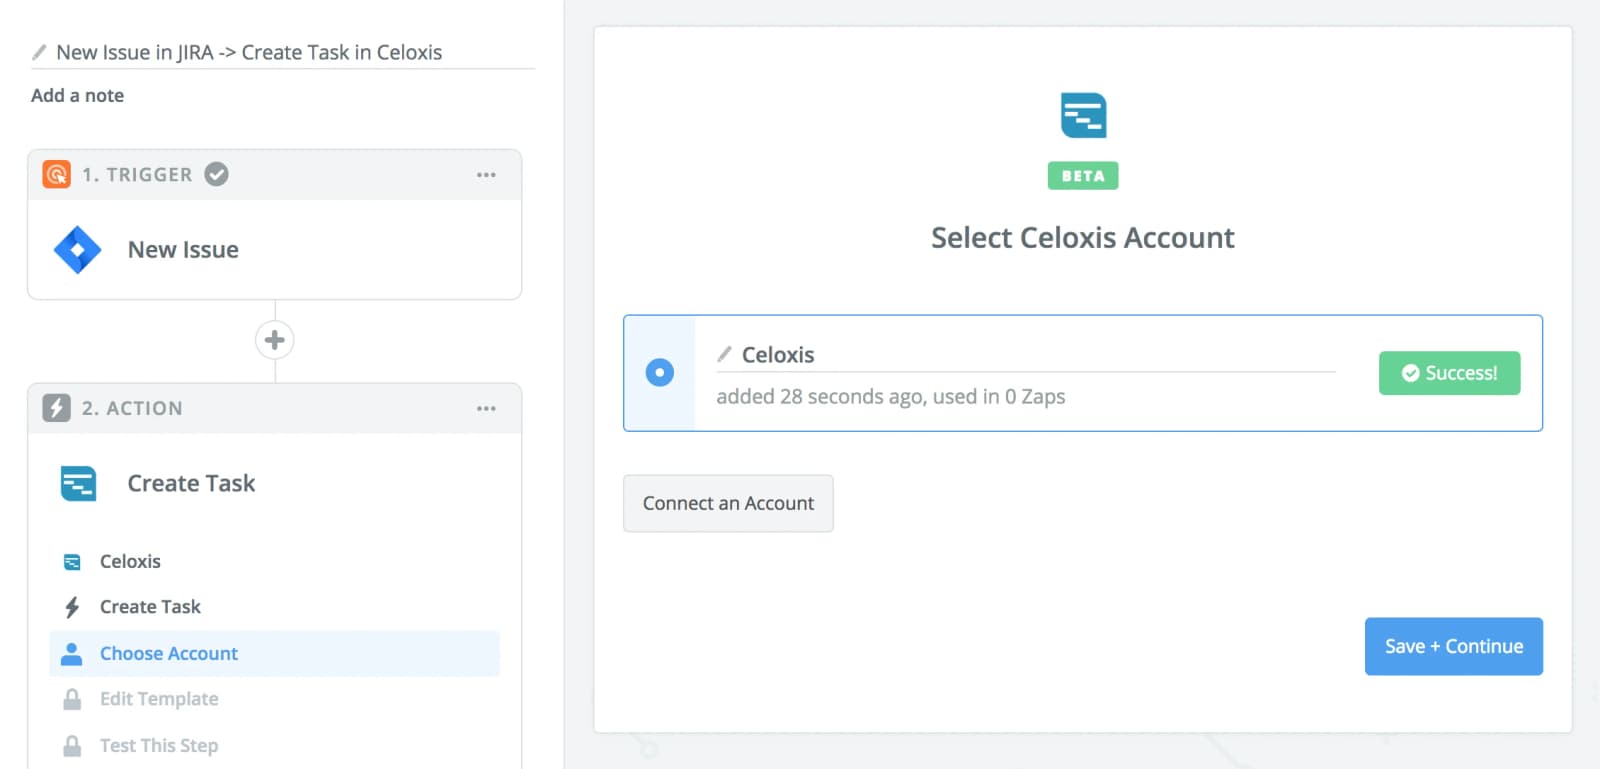
- Map Jira fields to Task fields

- Test this Zap
- Turn this Zap on

After you turn the Zap on, if issues are created in Jira in the project you selected, tasks will automatically be created in Celoxis based on the fields mapped above after
depending on your plan with Zapier.
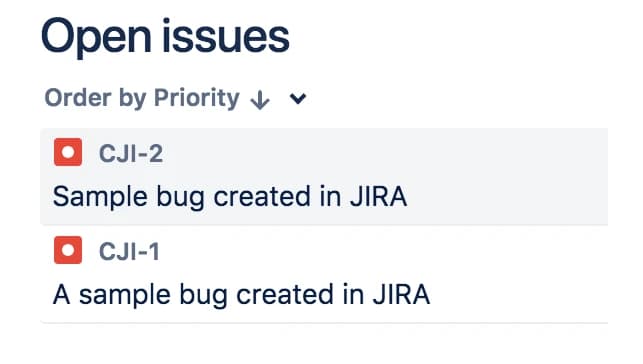
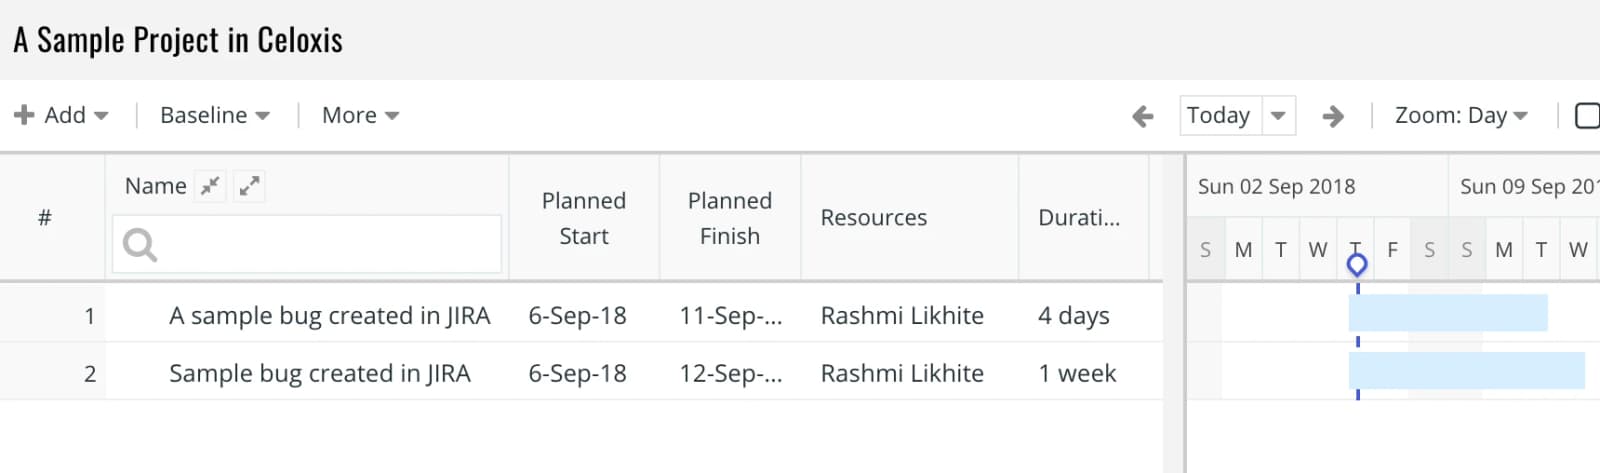
Zap #2 - Issue updated in Jira → Update task in Celoxis
- Make a Zap
- Select Jira as the trigger app

- Select the "Updated Issue" Jira trigger
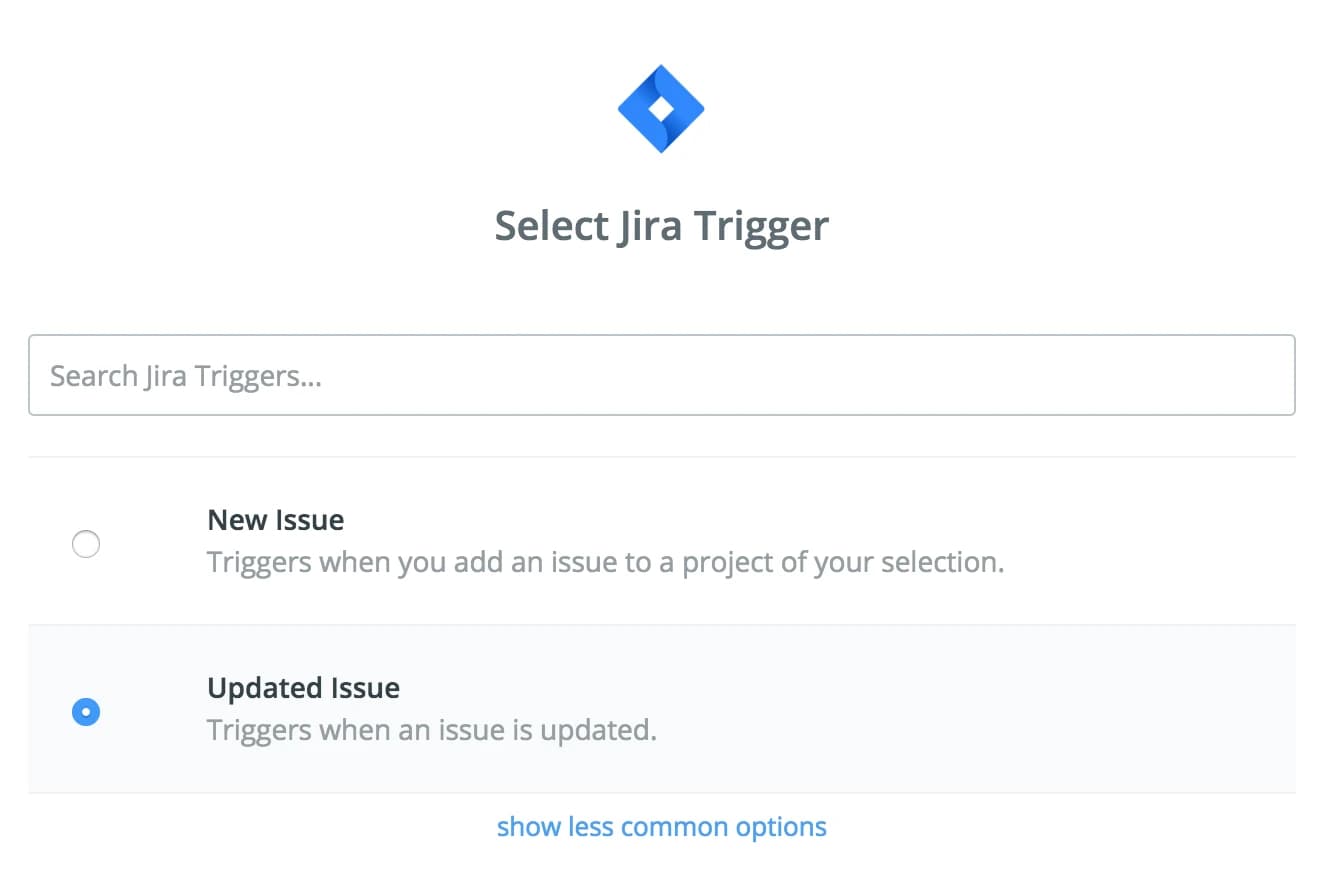
- Select Jira account
- Select Jira project
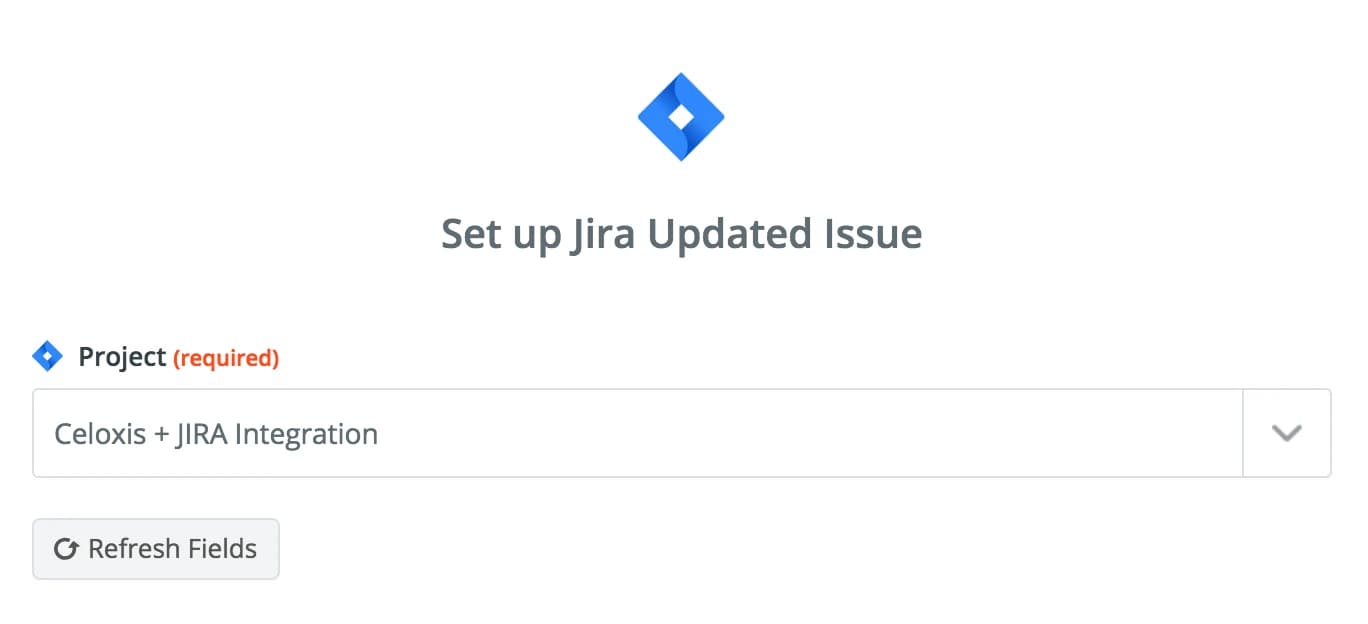
- Select Jira sample
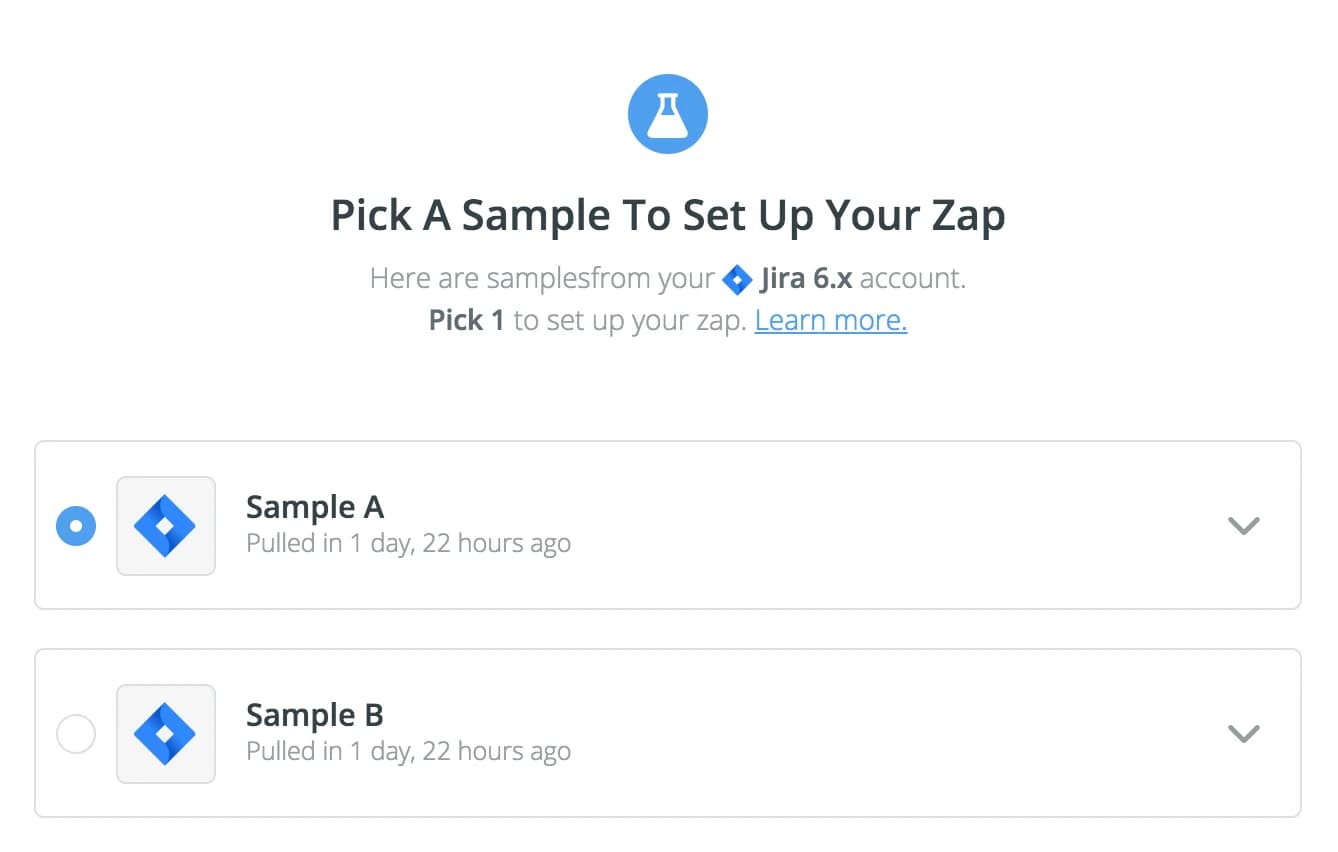
- Select Celoxis as the action app

- Select the "Find Task" action

- Select Celoxis account

- Use External Key

- Test the Find Task action
- Select Celoxis action app

- Select the "Update Task" action
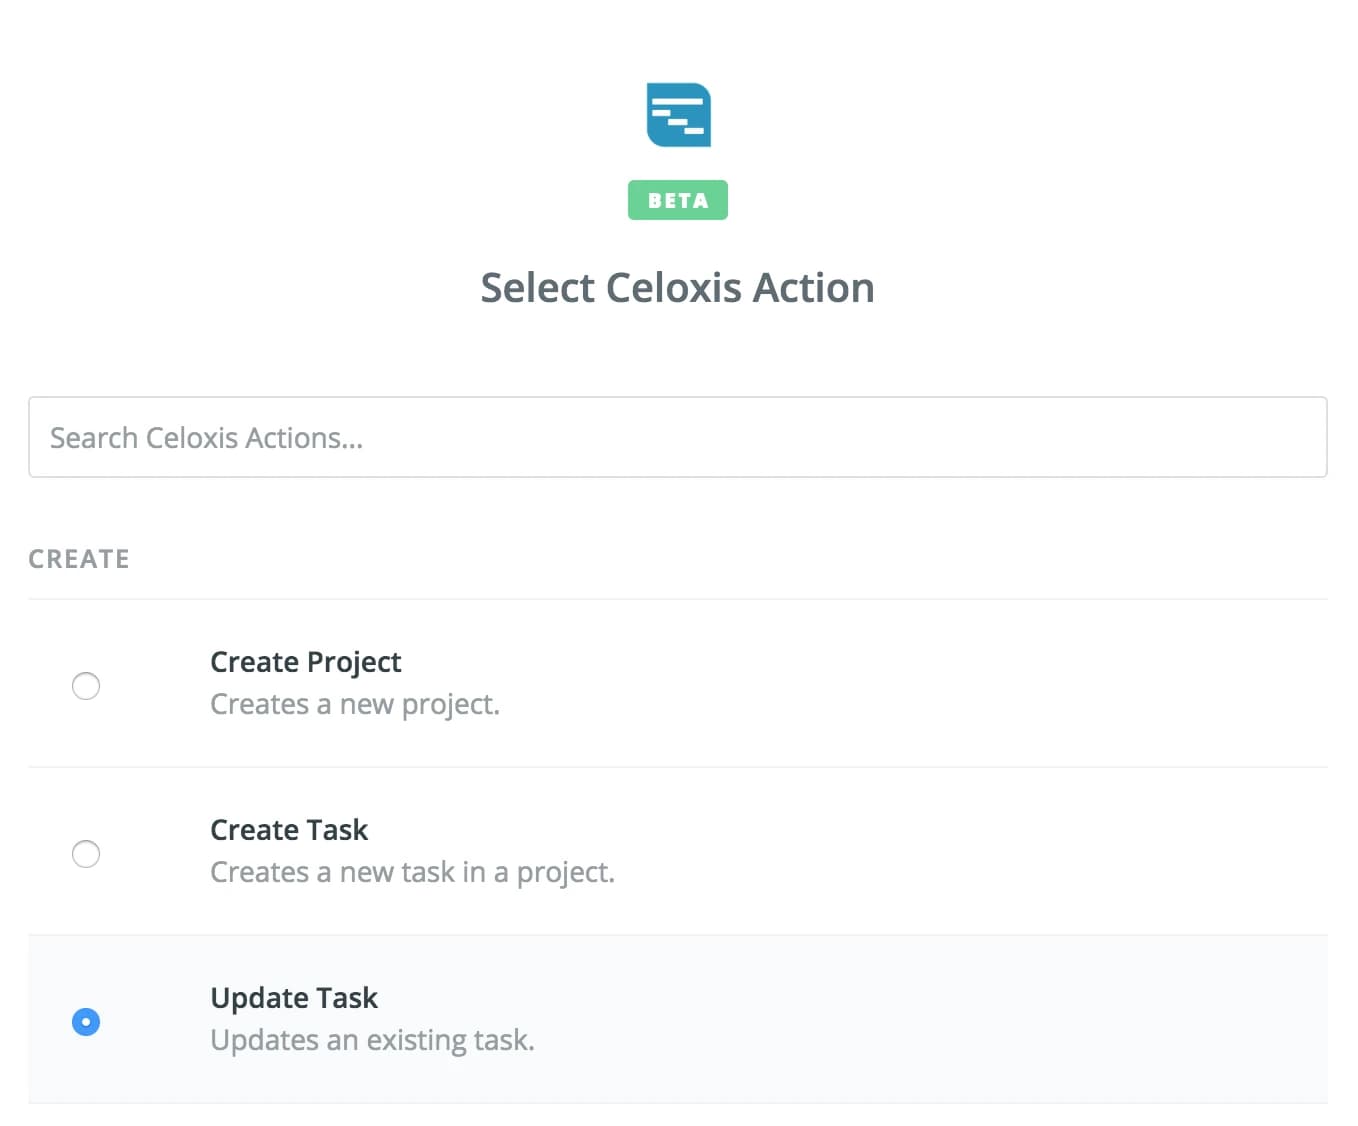
- Select Celoxis account

- Map Fields

- Test the Zap
- Turn the Zap on

Now after an issue has been updated in the project selected in the above Zap, the corresponding task will be updated in Celoxis based on the fields mapped above after
depending on your plan with Zapier.
MiscellaneousHow-To
Quickbooks (QBO) Integration
Celoxis App for QuickBooks Online helps you to synchronize billable time entries with Celoxis and your QuickBooks Online company. It facilitates quick and accurate Invoice generation. Users can sync all approved and billable time entries from Celoxis to QuickBooks for Invoicing and once they are Invoiced in QuickBooks they can be updated back in Celoxis as Invoiced.
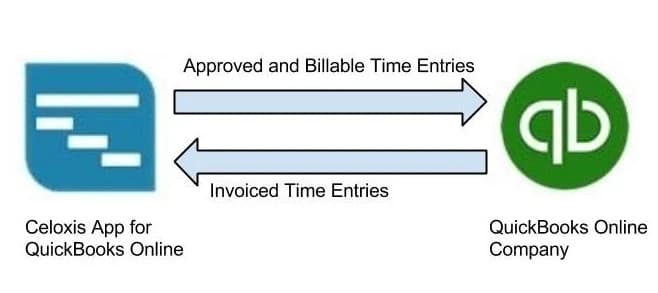
Data Mapping between Celoxis and QuickBooks Online
The terms used in QuickBooks Online are different than those in Celoxis. For example, a Time Entry in Celoxis is known as Time Activity in QuickBooks Online. The below table explains the field mapping between Celoxis and QuickBooks Online.
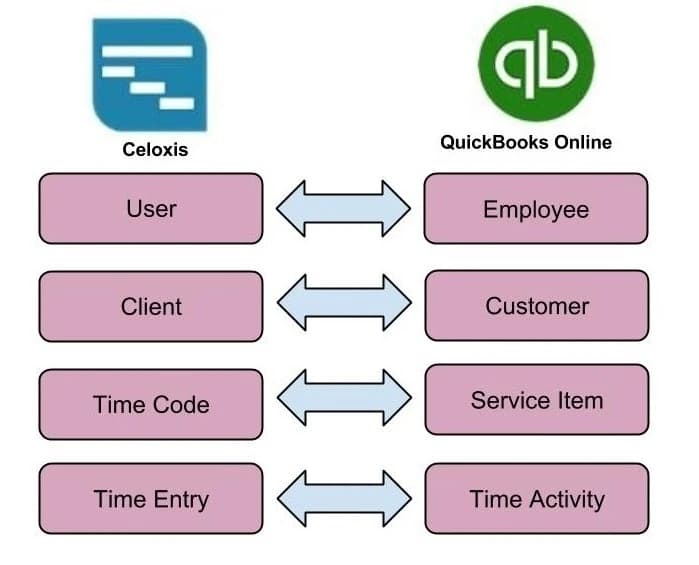
Before Using the App
Celoxis does not create or import supplementary data associated with time entries from QuickBooks Online. Supplementary data includes users, clients and time codes. It is imperative to follow the below steps.
Mapping Users
- You need ensure all your existing Users in Celoxis exist in QuickBooks Online as Employees.
- The display name of an employee in QuickBooks Online should be identical to display name of an user in Celoxis.
- Celoxis performs name based matching between associated entries during sync operation.
Mapping Clients
- You need ensure all your existing Clients in Celoxis exist in QuickBooks Online as Customers.
- The display name of a customer in QuickBooks Online should be identical to display name of a client in Celoxis.
- Celoxis performs name based matching between associated entries during sync operation.
Mapping Time Codes
- You need ensure all your existing Time Codes in Celoxis exist in QuickBooks Online as Service Items.
- The display name of the Time Code in QuickBooks Online should be identical to display name of a Service Item in Celoxis.
- Celoxis performs name based matching between associated entries during sync operation.
Connect Celoxis to QuickBooks Online
Only users with admin privileges can connect to QuickBooks Online. Once the connection is established all users (with Invoice Privilege) can sync time entries between the two systems. Before you connect to QuickBooks Online, please ensure that you have completed all steps listed in the Before Using the App section.
Following steps will guide you to connect the Celoxis App to your QuickBooks Online company:
- Go to Main MenuAdmin page.
- Under Timesheet section, click on Connect with QuickBooks Online (BETA)
- You will get a pop-up to Connect to Quick Books Online. Click on "Connect to QuickBooks" button. This will initiate Intuit's authentication process.
- On the next screen, you will be prompted to enter your QuickBooks Online credentials.
- Click on the "Authorize" button. By doing this, the admin authorizes QuickBooks Online company to securely share data with Celoxis App for QuickBooks Online.
- The pop up automatically closes and your Company Settings page is refreshed. You are now connected to QuickBooks Online.
Access Expiration
Every authenticated connection remains active for 180 days, after which QuickBooks Online automatically expires it for security reasons. Admins are required to Connect to QuickBooks Online again.
If your connection expires, your users will not be able to sync time entries with QuickBooks Online. They will see an authentication failure message. Once the admin reconnects to QuickBooks Online, they will be able to resume normal operation.
Disconnect from QuickBooks Online
At times you may want to explicitly discontinue using QuickBooks Online. Only admins are authorized to disconnect from QuickBooks Online. Once the app is disconnected, users can no longer sync time entries with QuickBooks online and all Celoxis time entries will resume the default Invoicing behavior.
Please refer the following steps to disconnect access from QuickBooks Online company.
- Go to Main MenuAdmin page.
- Under Timesheet section, click on Disconnect from QuickBooks Online.
- You will have to confirm your action by clicking 'Yes'.
- The Company Settings page will reload and your connection to QuickBooks Online will be disconnected. You will again see Connect with QuickBooks Online option.
Sync Time Entries
The Celoxis app for QuickBooks Online provides "Sync with QuickBooks Online (BETA)" report which lists all your Celoxis Approved & Billable Time Entries. This is particularly helpful when you want to see details of entries, if they are synced and date when they were synced. You can also apply dynamic filters (Date, Client name and Manager name) to further refine the data in your reports.
Sync with QuickBooks Online report provides two new columns, "QuickBooks Online Id" and "Last synced at" . "QuickBooks Online Id" column displays the time entry's corresponding ID in QuickBooks Online and "Last synced at" column shows the time stamp when the entry was synced. Blank values indicate the entry is yet to be synced with QuickBooks Online company.

Steps to sync time entries
- Select the time entries you want to sync.
- Click on bulk actions menu icon and select Sync with QuickBooks Online action.
- The system will sync the selected time entries and corresponding QBO Ids and Last synced values will be updated.
Sync Rules
Using the 'Sync with QuickBooks Online' action from Sync with QuickBooks Online Report
The below table explains actions performed by the system when sync operation is explicitly performed from the Sync with QuickBooks Online Report
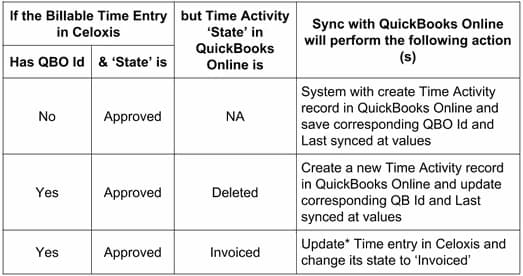
Single/Bulk Actions of Approved & Billable Time Entries (Previously synced with QuickBooks Online)
The below table explains the system behavior for Bulk or Single edit actions performed on previously synced approved & billable time entries. System will dynamically sync the selected time entries.
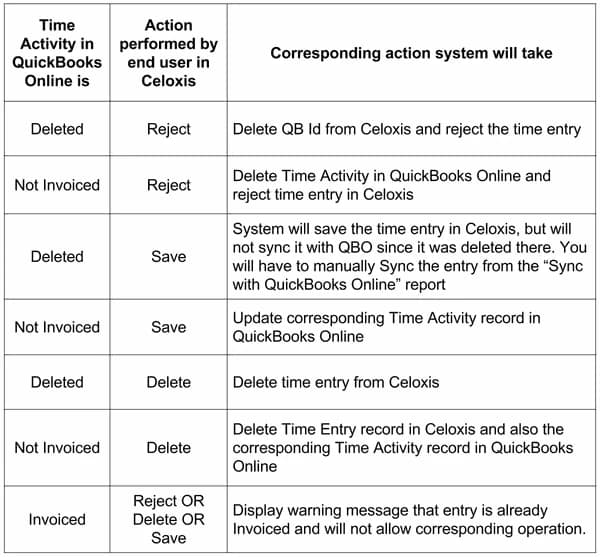
Special Conditions if Billable flag is "unchecked" on Approved & Billable Time Entries (Previously synced with QuickBooks Online)
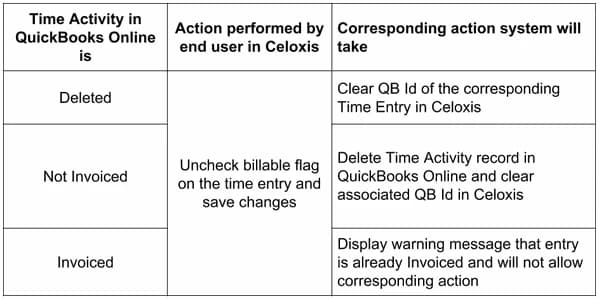
Single Edit Screen for Invoiced Time Entries
Once Entries are Invoiced in QuickBooks Online, and synced back into Celoxis, their state will be updated to 'Invoiced'. Such entries will be locked for any further edits (edit or delete) from Celoxis. On the single edit screen, you will have a "Sync" button. This button allows you to update* entries in Celoxis, if they have been altered in QuickBooks Online.
The below table explains actions performed by the system when sync operation is explicitly performed on Invoiced Time entries from the Single edit screen.
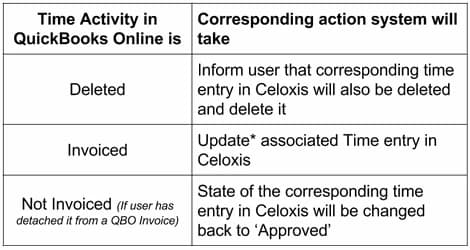
How to edit the Invoice in QBO
Once Time is Invoiced in QBO, further modifications are prohibited in Celoxis. This must be done from QBO. However, you cannot directly edit the Invoice. Changing the hours in the QBO invoice will not update the time entry in Celoxis. Instead, QBO expects you to unlink the line item from the Invoice, Edit the Time Entry separately, and then link it back to the Invoice. Here’s how you should Edit your Invoiced Time in QBO.
- In QBO, Go to Invoice > Edit > Unlink the Time Entry > Save.
- Locate the unlinked Time Entry in QBO > Edit and Make the required changes > Save.
- Go to the Invoice > Edit > Link the Time Entry > Save.
Once you save this Invoice in QBO, you need to sync this time entry in Celoxis, and the Time Entry will be updated in celoxis.
Common errors while syncing entries
Below are few errors that you may encounter while syncing time entries with QuickBooks Online.
- Error: Employees Missing in QuickBooks Online Reason:This error occurs when the user's name in Celoxis and QuickBooks Online company is not identical or the user is not available QuickBooks Online.
Solution:
a. Confirm if user has been set up in QuickBooks Online.
b. Make sure that the Name in Celoxis matches the Display Name in QuickBooks Online. - Error: Customers Missing in QuickBooks Online Reason:This error occurs when the client's name in Celoxis and QuickBooks Online is not identical or the client is not available in QuickBooks Online.
Solution:
a. Confirm if client has been set up in QBO.
b. Make sure that the Name in Celoxis matches the Display Name in QuickBooks Online. - Error: Time codes Missing in QuickBooks Online Reason:This error occurs when the time code's name in Celoxis and QuickBooks Online is not identical or the time code (service item) is not available in QuickBooks Online.
Solution:
a. Confirm if the service item has been set up in QBO.
b. Make sure that their names are identical. - Error: ERROR CODE:3200, ERROR MESSAGE:message=ApplicationAuthenticationFailed; errorCode=003200; statusCode=401, ERROR DETAIL:null Reason:This error occurs typically when your access token has expired.
Solution:
a. Please ask your admin to connect to QuickBooks Online from the Company Settings page in Celoxis. - Error: Feature Not Supported Reason:This error occurs when you connect to a QuickBooks Online Edition that does not support Time Entries
Solution:
a. You need upgrade your current version of QuickBooks Online to a version which supports Time Entries.
Switching to QuickBooks Online
If you are an existing Celoxis user and have been Invoicing Time entries in Celoxis, please take note of the following:
- Agree at an organization level on the date on which you would switch to invoicing with QuickBooks Online. This is important because once you connect to QuickBooks Online, your users cannot explicitly Invoice time entries (i.e. using the 'Invoice' action) in Celoxis.
- All Previously Invoiced time entries will continue to exist as is. They will not be automatically synced with QuickBooks Online. These entries will continue the default Invoicing behavior till the time they are explicitly “UnInvoiced” by a privileged user. Once “UnInvoiced” they can be synced with QuickBooks Online.
Please a note the behavior of the system when you switch to QuickBooks Online, i.e. using “Connect to QuickBooks” on Company Settings page.
Existing Invoiced entries will continue to function as-is, i.e. they can be UnInvoiced/Deleted/Edited as before. Once “UnInvoiced”, they can only be Invoiced through QuickBooks Online using the sync functionality.
MiscellaneousHow-To
Salesforce Integration
Celoxis Salesforce integration helps bridge the gap between your sales and delivery teams, thereby improving business outcomes.
This integration allows sales representatives to create multiple Celoxis projects per Salesforce.com opportunity. In addition, there is a ‘Celoxis Projects’ Tab, which lists all Celoxis projects created across all opportunities for quick and aggregate viewing at the account/client level.
Setup
To setup this integration, you will need to create the following
- Create Custom buttons
- Add Project
- View Projects
- Customize the Opportunity Page
- Create Custom Web Tab: This is to track the progress of all projects across your accounts.
Create Custom Buttons
Add Project
- Go to the Setup page.
- In the Platform Tools section, go to Objects and Fields -> Object Manager.
- Select the Opportunity object.
- Select Buttons, Links, and Actions.
- Click on New Button or Link
- In the New Button or Link pane, enter the following information:
- Label: Add Project
- Name: Add_Project
- Description: This button allows you to create a project in Celoxis for this opportunity.
- Display Type: Detail Page Button
- Behavior: Display in new window
- Content Source: URL
- URL: Pass the following parameters: Opportunity ID, Opportunity Name, Account ID and Account Name. Url encode the Opportunity Name and Account Name. SaaS customers need to enter URL as
https://app.celoxis.com/psa/salesforce.SelectProjectTemplate.wm?sf.oppName={!URLENCODE(Opportunity.Name)}&sf.oppId={!Opportunity.Id}&sf.accId={!Opportunity.AccountId}&sf.accName={!URLENCODE(Account.Name)}
On-Premise customers need to enter URL as
https://<servername:portnumber>/psa/salesforce.SelectProjectTemplate.wm?sf.oppName={!URLENCODE(Opportunity.Name)}&sf.oppId={!Opportunity.Id}&sf.accId={!Opportunity.AccountId}&sf.accName={!URLENCODE(Account.Name)} - Click Save
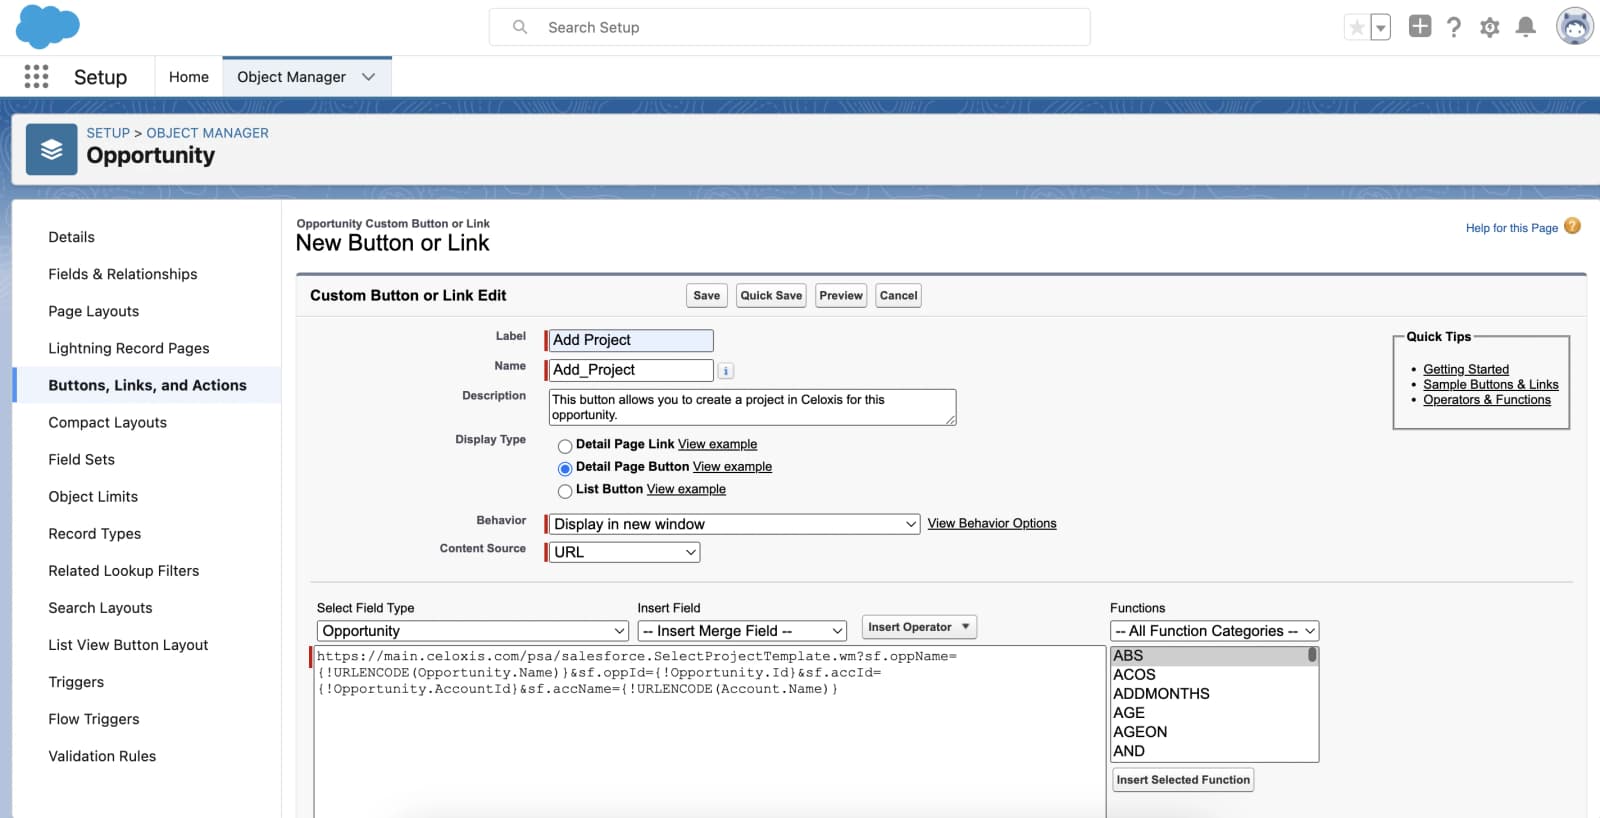
View Projects
- Click on New Button or Link
- In the New Button or Link pane, enter the following information:
- Label: View Projects
- Name: View_Projects
- Description: This button allows you to view all the projects in Celoxis for this opportunity.
- Display Type: Detail Page Button
- Behavior: Display in new window
- Content Source: URL
- URL: Pass the following parameters: Opportunity ID, Opportunity Name, Account ID and Account Name. Url encode the Opportunity Name and Account Name.
SaaS customers need to enter URL as
https://app.celoxis.com/psa/salesforce.do?sf.oppName={!URLENCODE(Opportunity.Name)}&sf.oppId={!Opportunity.Id}&sf.accId={!Opportunity.AccountId}&sf.accName={!URLENCODE(Account.Name)}
On-Premise customers need to enter URL as
https://<servername:portnumber>/psa/salesforce.do?sf.oppName={!URLENCODE(Opportunity.Name)}&sf.oppId={!Opportunity.Id}&sf.accId={!Opportunity.AccountId}&sf.accName={!URLENCODE(Account.Name)} - Click Save
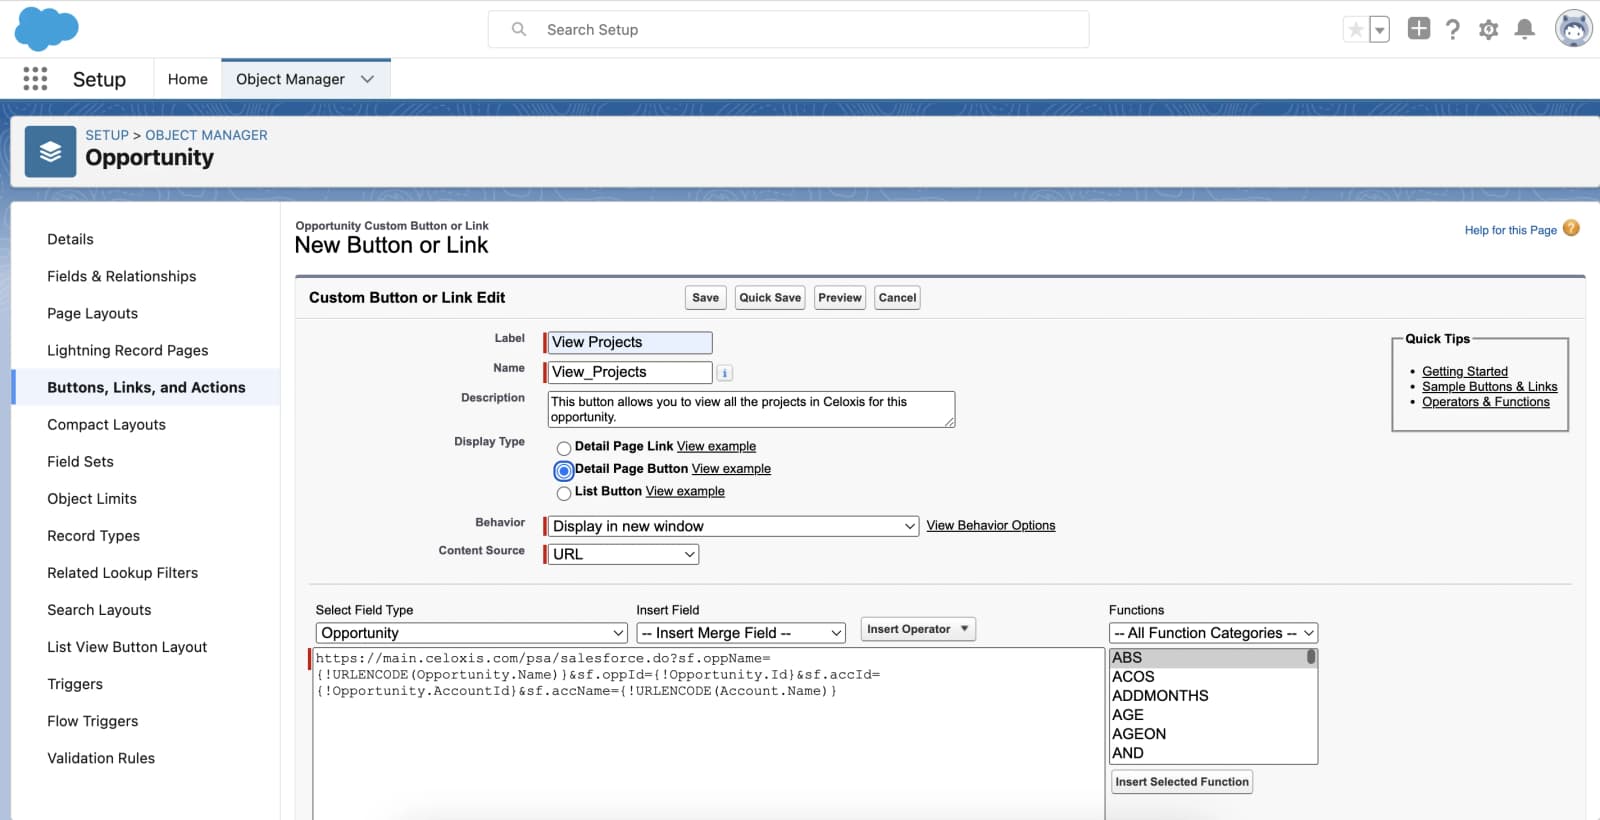
Customize the Opportunity Page
Once all the custom buttons are created, customize the opportunity page layout to add these custom buttons.
- Go to the Setup page, by clicking on the Setup menu.
- Click on Object Manager.
- Click on Opportunities.
- Click on Page Layouts on the left-hand side.
- Create a new layout or use the existing layout
- Click on Buttons
- Drag the new buttons to the Custom Buttons section and Save
Create Custom Web Tab
- Go to the Setup page, by clicking on the Setup menu.
- On your left-side, under the Build section, click on Create and then Tabs.
- Under Web Tabs section, click on New button.
- Choose Tab Layout and click Next.
- Under Define Content and Display Properties, enter the following information:
- Tab Label: Celoxis Projects
- Tab Name: Celoxis_Projects
- Tab Style: Pick the icon of your choosing
- Click Next
- In the Button or Link URL field, enter the following URL
SaaS customers need to enter URL ashttps://app.celoxis.com/psa/salesforce.do?action=all-projectsOn-Premise customers need to enter URL as
https://<servername:portnumber>/psa/salesforce.do?action=all-projects
How it works
Once you have set up the custom buttons, you can then create and view projects in Celoxis via the Opportunities module in Salesforce.
Create a project for an opportunity
- Click on an existing Opportunity or Create a new one by clicking on New.
- Click on Add Project button
- The first time, you will be asked to authorize by entering your Celoxis credential.
- Upon logging in with the Celoxis credentials, you will see a pop up to select the Project Template from the available list.
- The Client drop-down will be automatically populated with the client (Account Name in Salesforce) if the client already exists in Celoxis.
Else, you are shown the option to create the client in Celoxis. - Click on Next.
- On the Copy Project pop-up, Enter a new name or it will be auto-populated with opportunity name as entered in Salesforce.
- Select the Manager, Start Date, and the State of the project as required.
- On the same pop-up, under the Custom Fields tab, a custom field: SF Opportunity Id is shown which has the same ID of the opportunity in Salesforce. This helps in mapping.
The SF Opportunity Id custom field is used for when mapping the projects to be displayed for the particular opportunity in Salesforce. - A new project is created in Celoxis and the Overview page of the project is displayed.
View Projects for an opportunity
- Click on an existing Opportunity.
- Click on View Projects button
- The Name of the project is clickable. Clicking on the Name will show the project overview.
Reports
You can customize your view to see the projects you have created in Celoxis via Salesforce by clicking on the + sign and then click on Customize My Tabs.
By default, the projects where you are the creator will be shown in the report. The Name of the project is clickable. Clicking on the Name will show the project overview.
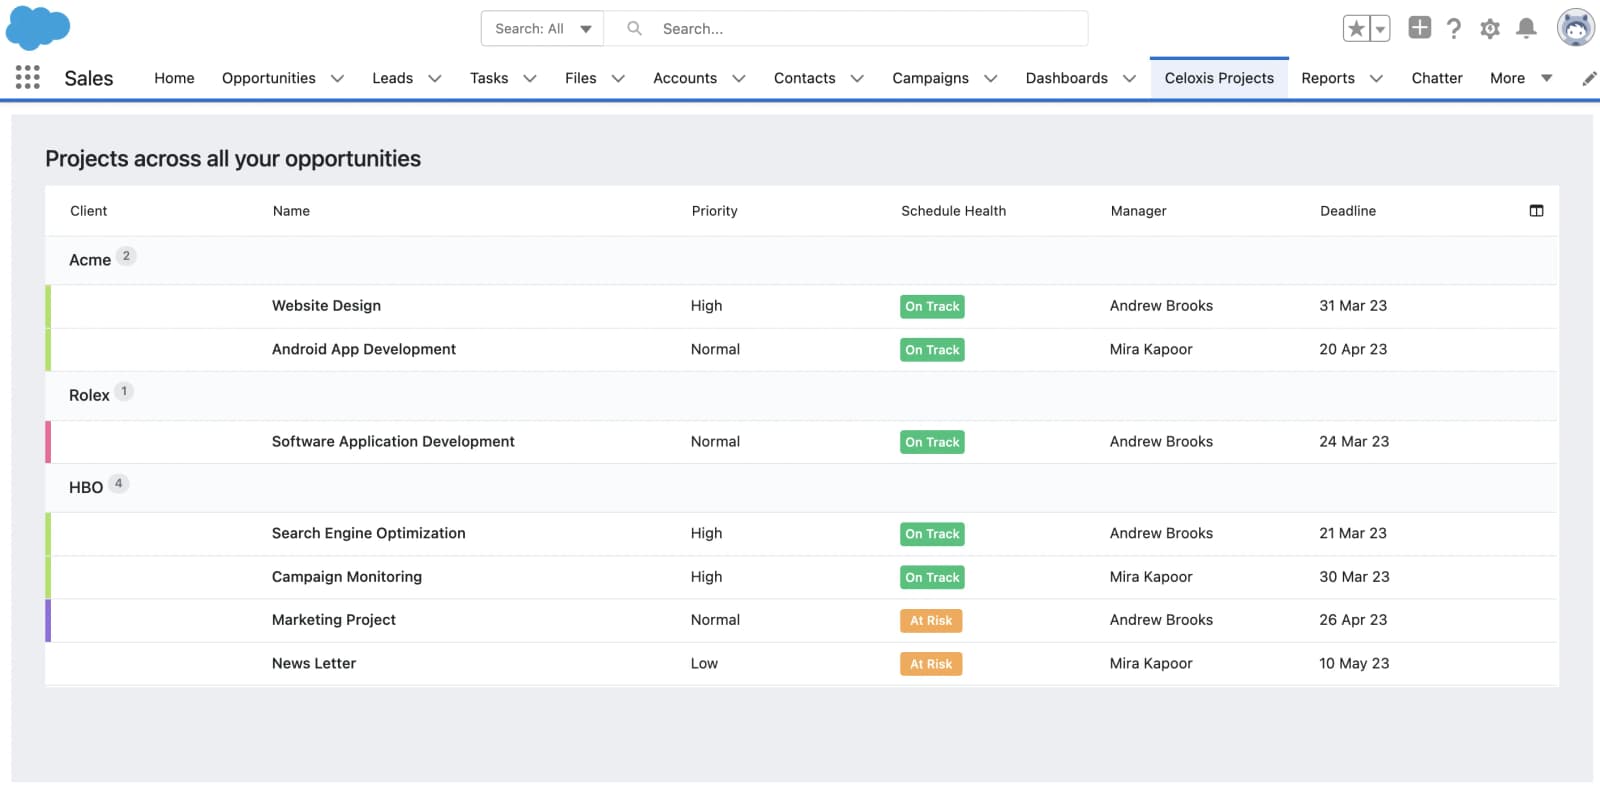
MiscellaneousHow-To
Custom Login Page
Celoxis allows you to have your own login page on your website. We have a sample login page that you can customise to suit your needs.
Behaviour
If a user is already logged in, he/she will be automatically taken to the application and this page will not be shown. Also, when the user logs out, he/she will be taken to this page instead of Celoxis' login page.
What you need to customize
- If you are on-premise customer, replace the URL in the head section with the correct version.
- Put in your company code in the hidden field below (search for CHANGEME below).
- You can style the page as you wish following the guidelines mentioned in the comments below.
Code
<html>
<head>
    <!-- Do not change the following line -->
    <meta http-equiv="Content-Type" content="text/html; charset=UTF-8">

    <!-- If you use the on-premise version use the correct URL below -->
    <script id="celoxisloginscript" language="javascript"
            src="https://app.celoxis.com/psa/customLogin.js.do"></script>

    <title>Celoxis Custom Login Example</title>
</head>
<body>

    <!-- Error message will be displayed in the following div -->
    <div id="celoxiserror" style="color:red;display:none;"> </div>

    <form method="post">

        <!-- Change the value parameter below with your company code -->
        <input type="hidden" name="code" value="CHANGEME"/>

        <!-- Do not change the following -->
        <input type="hidden" name="referrer"/>

        <!-- Do not change the name parameters -->
        Username:    <input type="text" name="username" />
        Password:    <input type="password" name="password" />
        Remember Me: <input type="checkbox" name="rememberme" value="true" />

        <button onclick="javascript:CeloxisAuth.customLogin(this.form);">
            Login
        </button>

    </form>

    <!-- The following will display the error in the div#celoxiserror above. -->
    <script language="javascript"> CeloxisAuth.handleError(); </script>
</body>
</html>MiscellaneousHow-To
Send Custom Email
At times, there is a need to send email to Executives, Clients or Team Members whenever a new entity is created in Celoxis such as new Project, App or Task. Although you can set your preferences to receive emails from User Settings yet there will always be a case where you need to send out customised emails when something happens in Celoxis.
In this article, we will learn to send a customised email whenever a New Project is created in Celoxis. For this we will be using Zapier, if you are not familiar with Zapier then first read this article.
Send an email when a New Project is created in Celoxis
- Make a Zap
- Choose Celoxis app and New Project as the Trigger
- Select your Celoxis account
In case the account is not displayed then add your account.
- Test the Trigger
- Select a Sample
The data from sample will be used in other steps to set up the Zap.
- Choose Gmail app and Send Email as the Action
In place of Gmail, you can use other Email apps supported by Zapier.
- Add your Gmail account
- Customize the Email
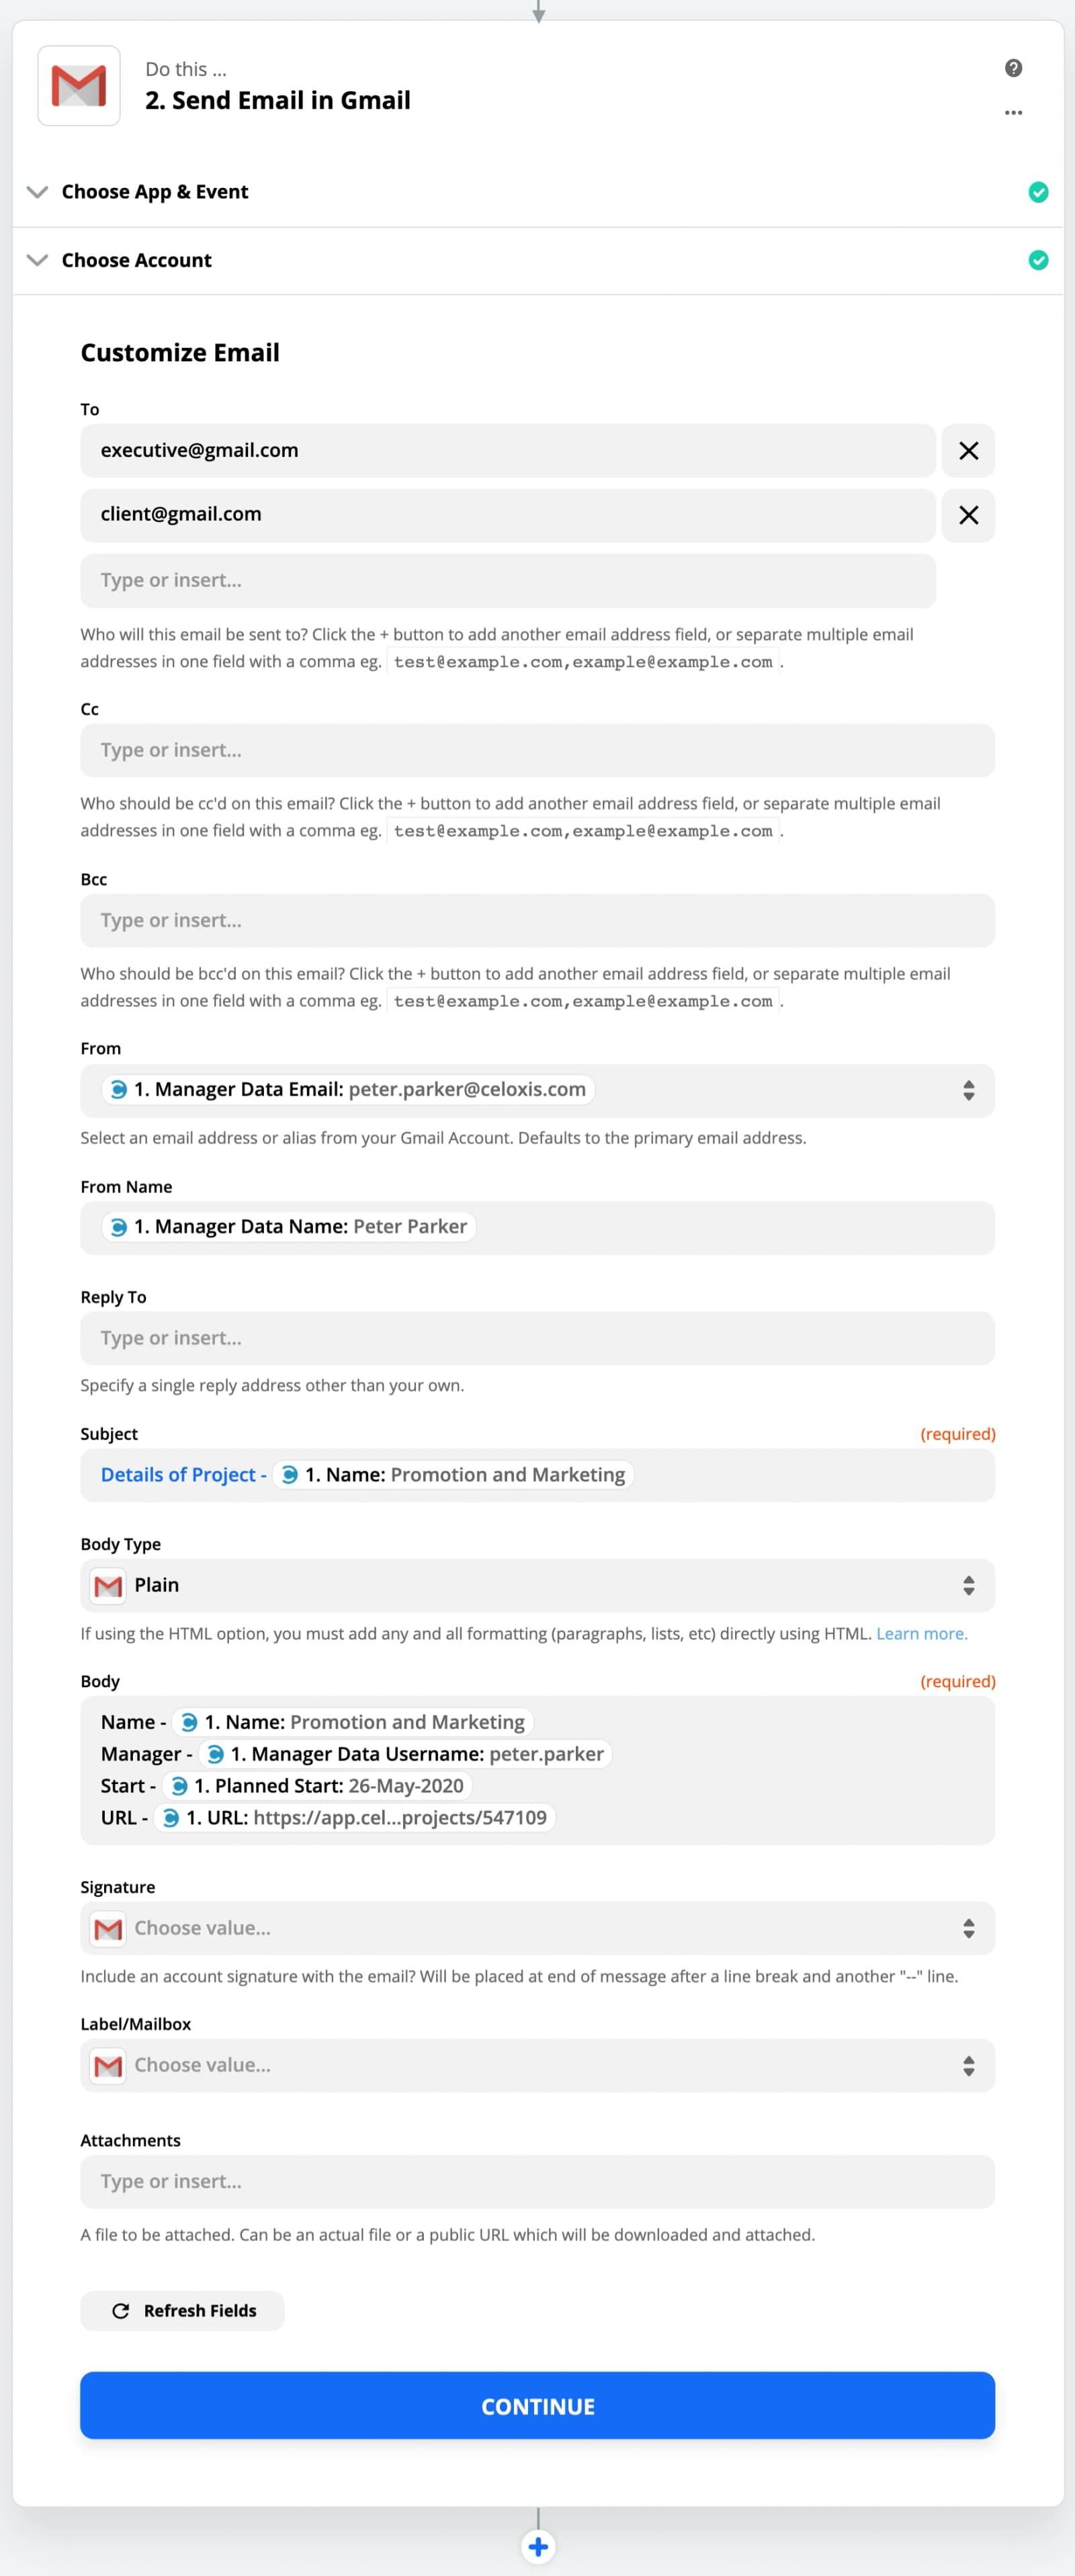
- Test the Action
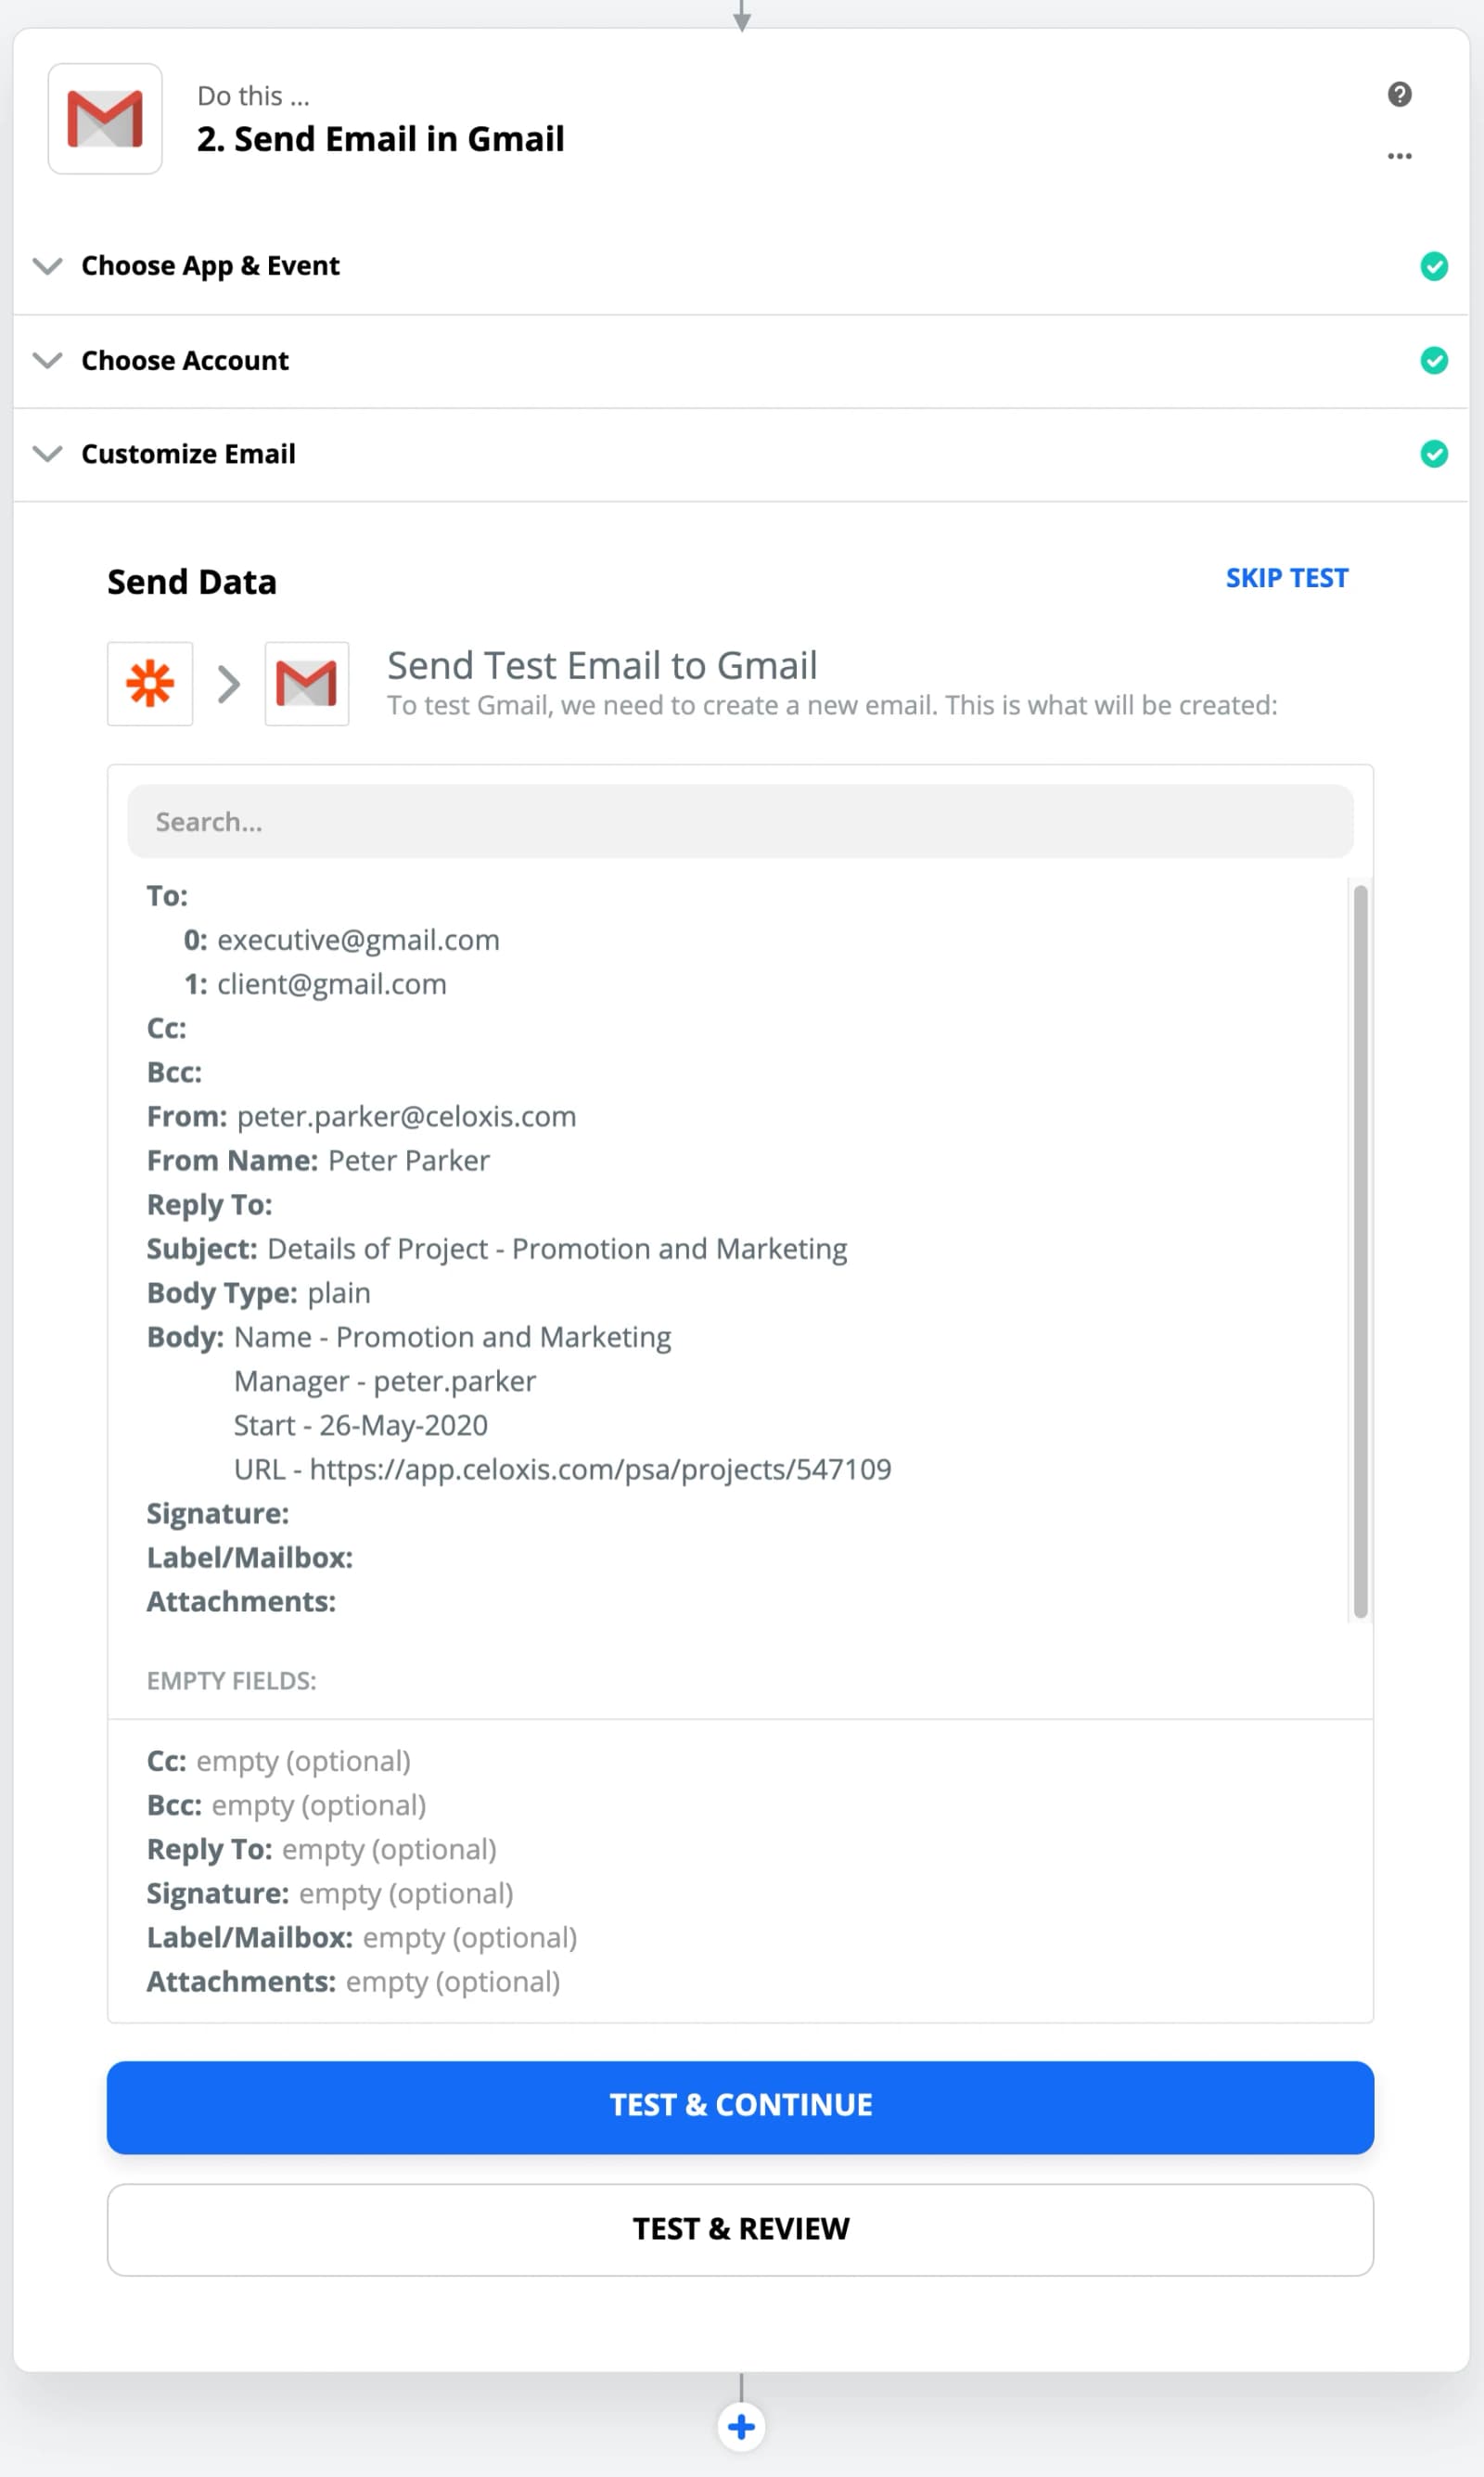
- Click on Done Editing
- Turn ON the Zap
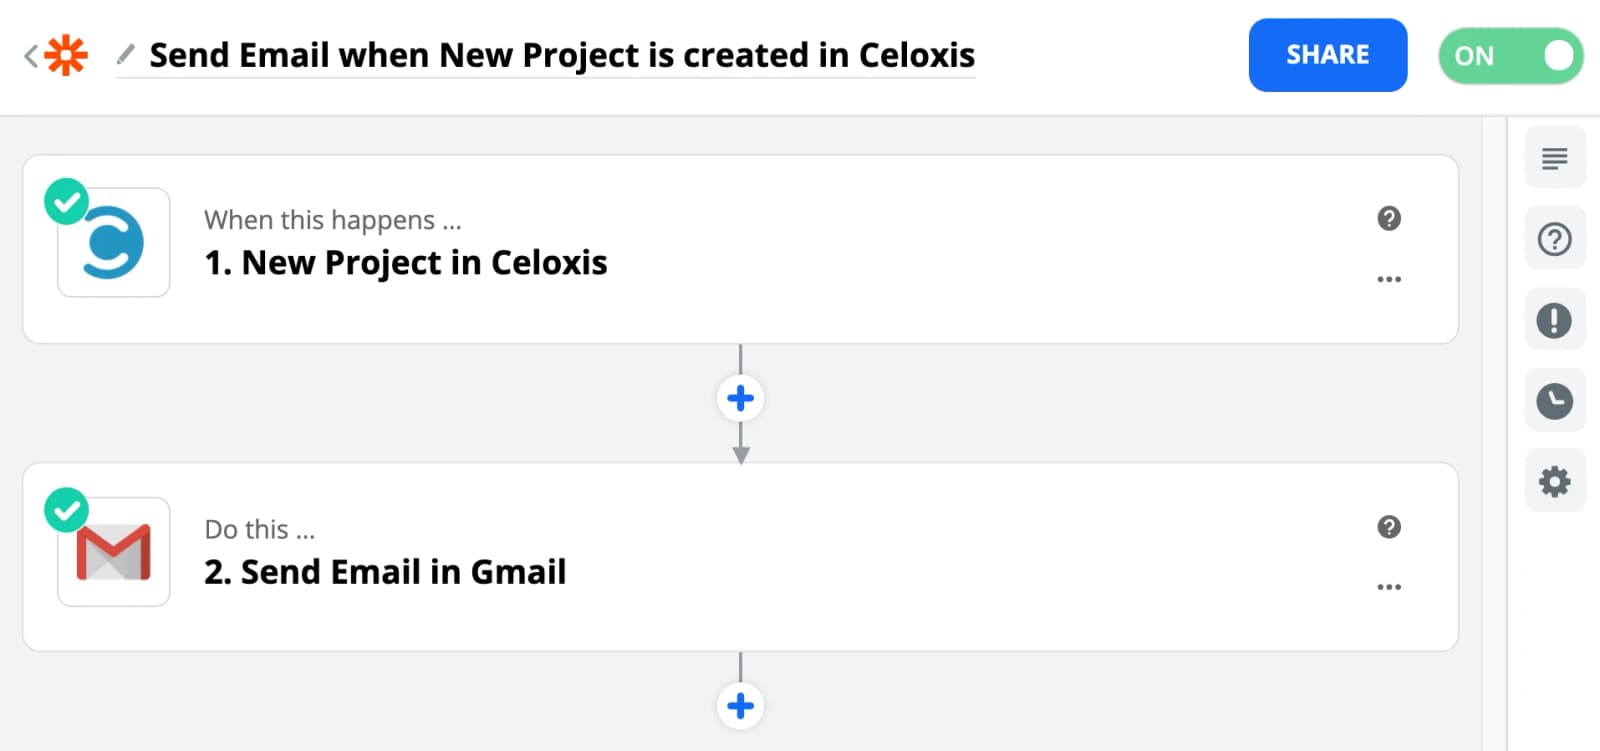
Now when ever a New Project is created in Celoxis then an Email will be sent along with the data of that project.
MiscellaneousHow-To
Managing your Helpdesk Ticketing System
Celoxis is a flexible platform and it quickly adjusts to manage your business processes. This document presents how to set up a Ticketing system with the help of Custom Apps in Celoxis.
Steps
- Configure the Ticketing System App
- Setting Triggers
- Setting Escalation Rules
- Ticketing System App in action
- Setup the Reports and Dashboard
Configure the Ticketing System App
Before you start defining the workflow, it is a good practice to draw that first on a paper so you are clear on the flow in which your ticket traverses. See the example below:
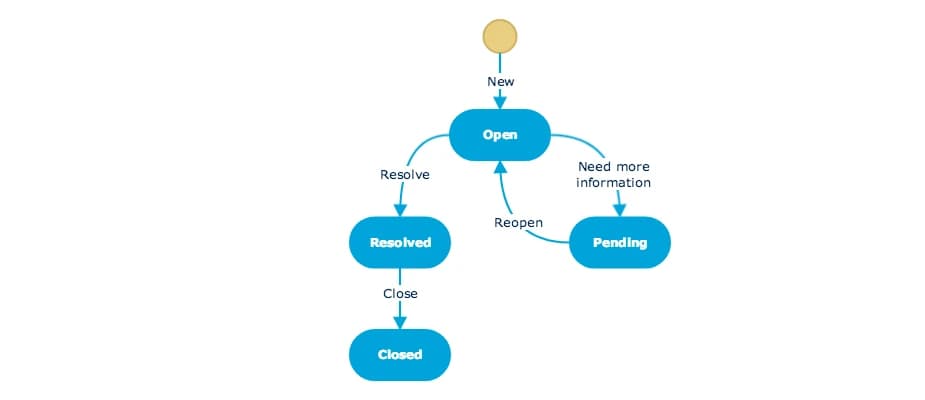
To create the Ticketing System App:
- Log in as a user with Administrator privileges and navigate to Main MenuAdminCustom AppsApps.
- Click on the + Add
You will see a form with many tabs. We will cover each tab below.
The Basic tab
This tab defines some basic properties of the app
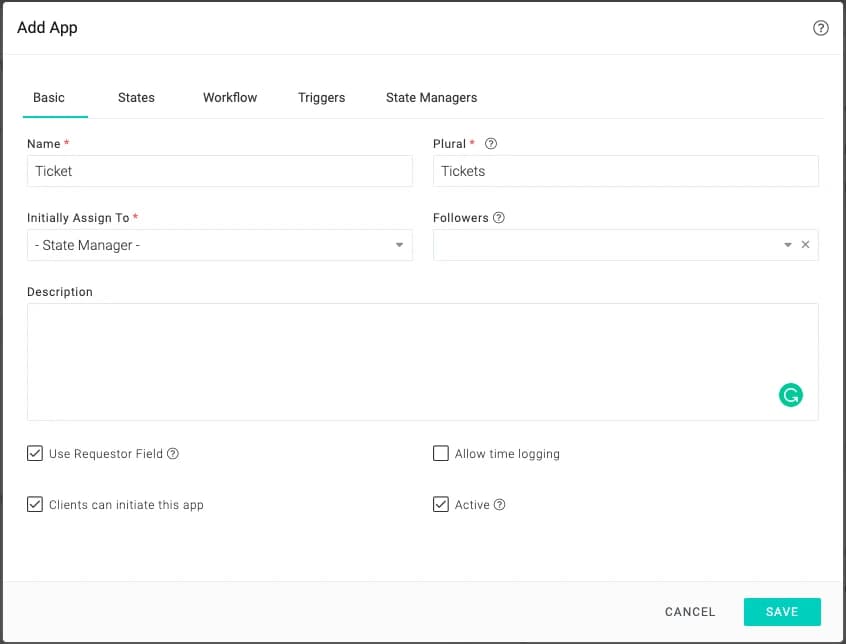
The States tab
This tab defines the states of the app. You can also mark the start and end states in the workflow. We have listed all the states in our ticket workflow.
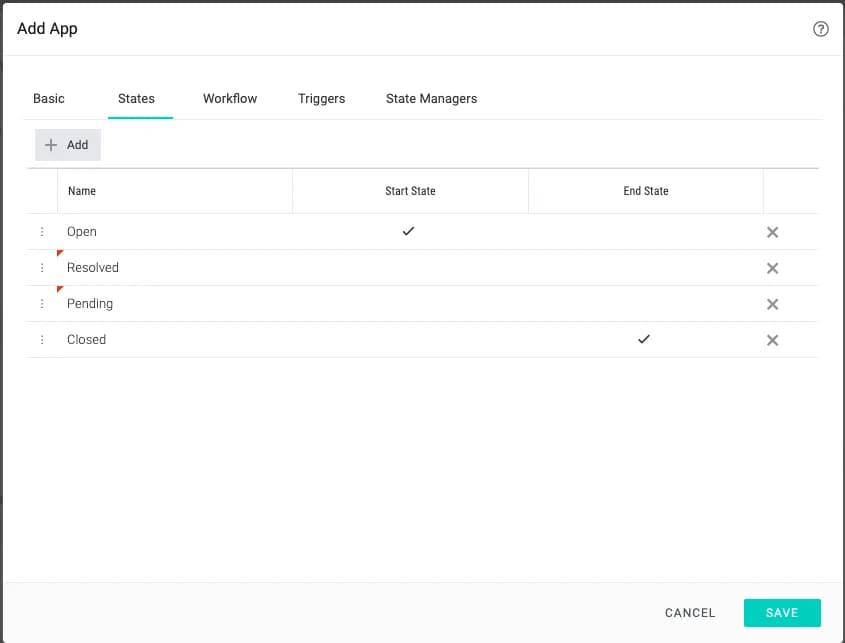
The Workflow tab
This tab defines all the arrows in the workflow diagram. Each arrow represents an end-user action. We shall see more about its usage later on in this document.
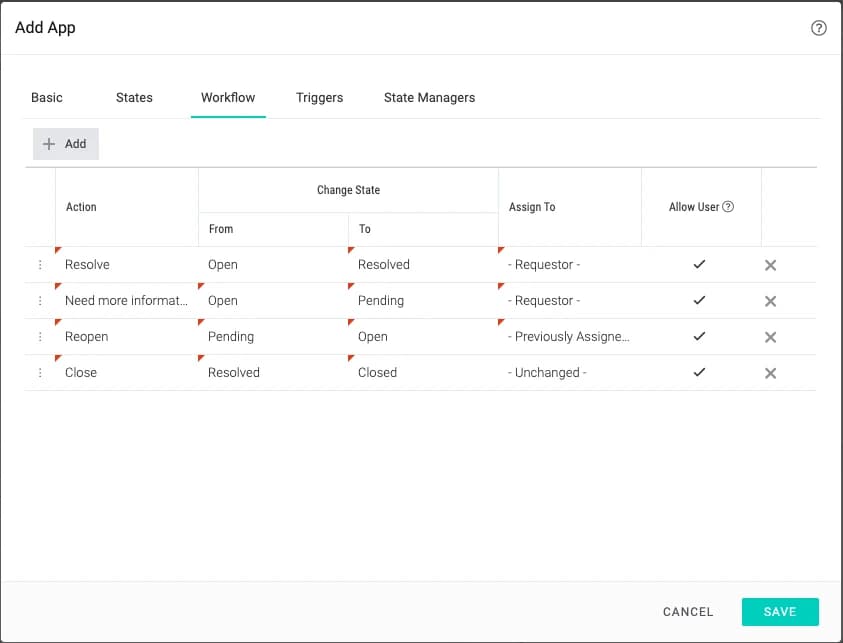
The Triggers tab
Using triggers you can tell Celoxis to perform state transitions when it receives an email from the requestor.
In our ticket app, the requestor will be the person who asked a question. When that person replies via email, we would want the ticket to be automatically moved to the Unresolved state as then it would be brought to the attention of the support team. In other words, we would want the Reopen transitions to happen. In this case, we would be defining our triggers like this:
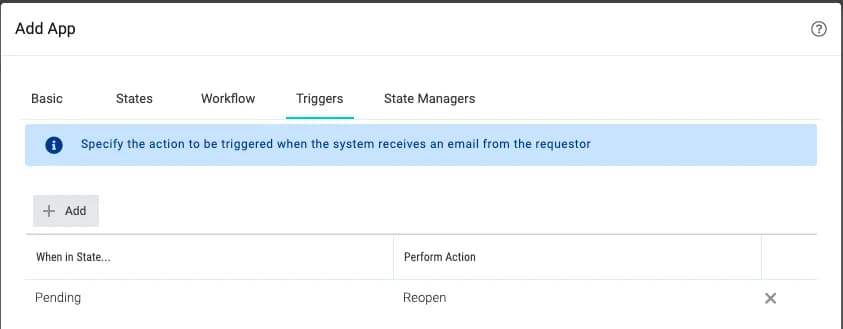
The State Managers tab
A state manager is a user who is treated as a Manager when an app is in a particular state. They are notified when things happen to an item in this state. In our example below, Andrew Brooks is the manager for Open state, so he is responsible for the Open state.
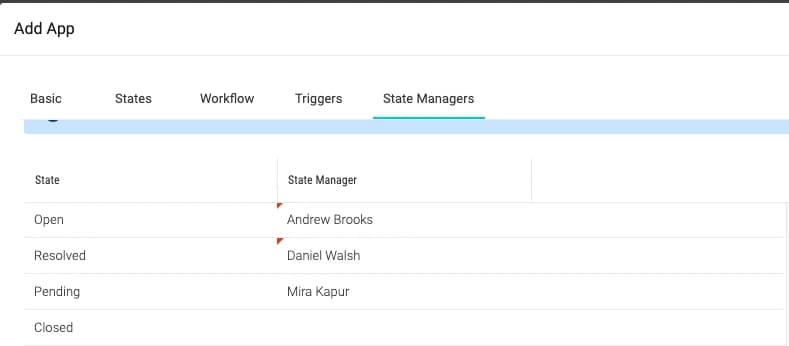
Setting Escalation Rules
You can set rules that define what should happen when an app item exceeds its stay in a particular state for more than the specified hours. This can be achieved by setting Timeout Policies. For more details, please click here.
Ticketing System App in action
There are multiple ways to create a ticket in Celoxis:
- One way is to log in to Celoxis, and then click on Main Menu ▸ Ticket. Or as a client, go to a project and then click on Plus ▸ Ticket.
- Another way is to create a ticket by sending an email. For more details, please click here and refer to the Direct Interface section
- One more way is to have a web based form on your web site, users can fill and submit this form to create a ticket in Celoxis. For more details, please click here and scroll down to Indirect Interface.
Assigning a Ticket
As a support team member, you can see all the unassigned tickets right from your dashboard. Here, you can customize the Team Member dashboard to view the unassigned tickets.
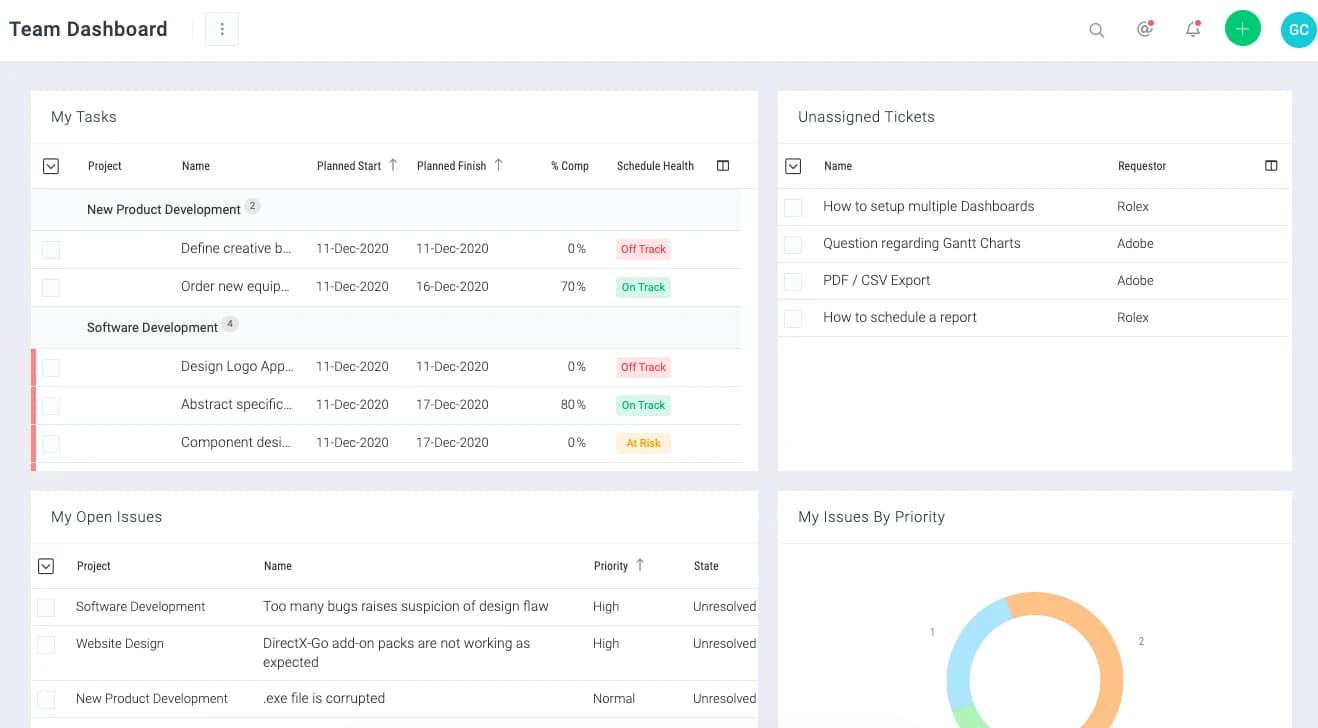
You can then reassign a ticket to yourself and start working on the ticket.
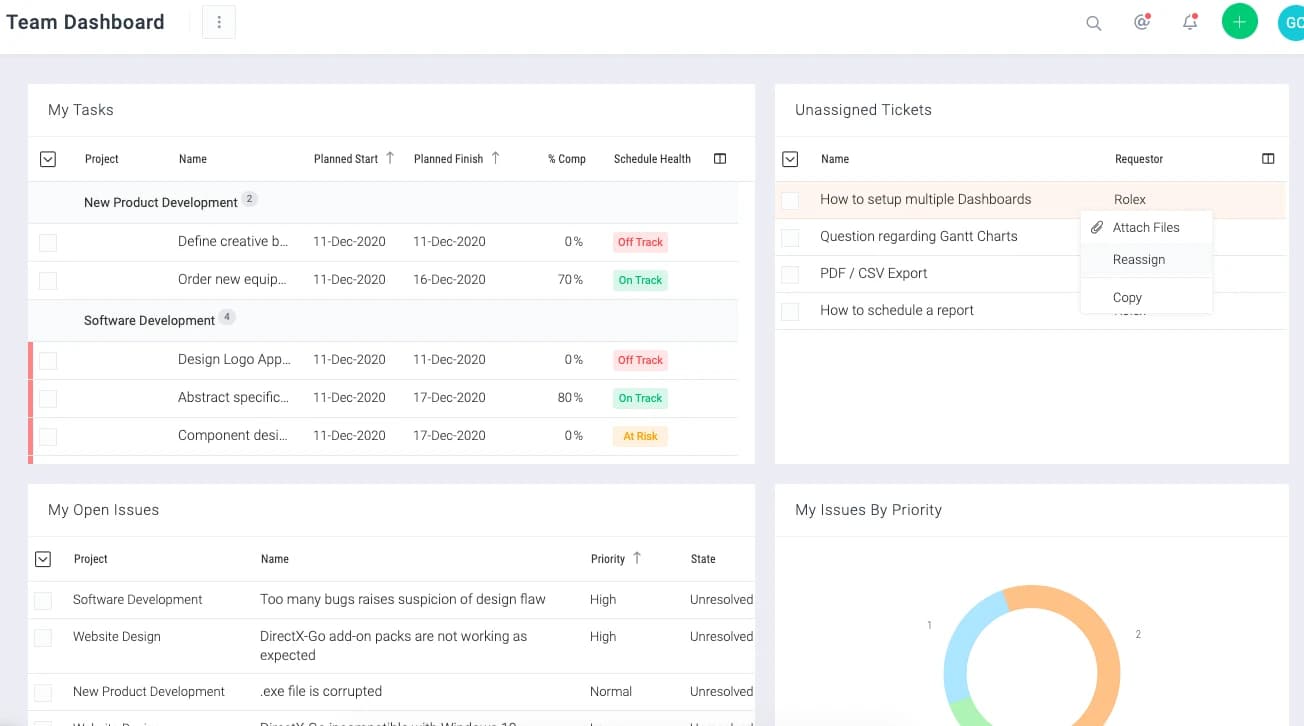
Replying/Resolving a Ticket
Grace has assigned a ticket to herself and clicks on the Resolve button. She then adds her reply on the ticket and selects the option Notify the Requestor.
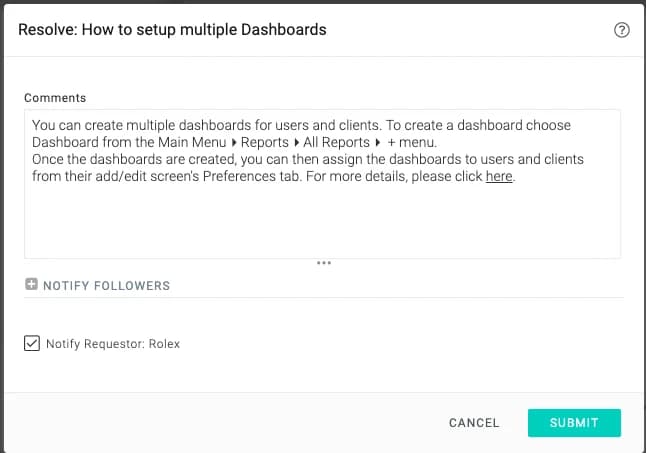
The client will be notified via email. The client can then reply to this email in case he needs more clarification. This will then reopens the ticket based on the trigger we have set above and the will be assigned back to Grace.
Setup the Dashboard and Reports
You can set up the reports and dashboard that will fetch the details so you get an overview of all the tickets.
The following dashboard is set up with reports that will help you to manage this.
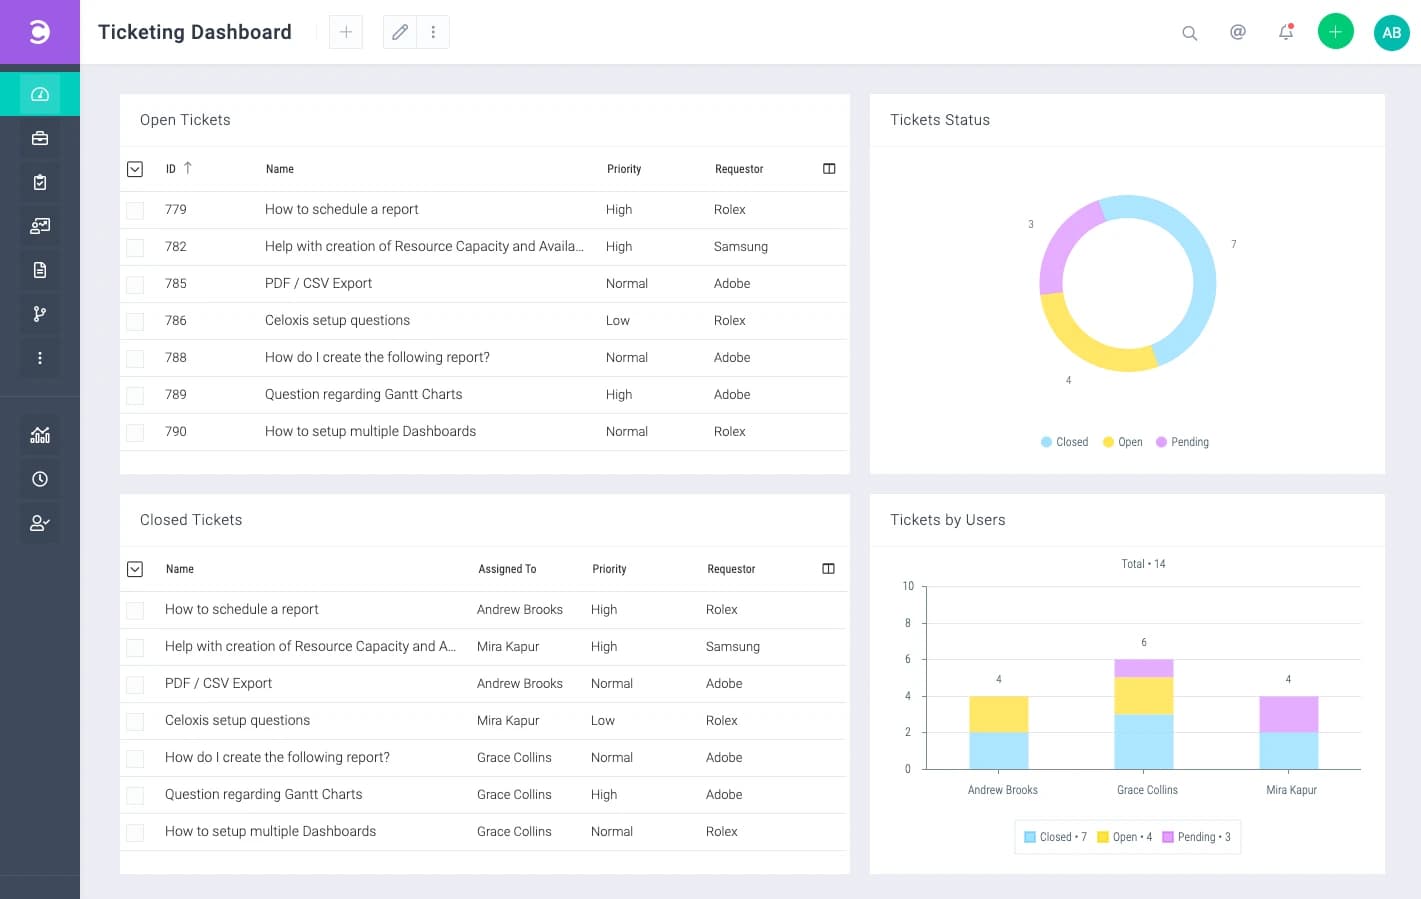
As you can see, the above dashboard is set up with 4 reports:
- Open Tickets
- Ticket Status
- Tickets by User
- Closed Tickets
To set up these reports, follow the steps below:
- Open Tickets
- Go to Main MenuReportsAll Reports.
- From the New Report drop-down, click on your App name say “Tickets”.
- Under the Filters tab, set the Open filter to Yes.
- Under the Output tab, select columns like ID, Name, Priority, Requestor, etc. You can pick your choice of sorting.
- Save the report.
- Ticket Status
- Go to Main MenuReportsAll Reports.
- From the New Report drop-down, click on your App name say “Tickets”.
- Navigate to the Output tab and then select the Charts tab.
- Click on Pie. From the screen below,
- Save the report.
- Tickets by User
- Go to Main MenuReportsAll Reports.
- From the New Report drop-down, click on your App name say “Tickets”.
- Navigate to the Output tab and then select the Charts tab.
- Click on Bar. From the screen below,
- Save the report.
- Closed Tickets
- Go to Main MenuReportsAll Reports.
- From the New Report drop-down, click on your App name say “Tickets”.
- Under the Filters tab, set the State filter to Solved, Closed.
- Under the Output tab, select columns like Name, Assigned To, Priority, Requestor, etc. You can pick your choice of sorting.
- Save the report.
Now, create a dashboard report (Main MenuReportsAll ReportsPlusDashboard) and add all the above reports to it. You can now select this dashboard to have a live view of your tickets.
MiscellaneousHow-To
Client Approval
In many organizations, some part of the project work often needs to be formally approved by the client once completed. Each organization may have their own approval process that dictates how this project work should be approved. Celoxis helps you set up this approval process and customize it as per your requirements. In this document we will see how to setup and use this approval process in Celoxis.
Follow the steps:
- Create a custom field with options to depict the stages of the approval process
- Select the completed tasks that needs to be reviewed by the client
- Create a kanban report based on the custom field and share it with the clients to approve or reject the tasks
- Add the Kanban report on the Client Dashboard
- Approval process in Action
- Tracking tasks status
Create a Custom Field
- Login as an administrator user and click on Main MenuAdminAccount ManagementCustom Fields.
- Click on the + Add button > Single-Select Drop Down
- Basic Tab
- Name: Task Approval
- Options: Pending Approval, Approved, Rejected.
- Colors: You can set the colors as required. This is an optional step.
- Attached To: Task
- Click Save
Select tasks that needs to be reviewed
- On the side menu, click on Main MenuTasks
- Select all the completed tasks that need to be reviewed by the client
- Click on the Bulk Action > Edit
- Select the Task Approval, and set the option to Pending Approval
Create a Kanban Report
- Go to Main MenuReportsAll Reports
- Click on the Plus button and select Task
- Details Tab
- Name: Approve Tasks
- Visible to Users: All
- Visible to Clients: All
- Filters Tab
- Display Tasks: Completed
- Task Approval: Pending Approval, Approved, Rejected
- Output Tab > Card
- Attribute: Task Approval
- Sort By: As per your requirement
- Select the option: Allow clients to drag-n-drop
- Click Save
Add the Kanban Report on the Client Dashboard (Optional)
- Go to Main MenuReportsAll Reports
- Search for the Client Dashboard
- Add the Approve Tasks report to Client Dashboard
Approval process in Action
- Login as a Client
- In the Approve Tasks report on the dashboard, drag and drop tasks across lanes to approve or reject
- For adding the approve or reject comments, click on the task and add your comment in the comment box.
- Here is the sample report
Tracking tasks status
- Login as Manager
- Go to Main MenuReportsAll Reports
- Click on the Plus button and select Task
- Details Tab
- Name: Tasks Approval Status
- Visible to Users: All
- Filters Tab
- Display Tasks: Completed
- Task Approval: Pending Approval, Approved, Rejected
- Output Tab > Tabular
- Columns: Name, Task Approval, Update (Last)
- Sort By: As per your requirement
- Group By: Project
- Click Save
- Here is the sample report
On-Premise
28 articlesConcepts
On-PremiseConcepts
Before you Install
Expertise Required
Before you install Celoxis on your servers it is important to understand what you will need. Celoxis itself can be easily installed using a web browser. While that itself does not need any special technical skills you will need at least moderate to advanced computer technical skills depending on your configuration.
For example, you have the choice of installing Celoxis on a dedicated server or on a shared server. If you are installing it on a shared server you will need to make sure that Celoxis performance is not impacted by the other apps and there is sufficient memory available to the Celoxis application.
Celoxis stores your data in a database so you must have the skills to configure, optimise, manage, monitor and backup your database. You should also be able to perform routine maintenance activities like re-indexing your database and running SQL queries that our support team may ask you to run to debug problems. When a new version of Celoxis is released you will need to perform upgrades which are also simple point and click but it is possible that there may be issues at times. So you must be able to backup the database and restore it in such cases.
Being a web based application you may also need the skills to manage DNS, firewalls, proxies and other systems depending on your infrastructure.
Celoxis also interacts with your mail server for sending and receiving email notifications. This means you also need the skills to manage your SMTP and IMAP servers.
Celoxis support for installation
You can either install Celoxis yourself or purchase the installation service from us. If you purchase the installation service there are some pre-requisites that must still be installed by you before we can proceed with the installation.
Our support team is always available to assist you if needed. But due to the myriad of operating system, server and network configurations that exist and the complexities involved with things like proxy settings, firewalls, VPN etc. we do not assist in configuring or troubleshooting your environment. This is to be done by your tech team. Celoxis is based on common web standards like HTTP/HTTPS and uses Apache Tomcat as the web server. We can point you to the location of Tomcat configuration files. You will need to look up Tomcat documentation and search the internet for assistance on these matters.
We recommend installing Celoxis from the same server running Celoxis application. This should bypass any firewall, proxy, VPN, or other network issues. Once Celoxis is installed and is working fine on http://localhost:8888 then you can proceed to make other changes.
On-PremiseConcepts
Server Requirements
Hardware Requirements
It goes without saying that the hardware requirements depend on a number of factors like the number for users, their access patterns, the number of tasks in a project, the number of projects, etc. The recommendation here is for an installation of 100 users with average workloads assuming your database is running on a different server.
While not mandatory, we strongly recommend having a dedicated server for Celoxis and not sharing it with other applications. This makes it easy to understand bottlenecks and analyze performance. If you are going to host on AWS then we recommend at least an m5.xlarge instance.
- Processor: A modern server processor like a multi core Xeon processor.
- Memory: Minimum 6 GB. Recommended 8 GB.
- Disk space: 250 MB for the software + about 5 GB for logs + about 1 GB for search indexes + the total size of documents your users will upload — if the average size of an uploaded file is 1 MB, then 100K documents will take about 100 GB which makes a total of about 110 GB.
Software Requirements
- Linux, Windows or Mac OS
- Amazon Corretto 21 – Amazon Corretto is a no-cost, multiplatform, production-ready distribution of the Open Java Development Kit (OpenJDK). Corretto comes with long-term support that will include performance enhancements and security fixes. Amazon runs Corretto internally on thousands of production services and Corretto is certified as compatible with the Java SE standard.
- SQL Server 2016 and above, Oracle 11g/12c or Postgresql 10 and above.
- SMTP and IMAP4 supported mail server.
On-PremiseConcepts
Network Diagram
The following diagram shows how Celoxis fits in to your intranet.
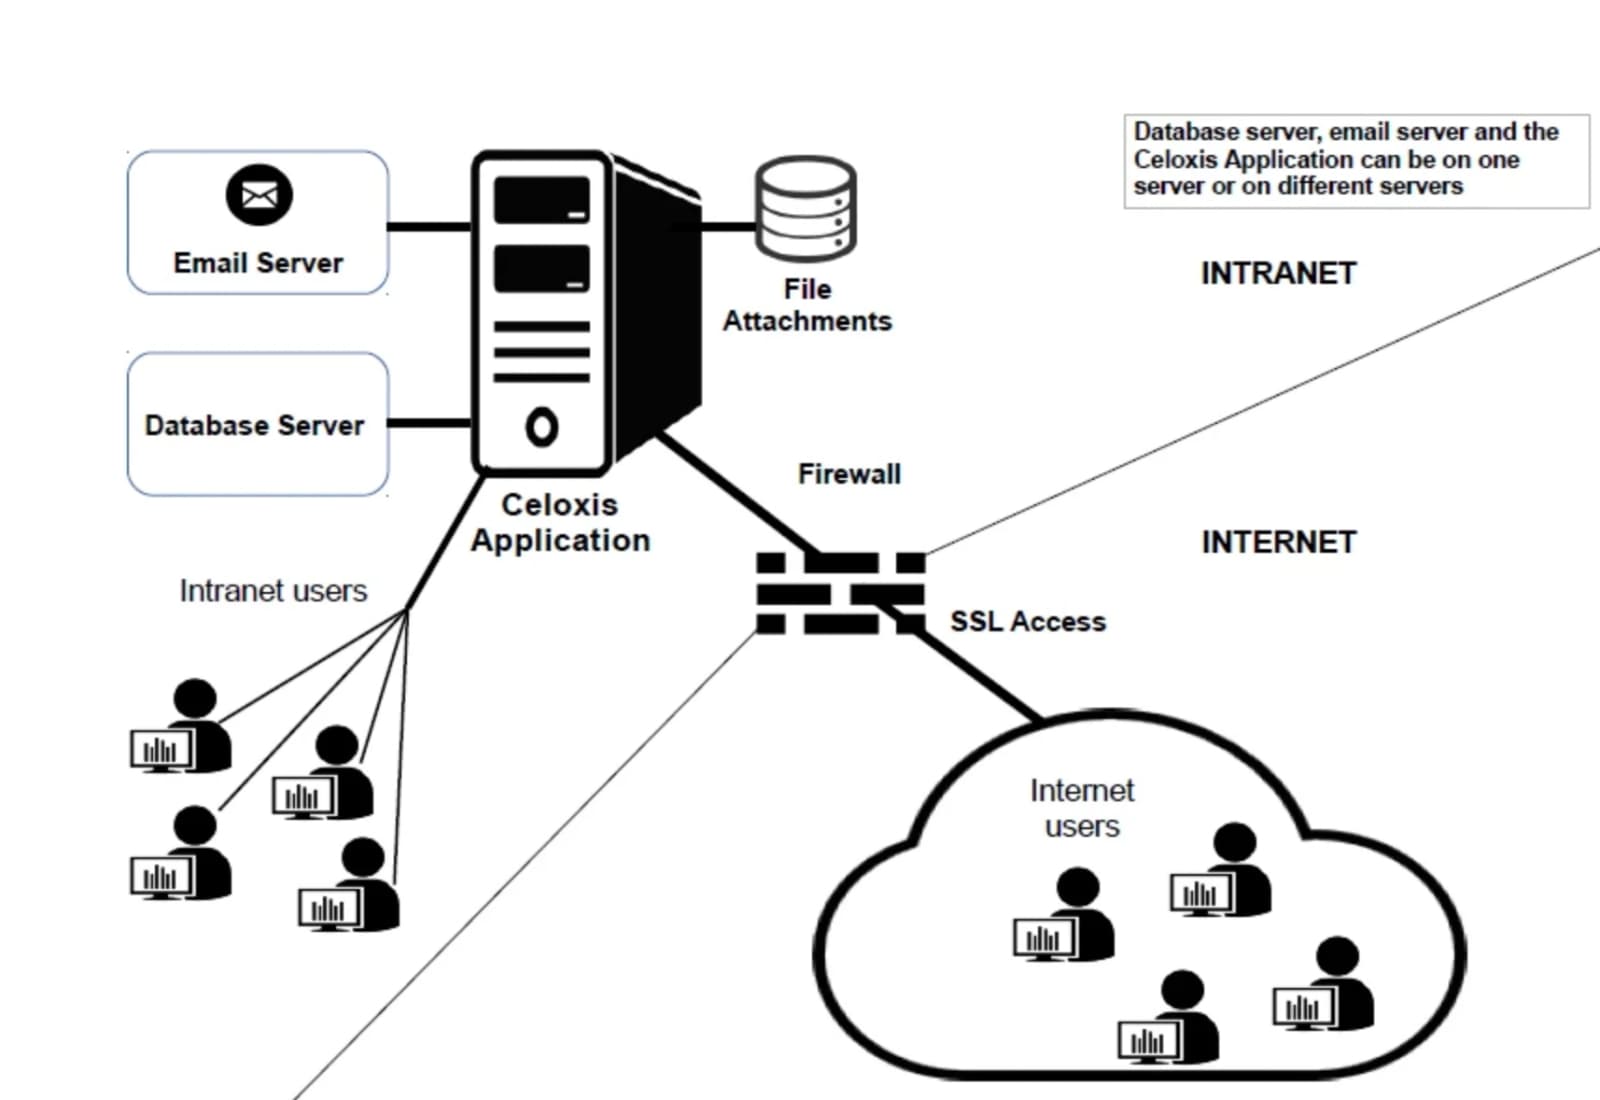
A few things to note: Uploaded files are stored on the disk and not in the database. Database server and email server can be on the same machine or on a different machine. If configured correctly, Celoxis can be accessed from your intranet as well as the Internet. To stop access to Celoxis from the Internet, configure your firewall appropriately.
Actions
On-PremiseActions
Setting up your Database
Celoxis requires a database to store data. The database must be configured before you start the installation process. Sample instructions for each software is given below. Instructions are based on the default settings and often vary from version to version and from platform to platform. It is not feasible for us to cover all cases so please consult your database administrator for any setup, security or performance questions. Creating and configuring databases is beyond the scope of our support services.
In a nutshell, Celoxis needs a database instance and a privileged database user account that create, query, modify, and delete tables, indices, constraints, etc. and their definitions. We recommend that you do not share the database instance and this database with any other application.
PostgreSQL
- Allow Postgresql to accept TCP/IP connections:
- Open
postgresql.conf. On Linux, you can find it most likely in/var/lib/pgsql/datawhile on Microsoft Windows, it is easily accessible from pgAdminFilepostgresql.conf. - Uncomment the line (if not already)
listen_addresses = '*'i.e. it should not have#as the prefix. - Save the file and exit.
- Open
- Allow connections from your local network:
- Open
pg_hba.confOn Linux, you can find it most likely in/var/lib/pgsql/datawhile on Microsoft Windows, it is easily accessible from pgAdminFilepg_hba.conf. - Assuming your network address is
192.168.0.0and network mask is255.255.255.0, add the following lines to that file. If Celoxis will be running on the same server as your Postgresql server, then you only need the first line below. local all all trust host all all 127.0.0.1 255.255.255.255 trust host all all 192.168.0.0 255.255.255.0 trust - Save the file and exit.
- Restart Postgresql. (On Linux, run:
sudo service postgresql restart, while on Microsoft Windows choose Stop service and then Start service from All Programs > Postgresql
- Open
- Create a database user with name celoxis with a password. Note this down, you will be asked for this during installation.
Linux
Use the createuser command as shown below:
$ createuser celoxis
Shall the new role be a superuser? (y/n) n
Shall the new role be allowed to create databases? (y/n) y
CREATE ROLE
$
Windows
- Open pgAdmin program.
- Open the appropriate server node for this database.
- Right click Login Roles and choose New Login Role...
- Enter
celoxisas the name and optionally enter a password. Ensure that Account expires is empty. - Select the Can create database objects option from Role Privileges.
- Click OK.
- Create a database with UNICODE character encoding with celoxis as its owner. The database name should be the same as specified in your license request.
Linux
Use the createdb command as shown below:
$ createdb -E UNICODE -U celoxis celoxis
CREATE DATABASE
$
Windows
- Open pgAdmin program.
- Open the appropriate server node for this database.
- Right click on the Databases node and choose New Database...
- Enter the correct database name, pick celoxis as the owner and choose UTF-8 as the encoding.
- Click OK.
MS SQL Server
To create a database and a database user, you need to login as sa (the database administrator user).
Enable TCP/IP
- Go to Microsoft SQL Server from your Start programs menu and open Configuration Tools > SQL Server Configuration Manager.
- Select the node SQL Server Network Configuration > Protocols for MSSQLSERVER
- Right-click on the TCP/IP node and select Enable
- Restart the SQL Server service (Right click on SQL Server from the SQL Server Services and click Restart)
Create a database
- Open the SQL Server Management Studio.
- Right click the Database node and click New Database...
- Enter the same database name as specified in your license request.
- Select celoxis as the owner.
- Choose SQL_Latin1_General_CP1_CI_AS as the Collation (available from the Options page on the left)
- Click OK.
Create a database user
- Right click on the Security node of the database created and click New > Login.
- Enter login name as celoxias.
- Choose SQL server authentication. Windows authentication will not work.
- Enter a password. Note the user name and password down as you will be asked for this later during installation.
- Uncheck the Enforce password policy.
- Click OK.
Oracle
- Create a database with UTF8 character encoding. The database name should be the same as specified in your license request.
- Create a database user. Grant this user all permissions on the database. Also, give this user unlimited quota for tablespace users.
On-PremiseActions
Configuring Site Settings
Navigate to Main MenuAdminSite Settings and click on Edit Settings under Actions. This will open up a form with multiple tabs. Interesting settings on each tab is described below under the corresponding tab.
Basic
| Celoxis URL | This is the URL that will be used to access Celoxis. |
| Data Directory Path | The fully qualified path to the directory that stores uploaded files, search indices and other control files. This should ideally be on the same server for optimal performance. |
| Max size of file upload | The maximum size of a file that can be uploaded. |
| Google Client Id | If you want to integrate with Google Drive, you will need to enter your ID here. Read this chapter on how to obtain one. |
| Chrome Path | The absolute path name of the Google Chrome executable. This is used for printing to PDF. Read this chapter for more information. |
Outgoing Mail
Please contact your system administrator for correct values. Also, read this chapter on how to troubleshoot issues with your email server.
| Send emails in background | If checked, users don't have to wait for the emails to be sent to complete the operation. This considerably speed things up. The cost, however, is that if the email sending fails for some reason, the user performing the operation is not notified of the failure. If your email server is unreliable, then instead of turning this option on, consider using Gmail. |
| Host | The host name of the SMTP server. |
| Default Sender Name/Email | Emails sent from Celoxis will have the sender name/email to these values. |
Incoming Mail
Please contact your system administrator for correct values. Also, read this chapter on how to troubleshoot issues with your email server.
| Protocol | We strongly recommend using either IMAP or IMAP+SSL. |
| Host | The host name of the IMAP or POP3 server. |
| Plussed Symbol | The sub-addressing symbol recognized by your SMTP server. For example, sending an email to celoxis+foobar@gmail.com caused the email to be delivered to celoxis@gmail.com. Celoxis can then read the foobar and perform actions based on this control information. For Sendmail, Gmail or Postfix use +. For Qmail use -. For Microsoft Exchange do not choose plussed addressing, in which case the control information will be appended to the subject of emails to enable routing. Plussed addressing is very effective. If your email server does not support this, then instead of not using plussed addressing, consider using Gmail. |
LDAP
| Is Microsoft ADS | Whether you are using Microsoft Active Directory Service |
| Authenticate clients via LDAP | If checked, client accounts are also authenticated via LDAP, else they will be authenticated based on credentials entered in Celoxis. |
| LDAP URL | Your LDAP URL e.g. ldap://lap.acme.com:389 |
| Base DN | The node of the LDAP server from where Celoxis will search the users. |
| Search Attribute | The attribute in the LDAP user entry that holds the user's login name. In ADS, this is always sAMAccountName. This value must match against the login name for that user in Celoxis. |
| Admin DN | If Celoxis needs to authenticate with your LDAP server to search for users, then enter that user's login name for your LDAP server. |
| Admin Password | The Admin Password |
| Principal Pattern | If Celoxis can directly authenticate the user against your LDAP server using a pattern, then enter that pattern here. {username} will be replaced with the login name. (Not applicable, if using Microsoft Active Directory.) |
Email Aliases
Read this section for more information.
Limits
We strongly recommend that you do not change these values. These values are reasonable and changing these may adversely affect performance. Optimizing these values for your installation is beyond the scope of our support services.
| Max rows from database | The maximum number of rows to fetch from a query while running a report. |
On-PremiseActions
Stopping and Starting Celoxis
Starting Celoxis
Windows
- Open Windows Explorer
- Go to the directory
<Celoxis-Install-Dir>/psa_14.5.x/bin - Double click the
startup.bat. A command window should pop-up and remain open. If it does not stay open, then it means that your JAVA_HOME is not correctly set and must be remedied.
Linux
- Open Terminal
cdto<Celoxis-Install-Dir>/psa_14.5.x/bin- Run
startup.sh
Stopping Celoxis
Windows
- Open Windows Explorer
- Go to the directory
<Celoxis-Install-Dir>/psa_14.5.x/bin - Double click the
shutdown.bat.
Linux
- Open Terminal
cdto<Celoxis-Install-Dir>/psa_14.5.x/bin- Run
shutdown.sh
Restarting Celoxis
First stop and then start Celoxis as described above.
On-PremiseActions
Increasing Memory for Performance
Celoxis is configured to use a maximum of 4GB of memory. While this is enough for most cases, you can increase this if you have a large installation or if you have more RAM.
- Stop Celoxis.
- Increase the memory as described below
- Start Celoxis.
We shall now see how to increase the memory allocated to Celoxis to 8GB (i.e. 8192 MB)
Windows
If Celoxis is installed as Windows Service
- Navigate to
<Celoxis-Install-Dir>/psa_14.5.x/binand runceloxisw.exe. - Click on the Java tab.
- Enter
8192in the Maximum memory pool field. - Click OK.
If Celoxis not installed as a Windows Service
- Right click My Computer.
- Click Properties.
- Click the Advanced tab (or click Advanced system settings in Windows Vista).
- Click the Environment Variables button
- Under Systemvariables, click New.
- Set variable name to
CATALINA_OPTSand variable value to-Xms512M -Xmx8192M - Click OK.
- Click OK on the Advanced tab to close the window.
Linux
- Open a terminal and login as the user that starts Celoxis.
- Add:
export CATALINA_OPTS=-Xms512M -Xmx8192Mto the user's startup file (e.g..profile) - Save the file.
- Logout and Login again.
On-PremiseActions
Installing Celoxis as a Service
Setting up a service for Celoxis will help you automatically start the application after a server reboot. You won't have to run the startup script every time.
Windows
To Install
Before you install Celoxis as a service, ensure that the application has been installed successfully.
In Windows Explorer, go to <Celoxis-Install-Dir>/psa_x.y.z/bin, right click on celoxis-service-install and click Run as Administrator.
To Uninstall
In Windows Explorer, go to <<Celoxis-Install-Dir>>/psa_x.y.z/bin, right click on celoxis-service-uninstall and click Run as Administrator.
Linux
In /etc/rc.local (or the file in your Linux flavor that get's executed at startup), write the following:
sudo -i celoxis -c /usr/local/celoxis/psa_14.5.x/bin/startup.shOn-PremiseActions
Getting your Google Client ID
If you wish to upload files from your Google Drive account, you will first need to get a Client ID from Google and enter that into Celoxis. To get your client ID:
- Go to Google Developers Console
- Create a new project and name it Celoxis
- Click: Create credentials > OAuth client ID
- You will be first asked to configure your consent screen. On the configure consent screen, enter Product name as Celoxis
- Enter any other details, you wish and save.
- You will be taken to the Create OAuth client ID screen.
- Choose client as Web application
- Enter name as Celoxis
- Click OK
- You will be shown the Google Client ID
- Enter this value in the Site Settings and Save
- restart.
Celoxis is now integrated with Google Drive. Try uploading a file from your Google Drive account into a task.
On-PremiseActions
Requesting for a New License
Celoxis license file is tied to your hardware ID, more specifically, the network adapter ID which is usually integrated with the machine motherboard. If you change your machine, or in case your motherboard or network card fails, you will need a new license from us.
Requesting a new license
To request a new license, go to https://www.celoxis.com/license.
Applying the new license file
You will receive a license.zip file from us. Unzipping it will yield a license.properties file. To apply the new license file:
- Stop Celoxis.
- Copy the license.properties file to
<Celoxis-Install-Dir>/psa_14.5.x/webapps/psa/WEB-INF/confdirectory. - Start Celoxis.
On-PremiseActions
Downloading the Debug Bundle
Debug bundle is a ZIP file containing your log files and configuration files. It helps our engineers and results in a speedy resolution.
If Celoxis is running
To send us the debug bundle:
- Stop Celoxis
- Go to
<Celoxis-Install-Dir>/psa_14.5.x/webapps/psa/WEB-INF/logsdirectory and delete all files. - Start Celoxis.
- Follow the steps that causes the error.
- Log in as a user having administrator privileges.
- Navigate to Main MenuAdminSite Settings.
- Click on Download Debug Bundle.
- You will be prompted to save a ZIP file. Save it on your computer.
- Attach the file to your support ticket.
If Celoxis is not running
- Go to the
<Celoxis-Install-Dir>/psa_14.5.x/webapps/psa/WEB-INFdirectory. - Zip the entire
logsdirectory and send it to us.
On-PremiseActions
Viewing the Site Admin Password
Site administrator password is different than an administrator password. You are required to enter the site administrator password when accessing Main MenuAdminSite Settings. To view or change this password:
- Go to the
<Celoxis-Install-Dir>/psa_14.5.x/webapps/psa/WEB-INF/confdirectory. - Open the
site.propertiesfile in Notepad (or any text editor). - You should see the password in plaintext. E.g. if you see
password=foobar1, the password is foobar1. - To reset the password, change the password and restart the application.
On-PremiseActions
Resetting an Admin Password
Administrators can reset passwords of other users (admins as well as non-admins). However, there are cases, when you would want to quickly reset a password from the back-door.
- Find the ID of the person whose password you want to reset. Let's say that person's email address is
joe@acme.com. To do that run the SQL:select id,name from db_person where email = 'joe@acme.com' - You should see only ONE record in the result. Note down the ID; we shall be using it in the next step. Let's say it is
123456. - Run the SQL:
update db_person set password_hash='Y2Vsb3hpczE=' where id=123456. - The password of the user has now been changed to
celoxis1 - Ask that person to change this password after logging in.
On-PremiseActions
Accessing Celoxis using SSL
For the purpose of this article, let's assume that Celoxis has been installed on a Linux server at /usr/local/celoxis and is accessed as http://celoxis.acme.com:8888
Default SSL
Celoxis comes with a self-signed SSL certificate and accessible on port 8843 as https://celoxis.acme.com:8843. Accessing websites that serve self-signed SSL certificates gets a warning in Chrome and other browsers saying that the site is not secure. You can install a certificate from a know provider like Verisign, Thawte, RapidSSL, etc. to overcome this issue.
Installing your own SSL Certificate
Each provider comes with their own instructions. However, we are going to look at the most common scenario.
Stop Celoxis
Stop Celoxis as we are going to overwrite a file.
Go to the <Celoxis-Install-Dir>
$ cd /usr/local/celoxisGenerate a Key Pair
Give the password as celoxis. The reason will be evident at the end of the chapter. Instead of celoxis.acme.com, you would put in your own hostname.
$ keytool -genkey -alias celoxis -keyalg RSA -keystore celoxis.jks
Enter keystore password:
Re-enter new password:
What is your first and last name?
  [Unknown]:  celoxis.acme.com
What is the name of your organizational unit?
  [Unknown]:
What is the name of your organization?
  [Unknown]:  Acme
What is the name of your City or Locality?
  [Unknown]:  Santa Clara
What is the name of your State or Province?
  [Unknown]:  CA
What is the two-letter country code for this unit?
  [Unknown]:  US
Is CN=celoxis.acme.com, OU=Unknown, O=Acme, L=Santa Clara, ST=CA, C=US correct?
  [no]:  yes

Enter key password for
    (RETURN if same as keystore password):
$
Generate a Certificate Request (CSR)
We will be generating the CSR in a file certreq.csr.
$ keytool -certreq -keyalg RSA -alias celoxis -file certreq.csr -keystore celoxis.jks
Enter keystore password:
$
List the files
We have the two expected files.
$ ls
celoxis.jks certreq.csr
$
Get the SSL certificate
You would now go to one of the SSL certificate issuers like Verisign, RapidSSL, GeoTrust, etc. and use the certreq.csr file to request and SSL certificate. They will ensure that you are owner of the domain you requested for and issue you a certificate.
You would get two files in PEM format. One will be your certificate and the other your chain to the CA certificate.
Let's assume that the chain is available in the file chain.crt and your certificate in certificate.crt.
Copy these two files to <Celoxis-Install-Dir>.
Import the two files into our keystore
$ keytool -import -trustcacerts -alias intermediate -file chain.crt -keystore celoxis.jks
Enter keystore password:
$
keytool -import -trustcacerts -alias celoxis -file certificate.crt -keystore celoxis.jks
Enter keystore password:
$Our keystore is now ready!
Overwrite Celoxis's keystore with our keystore
$ cp celoxis.jks /usr/local/celoxis/psa_14.5.x/.keystore
$
Change 8843 to 443 (the default SSL port)
Open <Celoxis-Install-Dir>/psa_14.5.x/conf/server.xml and change the port number as shown from the left to the right.
<Connector port="8843"
...
   scheme="https"
   secure="true"
   keystoreFile=".keystore"
   keystorePass="celoxis"
...
/>
<Connector port="443"
...
scheme="https"
secure="true"
keystoreFile=".keystore"
keystorePass="celoxis"
...
/>Start Celoxis
Start Celoxis and point your browser to https://celoxis.acme.com. You should be taken to the Celoxis login screen.
On-PremiseActions
Modify Celoxis URL
When you install Celoxis, you input the URL users will use to access the application. This URL is also used in the links sent in notifications.
It is important to note that the URL you type in the browser to access Celoxis must match the URL is stored in the database. For example, if the URL stored in Celoxis is http://localhost:8888 none of the following will work in the browser even though they point to the same machine and port number.
http://127.0.0.1:8888(althoughlocalhostresolves to127.0.0.1)http://<IP address>:8888(although this is the same server)http://pm-software:8888(wherepm-softwareis one of the host names of the machine)
You will receive an error indicating that the URL is different. The URL must exactly match the entry in the database.
Do the following to view/change the URL stored in Celoxis. Note that the site settings page does not depend on using the same URL as stored in the database. So you can use any valid URL (IP address/CNAME etc).
- Point your browser to
http://<IP address>:8888/psa/site.admin.wm-or- start the browser on the same machine you installed Celoxis and go tohttp://localhost:8888/psa/site.admin.wm - Enter your Site Administrator password.
- Click on Site Settings
- View/Change the Celoxis URL
- Submit
On-PremiseActions
Working with a Proxy Server
You may want to configure Celoxis application behind a reverse proxy server to provide SSL access to Celoxis. Let us assume we want to setup Acme consulting (acme.com) with the following configuration:
- Users should access the Celoxis application using
https://pm.acme.com(which is actually a proxy server) - The proxy server servicing
https://pm.celoxis.comshould proxy requests to the celoxis application.
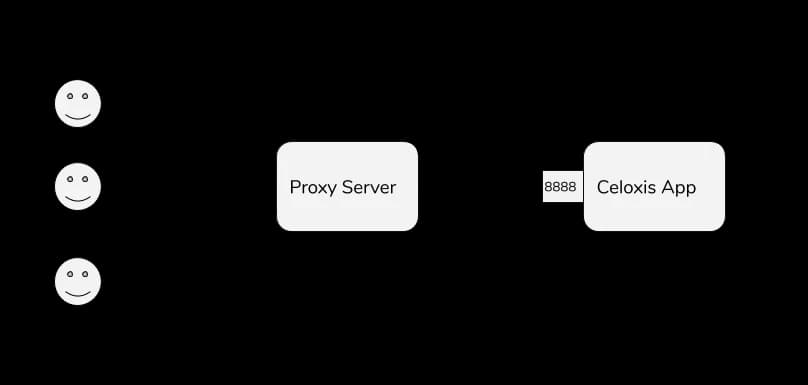
The setup looks like this:
To do this:
- You will configure the proxy server to forward requests to port
8888on the host running the Celoxis application. - Configure the Celoxis application URL to
https://pm.acme.com(see this) - You will also need to run the following SQL on the celoxis database:
insert into db_config (id, vdb_id, name, value) values (95, 0, 'stricthost', 'false') - Restart the Celoxis application
How-To
On-PremiseHow-To
Installing 14.5
Celoxis is a powerful application, yet easy to install and configure if you follow the steps given below. Not following the instructions can lead to a lot of wasted hours. If you do not follow something, contact us and we will help you out.
Preparing for Installation
- Your database server must be up and running and you must have created a database and a database user for Celoxis. If not, first do that as described in the chapter on database setup. Keep your database information ready: database name, login, password. You will be asked to input these during the installation process.
- Create an email account for Celoxis in your email server. Celoxis should be able to read email via IMAP and also send email using this account. Think of Celoxis as a regular user in your system. Note down the username and password. This will be used in installation. If your email server is unreliable or does not support plussed addressing, consider using Gmail.
- Decide how your users would want to access Celoxis. For example, if your domain is acme.com, you can have celoxis.acme.com, projects.acme.com, pm.acme.com, etc. Before you begin installation, ensure that your DNS server has been updated with this hostname and is working fine by using the
pingcommand. - Create a user called celoxis on the machine where you will install Celoxis. If you are running Linux, we do not recommend running Celoxis as the root user.
- Download and install Java Development Kit v21 (JDK 21) from AWS. Amazon Correto is a no-cost, multiplatform, production-ready distribution of the Open Java Development Kit (OpenJDK). Download from Amazon's Java 21 download center.
- On Linux download the tar version; for Windows, the MSI version.
- If your operating system is 64 bit, then you must install the 64 bit version, else you must install the 32 bit version.
Configure JAVA_HOME environment variable
Celoxis uses Java and for it to work correctly, the JAVA_HOME environment variable must be correctly set.
Windows
AWS Corretto will correctly setup the JAVA_HOME and PATH system properties during installation. All we have to do is verify its correctness.
Verify JAVA_HOME is correctly set
Open a command prompt and type
java -version. You should see something like:C:\> %JAVA_HOME%\java -version openjdk version "21.0.5" 2024-10-15 LTS OpenJDK Runtime Environment Corretto-21.0.5.11.1 (build 21.0.5+11-LTS) OpenJDK 64-Bit Server VM Corretto-21.0.5.11.1 (build 21.0.5+11-LTS, mixed mode, sharing) C:\>Linux
- Open a terminal and login as the user on whose behalf Celoxis application will be started.
- In the appropriate profile file depending on the shell you use (e.g. .bash_profile or .profile for bash), type:
export JAVA_HOME=/usr/java/amazon-corretto-xx.yy.zzreplacing the path with the correct directory in which AWS Corretto 21 was installed. - Save the file.
- Log out.
- Log in.
Verify JAVA_HOME is correctly set
Open a shell and type
$JAVA_HOME/bin/java -version. You should see something like:$ $JAVA_HOME/bin/java -version openjdk version "21.0.5" 2024-10-15 LTS OpenJDK Runtime Environment Corretto-21.0.5.11.1 (build 21.0.5+11-LTS) OpenJDK 64-Bit Server VM Corretto-21.0.5.11.1 (build 21.0.5+11-LTS, mixed mode, sharing) $ - Create a directory for installation of the application and uploaded files. On Windows, we recommend:
C:\celoxis, while on Linux, we recommend:/usr/local/celoxis. Avoid creating a directory with name having the space character. The directory should have at least 10GB + size of uploaded files you will upload into Celoxis. - Download the installation zip file (link will be sent to you via email) and copy it to the directory created above.
- Unzip it. Your installation directory should contain something like:
psa_14.5.0/ ├── LICENSE ├── NOTICE ├── bin/ ├── conf/ ├── lib/ └── webapps/ - You should have received a
license.propertiesfile in an email from us that contains your license information. Keep this file ready. You will be asked to upload this file during the installation process.
Before you proceed
Before you proceed, keep the following handy:
- The
license.propertiesfile sent by our support team. - The database user and password.
- A host name which your users will use to access Celoxis e.g. celoxis.acme.com
- A location for the data directory. This is the directory that will store files, search indices and other files. At least 10 GB should be free. Also, this directory should not exist. We recommend that you store it as a subdirectory of the installation directory and name it data. So if you have installed celoxis in
D:\celoxis, then the data directory should beD:\celoxis\data.
Start Celoxis
Windows
- Open a command prompt
- Type
%JAVA_HOME%\java -version. - You should see something like:
C:\> %JAVA_HOME%\java -version openjdk version "21.0.5" 2024-10-15 LTS OpenJDK Runtime Environment Corretto-21.0.5.11.1 (build 21.0.5+11-LTS) OpenJDK 64-Bit Server VM Corretto-21.0.5.11.1 (build 21.0.5+11-LTS, mixed mode, sharing) - Go to the Celoxis installation directory –
cd C:\celoxis - Run the startup.bat file –
psa_14.5.x\bin\startup.bat
Linux
- Open Terminal
- Type
$JAVA_HOME/java -version. - You should see something like:
$ $JAVA_HOME/java -version openjdk version "21.0.5" 2024-10-15 LTS OpenJDK Runtime Environment Corretto-21.0.5.11.1 (build 21.0.5+11-LTS) OpenJDK 64-Bit Server VM Corretto-21.0.5.11.1 (build 21.0.5+11-LTS, mixed mode, sharing) - Go to the Celoxis installation directory –
cd /usr/local/celoxis - Run the startup.sh file –
psa_14.5.x/bin/startup.sh
Install Celoxis
- Open
http://your-server-name:8888/in browser. - Click on the Install button.
- Read the EULA and click Agree if you agree to the terms.
- Choose a site admin password between 8 to 10 characters.
- Upload the
license.propertiesfile sent by us. - You will be shown the license details. Verify its correctness.
- Choose your database and enter the database username and password.
- Enter the data directory path. Double check that it does not exist.
- Press OK.
- On the "Add Company" form, add your details. We recommend that your Company code be the second level domain i.e. if your domain name is acme.com, then enter
acmehere. Enter the Celoxis URL to behttp://your-server-name:8888. - You should be taken to a sample Dashboard
- You can now move on to the site settings chapter to configure some advanced settings.
On-PremiseHow-To
Upgrading from 14.1 to 14.5
Download Celoxis v14.5
You can get the download link from our support team.
Backup your current installation
Backup your existing database and data directory. If the upgrade fails for any reason, the backup of your database and data directory will have to be restored.
To find your install directory, database and data directory, navigate to Main MenuAdminSite Settings and check the Server Information as shown below:
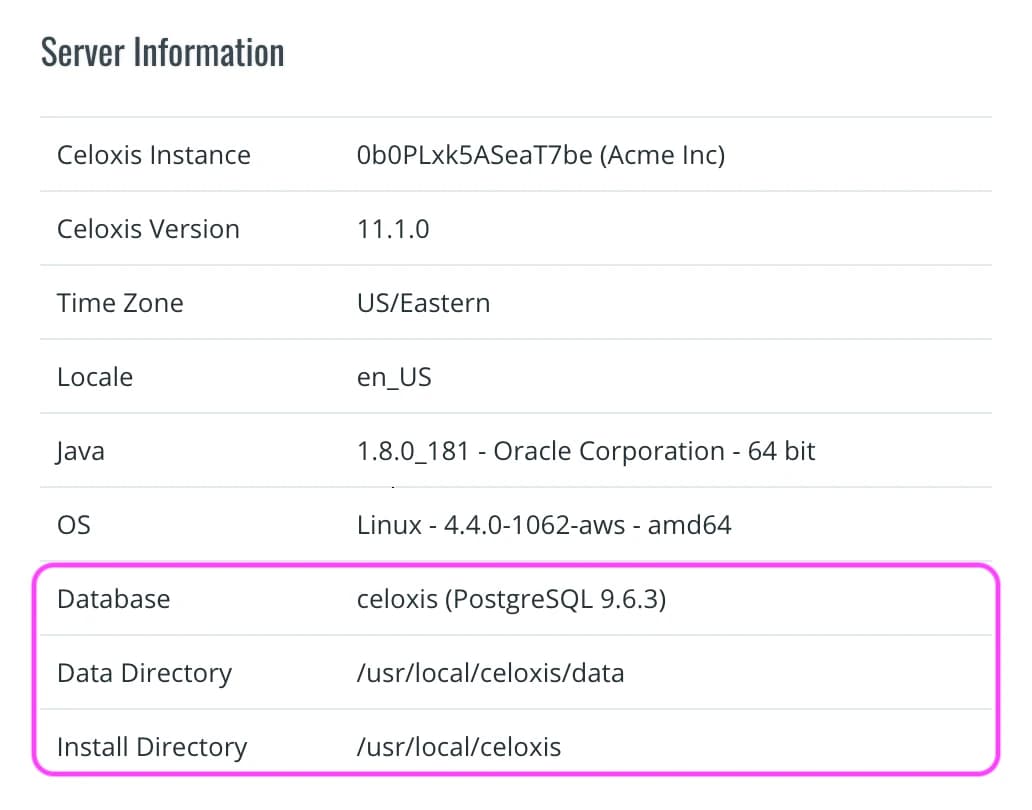
Stop the current version
- Stop Celoxis.
- If you have installed Celoxis as a Windows Service, uninstall it.
Start the upgrade
- Copy the downloaded
psa_14.5.x.zipfile into<Celoxis-Install-Dir>. - Unzip the
psa_14.5.x.zipfile. - You should now have a
psa_14.5.xdirectory inside<Celoxis-Install-Dir>. - Open a command prompt (terminal on Linux).
cd<Celoxis-Install-Dir>and then topsa_14.5.x.- Type: bin\startup.bat (bin/startup.sh on Linux).
- Open
http://<your-server-name>:8888/in your browser. - Choose the Upgrade option and follow the instructions to complete the upgrade.
- If you had installed Celoxis as a Windows Service, reinstall it.
On-PremiseHow-To
Upgrading from 14.5.X to 14.5.Y
- Stop Celoxis.
- If you have installed Celoxis as a Windows Service, uninstall it.
- Browse (or 'cd' on Linux) to the
<Celoxis-Install-Dir>. - Rename
14.5.xfolder to14.5.x.old - Download the new
14.5.y.zipand copy it to<Celoxis-Install-Dir> - Unzip
- Now you should have two folders
14.5.yand14.5.x.oldin<Celoxis-Install-Dir> - Copy the files:
db.properties,site.properties&license.propertiesfrom14.5.x.old/webapps/psa/WEB-INF/confto14.5.y/webapps/psa/WEB-INF/conf - Start Celoxis.
- Once you see that everything is working fine, delete
14.5.x.old - If you had installed Celoxis as a Windows Service, reinstall it.
On-PremiseHow-To
Maintaining Celoxis
Celoxis is easy to maintain. The most important part of maintenance is backing up the database, backing up the data directory (where uploaded files are stored) and regularly tuning the database.
Backup Database and Data Directory
The database and the data directory should be backed-up regularly to different machines than the one on which they reside. We highly recommend that you use the backup solutions you currently use to perform the backups. It is very important to check periodically that the backups are actually working. Not ensuring that the backup actually works is one of the most common issues we see faced by customers.
If you do not have any tools, you can use a combination of cron, pg_dump and rsync programs on Linux, while on Windows you can use a combination of Scheduled Task, robocopy to backup the data directory while you can use pg_dump for PostgreSQL and Maintenance plan for Microsoft SQL Server to create database backups.
Database Tips
The same software that runs on our cloud service and supports tens of thousands of users is running on your site. If you see a performance problem and if you have good hardware (a dedicated host with a modern CPU with at least 16GB RAM should be fine in most cases), you should check if your database is tuned correctly. Your database administrator should be able to help you with this.
PostgreSQL
You can optimize performance by tuning the following parameters in your postgresql.conf file. If you are using a cloud hosted database like Amazon Aurora or Google Cloud SQL, they will have their own way of specifying these parameters.
| Parameter | Minimum | Recommended |
|---|---|---|
shared_buffers | 2GB | 4GB |
work_mem | 32MB | 128MB |
maintenance_work_mem | 256MB | 512MB |
default_statistics_target | 1000 | 5000 |
We also recommend that you run the vacuum analyze SQL command on the database every week.
Microsoft SQL Server
A SQL maintenance plan for rebuilding indexes and setting the index free space percentage to 10% within the Celoxis database should be scheduled to run monthly (preferably weekly). This maintenance plan should also be configured to update column statistics (index statistics are updated during the index rebuild process). We recommended that this plan be scheduled to run at a time when database utilization by the Celoxis application is at its lowest. This could be on a Sunday during the day or a during a scheduled maintenance cycle, etc.
You should also manually execute this maintenance plan after every major and minor upgrade as it could possibly be updating a lot of tables and records in the database leading to fragmentation and loss of performance.
Rebuilding the Search Index
Celoxis maintains a search index for advanced searching capabilities. Sometimes, it could happen that the search index is corrupted. To fix:
- Login as site administrator by going to Main MenuAdminSiteSetiings.
- Click Run admin program under Actions.
- Enter
com.celoxis.psa.base.search.Reindexerin the Class Name field and submit.
After a few minutes (less than 30), your search index will be updated.
On-PremiseHow-To
Troubleshooting Database
Celoxis uses standard JDBC connections to connect to your database. If there are issues connecting to your database, it is most likely the result of a misconfiguration. We have provided you with the JDBC Probe program to identify the problem.
About JDBC Probe
Celoxis JDBC Probe is a simple java program that connects to your celoxis database. This helps to identify and fix connection issues with your database server.
Download JDBC Probe
Download jdbc-probe.zip from here
Using JDBC Probe
- Unzip the jdbc-probe.zip file. It should create a folder with the file JDBCProbe.class in it.
- Open a command prompt and cd to the folder that contains the JDBCProbe.class file.
- Run the program as shown below substituting values according to your setup.
Windows
java -cp .;drivers/* JDBCProbe product=oracle name=celoxis user=tim password=fox host=localhostLinux
java -cp '.:drivers/*' JDBCProbe product=oracle name=celoxis user=tim password=fox host=localhost - You will receive a success message if the connection was successful. If the connection fails, the message returned by the driver is printed. This error message will give you a clue about the possible causes as explained later in this document.
Program Options
| product | One of oracle, pgsql (for PostgreSQL), or mssql (for MicrosoftSQL Server) |
| name | The name of the celoxis database instance. |
| user/password | The username and password to be used to connect to the database. In case of Microsoft SQL server, the login and database must be configured to use the SQL Authentication mode (or Mixed mode), not Windows authentication mode. |
| host | The dns hostname of the server where the database is running. |
| port | The port of the database server. This is an optional field and when unspecified the default port will be used. |
Error Messages and Possible Causes
PostgreSQL
The connection attempt failed
- The host name cannot be resolved by the DNS server.
- Database server is not running on the host.
- The database port on the database server is inaccessible because of a firewall.
Connection rejected: FATAL: password authentication failed for user
- Username or password is incorrect
Backend start-up failed: FATAL: database "celoxis_db" does not exist
- The database name (celoxis_db) is incorrect.
- The user doesn't have privileges to logon to the database
SQL Server
Error establishing socket.
- The host name cannot be resolved by the DNS server.
- Database server is not running on the host.
- The database port on the database server is inaccessible because of a firewall
Login failed for user
- Username or password is incorrect.
Cannot open database requested in login
- The database name is incorrect.
- The user doesn't have privileges to logon to the database.
Not Associated with a trusted SQL Server Connection
- This occurs typically when Microsoft Sql Server installation is configured to use only Windows authentication and not SQL Server authentication. To solve the problem: Change the Authentication change the authentication mode to sql server authentication.
The TCP/IP port is disabled or not accepting connections
- Firewall is blocking the connection.
- SQL Server not not been configured to listen on TCP/IP ports. To fix:
- Go to Microsoft SQL Server > Configuration Tools > SQL Server Configuration Manager
- In the SQL Server Configuration Manager select the node SQL Server Network Configuration > Protocols for MSSQLSERVER
- Right-click on the TCP/IP node and select Enable
- Restart the SQL Server (SQLEXPRESS) service (In Control Panel > Adminstrative Tools > Services, right-click on the SQL Server (SQLEXPRESS) service and select Restart)
Oracle
The Network Adapter could not establish the connection
- The host name cannot be resolved by the DNS server.
- Database server is not running on the host.
- The database port on the database server is inaccessible because of a firewall.
Invalid username/password; logon denied
- Username or password is incorrect
Connection refused(DESCRIPTION=(TMP=) (VSNNUM=153092352)(ERR=12505) (ERROR_STACK=(ERROR=(CODE=12505)(EMFI=4))))
- The database name is incorrect
- The user doesn't have privileges to logon to the database
FAILURE: Listener refused the connection with the following error: ORA-12505, TNS:listener does not currently know of SID given in connect descriptor. [java.sql.SQLException]
- One of the parameter you are passing is incorrect
- The database does not exist on the connection properties you are specifying.
On-PremiseHow-To
Troubleshooting SSL
When Celoxis connects to your servers over SSL, it should be able to validate the SSL certificate presented by your server to it. Celoxis must be able to validate your SSL certificate against the Java trusted CA certificate store. For this to happen, the SSL certificate must be obtained from trusted Certificate Authority (CA) like Verisign, RapidSSL, Thawte, GeoTrust, etc. Celoxis does not support certificates signed using CAs not trusted by Java.
About SSL Poke
Celoxis SSL Poke is a java program that connects via SSL to a host and port of your choice. The server could be a web server, mail server or any other server that supports SSL. The primary objective is to determine whether Java can authenticate the server's certificate using its trusted CA certificate store. This program also verifies whether the host and port are correct.
Downloading SSL Poke
Download ssl-poke.zip from here
Using SSL Poke
- Unzip the ssl-poke.zip file. It should create a folder
ssl-pokethat contains theSSLPoke.classfile. - Open a terminal window and
cdto thessl-pokefolder. You must now be in the same directory that contains theSSLPoke.classfile. - Then type:
java SSLPoke <host> <port>
Examples
Connect to our web site
$ java SSLPoke www.celoxis.com 443
SUCCESS
Connect to a server with a self-signed certificate
$ java SSLPoke localhost 8843
FAILURE: javax.net.ssl.SSLHandshakeException : PKIX path building failed
         unable to find valid certification path to requested target
Connect to our IMAP+SSL mail server
$ java SSLPoke secure.emailsrvr.com 993
SUCCESS
Error Messages
- javax.net.ssl.SSLHandshakeException : sun.security.validator.ValidatorException: PKIX path building failed
Java cannot authenticate the server's SSL certificate because its Certificate Authority (CA) is not present in its trusted CA store. - java.net.UnknownHostException
The host name is invalid i.e. not resolvable by your DNS server - java.net.ConnectException : Connection refused
Port is invalid. No server is listening on that port. - java.net.ConnectException : Operation timed out
The host and port combo cannot be connected. Most likely your firewall is blocking the connection, or, the IP address of the host is incorrect. - javax.net.ssl.SSLProtocolException: handshake alert: unrecognized_name
There is a mismatch between host specified in input and host name in the SSL certificate. - Error: Could not find or load main class SSLPoke
You are not in the directory that contains theSSLPoke.classfile.cdto that directory and try again. - FAILURE: javax.net.ssl.SSLException : Unrecognized SSL message, plaintext connection?
You are connecting to a non-SSL port.
On-PremiseHow-To
Troubleshooting LDAP
Celoxis LDAP authentication has been by hundreds of companies in various environments. If your LDAP based authentication is not working, it is most likely because of a misconfiguration which can be easily remedied using the LDAP Quest program.
About LDAP Quest
Celoxis LDAP Quest is a java program to debug connection and authentication issues with an LDAP server. First, it connects to an LDAP server and authenticates using the specified admin DN and password. If successful, tries to connect as the specified combination of end-user and password.
Downloading LDAP Quest
Download ldap-quest.zip from here
Using LDAP Quest
- Unzip the ldap-quest.zip file. It should create a folder
ldap-questthat contains theLDAPQuest.classfile. - Open a terminal window and
cdto theldap-questfolder. You must now be in the same directory that contains theLDAPQuest.classfile. - Then type:
java LDAPQuest <ldap-url> <admin-DN> <admin-password> <ldap-search-attr> <base-dn> <celoxis-username> <password>- If you are using Microsoft ADS, the
ldap-search-attrmust always besAMAccountName
- If you are using Microsoft ADS, the
Examples
$ java LDAPQuest ldap://ldap.celoxis.com cn=Administrator,cn=users,dc=celoxis,dc=com kaboom1 sAMAccountName cn=users,dc=celoxis,dc=com Joe joeIsKing1
1) Trying to connect to LDAP and bind as Admin...
----------------------------------------------------------------------------------------
SUCCESS: Admin authenticated successfully.

2) Trying to authenticate end user...
----------------------------------------------------------------------------------------
Searching for Joe in cn=users,dc=celoxis,dc=com
FOUND DN: CN=Joe,CN=Users,DC=celoxis,DC=com

3) Connecting as CN=Joe,CN=Users,DC=celoxis,DC=com with specified password...
----------------------------------------------------------------------------------------
SUCCESS: Joe authenticated successfully.
Example of enclosing admin DN with double quotes:
$ java LDAPQuest ldap://ldap.celoxis.com "cn=Marcia Overstrand,cn=users,dc=celoxis,dc=com" kaboom1 sAMAccountName ou=Sales,dc=celoxis,dc=com Joe joeIsKing1
1) Trying to connect to LDAP and bind as Admin...
----------------------------------------------------------------------------------------
SUCCESS: Admin authenticated successfully.
2) Trying to authenticate end user...
----------------------------------------------------------------------------------------
Searching for Joe in ou=Sales,dc=celoxis,dc=com
FOUND DN: CN=Joe,OU=Sales,DC=celoxis,DC=com
3) Connecting as CN=Joe,OU=Sales,DC=celoxis,DC=com with specified password...
----------------------------------------------------------------------------------------
SUCCESS: Joe authenticated successfully.
$ java LDAPQuest ldap://ldap.forumsys.com cn=read-only-admin,dc=example,dc=com password uid dc=example,dc=com euler password
1) Trying to connect to LDAP and bind as Admin...
-------------------------------------------------------------------------------
SUCCESS: Admin authenticated successfully.
2) Trying to authenticate end user...
-------------------------------------------------------------------------------
Searching for euler in dc=example,dc=com
FOUND DN: uid=euler,dc=example,dc=com
3) Connecting as uid=euler,dc=example,dc=com with specified password...
-------------------------------------------------------------------------------
SUCCESS: euler authenticated successfully.On-PremiseHow-To
Troubleshooting Email
Celoxis requires an email account just like a regular person. The easiest way to debug is to setup a temporary email account in a program like Outlook, Thunderbird, Gmail, etc. with the same settings entered in Celoxis. If that works, then Celoxis should work.
Network: DNS or Firewall
If the email works from a program but not from Celoxis using the same settings in Celoxis, then it is either the machine on which Celoxis is running cannot resolve the hostnames you specified or firewall is blocking access.
SSL
If your email servers are using self-signed certificates, then it will not work. To check if that is the issue, please read this chapter.
Plussed Addressing
For incoming emails to be properly acted upon by Celoxis, the Plussed Addressing setting should be correctly set. Please refer to this chapter for more information.
On-PremiseHow-To
Printing to PDF
Setup
The application uses Google Chrome to convert pages to PDF. You will have to download and install Google Chrome on the same machine running the Celoxis server.
Why do I get an error message while printing to PDF?
If you see an error message that says something like: "Cannot locate Chrome browser on the computer running Celoxis. Probably it has...", it means that the application is not able to find Google Chrome in the usual locations, or Google Chrome has not been installed.
Remember that Chrome needs to be installed on the same computer on which you are running the Celoxis application. Once you install Chrome, launch it and ensure it is working fine. Then restart the application and retry printing.
I have installed Google Chrome. Why do I still get the same error message?
Celoxis will try to find Google Chrome in the usual locations. However, the location of the Chrome executable varies with the operating systems and installation paths. In these cases, you will need to find the path of the Chrome executable and enter that into Celoxis.
Locating Google Chrome
Windows
- Log on to your Celoxis server
- Open Chrome
- Type
chrome://versionand press enter in the location bar. You should see something like the following image: - Copy the executable path
- Configure Celoxis, restart the application and retry.
Linux
- Log on to your Celoxis server
- Open the command prompt and run this command:
which google-chrome - You will get the path of the chrome. It will be something similar to this,
/usr/bin/google-chrome - Copy the executable path
- Configure Celoxis, restart the application and retry.
I still get an error message. What now?
Ensure that you have restarted the application after you have made the changes. If you have and still get an error message, then send us the debug bundle and we'll investigate.
On-PremiseHow-To
Using Gmail as an email service
Gmail is a free and reliable email service from Google. If your email server does not provide plussed addressing, you can use Gmail as an alternative.
In this section, we shall create an example account in Gmail (celoxis.acme@gmail.com) and show how to set it up in Celoxis.
Create the Gmail account
Create the celoxis.acme@gmail.com account in Gmail.
Enable access to the Gmail Inbox from Celoxis
Login to celoxis.acme@gmail.com and go to SettingsAdvanced, then click IMAP Enabled under the IMAP Access field. This will enable Celoxis to connect to your Gmail account.
Configure Celoxis
Navigate to Main MenuAdminSite Settings and click on Edit Settings under Actions. Enter information in the tabs as described below and save. restart.
Outgoing Email
| Host | smtp.gmail.com |
| SMTP Port | 465 |
| Authentication Type | Plain |
| Protocol | SMTP+SSL |
| Use STARTTLS | Yes |
| Username | celoxis.acme@gmail.com |
| Password | <gmail-password> |
| Default Sender Email | celoxis.acme@gmail.com |
Incoming Email
| Email Address | celoxis.acme@gmail.com |
| Protocol | IMAP+SSL |
| Host | imap.gmail.com |
| Username | celoxis.acme@gmail.com |
| Password | <gmail-password> |
| Plussed Symbol | + |
On-PremiseHow-To
Moving Celoxis to another machine
The way this works is first we install Celoxis on the new machine. We verify the installation works correctly. Then we replace the database and data directory with those from the old machine.
We will assume M1 to be the old machine and M2 to be the new machine on which to install Celoxis.
Apply for a new license for M2
Read this chapter on how to apply for a license. You should start the migration process only after you have the new license file.
Backup your database and data directory on M1
- On M1, navigate to Main MenuAdminSite Settings and look for the database name and data directory under Server Information. See this example.
- On M1, Stop Celoxis.
- Backup your database into a file called
database.backupand copy data directory to a directorydata. Ensure that this directory has the two sub-directoriesindicesanddocuments.
Complete and verify your Celoxis installation on M2
Install Celoxis on your new server. Verify that you are able to login and you can see the sample data on your dashboard. There is no need to configure your email server, authentication, etc. as of now. You can do that after your data is restored.
Restore the database backup and data directory on M2
- On M2, Navigate to Main MenuAdminSite Settings and look for the database name and data directory under Server Information. See this example for more information.
- Stop Celoxis.
- Drop the existing database.
- Recreate the database using the same database user that Celoxis will use to connect to the database.
- Restore the database from the backup file on M1. Instructions are provided later in this chapter.
- Delete your data directory (recorded in step 1) and copy the
datadirectory that you have from M1in its place. - Assuming your data directory on M2 is at
C:\celoxis\data, run the following sql:update db_config set value='C:\celoxis\data' where name='local_storage_root' - Assuming you will now access Celoxis as http://celoxis.acme.com:8888, run the following sql:
update db_company set server_name='celoxis.acme.com:8888' - Start Celoxis.
- Update site settings like email settings, etc. if required
Restoring your database
PostgreSQL
pg_restore -Fc -d <dbname> -O -U <username> database.backup
Microsoft SQL Server
Using Enterprise Manager, right click on the database node and choose Restore from All Tasks. Use the database.bak provided.
Oracle
Please contact your Oracle DBA.
On-PremiseHow-To
Migrating from SaaS to On-Premise
The way this works is first we do a local installation. We verify the installation works correctly. Then we replace the database and data directory with the one provided by us from your SaaS account.
Complete and verify your local installation
Install Celoxis on your server. Verify that you are able to login and you can see the sample data on your dashboard. There is no need to configure your email server, authentication, etc. as of now. You can do that after your data is restored.
Download your SaaS backup files
You will be provided with a link to download the database and the documents. You will see two files:
database.backup.zip- the backup of the databasedata.zip- the backup of the documents you have uploaded
Unzip the backup files
Download the two files and unzip them. You should now have 2 directories :
- A
database.backupdirectory - A directory called
data. Verify that this directory has two sub-directoriesindicesanddocuments.
Restore the database backup and data directory
- Navigate to Main MenuAdminSite Settings and look for the database name and data directory under Server Information. See this example for more information.
- Stop Celoxis.
- Drop the existing database.
- Recreate the database using the same database user that Celoxis will use to connect to the database.
- Restore the database. Instructions are provided later in this chapter.
- Delete your data directory (recorded in step 1) and copy the
datadirectory that you obtained after unzippingdata.zipto that location. - Assuming your data directory is at
C:\celoxis\data, run the following sql:update db_config set value='C:\celoxis\data' where name='local_storage_root' - Assuming you will access Celoxis as http://celoxis.acme.com:8888, run the following sql:
update db_company set server_name='celoxis.acme.com:8888' - Start Celoxis.
- Update site settings like email settings, etc.
Restoring your database
PostgreSQL
pg_restore -Fc -d <dbname> -O -U <username> database.backup
Microsoft SQL Server
Using Enterprise Manager, right click on the database node and choose Restore from All Tasks. Use the database.bak provided.
Oracle
Please contact your Oracle DBA.