Getting Started — for admins
This quick start guide will help you understand how to:
- Turn off unwanted features
- Configure account settings
- Configure password policies
- Customize project settings
- Set up work calendars
- Enter your holidays
- Customize project types
- Add custom fields
- Set up dashboards
- Customize Kanban lanes
- Configure time tracking
- Add users
- Add clients
A. Turn off unwanted features
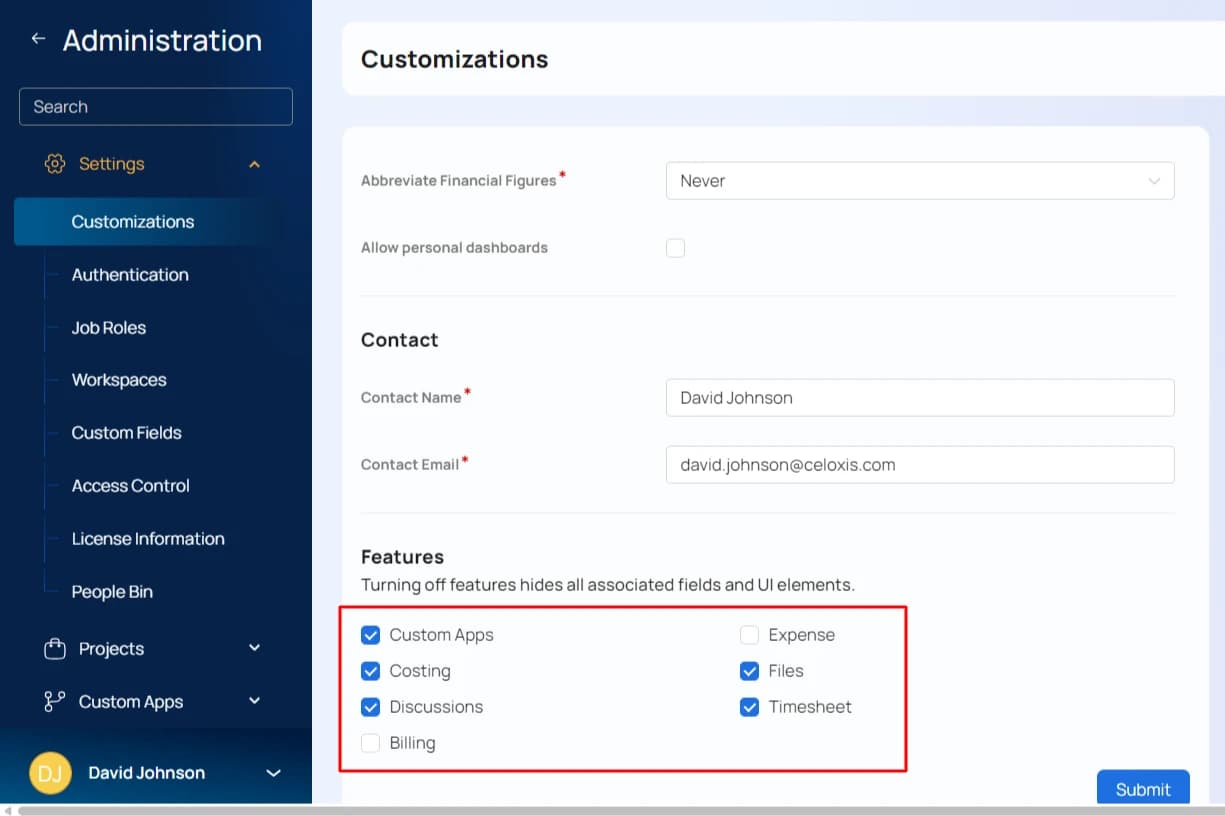
When you turn off features that you do not plan on using, related buttons and menus are not shown to users in your account making the user interface easier to use. To do this go to Main MenuAdmin. Then, switch the features on or off as shown below. In the following image, Expenses and Contacts functionality has been turned off.
B. Configure account settings
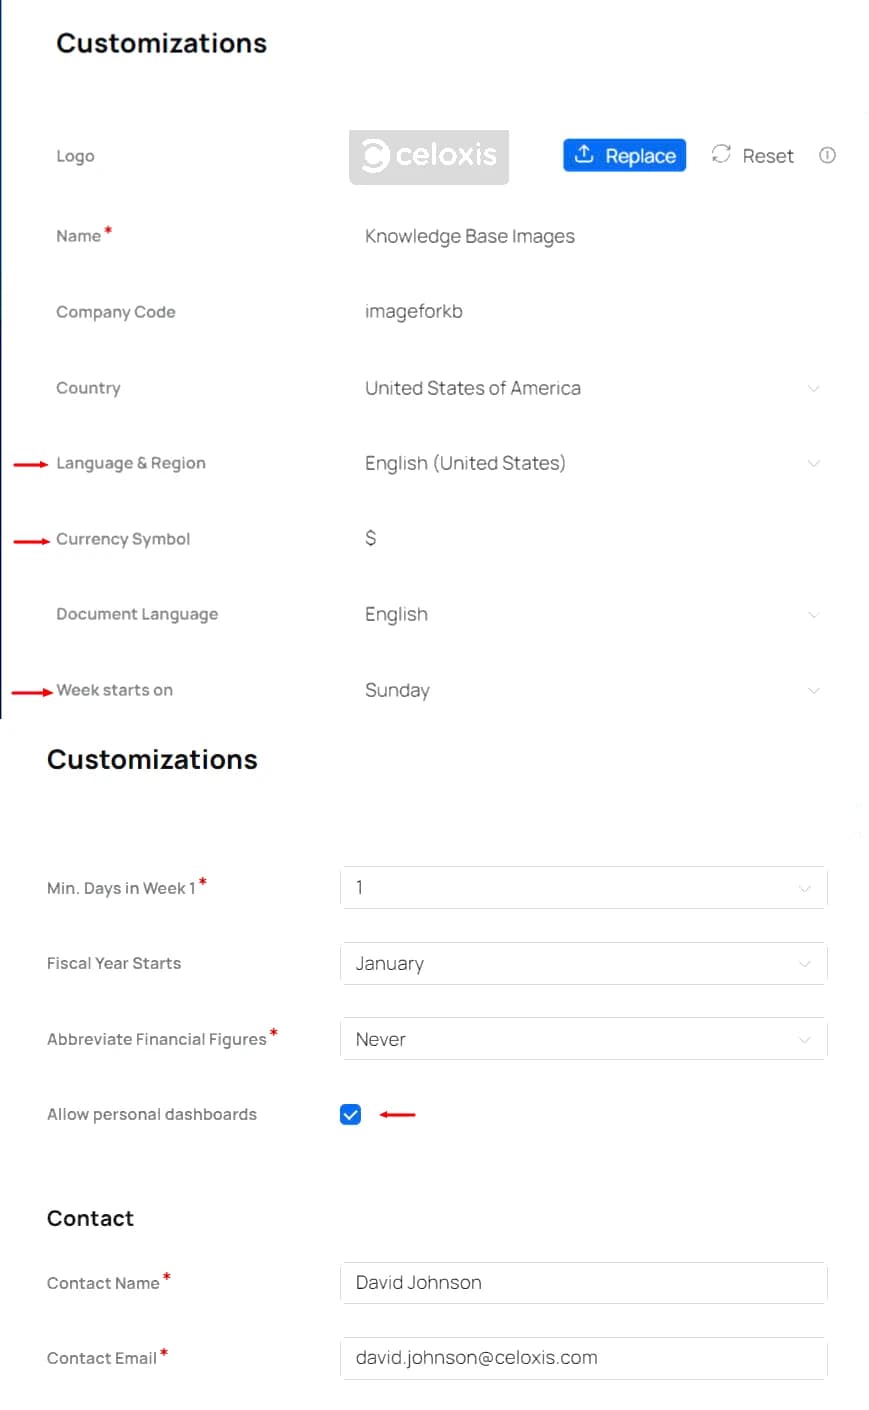
A number of organization widget settings are used while display various user interface widgets like calendars or while displaying reports. Configure the options highlighted in the image below by navigating to Main MenuAdminAccount ManagementCompany Information
C. Configure password policies
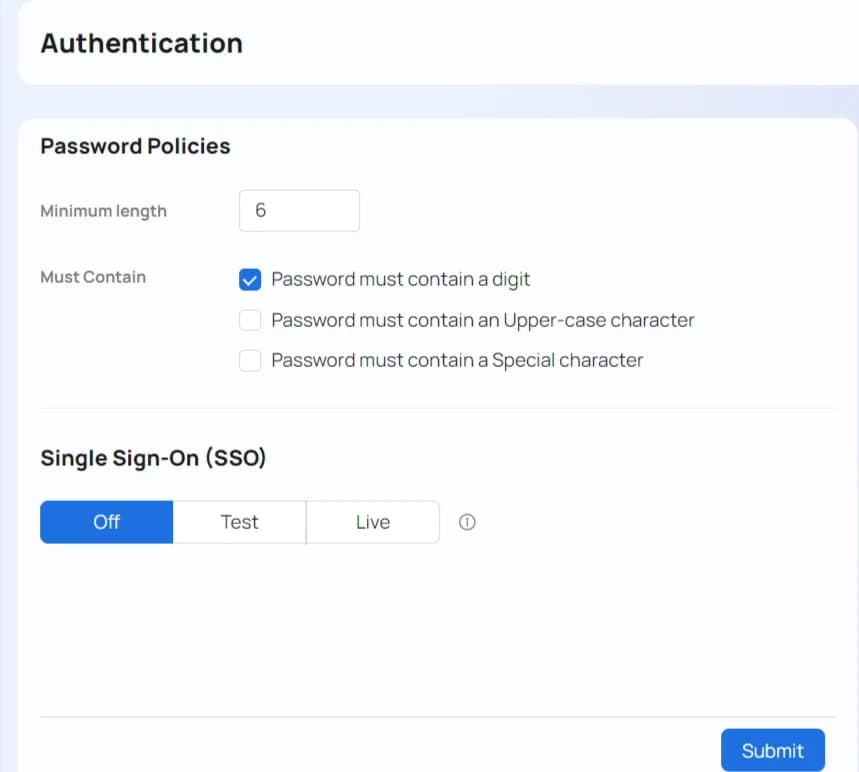
You can configure login settings by navigating to Main MenuAdminAccount ManagementCompany Information and then clicking on the Password Rules tab.
if you use single sign-on, then we recommend that you first get a feel for the software and turn the single sign-on functionality on later.
D. Customize project settings
You can customize some basic project management settings by going to Main MenuAdminProject ManagementProject Options. We recommend that you leave the settings as is if you are not sure of your exact requirements.
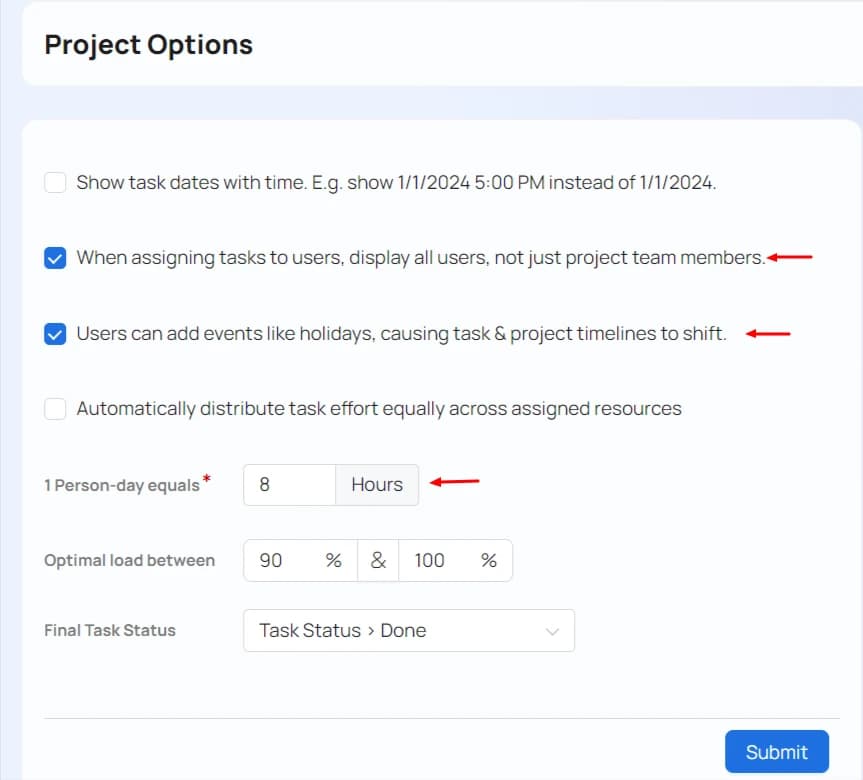
E. Set up work calendars
The software has the capability to automatically schedule tasks based on the assignee's work timings and holidays in addition to other parameters like dependencies, constraints, etc. So it is important to set the working timings correctly.
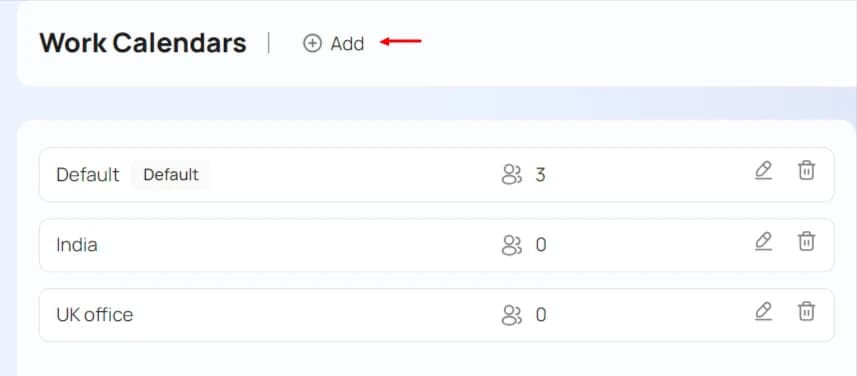
To set up, go to Main MenuAdminProject ManagementWork Calendars. If your users work in different shifts or time zones, create a calendar for each. Name them so it is easy to identify e.g. "Half Day" or "London Office".
Read more about work calendars ⟶
F. Enter your holidays
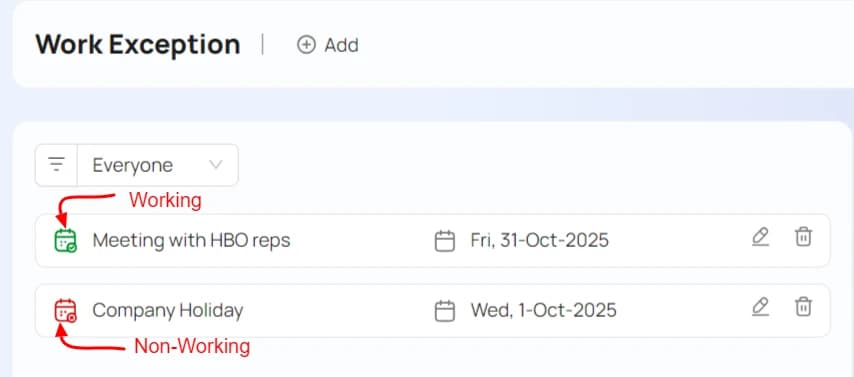
Celoxis will schedule tasks taking holidays into consideration. Holidays can be entered for every one (e.g. Christmas), or for specific work calendars (e.g. 4th July - only for U.S. calendars), or for a specific user (e.g. Joe is on leave from 10th March 2020 to 20th April 2020).
To enter holidays, go to Main MenuAdminProject ManagementWork Calendars and then click on the Exceptions tab.
Read more about adding holidays ⟶
G. Customize project types
Project types help categorize projects that help you in filtering and reporting. You can also attach different custom fields to different project types. To input your project types, go to Main MenuAdminProject ManagementProject Types.

Read more about project types ⟶
H. Add Custom Fields
You can create a number of custom fields for projects, tasks, users, issues, risks, etc. Celoxis supports a varierty of custom fields like text, single select, multi select and more. You can even create formula fields.
A number of custom fields have already been created. To edit them or create your own, go to Main MenuAdminAccount ManagementCustom Fields.
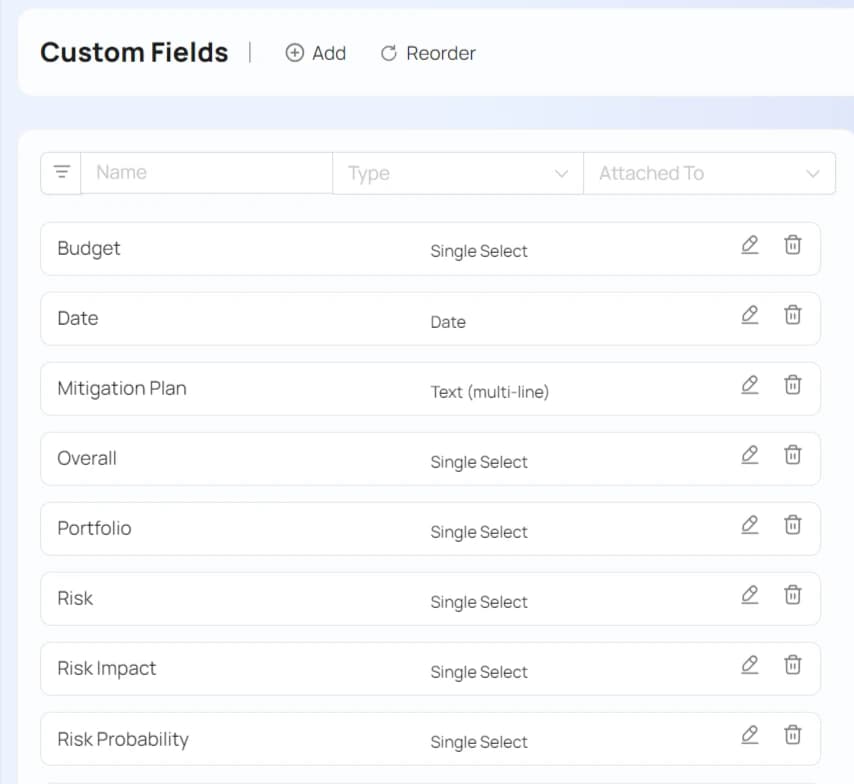
You can attach the same custom field to multiple types. For example, the following custom fields is available for all project types, the "Project Request" custom app and tasks. To change, click on the icon in the list as shown above.
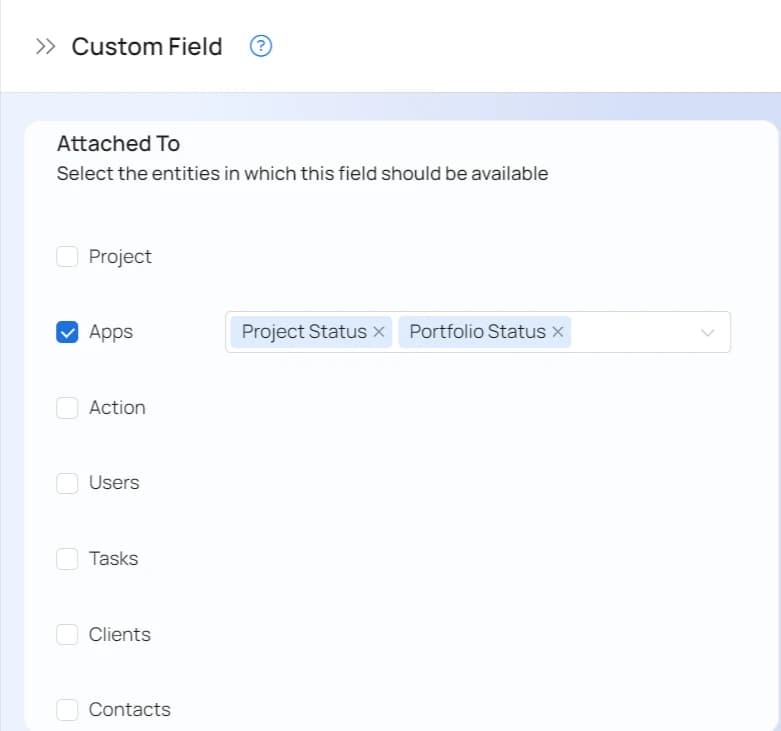
Read more about custom fields ⟶
J. Set up Dashboards
Before you add users, you should prepare dashboards for them. We have already created a few dashboards for managers, executives and team members. To view and modify them go to Main MenuReportsAll Reports.
For more information, refer the dashboard section in the getting started for users guide.
K. Customize Kanban Lanes
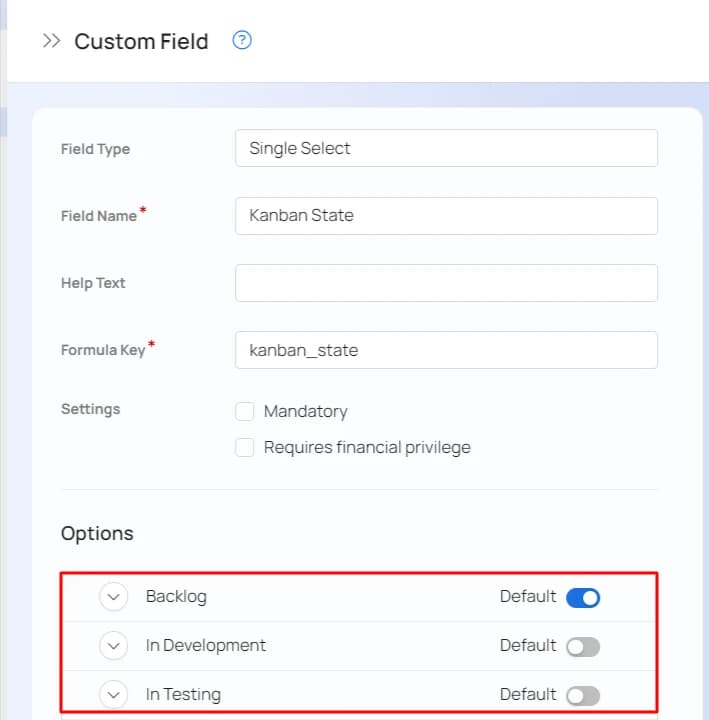
If your organization uses a Kanban like view to track tasks, you should configure your lanes if required. We provide the three most common lanes: Backlog, In Progress and Done..
To change, go to Main MenuAdminCustom Fields and click on icon besides Kanban State field and change the options to the ones you need.
L. Configure Time Tracking
Celoxis provides a comprehensive, flexible and customizable time tracking module. Setting it up is easy.
Time Codes
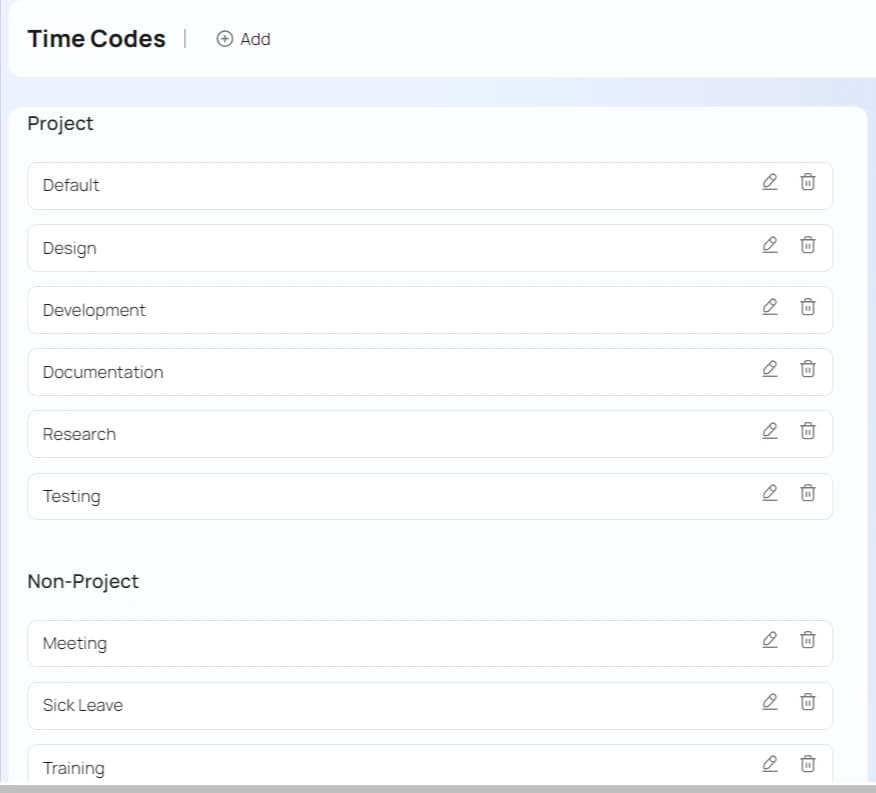
If you do activity based billing, or if you want to categorize time logs, you should customize this list by going to Main MenuAdminTimesheetTime Codes.
Billing Model
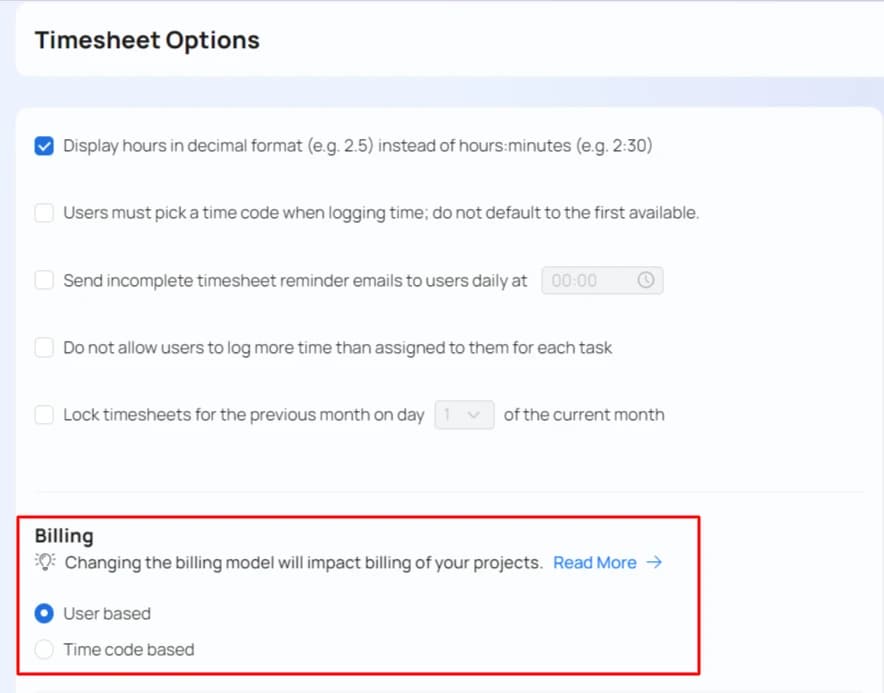
Celoxis provides you the option of turning billing off, or using an activity based billing model where a per hour rate is defined for an activity, or a per user model where a per hour rate is defined for a user. To change, go to Main MenuAdminTimesheet and choose the appropriate option as shown below.
Options X/Timesheet
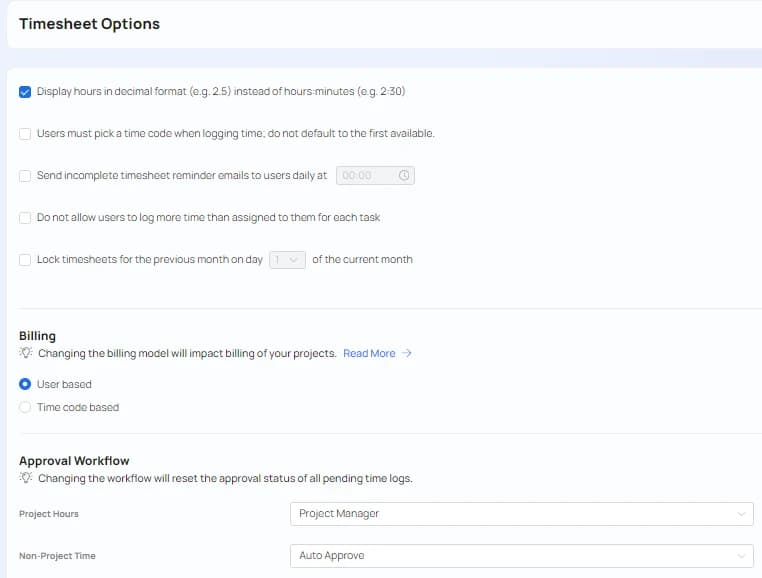
Click on Main MenuAdminTimesheetTimesheet Options to customize time tracking as per your requirements. There are many useful options that you should be aware of. If you are not sure, you can always change them later.
M. Add Users
Celoxis allows you to create a user that is "like" some other user – the new user will inherit dashboards, notification preferences, security privileges, etc. thus making it very convenient for you to create similar users.
You can add multiple users in one go by uploading a CSV file. Read More.
Viewing the user list
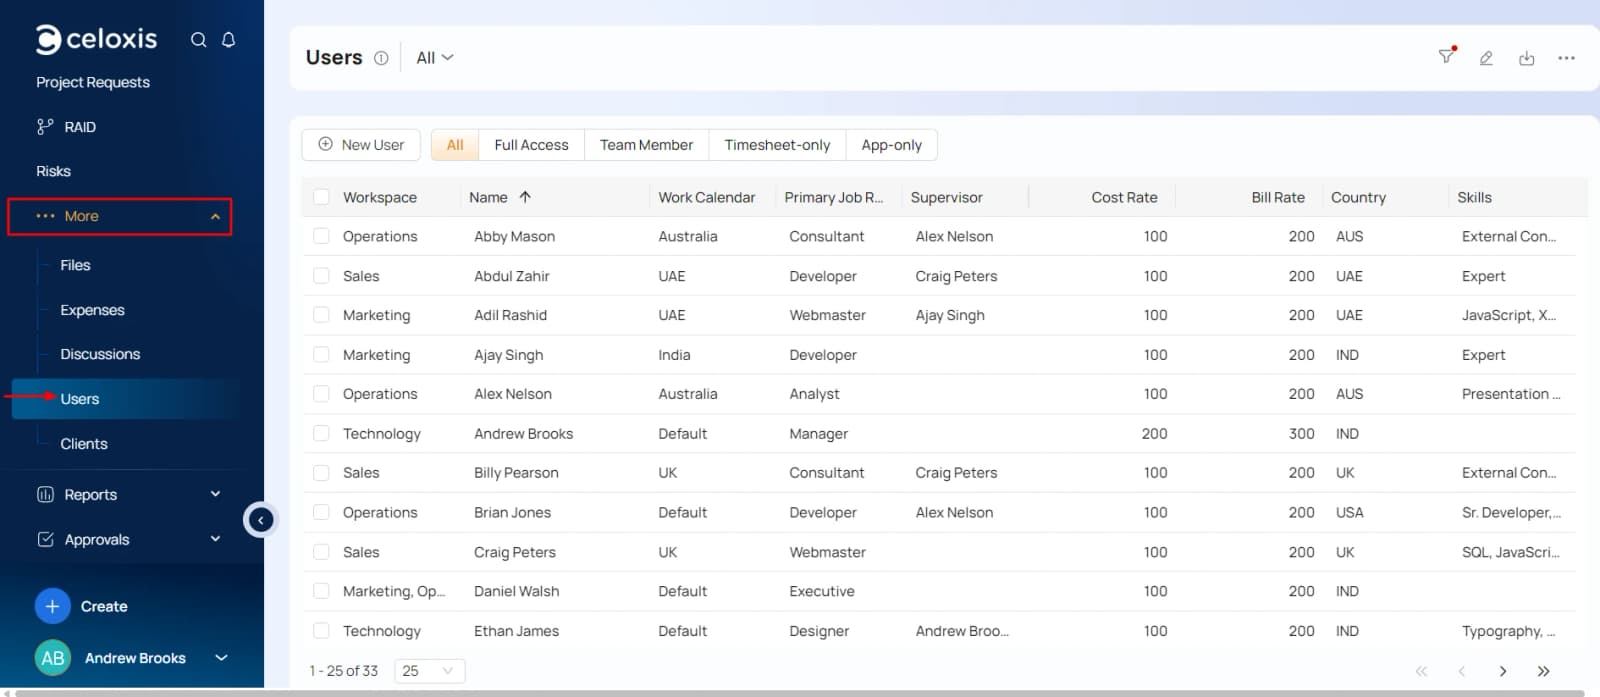
Go to Main MenuMoreUsers
Logging in as another user
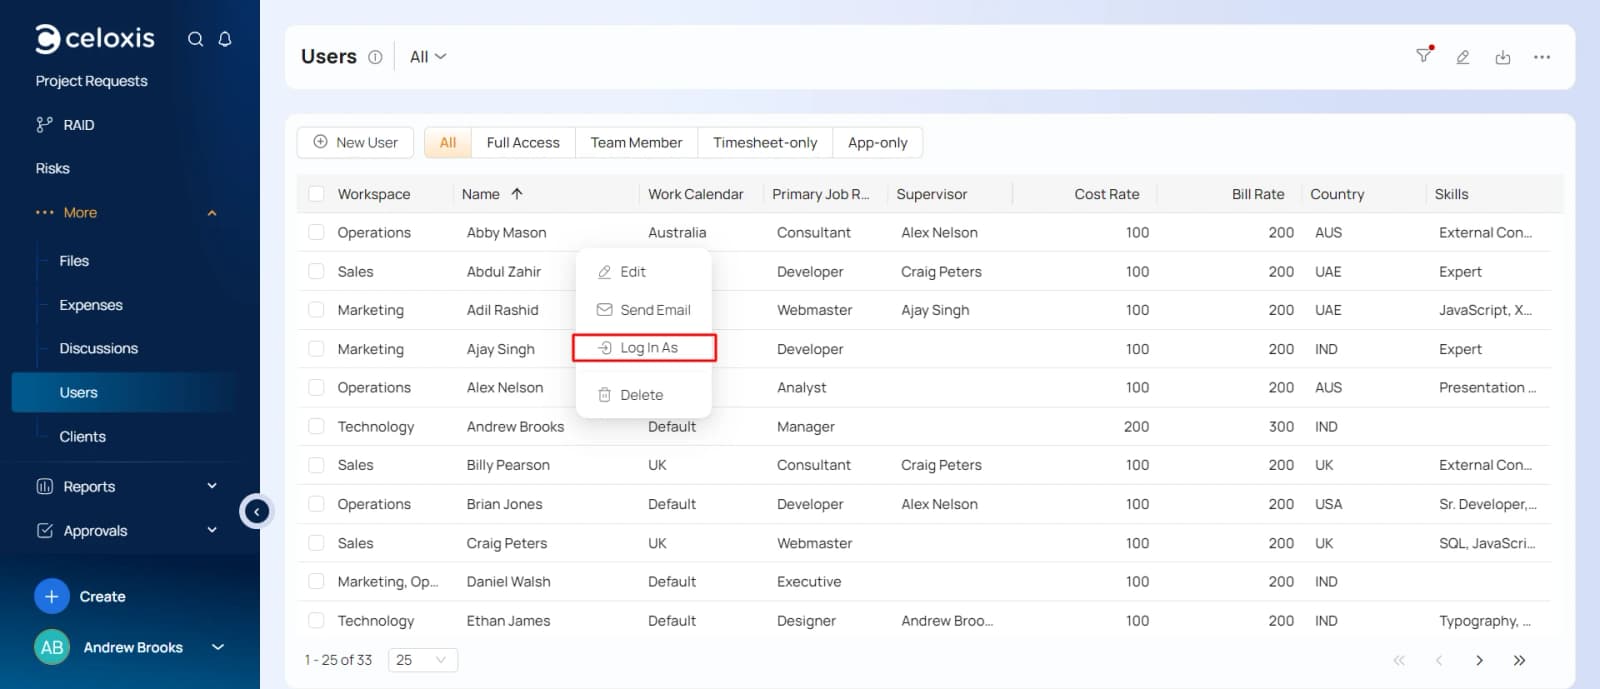
To check what any user sees, you can login as that user quickly. Go to Main MenuMoreUsers and click on Switch To for a user as shown below.
Switching back
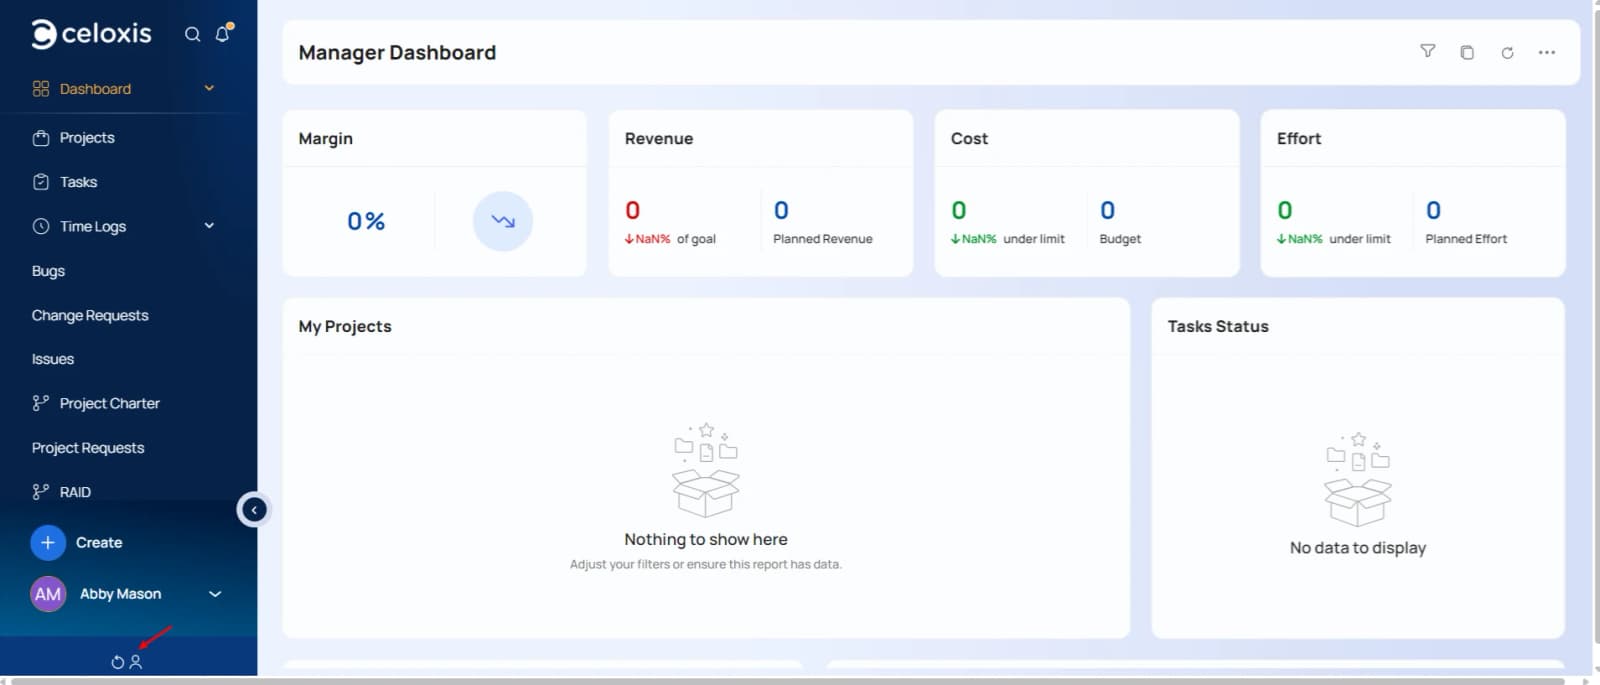
To switch back, click on the button as shown below.
Read more about users ⟶
N. Clients
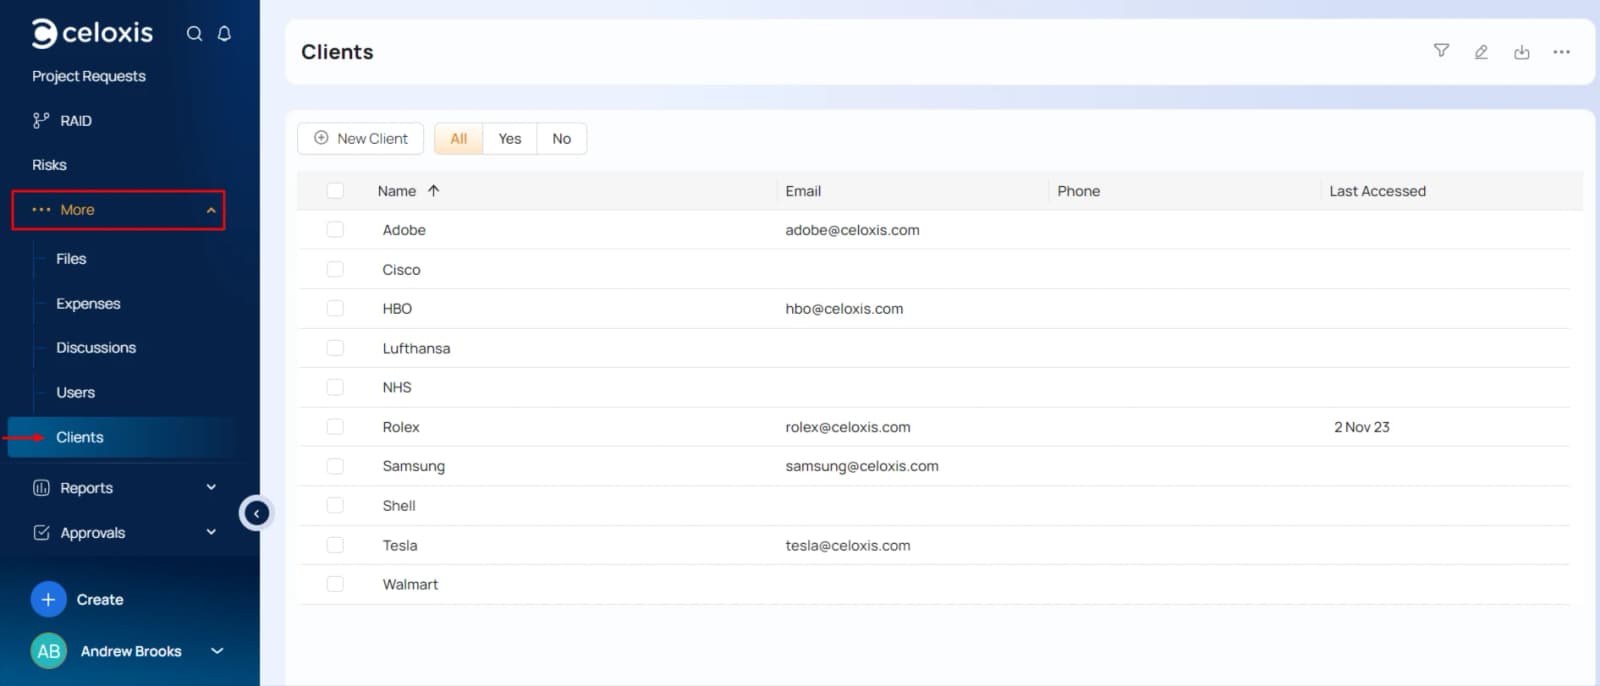
Projects can be associated with clients. You can, optionally, give clients a login and a dashboard so they can access project status and collaborate with your team through the software. To view or add clients, go to Main MenuMoreClients.
Read more about clients ⟶